Table of Contents
Advertisement
Quick Links
Advertisement
Table of Contents

Related Manuals for Rage RC STINGER 3.0

Summary of Contents for Rage RC STINGER 3.0
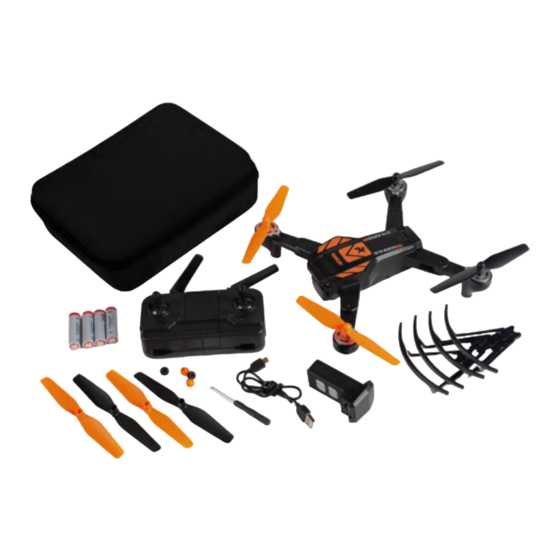
- Page 1 INSTRUCTION MANUAL Specifications...
- Page 2 As with its predecessors, the S�nger 3.0 doesn’t break the budget when ge�ng started with a full-featured FPV drone. The S�nger 3.0 includes standard features in its class such as Al�tude Hold, One-Touch Take-Off and Landing, Heading Lock, 6-Axis Gyro Stabiliza�on Control,high-visibility LED’s and more. For FPV photos and videos, the new 3.0 includes a 1080p HD camera with a 1-axis control (up and down) from the transmi�er.
-
Page 3: Installing Transmitter Batteries
Short Press for Headless Mode/ Camera Downward Press and Hold for Return Home Adjustment Short Press for Speed Camera Upward Selec�on/ Adjustment Hold for Obstacle Avoidence Direc�on Thro�le S�ck Control S�ck Short Press for Photo/ Press for Trimming Hold for Video Func�on Short Press for Auto Take-off... -
Page 4: Blade Replacement
Blade Guard Installation 3.0. Blade Replacement To reach the blade removal screw, remove the cap at the center. Storage For safe and convenient storage in the carry case, make sure to fold the arms as shown in the diagram. Installing Transmitter Sticks The transmi�er s�cks are located in compartments at the bo�om of the transmi�er, as shown. - Page 5 Flight Set-Up First, press the on/off bu�on on the bo�om of Next, turn on the transmi�er by pressing and holding the body un�l the LED’s in the arms begin to the on/off bu�on. The LED’s in the arms of the aircra� flash.
-
Page 6: Flight Control
Enable One Key Return by pressing and holding the right side of the bu�on of the le� shoulder of the transmi�er. The transmi�er will begin to beep and the lights will flash. The aircra� will fly back in the direc�on of where it started no ma�er which difrec�on it is facing. - Page 7 Yaw (spin) Left or Right Move the le� s�ck to the le� for the aircra� to yaw to the le� and to the right to yaw the aircra� to the right. Forward & Backward Move the right s�ck up for the aircra� to move forward and down to move backwards.
-
Page 8: Collision Avoidance
Phone Holder Installation A built-in phone holder is part of the S�nger 3.0 for FPV view during flight. To use the phone holder, complete the folowing steps. 1. Li� the center sec�on of the transmi�er from bo�om and pull up. 2. - Page 9 WiFi and App Instructions (cont.) Gesture Control View Switching Master Mode Picture in Picture Palm Control Flight Headless Mode Tracking Mode Menu Speed Take Picture Video Airplane Mode Entertainment Album 3D Mode...
-
Page 10: Troubleshooting Guide
Decreasing throttle too Lower the throttle slowly for smooth landings or use the auto land feature quickly Parts List RGR4550 Stinger 3.0 RTF Drone RGR4551 Printed Body Set RGR4552 Prop Guard Set (4) Replacement Motor w/Gear (CW) RGR4553... -
Page 11: Battery Safety Precautions
Safety Precautions yourself and others or result in damage to the product or property. as serious injury could result. is controlled by a radio signal that is subject to interference from many outside sources and could result in a momentary loss of control. can damage unprotected electronics. -
Page 12: Warranty
Warranty Warranty Period: Rage R/C warrants that the Stinger 3.0 (“Product”) will be free from original factory defects in materials and workmanship upon purchase (“Warranty Period”). What is Not Covered - This warranty is not transferable and does not cover (a) cosmetic...
Need help?
Do you have a question about the STINGER 3.0 and is the answer not in the manual?
Questions and answers