Dell P2724DEB User Manual
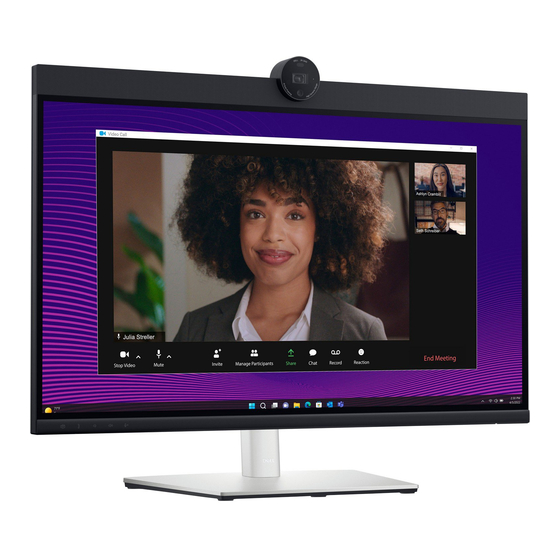
Video conferencing monitor
Hide thumbs
Also See for P2724DEB:
- Service manual (32 pages) ,
- Manual (6 pages) ,
- User manual (121 pages)

Related Manuals for Dell P2724DEB


Summary of Contents for Dell P2724DEB
- Page 1 Dell P2724DEB Video Conferencing Monitor User’s Guide Model: P2724DEB Regulatory model: P2724DEBt...
- Page 2 WARNING: A WARNING indicates a potential for property damage, personal injury, or death. Copyright © 2023 Dell Inc. or its subsidiaries. All rights reserved. Dell, EMC, and other trademarks are trademarks of Dell Inc. or its subsidiaries. Other trademarks may be trademarks of their respective owners.
-
Page 3: Table Of Contents
Contents Safety instructions......6 About your monitor ......7 Package contents . - Page 4 Operating the monitor webcam ....60 Dell Peripheral Manager ......61 Securing your monitor using Kensington lock (optional) .
- Page 5 ....... 120 Contacting Dell....... 121...
-
Page 6: Safety Instructions
Safety instructions Use the following safety guidelines to protect you monitor from potential damage and to ensure your personal safety. Unless otherwise noted, each procedure included in this document assumes that you have read the safety information that shipped with your monitor. -
Page 7: About Your Monitor
About your monitor Package contents The following table provides the list of components that are shipped with your monitor, If any component is missing, contact Dell. For more information, see Contact Dell. NOTE: Some items may be optional and may not ship with your monitor. -
Page 8: Product Features
• On-Screen Display (OSD) adjustments for ease of set-up and screen optimization. • Power and OSD buttons lock. • Security lock slot. • Stand lock. • The monitor is designed with Dell Power Button Sync (DPBS) feature to control PC system power state from monitor power button.* About your monitor... -
Page 9: Operating System Compatibility
(DDM) for Windows operating system and Dell Display and Peripheral Manager (DDPM) for Mac operating system. * Dell system that supports DPBS is listed in Dell website. DPBS function can be enabled in OSD menu under Display. WARNING: The possible long-term effects of blue light emission from the monitor may cause damage to the eyes, which includes but is not limited to eye fatigue and digital eyestrain. -
Page 10: Identifying Parts And Controls
Identifying parts and controls Front view 10 11 12 13 Label Description Microphones Monitor microphones (Mic). IR LED Indicator of infrared (IR). RGB Camera Transmits your image in a video conference. Proximity Sensor Supports the human presence wake & lock feature. Webcam LED Indicator of Webcam. - Page 11 Teams button & LED LED will light in static white when Microsoft Teams ® signed in and running. LED will blink when there is a Teams notification. Short press on the button to bring up Teams and open notification. Ensure that the Teams application is signed in and is already running at the background.
- Page 12 Camera Shutter Rotate clockwise to close camera shutter. When Close/Open closed, the camera will replace the image with a black pattern. Rotate counterclockwise to open camera shutter. When opened, UC applications can open camera function to use the camera when it is needed. NOTE: The close camera shutter is different from the disable ‘Webcam &...
-
Page 13: Back View
For more information, see Operating the Monitor. Mac Address, Barcode, serial Refer to this label if you need to contact Dell number, and Service Tag label for technical support. The Service Tag is an unique alphanumeric identifier that enables Dell service technicians to identify the hardware components in your computer and access warranty information. -
Page 14: Bottom View
Bottom view 4 5 6 7 8 11 12 Label Description Security lock slot Secures monitor with security cable lock (sold separately). (based on Kensington Security Slot Connect the power cable. Power connector Connect your computer with the HDMI cable. HDMI port Connect your computer with the DisplayPort cable. - Page 15 8,9,11 Connect your USB device. You can use these ports only after you have connected the USB cable (Type-A to Super speed USB Type-B or Type-C to Type-C) from the computer to the 5 Gbps (USB 3.2 monitor. Gen1) (3) Port with battery icon supports Battery Charging Rev.
-
Page 16: Monitor Specifications
Monitor specifications Model P2724DEB Screen type Active matrix - TFT LCD Panel Type In-plane switching Technology Aspect ratio 16:9 Viewable image dimensions Diagonal 68.47 cm (27 in.) Active Area Horizontal 596.74 mm (23.49 in.) Vertical 335.66 mm (13.22 in.) Area 200301.75 mm... - Page 17 Swivel -45° to 45° Pivot -90° to 90° Slant adjust Cable management Dell Display Manager Easy Arrange and other key features (DDM)Compatibility Security Security lock slot (cable lock sold separately) At panel native only, under Custom Mode preset. Supports up to QHD 2560 x 1440 at 60Hz as per specified in HDMI 1.4.
-
Page 18: Resolution Specifications
Resolution specifications Model P2724DEB Horizontal scan range 30 kHz to 90 kHz Vertical scan range 56 Hz to 76 Hz Default resolution 2560 x 1440 at 60 Hz Video display capabilities 480p, 560p, 720p, 1080p (HDMI & DP & USB Type-C... -
Page 19: Dp Multi-Stream Transport (Mst) Modes
DP Multi-Stream Transport (MST) Modes Host video port MST Source Monitor Maximum number of external monitors that can be supported 2560 x 1440 at 60 Hz HBR3 (DP 1.4) 2560 x 1440 at 60 Hz HBR2 (DP 1.2) 2560 x 1440 at 60 Hz NOTE: Maximum external monitor resolution supported is 2560 x 1440 at 60 Hz only. -
Page 20: Unified Communications (Uc) Platform Compatibility List
Supported* microphone * Mute function on the Dell P2724DEB monitor works by pressing the Mute button. However, the Mute icon on the UC platform is not synchronized (icon shows unmute). ** Volume function on the Dell P2724DEB monitor does not work on macOS. -
Page 21: Electrical Specifications
Electrical specifications Model P2724DEB Video input signals • Digital video signal for each dierential line Per dierential line at 100 ohm impedance • DP/HDMI/USB Type-C signal input support Input voltage/ 100-240 VAC/50 or 60 Hz ± 3 Hz/2.5 A (maximum) -
Page 22: Webcam Specifications
100 Hz - 20 kHz Impedance 8 ohm Microphone specifications Microphone type Digital microphone x 2 Physical characteristics Model P2724DEB Connector type • DP connector (in) • DP connector (out) • HDMI connector • Audio jack • RJ45 connector • USB Type-C upstream connector •... - Page 23 Dimensions Height (extended) 590.79 mm (23.26 in.) Height (compressed) 440.79 mm (17.35 in.) Width 611.78 mm (24.09 in.) Depth 230.00 mm (9.10 in.) Dimensions (without stand) Height 415.82 mm (16.37 in.) Width 611.78 mm (24.09 in.) Depth 59.61 mm (2.35 in.) Stand dimensions Height (extended) 428.30 mm (16.90 in.)
-
Page 24: Environmental Characteristics
Environmental characteristics Compliant Standards • ENERGY STAR certified Monitor. • EPEAT registered where applicable. EPEAT registration varies by country. https://www.epeat.net for registration status by country. • TCO Certified & TCO Certified Edge. • RoHS Compliant. • BFR/PVC Free monitor (excluding external cables). •... - Page 25 USB upstream cable Audio path Echo Cancelling Speakerphone (DELL P2724DEB USB) USB-C (Alt Mode DP 1.2) USB-C Gen1/2 cable DELL P2724DEB (Display Audio) Echo Cancelling Speakerphone (DELL P2724DEB USB) USB-C (Alt Mode DP 1.4) USB-C Gen1/2 cable DELL P2724DEB (Display Audio)
-
Page 26: Pin Assignments
Pin assignments DP port (in) Pin number 20-pin side of the connected signal cable ML3(n) ML3(p) ML2(n) ML2(p) ML1(n) ML1(p) ML0(n) ML0(p) CONFIG1 CONFIG2 AUX CH (p) AUX CH (n) Hot Plug Detect Return DP_PWR About your monitor... - Page 27 DP port (out) Pin number 20-pin side of the connected signal cable ML0(p) ML0(n) ML1(p) ML1(n) ML2(p) ML2(n) ML3(p) ML3(n) CONFIG1 CONFIG2 AUX CH(p) AUX CH(n) Hot Plug Detect Return DP_PWR About your monitor...
- Page 28 HDMI port Pin number 19-pin side of the connected signal cable TMDS DATA 2+ TMDS DATA 2 SHIELD TMDS DATA 2- TMDS DATA 1+ TMDS DATA 1 SHIELD TMDS DATA 1- TMDS DATA 0+ TMDS DATA 0 SHIELD TMDS DATA 0- TMDS CLOCK+ TMDS CLOCK SHIELD TMDS CLOCK-...
- Page 29 USB Type-C port Signal Signal SSTXp1 SSRXp1 SSTXn1 SSRXn1 VBUS VBUS SBU2 SBU1 VBUS VBUS SSRXn2 SSTXn2 SSRXp2 SSTXp2 About your monitor...
- Page 30 Universal Serial Bus (USB) This section gives you information about the USB ports available on your monitor. NOTE: Up to 2 A on USB downstream port (port with battery icon) with BC 1.2 compliance devices; up to 0.9 A on the other USB downstream ports;...
- Page 31 BI_DD- Driver installation Install the Realtek USB GBE Ethernet Controller Driver available for your system. This is available for download at https://www.dell.com/support under the “Driver and download” section. Network (RJ45) data rate via USB-C max speed is 1000 Mbps. Wake-on-LAN behavior...
- Page 32 OS. Functionality may vary with Non Dell PC’s. *UEFI stands for Unified Extensible Firmware Interface. NOTE: WOL S4 and WOL S5 only capable with Dell Systems that support DPBS and is with USB-C connection only. Ensure DPBS function are enabled on both the Computer and Monitor.
- Page 33 RJ45 Connector LED status: Right LED Left LED Color Description Right LED Amber or Green Speed indicator: • Amber On - 1000 Mbps • Green On - 100 Mbps • Off - 10 Mbps Left LED Green Link/Activity indicator: • Blinking - Activity on the port. •...
-
Page 34: Plug-And-Play Capability
During the LCD Monitor manufacturing process, it is not uncommon for one or more pixels to become fixed in an unchanging state which are hard to see and do not affect the display quality or usability. For more information on Dell Monitor Quality and Pixel Policy, see https://www.dell.com/pixelguidelines. -
Page 35: Ergonomics
Ergonomics CAUTION: Improper or prolonged usage of keyboard may result in injury. CAUTION: Viewing the monitor screen for extended periods of time may result in eye strain. For comfort and efficiency, observe the following guidelines when setting up and using your computer workstation: •... - Page 36 • Keep the area under your desk clear of obstructions and cables or power cords that may interfere with comfortable seating or present a potential trip hazard. monitor screen at or below eye level monitor and keyboard positioned directly in front of the user wrists relaxed and flat...
-
Page 37: Handling And Moving Your Display
Handling and moving your display To ensure the monitor is handled safely when lifting or moving it, follow the guidelines mentioned below: • Before moving or lifting the monitor, turn off your computer and the monitor. • Disconnect all cables from the monitor. •... -
Page 38: Maintenance Guidelines
• Use a clean cloth that is slightly dampened with water to clean the stand assembly, the screen, and the chassis of your Dell monitor. If available, use a screen-cleaning tissue or solution suitable for cleaning Dell monitors. - Page 39 Customer Induced Damage (CID). CID is not covered under the standard Dell warranty. • If you notice white residual powder when you unpack your monitor, wipe it off with a cloth.
-
Page 40: Setting Up The Monitor
Setting up the monitor Attaching the stand NOTE: The stand is not installed at the factory when shipped. NOTE: The following instructions are applicable only for the stand that was shipped with your monitor. If you are attaching a stand that you purchased from any other source, follow the setup instructions that were included with the stand. - Page 41 4. Close the screw handle. 5. Open the protective cover on the monitor to access the VESA slot on the monitor. 6. Slide the tabs on the stand riser into the slots on the display back cover and lower the stand assembly to snap it into place. Setting up the monitor...
- Page 42 7. Hold the stand riser and lift the monitor carefully, then place it on a at surface. NOTE: Hold the stand riser firmly when lifting the monitor to avoid any accidental damage. 8. Lift the protective cover from the monitor. Setting up the monitor...
-
Page 43: Using The Tilt, Swivel, And Vertical Extension
Using the tilt, swivel, and vertical extension NOTE: The following instructions are applicable only for the stand that was shipped with your monitor. If you are connecting a stand that you purchased from any other source, follow the set up instructions that were included with the stand. -
Page 44: Rotating The Display
90° 90° NOTE: To toggle the display setting on your Dell computer between landscape and portrait when rotating the display, download and install the latest graphics driver. To download, go to https://www.dell.com/support/drivers and search for the appropriate driver. -
Page 45: Configuring The Display Settings On Your Computer After Rotation
After you have rotated the display, complete the procedure given below to configure the display settings on your computer. NOTE: If you are using the monitor with a non-Dell computer, go to the graphics card manufacturer’s website or your computer manufacturer website for information on how to rotate the contents of your display. -
Page 46: Connecting Your Monitor
WARNING: Before you begin any of the procedures in this section, follow Safety Instructions. NOTE: Dell monitors are designed to work optimally with the Dell supplied cables inside the box. Dell does not guarantee the video quality and performance if non-Dell cables are used. - Page 47 Connecting the HDMI cable (Optional) HDMI HDMI Connecting the DP cable Connecting the monitor for DP Multi-Stream Transport (MST) function DP out Setting up the monitor...
- Page 48 NOTE: Supports the DP MST feature. To make use of this feature, your PC Graphics Card must be certified to at least DP1.2 with MST option. NOTE: Remove the rubber plug when using DP out connector. Connecting the USB cable Connecting the USB-C Cable (A to C) (Optional) USB Type-C NOTE: This connection only data is available and no video.
- Page 49 Supports USB Power Delivery (PD), with profiles up to 90 W. NOTE: Regardless of the power requirement/actual power consumption of your laptop, or the remaining power runtime in your battery, the Dell monitor is designed to supply power delivery of up to 90 W to your laptop.
- Page 50 (MST) function DP in USB Type-C DP out USB Type-C NOTE: The maximum number of supported P2724DEB via MST is subjected to the bandwith of the USB-C source. Please refer to product specific problems –No image when using USB Type-C MST.
-
Page 51: Dell Power Button Sync (Dpbs)
Dell Power Button Sync (DPBS) The monitor is designed with Dell Power Button Sync (DPBS) feature to allow you to control PC system power state from the monitor power button. This feature is compatible with Dell platforms that support DPBS, and is only supported over USB-C interface. - Page 52 3. Go to System Settings 4. In the drop-down menu of When I press the power button, there are a few options for selection namely Do nothing/Sleep/Hibernate/Shut down, and you can select Sleep/Hibernate/Shut down. NOTE: Do not select Do nothing, otherwise monitor power button cannot sync with PC system power state.
-
Page 53: Connecting The Monitor For Dpbs For The First Time
USB-C For the first time setting up the DPBS function, please follow below steps: 1. Navigate to Dell Power Button Sync in sub menu under Display and enable it. 2. Ensure both the PC and monitor is OFF. 3. Connect the USB-C cable from the PC to the monitor. -
Page 54: Using Dpbs Function
Initial system power state (OFF) Connect USB-C USB-C cable USB-C * Not all Dell PC systems support to wake up the platform via the monitor. *Upon USB-C cable connection, mouse movement or keyboard press might be required to wake the system/monitor up from sleep or hibernate. - Page 55 When the monitor and PC power state are both ON, while you press and hold 4 seconds on monitor power button, the screen prompt will ask if you would like to shut down the PC. USB-C Press and hold 4s PC will shut down Slide to shut down your PC When the monitor and PC power state are both ON, while you press and hold 10...
-
Page 56: Connecting The Monitor For Usb-C Multi-Stream Transport (Mst) Function In Dpbs Mode
Connecting the monitor for USB-C Multi-Stream Transport (MST) function in DPBS mode A PC is connected to two monitors in an initially OFF power state, and the PC system power state is in sync with Monitor 1 power button. When you press the Monitor 1 or PC power button, both the Monitor 1 and PC turns ON. -
Page 57: Connecting The Monitor For Usb-C In Dpbs Mode
Connecting the monitor for USB-C in DPBS mode Dell PC* platform has two USB-C ports, so both Monitor 1 and Monitor 2 power state can sync with the PC. While the PC and two monitors are in an initially ON power state, by pressing the power button on Monitor 1 or Monitor 2 will turn OFF the PC, Monitor 1, and Monitor 2. - Page 58 Ensure to set USB-C Charging 90 W to On in Off Mode. While the PC and two monitors are in an initially OFF power state, by pressing the power button on Monitor 1 or Monitor 2 will turn ON the PC, Monitor1, and Monitor 2. USB-C USB-C port1 Monitor 1...
-
Page 59: Organizing Your Cables
Organizing your cables After attaching all necessary cables to your monitor and computer, (see Connecting Your Monitor for cable attachment) organize all cables as shown above. If your cable is not able to reach your PC, you may connect directly to the PC without routing through the slot on the monitor stand. -
Page 60: Operating The Monitor Webcam
• Walk Away Lock and Wake on Approach support • Windows Hello support • Additional customization using Dell Peripheral Manager Auto-framing (Single user framing) : • If the user is within 2 meters of the webcam, the webcam will enable the Auto- framing. -
Page 61: Dell Peripheral Manager
Dell Peripheral Manager What is Dell Peripheral Manager? The Dell Peripheral Manager application helps you manage and set up various Dell Peripherals connected to your computer. It allows the user to make changes to webcam settings of the device and provides additional customization. -
Page 62: Removing The Monitor Stand
Removing the monitor stand NOTE: To prevent scratches on the LCD screen when removing the stand, ensure that the monitor is placed on a soft surface and handle it carefully. NOTE: The following steps are specifically for removing the stand that is shipped with your monitor. -
Page 63: Wall Mounting (Optional)
Wall mounting (Optional) NOTE: Use M4 x 10 mm screws to connect the monitor to the wall- mounting kit. Refer to the instructions that come with the VESA-compatible wall mounting kit. 1. Place the monitor on a soft cloth or cushion on a stable flat table. 2. -
Page 64: Operating The Monitor
Operating the monitor Power on the monitor Press the button to turn on the monitor. Using the joystick control To modify the OSD adjustments using the joystick control on the rear end of the monitor, do the following: 1. Press the joystick to open the OSD Menu Launcher. 2. -
Page 65: Using The Rear-Panel Controls
Joystick Functions Joystick Description Press joystick to open the OSD Menu Launcher. For right and left navigation. For up and down navigation. Using the rear-panel controls Press the Joystick to open the OSD Menu Launcher. Preset Modes Menu Launcher • Toggle the Joystick Up to open the Main Menu. - Page 66 Menu Launcher Details The following table describes the Menu Launcher icons: Options Description Use this Menu button to launch the on-screen display (OSD) and select the OSD menu. Shortcut key: Menu Use this button to choose from a list of preset color modes.
-
Page 67: Front-Panel Button
Front-panel button Use the buttons on the front of the monitor to adjust the image settings. Front Panel Description Use the Up (increase) and Down (decrease) buttons to adjust items in the OSD menu. Down Use the Previous button to go back to the previous menu. -
Page 68: Using The Main Menu
Using the Main Menu Icon Menu and Description Submenus Brightness/ Use this menu to activate Brightness/Contrast Contrast adjustment. 27 Monitor Brightness/Contrast Input Source Color Display Audio & Webcam Menu Personalize Others Exit Brightness Adjusts the luminance of the backlight (Range: 0 - 100). Move the Joystick Up to increase brightness. - Page 69 Icon Menu and Description Submenus Input Source Use the Input Source menu to select between different video inputs that are connected to your monitor. 27 Monitor Brightness/Contrast USB-C Input Source Color HDMI Display Auto Select Auto Select for USB-C Prompt for Multiple Inputs Rename Inputs Audio &...
- Page 70 Icon Menu and Description Submenus Color Adjusts the color setting mode. 27 Monitor Brightness/Contrast Preset Modes Standard Input Source Input Color Format Color Reset Color Display Audio & Webcam Menu Personalize Others Exit Preset Modes When you select Preset Modes, you can choose Standard, Movie, Game, Warm, Cool or Custom Color from the list.
- Page 71 Icon Menu and Description Submenus • Cool: Presents colors at higher color temperatures. The screen appears cooler with a blue tint. • Custom Color: Allows you to manually adjust the color settings. Press the joystick left and right buttons to adjust the Red, Green, and Blue values and create your own preset color mode.
- Page 72 Aspect Ratio 16:9 Input Source Sharpness Color Response Time Normal Display Off Off Multi-Monitor Sync Dell Power Button Sync Off Audio & Webcam Reset Display Menu Personalize Others Exit Aspect Ratio Adjust the image ratio to 16:9, 4:3, 5:4. Sharpness Makes the image look sharper or softer.
- Page 73 To allow you to control PC system power state from the Button Sync monitor power button. Allows you to On or Off Dell Power Button Sync function. NOTE: This feature is only supported with Dell platform which has built-in DPBS function, and is only supported over USB-C interface.
- Page 74 Icon Menu and Description Submenus Allows you to set the USB upstream port for the DP/ HDMI input signals, thus the monitor’s USB downstream port (For example, keyboard and mouse) can be used by the current input signals when you connect a computer to either one of the upstream ports.
- Page 75 Icon Menu and Description Submenus Audio & Webcam Use the Audio Settings menu to adjust the audio settings. 27 Monitor Brightness/Contrast Volume Input Source Speaker Unmute Color Microphone Unmute Display Webcam & Presence Sensor Disable Audio Profiles Standard Reset Audio & Webcam Audio &...
- Page 76 Icon Menu and Description Submenus Menu Select this option to adjust the settings of the OSD, such as the languages of the OSD, the amount of time the menu remains on screen, and so on. 27 Monitor Brightness/Contrast Language English Input Source Rotation Select...
- Page 77 Icon Menu and Description Submenus Lock With the control buttons on the monitor locked, you can prevent people from accessing the controls. It also prevents accidental activation in multiple monitors side-by-side setup. 27 Monitor Brightness/Contrast Language Input Source Rotation Color Transparency Display Timer...
- Page 78 Icon Menu and Description Submenus Shortcut key 1 Shortcut key 2 Select from Aspect Ratio, Input Source, Preset Shortcut key 3 Modes, Brightness/Contrast, Display Info set as shortcut key. Shortcut key 4 Shortcut key 5 Power Button Allows you to set the state of the power light to save energy.
- Page 79 DP 1.4 HDMI 1.4 USB: 8.1Gbps Stream Info: USB Upstream: USB C2 Model: P2724DEB Firmware: M2T101 Service Tag: CN073K0 DDC/CI DDC/CI (Display Data Channel/Command Interface) allows your monitor parameters (brightness, color balance, and etc.) to be adjustable via the software on your computer.
- Page 80 Displays the Firmware version of your monitor. Service Tag Displays the Service Tag. The Service Tag is a unique alphanumeric identifier that allows Dell to identify the product specifications and access warranty information. NOTE: The Service Tag is also printed on a label located at the back of the cover.
-
Page 81: Using The Osd Lock Function
Using the OSD lock function You can lock the front-panel control buttons to prevent access to the OSD menu and/ or power button. Use the Lock menu to lock the button(s). 1. Select one of the following options. 27 Monitor Brightness/Contrast Language Input Source... - Page 82 Use the Joystick to lock the button(s). Press the left directional navigation of Joystick for four seconds, a menu appears on the screen. Select Option: Select one of the following options: Options Description Select this option to lock OSD menu function. Menu Button lock Use this option to lock power button.
- Page 83 To unlock the button(s). Press the left directional navigation of Joystick for four seconds until a menu appears on the screen. The following table describes the options to unlock the front-panel control buttons. Select Option: Options Description Use this option to unlock OSD menu function. Menu Button unlock Use this option to unlock power button to turn off the monitor.
-
Page 84: Initial Setup
Initial Setup When you select OSD items of Factory Reset in Other feature, the following message will appear: Your webcam status will be reset after factory reset. To enable it, twist to open the shutter or go to OSD settings. Are you sure you want to reset to default settings?... -
Page 85: Osd Warning Messages
OSD warning messages When the monitor does not support a particular resolution mode, you can see the following message: The current input timing is not supported by the monitor display. Please change your input timing to 2560x1440, 60Hz or any other monitor listed timing as per monitor specifications. This means that the monitor cannot synchronize with the signal that it is receiving from the computer. - Page 86 A message is displayed while the cable supporting DP alternate mode is connected to the monitor under the following conditions: • When Auto Select for USB-C is set to Prompt for Multiple Inputs. • When the USB-C cable is connected to the monitor. Select the primary use of the monitor’s USB-C connection: Display PC screen while charging Only charge device...
- Page 87 NOTE: The message may be slightly different according to the connected input signal. No DP Cable The display will go into Standby Mode in 4 minutes. Dell.com/support/P2724DEB No USB-C Cable The display will go into Standby Mode in 4 minutes. Dell.com/support/P2724DEB No HDMI Cable The display will go into Standby Mode in 4 minutes.
-
Page 88: Setting The Maximum Resolution
1. For Windows 8.1, select the Desktop tile to switch to classic desktop. 2. Right-click on the desktop and click Screen Resolution. 3.If you have more than one monitor connected, ensure that you select P2724DEB. 4. Click the Screen Resolution dropdown list and select 2560 x 1440. -
Page 89: Multi-Monitor Sync (Mms)
Brightness/Contrast Aspect Ratio Input Source Sharpness Color Response Time Display Multi-Monitor Sync Dell Power Button Sync Off Audio & Webcam Reset Display Menu Personalize Others Exit If Monitor 2 supports Multi-Monitor Sync, its MMS option will automatically be set to On for syncing as well. -
Page 90: Setting Multi-Monitor Sync (Mms)
27 Monitor Brightness/Contrast Aspect Ratio Input Source Sharpness Color Response Time Display Multi-Monitor Sync Dell Power Button Sync Off Audio & Webcam Reset Display Menu Personalize Others Exit After first synchronization, subsequent syncing is driven by changes to the predefined group of OSD settings from any monitor in the chain. -
Page 91: Setting Up Windows Hello
Setting up Windows Hello In Windows 10/Windows ® ® Click Windows start menu, click Settings. Click Accounts. Click Sign-in options. You must set up a PIN before you can enroll in Windows Hello. Operating the monitor... - Page 92 Click Add under PIN enter to Set up a PIN. Enter New PIN and Confirm PIN, and thenclick OK. Once you’ve done that, the options to set up Windows Hello will unlock. Click Set up under Windows Hello, enter to Windows Hello setup. Operating the monitor...
- Page 93 The following message is displayed, click Get started. Keep looking directly at your screen and position yourself so that your face is in the center of the frame that appears on screen. The webcam will then register your face. Operating the monitor...
- Page 94 When the following message is displayed, click Close to exit Windows Hello setup. Once you have set up, you have another option to improve the recognition. Click Improve recognition if necessary. Operating the monitor...
-
Page 95: Setting Up The Monitor Webcam As Default Setting On The Operating System
Setting up the monitor webcam as default setting on the operating system When using a notebook with built-in webcam to connect this monitor, in the device manager interface, you can find the notebook built-in webcam and the monitor webcam. Normally, they are in enable status, and the default setting is using notebook built-in webcam. - Page 96 If you want to set up the monitor webcam as default setting, you need disable the notebook built-in webcam. To identify the notebook built-in webcam and disable it, please follow below instructions: Right-click DELL Display with 4MP WebCam, and click Properties to open the DELL Display with 4MP WebCam Properties. Operating the monitor...
- Page 97 Click Details > Property and select Hardware Ids. Operating the monitor...
- Page 98 The Value will show the detail hardware ids of this DELL Display with 4MP WebCam. The hardware ids of the notebook built-in webcam and the monitor webcam are different. For P2724DEB, the monitor webcam hardware ids will show as below: Right click the PC/Notebook webcam which has different hardware ids , and then click Disable.
- Page 99 The following message is displayed: Click Yes. The notebook webcam is now disabled and the monitor webcam will be used as the default setting. Restart the notebook. Operating the monitor...
-
Page 100: Setting Up The Monitor Speaker As Default Setting On The Operating System
P2724DEB Echo Cancelling Speakerphone (DELL P2724DEB USB) If only the HDMI or DP cable is connected from your monitor to the computer, only one speaker named DELL P2724DEB from the monitor will show in the Sound setting interface. DELL P2724DEB... - Page 101 Click DELL P2724DEB, and then click Set Default, the monitor speaker will be used as the default setting. DELL P2724DEB Click OK to exit the Sound setting. DELL P2724DEB USB DELL P2724DEB If the USB cable and the HDMI or DP cable are connected from monitor to the computer, two audio paths named DELL P2724DEB and Echo Cancelling Speakerphone P2724DEB from the monitor will show in the Sound setting interface.
-
Page 102: Use Case Of Monitor Speaker And Microphone
The Echo Cancelling Speakerphone audio path is ideal for video conference calls using the Microsoft Teams or Zoom application. The Dell P2724DEB audio using I2S path is appropriate when the user wants only to listen to playback audio/music/video and there is no requirement to speak or record user voice. - Page 103 Echo Cancelling Speakerphone DELL P2724DEB USB 2-DELL P2724DEB USB DELL P2724DEB DELL P2724DEB Operating the monitor...
-
Page 104: Troubleshooting
LED remains white. Also, depending upon the selected input, one of the dialogs shown below will continuously scroll through the screen. No DP Cable The display will go into Standby Mode in 4 minutes. Dell.com/support/P2724DEB No USB-C Cable The display will go into Standby Mode in 4 minutes. Dell.com/support/P2724DEB 4. -
Page 105: Built-In Diagnostics
Built-in diagnostics Your monitor has a built-in diagnostic tool that helps you determine if the screen abnormality you are experiencing is an inherent problem with your monitor, or with your computer and video card. 27 Monitor Brightness/Contrast Display Info Select √... -
Page 106: Common Problems
• Cycle power on-off. spots • Pixel that is permanently o is a natural defect that can occur in LCD technology. • For more information on Dell Monitor Quality and Pixel Policy, see Dell Support site at: www.dell.com/pixelguidelines. https:// Stuck-on Pixels LCD screen has •... - Page 107 Common What you Possible solutions Symptoms experience Intermittent Monitor • Ensure that the video cable connecting Problems malfunctions on the monitor to the computer is connected & off properly and is secure. • Reset the monitor to factory settings. • Perform monitor self-test feature check to determine if the intermittent problem occurs in self-test mode.
-
Page 108: Product Specific Problems
Product specific problems Problem What you Possible solutions experience Screen image is Image is centered • Check the Aspect Ratio setting in the Display too small on screen, but menu OSD. does not fill entire • Reset the monitor to factory settings. viewing area Cannot adjust OSD does not... - Page 109 • If the Notebook requires a >90 W power laptop, and so adaptor, it may not charge with the USB Type-C connection. • Ensure that you use only Dell approved adapter or the adapter that comes with the product. • Ensure that the USB Type-C cable is not damaged.
- Page 110 Problem What you Possible solutions experience The LAN port is OS setting or • Ensure that the latest BIOS and drivers for not functioning cable connection your computer are installed on your computer. issue • Ensure that the RealTek Gigabit Ethernet Controller is installed in the Windows Device Manager.
- Page 111 Echo Cancelling Speakerphone or the speakers when play audio/ DELL P2724DEB on your system. video on your • Turn O the monitor, unplug the monitor system power cord, replug it, and then turn On the monitor.
- Page 112 • Press the Volume Up button to increase the P2724DEB in speaker volume of DELL P2724DEB Sound setting • If you select DELL P2724DEB audio path, interface please ensure that the Echo Cancelling Speakerphone volume is set to medium or high.
- Page 113 Sensor in OSD is set to Enable. • Reconnect the USB upstream cable to the computer or notebook. Webcam is not • To support the P2724DEB monitor, please use detected in the the Dell Peripheral Manager version 1.7.0 or Dell Peripheral later.
- Page 114 The user should avoid a dim/dark background. The user should avoid direct facing a window with bright sunlight. • Alternatively, you may use Dell Peripheral Manager to adjust the webcam setting on color. Webcam image Webcam image •...
- Page 115 Problem What you Possible solutions experience Webcam image Webcam image • Use a clean and slightly damp cloth to wipe looks blurry appears blurry/not the surface of the front webcam. clear. • Adjust the distance between the user and the camera.
- Page 116 Notebook not Notebook ≥ 180W • Connect the Notebook with Power adaptor charging via not charging USB-C when connected to P2724DEB monitor USB-C port Notebook When the • Connect the Notebook with Power adaptor cannot power Notebook battery is at 0%, Notebook...
-
Page 117: Microsoft Teams /Skype For Business Specific Problems
Problem What you Possible solutions experience The wireless Connect USB • Workaround: mouse does not up-stream cable a) connect to Quick Access Port work smoothly to the DUT. More b) Connect USB 2.4Ghz dongle via USB-A and pauses. than one meter Male to Female cable (0.5M) away, 2.4Ghz mouse does not... - Page 118 Type-B or Type-C to Type-C) is connected using Skype for from the PC to the monitor. Business (SfB) • Select ‘DELL Monitor RGB Webcam’ as the camera in Skype Video Device setting. Webcam being Webcam being • Avoid running multiple conference softwares at...
-
Page 119: Universal Serial Bus (Usb) Specific Problems
Universal Serial Bus (USB) specific problems Specific What you Possible solutions Symptoms experience USB interface is USB peripherals • Check that your display is turned ON. not working are not working • Reconnect the upstream cable to your computer. • Reconnect the USB peripherals (downstream connector). -
Page 120: Regulatory Information
Regulatory information FCC notices (U.S. Only) and other regulatory information For FCC notices and other regulatory information, see the regulatory compliance website located at https://www.dell.com/regulatory_compliance. EU product database for energy label and product information sheet P2724DEB: https://eprel.ec.europa.eu/qr/1378993 Regulatory information... -
Page 121: Contacting Dell
Availability varies by country and product, and some services may not be available in your area. • To get online monitor support content, see https://www.dell.com/support/monitors. • To contact Dell for sales, technical support, or customer service issues, see https://www.dell.com/contactdell. Contacting Dell...
Need help?
Do you have a question about the P2724DEB and is the answer not in the manual?
Questions and answers