Advertisement
Thank you for purchasing a BN Thermic product. Manufactured to a high standard, this product will, if used according to these
instructions and properly maintained, give you years of trouble-free performance.
To make sure that you have selected the correct heater for your application, please read Section 13 on the back page before
installation.
REGISTER: PLEASE REGISTER THIS PRODUCT ONLINE TO ACTIVATE YOUR GUARANTEE AT
IMPORTANT: PLEASE READ THESE INSTRUCTIONS, NOTE THE SAFE OPERATIONAL REQUIREMENTS, WARNINGS, AND CAUTIONS.
USE THIS PRODUCT CORRECTLY, AND WITH CARE FOR THE PURPOSE FOR WHICH IT IS INTENDED. FAILURE TO DO SO MAY CAUSE
DAMAGE AND/OR PERSONAL INJURY AND WILL INVALIDATE THE WARRANTY.
1. SAF E TY IN S TR UC TIO N S
1.1 ELECTRICAL SAFETY
WARNING! It is the responsibility of the owner and the operator to read, understand and comply with the following:
You must check all electrical products, before use, to ensure that they are safe. You must inspect power cables, sockets and any other
connectors for wear or damage. You must ensure that the risk of electric shock is minimised by the installation of appropriate safety devices.
If in any doubt consult a qualified electrician.
You must also read and understand the following instructions concerning electrical safety.
The Health & Safety at Work Act 1974 makes owners of electrical appliances responsible for the safe condition of those appliances and the
safety of the appliance operators. If in any doubt about electrical safety, contact a qualified electrician.
Installation should in accordance with current IEE electrical regulations.
Ensure that the insulation of all the cables on the appliance are undamaged and safe, before connecting it to the power supply.
Ensure that the cables are always protected against short circuit and overload.
Regularly inspect the power supply cables and plugs etc. for wear or damage and check all connections to ensure that none are loose. This
is especially important on the internal mains connecting terminal block as any vibration may loosen the terminal screws.
Important: Ensure that the voltage marked on the appliance matches the power supply to be used and that a correctly rated fuse is fitted.
DO NOT use worn or damaged cables, plugs or connectors. Immediately have any faulty item repaired or replaced by a qualified electrician.
A suitable local isolating switch must be provided in the electrical supply circuit as close as possible to the heater with at least 3mm clearance
on each pole. This must only be used to turn off the heater in an emergency or once the heater has fully cooled down.
This heater is IP20 rated and is suitable for indoor use only.
The controls and heaters may be fed from a different source, and it is essential that all circuit breakers feeding the heating system are isolated
prior to any work being carried out on any of the heaters in the system.
If there are 2 or more heaters being used as a Master / Slave system there may be 400v ac present in the control boxes due to supplies being
taken from different phases.
If you connect the heaters together in a Master / Slave configuration you can only use one RCD (Residual Circuit Device) for all heaters and
individual MCB's for each heater.
Do not attach this heater to an extension cord it must be hard wired in position.
1.2 GENERAL SAFETY INSTRUCTIONS
Remove all packaging and store it away from children, check the package and
heater for visible damage or tampering.
Familiarise yourself with the applications and limitations of the heater.
Ensure the heater is in good order and condition both physically and electrically
before use. If in any doubt, do not use the unit and contact your supplier.
Only use recommended attachments and parts. To use unauthorised parts
may be dangerous and will invalidate your warranty.
Keep tools and other items away from the heater when it is in use.
Keep children and unauthorised persons away from the heater, as it gets hot.
Disconnect from mains and allow to cool before attempting any cleaning or
maintenance.
DO NOT use in areas where hazardous gases or dusts may be present.
X
DO NOT locate the heater directly below the power outlet.
X
DO NOT disassemble the heater for any reason. This heater must be checked
X
by qualified personnel only.
DO NOT use this heater to perform a task for which it has not been designed.
X
WARNING! Ensure you observe the safety distances and mounting heights
and there is no possibility of inflammable materials coming into contact.
www.
.co.uk
bnthermic
INSTRUCTIONS FOR:-
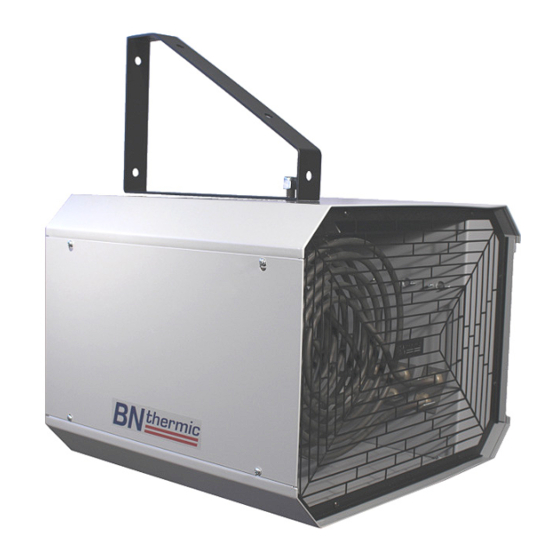
INDUSTRIAL SPACE HEATER
OUH3 Series
Advertisement
Table of Contents

Related Manuals for BN Thermic OUH3 Series


Summary of Contents for BN Thermic OUH3 Series
- Page 1 INDUSTRIAL SPACE HEATER OUH3 Series Thank you for purchasing a BN Thermic product. Manufactured to a high standard, this product will, if used according to these instructions and properly maintained, give you years of trouble-free performance. To make sure that you have selected the correct heater for your application, please read Section 13 on the back page before installation.
-
Page 2: Mounting Installation
2. I NTR O D UCT IO N & S P E CI FI CAT IO N This heater produces a totally dry heat, no condensation, no gas, no fumes. It reaches maximum heat output within a few minutes of being turned on. - Page 3 If you use the heater in mounting position 7, 8 or 9 you MUST remove the 2 side panels turn them around 180° and reinstall them. Would you also please turn around the front guard so our Logo reads correctly. Many Thanks...
-
Page 4: Electrical Connections
4. EL E CTR IC AL CO N N E CTIO N S The 3KW, 6kW can only be wired 230V single phase. The 9kW can be wired 230V single phase or 400V 3 phase. The 15kW, 20kW and 25 kW can only be wired 400V 3 phase. All Heaters MUST BE EARTHED. - Page 5 4.3 OUH3-09 230V Single Phase (only suitable for 9kW model) Please make sure you have read the Safety instructions and that you are a suitably qualified electrician before continuing. Please Note:- Specified cable sizes are for typical installations, correction factors may need to be used when determining actual cable sizes. Do NOT use power tools to undo or do up terminal screws.
- Page 6 If you are not using any controls other than the heater’s built-in thermostat AND are not using the heater in a Master/Slave configuration go to section 7 – LINK CONNECTIONS (page 11). 5. A DD ING AD DI TIO NAL CO N TRO L S. You may add the following controls to the OUH3 Space Heater all of these controls if connected as shown in the wiring diagrams are protected by the heaters internal 3A fuse.
- Page 7 5. 1 C O N E CTI NG A O U H3- S H E AT ER CO N TRO L S W ITC H This can either be mounted on a wall or on the back of the heater next to the thermostat. If mounting on the heater, remove the knockout in the heater and electrical box of the OUH3-S and screw onto the heater using 2 x M4 screws and nuts (not supplied).
- Page 8 5. 3 C O N EC TI NG A O UH 3- D T O R A O UH 3- WiF i TH E RM O STA T + F AN O N L Y O PT IO N The controls and heaters may be fed from a different source and it is essential that all circuit breakers feeding the heating system are isolated prior to any work being carried out on any of the heaters in the system.
- Page 9 5. 6 CO N ECT IN G A RS T 3- IN or R ST - R S T H ER MO ST AT Links may be required – See Section 7 The controls and heaters may be fed from a different source and it is essential that all circuit breakers feeding the heating system are isolated prior to any work being carried out on any of the heaters in the system.
- Page 10 6. CO N E CTI NG HE AT E RS IN A MA ST E R S LA V E A RA NG EM E NT IF USING THE HEATERS IN A MASTER / SLAVE ARANGEMENT PLEASE READ THE FOLLOWING IMPORTANT NOTES BEFORE STARTING THE INSTALATION.
-
Page 11: Fa N O Ve R Ru N
Do NOT use power tools to undo or do up the terminal screws. Linking Master Heater to First Slave Heater - Use 1.0mm² 3 core cable Connections – (Colours for reference only) Connect Black wire – Terminal 6 of Master heater and Terminal 6 of first Slave heater. Connect Grey wire –... -
Page 12: Tro Ub Le Sh O O T Ing A Nd So L Utio N S
Failure to do so may incur penalties established by laws governing waste disposal. IMPORTANT: No liability is accepted for incorrect use of this product. WARRANTY: Your BN Thermic product is guaranteed for a period of five years from date of purchase BN Thermic Ltd, assuming standard comfort heating application.
Need help?
Do you have a question about the OUH3 Series and is the answer not in the manual?
Questions and answers