Advertisement
Quick Links
Advertisement

Subscribe to Our Youtube Channel
Related Manuals for SunHome Luminar


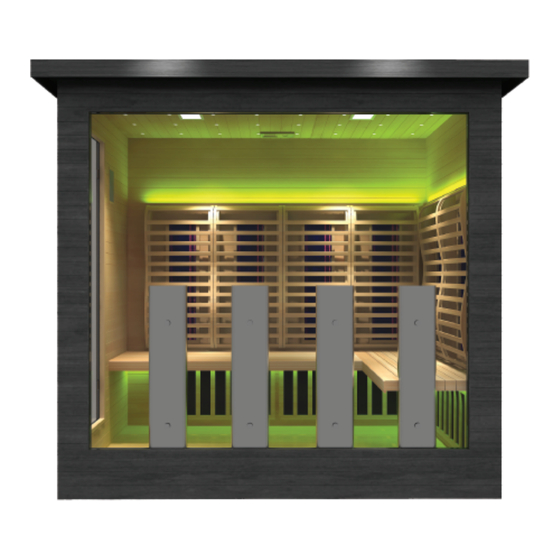
Summary of Contents for SunHome Luminar
-
Page 2: Table Of Contents
PLEASE READ THESE DIRECTIONS CAREFULLY BEFORE USE AND KEEP FOR FUTURE REFERENCE. THE INSTALLATION OF THE SAUNA REQUIRES A MINIMUM OF 2 PEOPLE. YOU SHOULD NOT TRY TO INSTALL THE SAUNA ON YOUR OWN. LIST OF CONTENTS 1 INSTALLATION STEPS ----------------------------------------------------------- 2 FRAME AND HEATER ASSEMBLY ----------------------------------------------------------- 2... - Page 3 Place your sauna on a level surface that will not flood. The saunas are very heavy so a solid foundation is recommended. While the Luminar saunas are designed to be placed outside, choosing a location without excessive rain and wind is highly recom mended.
-
Page 4: Frame And Heater Assembly
Frame and Heater Assembly (2 person & 5 person) (The following pictures are used for your reference. Don’t worry if your sauna has any differences from the pictures, please just follow the steps.) 1) Open sauna packages in a large area. Place Floor Panel on the desired location. - Page 5 3) Secure the Right Wall on the Floor panel the same way as the Back Panel. 4) Secure the Right Wall on the Floor panel in the same way.
- Page 6 5) Secure the Left Wall on the Floor panel in the same way. 6) Install the seat supports and connect to the power supply under seat.
- Page 7 7) Install the benches and fasten with screws. 8) Install backrests with screws and connect the light strip with plug. The width of the four backrest is 18.11 inch. The width of the two side backrest is 20.27 inches.
- Page 8 9) Install the inner ceiling top and connect all plugs.
- Page 9 10) Install full spectrum heaters on glass via the provided screws and connect to the plugs.
- Page 10 11) Before installing the outer overhang ceiling, test the power and heaters. Once confirmed they are fully functional, then proceed with installing the roof 12) Install the roof and connect LED light strip to plug.
- Page 11 13) Power the unit on and test heaters, controls, and lights 14) Tighten the screws to secure the roof...
- Page 12 Completed Sauna: Congratulations! Installation is completed!
- Page 13 For Towel rack, cup holder, magazine holder, and oxygen ionizer istallation Although there are small pre-drilled holes for the placement of these items, the towel rack, magazine holder, and cup holder can be placed wherever you prefer as long as you do not damage the wood.
-
Page 14: Caution
2. OPERATIONAL INSTRUCTIONS 1) CAUTION Check all the circuitry and the plug connections carefully. Install a voltage regulator if the power is unsuitable. Do not share the outlet with other electrical appliances to avoid danger. Do not use the sauna room if under the influence of alcohol, drugs or medications. Pregnant women or persons with poor health should consult their physicians before use. - Page 15 3) OPERATIONAL INSTRUCTIONS PHYSICAL CONTROL PANEL: Note: All the control panel cables must be connected prior to use. 1. Temperature +/ Previous song/manual search: infrared mode (heaters on) can be acti- vated via the plus key on the temperature setting. Controlling the speaker volume is also controlled via the temperature buttons 2.
- Page 16 PHYSICAL CONTROL PANEL: 3. Time +/ Volume + key: infrared mode for the time setting plus key, music and radio mode for the volume plus. 4. Time -/ Volume - key: Set the reduction key for time in infrared mode, and the volume reduction for music and radio mode.
- Page 17 Mobile App Control Panel 1. Power button: press to start and then press to shut down. 2.Temperature +/ Previous song/manual search: infrared mode is the temperature set- ting plus key, music mode this key is the previous song, radio mode this key is the upward manual search.2.Temperature Display: Press arrow UP or DOWN to set desired temperature.
- Page 18 6. Color lights on key: the order is RGB->R->G->B->RG->RB->GB-> Turn off the physio- therapy light automatic cycle, a total of nine modes. 8. Internal light control key: press to turn on the external light and then press to turn off. 9.
-
Page 19: Troubleshooting
4) TROUBLESHOOTING Possibility Repair Method 1 The bulb fuse is burned up. Change a bulb. 2 The bulb and the soc ket are not connected well. 3 The fuse is burned up. Change a fuse. On the top of ceiling. Possibility Repair Method 1 The cable of control panel is not... - Page 20 - Before using your sauna for the first time, clean the inside of the sauna with a damp cloth. Use your favorite furniture polish on the exterior. Place a towel on the bench to absorb any perspiration. Wash these often to maintain a clean and pleasant environment inside your sauna.
-
Page 21: Specifications
Type Capacity (Person) Size (L×W×H mm) Two Person 51.5*57*82inch Luminar Five Persons 51.5*82*82inch IMPORTANT SAFEGUARDS 1. READ INSTRUCTIONS - All safety and operating instructions should be read before the sauna is installed & operated. 2. RETAIN INSTRUCTIONS - The safety and operating instructions should be retained for future reference. - Page 22 WARRANTY: Sun Home Saunas offers a 6-year limited warranty on your Luminar outdoor infrared saunas. This includes 6 years on all carbon heaters and 1 year on all other components, including the cabin, controller, full-spectrum heater, oxygen bar, color light and light strip.
- Page 23 WARRANTY EXCLUSIONS AND LIMITATIONS: Warranty periods for all covered components start from the date of delivery, and are only applicable to the original purchaser or owner. This warranty does not cover the water filter or any loss of o-rings, filters, or gaskets for any cold plunge or other applicable products.
- Page 24 LIMITATIONS ON IMPLIED WARRANTIES: Please be aware that this Limited Warranty is the exclusive warranty provided by Sun Home Saunas and supersedes any prior, contrary, or additional representations. All other warran- ties, express or implied, including any statutory warranty or condition of merchantability or fitness for a particular purpose, are disclaimed, except where prohibited by law.
Need help?
Do you have a question about the Luminar and is the answer not in the manual?
Questions and answers