Table of Contents
Advertisement
Always wear a helmet; It could save your Life!
This manual should be considered as a permanent part of the vehicle and
should remain with the vehicle when resold or otherwise transferred to a
new user or operator. The manual contains important safety information
and instructions which should be read carefully before operating the
vehicle.
OWNER'S MANUAL
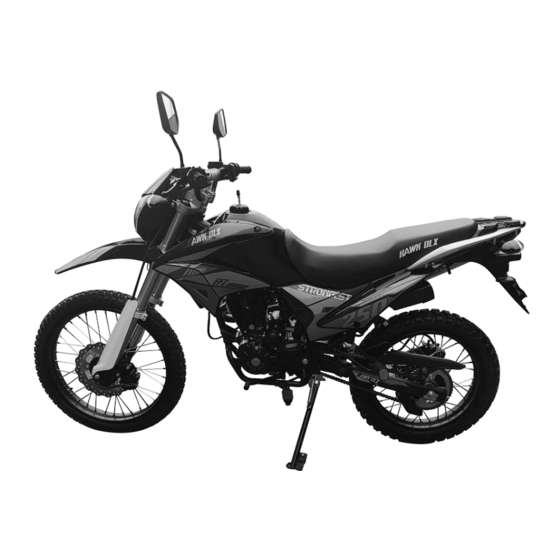
Hawk DLX EFI Motorcycle
Minimum age requirement: 16
Advertisement
Table of Contents

Related Manuals for RPS Hawk DLX EFI


Summary of Contents for RPS Hawk DLX EFI
- Page 1 OWNER’S MANUAL Hawk DLX EFI Motorcycle Minimum age requirement: 16 Always wear a helmet; It could save your Life! This manual should be considered as a permanent part of the vehicle and should remain with the vehicle when resold or otherwise transferred to a new user or operator.
- Page 2 INTRODUCTION Congratulations on your purchase of the Ricky Power Sports LLC’ 250cc Hawk DLX EFI motorcycle. Take time to understand how your motorcycle works before riding. Scheduled service is a must and it is important to follow the break-in guidelines and pre-ride instructions.
-
Page 3: Table Of Contents
CONTENTS Warranty ......................1 Safety Information ....................2 TAKE TIME TO LEARN AND PRACTICE..............2 RIDE DEFENSIVELY .................... 2 Safety Labels ...................... 3 Components Locations ..................4 Indicators ......................5 Controls ......................6 Before Riding ..................... 8 Pre-Ride Inspection .................... 9 Loading guidelines and load limits .............. -
Page 4: Warranty
Power Sports, LLC will at its option repair, provide replacement parts or replace your 250cc Hawk DLX EFI motorcycle at no charge. This warranty does not cover normal wear items or damage caused by neglect or misuse of the product. -
Page 5: Safety Information
SAFETY INFORMATION This user’s manual contains important safety and maintenance information. Read it carefully before riding. Failure to follow the warnings contained in this manual could result in INJURY or DEATH. ALWAYS WEAR A HELMET The operator and passenger (if any) of this vehicle should always wear a helmet approved by agencies such as the Department of Transportation (DOT), Safety Helmet Council of America (SHCA), or Snell Memorial Foundation (SNELL). -
Page 6: Safety Labels
SAFETY LABELS The safety labels on your motorcycle provide you with important information do not remove them. If a label becomes too difficult to read or comes off, please contact Ricky Power Sports, LLC for replacements. -
Page 7: Components Locations
COMPONENTS LOCATIONS... -
Page 8: Indicators
INDICATORS The indicators on your motorcycle help make you aware of possible issues, refer to them often. Speedometer - Shows the speed you are traveling miles per hour. Odometer - Tracks the total miles driven. Trip meter - Tracks the total miles driven on your trip. High beam indicator - Illuminates when high beam lights are on. -
Page 9: Controls
CONTROLS FUEL VALVE Fuel valve-Used to control the flow of gasoline from the fuel tank to the fuel nozzle. ON - Gasoline can flow to the fuel nozzle. OFF - Gasoline cannot flow to the fuel nozzle. RES - Gasoline can flow to the fuel nozzle when you have run out of gas in the gas tank. - Page 10 IGNITION SWITCH Ignition switch-used for starting and stopping the engine. The key is used to lock the steering, preventing theft. ON-ALL electrical components are ON. Off-ALL electrical components are OFF. START BUTTON AND ENGINE STOP SWITCH Start button - Pushing the start button will start the engine.
-
Page 11: Before Riding
BEFORE RIDING Before your first ride on your new motorcycle we strongly recommend you: Read the owner’s manual. Understand all safety labels. Know how to operate all controls. Before you ride each time, make sure: You are in good physical and mental health. ... -
Page 12: Pre-Ride Inspection
PRE-RIDE INSPECTION Before each ride check the condition of your motorcycle to make sure that it does not have mechanical problems. Your motorcycle should always be in good riding condition to ensure the safety of you, your passenger (if any) and others around you. ... -
Page 13: Loading Guidelines And Load Limits
LOADING GUIDELINES AND LOAD LIMITS Your motorcycle has been designed to carry you and one passenger. When a passenger is riding with you there will be a difference in the acceleration and braking. Load Limits Maximum weight capacity (including rider, passenger, accessories and cargo): 331 lbs (150kg) Maximum cargo weight: 25lbs (10kg) Loading guidelines... -
Page 14: Starting Procedures
STARTING PROCEDURES Insert key hexagon into the groove turning anti-clockwise to “OPEN”。 Insert key into ignition, turn to “ON” position. Make sure the transmission is in the “NEUTRAL” position. Turn the engine stop switch to “RUN”. If you are restarting a warm engine, follow procedure for High Air Temperature. -
Page 15: Starting And Stopping The Engine, Shifting Gears
STARTING AND STOPPING THE ENGINE, SHIFTING GEARS How to stop the engine Normal Engine Stop Shift into neutral and turn the ignition switch “OFF”. DO NOT leave the ignition switch “ON” while the engine stop switch if “OFF”, this will allow the lights to stay “ON”... -
Page 16: Braking
BRAKING Your motorcycle is equipped with a hand operated front hydraulic disc brake and a foot operated rear hydraulic disc brake. Your front brake provides 70% of your braking power. By using both front and rear brakes you will achieve faster, more stable and effective braking. -
Page 17: Servicing Your Motorcycle
SERVICING YOUR MOTORCYCLE This section is provided to help you keep your motorcycle in good running condition. The following table provides you with the three types of inspections b v recommended for your bike. Type of inspection/ service When to perform? Who performs? Pre-ride inspection Before every ride... -
Page 18: Maintenance Safety
MAINTENANCE SAFETY Including the regular maintenance and pre-ride inspection, perform the periodic checks once a month and once a week if you ride frequently. Check the odometer and perform any scheduled maintenance necessary. Tires - ● Check the air pressure and add air if needed. ●... - Page 19 Periodic and Anticipated Maintenance and Procedures Owner’s Manual for the motorcycle is available upon EPA’s request. To keep the performance good, the motorcycle should be checked and maintained at certain interval. The meanings of capital in following table are: I: Inspection, including check, clean, lubricate, refuel, repair or replacing if necessary. A: Inspection, adjusting if necessary C: Cleaning R: Replacing...
-
Page 20: Maintenance Records
MAINTENANCE RECORDS To ensure proper maintenance keep record. If the motorcycle is sold be sure to include the maintenance records. All scheduled maintenance is considered normal operator cost if a service center performs these tasks you will be charged. Please use the tables below to keep track of all maintenance performed. -
Page 21: Tool Kit And Owner's Manual Storage
TOOL KIT AND OWNER’S MANUAL STORAGE Your tool kit is located in the tool kit bag. These tools may come in handy during minor roadside repairs and adjustments. Tools in tool kit: Open end wrench Standard Phillips screw driver ... -
Page 22: Fuel And Engine Oil
only use an octane number of 87 or higher. Using a lower octane gasoline can cause severe damage to the engine. Never use stale or contaminated gasoline or an oil/gasoline mixture. Fuel Capacity Fuel tank capacity, including reserve - 14L Reserve capacity –... -
Page 23: Engine Oil
ENGINE OIL Recommended Oil API classification Viscosity(weight) SAE 10W-30 Use the recommended oil, the oil does not need additives. Do not use graphite oil or oil with molybdenum additives. Do not use castor based racing oil, vegetable oil or non-detergent oil. Checking and Adding Oil 1. - Page 24 8. Screw in the oil fill plug/dipstick. 9. Check for any leaks. Changing Engine Oil This procedure will require some mechanical skill and special tools such as a torque wrench. If you are not capable of performing this procedure contact your local service center.
-
Page 25: Air Cleaner
AIR CLEANER Be sure to clean the air cleaner more frequently if you are ridding in dusty or wet areas. You local service center can help you determine the correct service interval for your riding conditions. Use only the air cleaner specified for your motorcycle or one of equivalent quality. NOTICE: Using the correct air cleaner can prevent engine wear, damage, repairs, spark plug fouling and poor gas mileage. -
Page 26: Crankcase Breather And Throttle
CRANKCASE BREATHER AND THROTTLE Crankcase Breather You should service the crankcase breather that connects air cleaner more often if you are riding at full throttle or in rain. Be sure to service, if there are deposits in the transparent section of the drain tube. Draining 1. -
Page 27: Throttle Inspection
THROTTLE INSPECTION 1. Make sure that all nuts and bolts are securely fastened and the throttle assembly is positioned correctly. 2. Check the full rotation of the throttle grip from all steering positions. Clutch System The proper free play adjustment of the clutch allows for a gradual, smooth engagement when shifting gears. -
Page 28: Clutch System
CLUTCH SYSTEM If the upper clutch cable adjuster has reached its limit or you cannot obtain the correct free play, you may also use the lower clutch cable adjuster. 1. Loosen the upper lock nut and rotate the upper clutch cable adjuster in to maximum free play. -
Page 29: Spark Plug
SPARK PLUG Spark Plug Recommendation Please use EPA approved spark plug of recommendation by Ricky Power Sports, LLC. Do not use any spark plugs other than the one recommended in the heat recommended. NOTICE: If you use a spark plug in the improper heat range you can cause engine damage. -
Page 30: Brakes
Adjustment to the spring pre-load on the rear suspension should be done for the weight of a rider and passenger (if any) and different riding conditions. The adjustments in this manual are limited. Do not disassemble or service the dampers, have your local service center perform these tasks. BRAKES Your motorcycle uses hydraulic disc brakes( front and rear). - Page 31 mark. If the pads are worn, replace immediately. Have your local service center do this. Rear Brake Pedal Free Play Brake Pedal Height Adjustment The height of the brake pedal can be adjusted by using the stopper bolt. 1. Loosen lock nut and turn stopper bolts to adjust. 2.
-
Page 32: Tires And Tube Repair
Inspection Always look for the following when checking tire pressure: Bumps or bulges on the tire, if there are any replace the tire. Cuts or cracks, replace tire if any fabric is visible. Any foreign objects such as nails embedded in the tire. ... -
Page 33: Drive Chain
Recommended Tire Size: Front - 80/110-21 Rear - 110/100-18 When replacing a tire: Have the wheel balanced after installation. If possible, have tire replaced by your local service center. Replace the tube. Safety Reminders Do not replace tire with a Radial tire. Using a different type of tire may affect stability and handling. - Page 34 NOTICE : The use of a new chain with a worn sprocket will cause quick wear to the chain. Adjustment Every 500 miles you should check and adjust (if needed) the slack of the drive chain. If you are riding at high speeds the chain may need adjusting more often. Place the bike on level ground using the side stand.
-
Page 35: Lubrication
slack in between the drive sprocket and the rear wheel sprocket. Move the bike forward, stop and park it on the side stand. Recheck the slack, it should allow vertical movement by hand: 9/16 inch (15-30mm) You can check the rear axle alignment by making sure the index marks align with the rear edge of the adjusting slots both marks should be at some point. - Page 36 Battery Storage We recommend that you remove the battery from your motorcycle if you are planning to store it for a long period of time. In order to maintain the life of the battery while storing you should slow trickle charge the battery every 30 days. If you do not remove the battery you should disconnect the battery wires (negative wire first).
-
Page 37: Appearance Care
leave the battery connected to the charger longer than the recommended amount of time. Do not use an automotive battery charger as this can cause permanent damage to your battery. APPEARANCE CARE You should always clean and polish your motorcycle on a regular basis to keep it looking newer longer. -
Page 38: Vehicle Identification
VEHICLE IDENTIFICATION Serial Numbers The frame (VIN) and engine serial numbers will be required when you register your motorcycle. You may also need this information when ordering parts, make sure to keep these numbers in a safe spot. Frame number (VIN- Vehicle Identification Number) can be found on the left side of the front forks stamped into a metal plate. -
Page 39: Specifications
SPECIFICATIONS Overall length 2115 mm Overall width 920 mm Overall height 1370 mm Wheel base 1390 mm Curb mass 125 kg Fuel recommendation Octane 87or above Fuel tank capacity Engine oil recommendation API service classification SF SAE 10W-30 Passenger One driver or one passenger only Displacement 229cc Bore and stroke... -
Page 40: Wire Diagram
WIRE DIAGRAM... -
Page 42: Hmc-Emission Control System Warranty Statement
HMC-EMISSION CONTROL SYSTEM WARRANTY STATEMENT YOUR WARRANTY RIGHTS AND OBLIGATIONS The U.S. Environmental Protection Agency and Ricky Power Sports, LLC (hereinafter MFR), are pleased to explain this Emission Control System Warranty on your motorcycle. New motor vehicles must be designed, built, and equipped to meet U.S. - Page 43 owner. MFR will deliver warranted parts to the licensed mechanic workshop or the ultimate vehicle owner for the Warranty repair job done at the MFR approved licensed mechanic workshop at vehicle owner’s convenience with no cost to the ultimate vehicle owner. ...
- Page 44 3. LIMITED LIABILITY A. The liability of MFR under this Emission Control System Warranty is limited solely to the remedying of defects in material workmanship by a MFR authorized dealer at its place of business during customary business hours. This warranty does not cover inconvenience or loss of use of the motorcycle or transportation of the motorcycle to or from the MFR dealer.
- Page 45 C. MFR will reimburse the ultimate vehicle owner the Warranty repair labor cost once your Warranty repair is completed by the approved local licensed mechanic workshop. 8. ADDITIONAL INFORMATION MFR recommend that OEM parts be used when Warranty repairs are needed. Nonetheless, any replacement part that is equivalent in performance and durability may be used in the performance of any maintenance or repairs.
- Page 46 Ricky Power Sports, LLC. 2425 Camp. Avenue, Carrollton, TX 75006 Toll Free: 844-250-2199 Office: 972-242-1143...
Need help?
Do you have a question about the Hawk DLX EFI and is the answer not in the manual?
Questions and answers
removing the seat, hawk dlx 250
Clutch throw out beating no.
What are the torque specs on the valve cover