Table of Contents
Advertisement
Advertisement
Table of Contents

Subscribe to Our Youtube Channel
Related Manuals for Carrier TRANSICOLD Neos 100S


Summary of Contents for Carrier TRANSICOLD Neos 100S
- Page 1 Operator’s Manual Neos 100S Truck Refrigeration Units 62-11850 Rev C...
- Page 3 OPERATOR’S MANUAL For The Neos 100S Truck Refrigeration Units Printed in USA April 2020 © 2020 Carrier Corporation ●...
-
Page 5: Table Of Contents
TABLE OF CONTENTS INTRODUCTION ........1 UNIT IDENTIFICATION . - Page 6 62-11850...
-
Page 7: Introduction
INTRODUCTION This guide has been prepared for the operator of Carrier Transicold’s Neos 100S battery driven refrigeration units with Cab Command controller. It contains basic instructions for the daily operation of the refrigeration unit as well as safety information, and other information that will help to deliver the load in the best possible condition. -
Page 8: Unit Identification
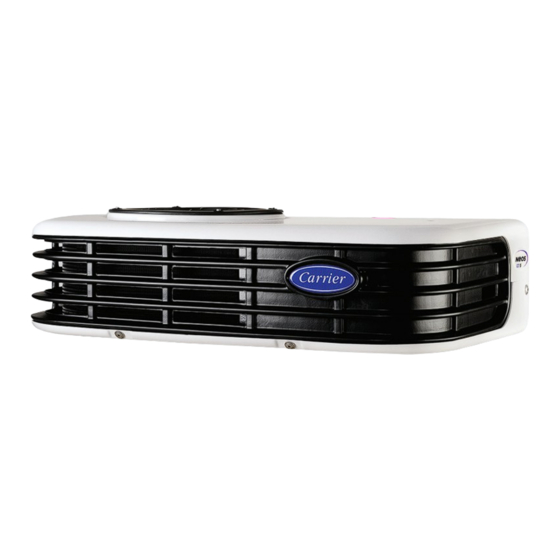
UNIT IDENTIFICATION Each unit is identified by a nameplate attached to the frame of the unit. The nameplate identifies the complete model number of the unit, the serial number and some other information. If a problem occurs, please refer to the information on this plate, and make a note of the model and serial number before calling for assistance. -
Page 9: Safety
All unit inspection/servicing must be performed by properly trained personnel only. This Carrier Transicold refrigeration unit has been designed with the safety of the operator in mind. During normal operation, all moving parts are fully enclosed to help prevent injury. During all pre-trip inspections, daily inspections, and problem troubleshooting, you may be exposed to moving parts;... -
Page 10: Unit Operation
Cab Command. Standby Mode The Neos 100S is powered by a standby module reducing the 230 VAC into 12 Vdc. The power network connection is detected by the standby module which automatically starts up the unit in standby mode. -
Page 11: Display
DISPLAY 1. Display - 3 digits 2. °F LED 3. °C LED 4. Manual Defrost key 5. - key 6. Set key 7. + key 8. OFF key 9. ON key 10. Unit operation display: • Green (left half): - Cooling, Null, and Heating modes. •... - Page 12 DISPLAY - CONTINUED Display - 3 digits • Box temperature • "dF" message in defrost mode • Malfunction messages • Software version • Hourmeter value • Configuration parameters in the different menus ON / OFF keys These keys are for starting and stopping the unit. SET key This key is for accessing set point and unit data.
-
Page 13: Starting The Unit
STARTING THE UNIT 1. Start the vehicle engine. 2. Start the unit by pressing the ON key. Start-up is time-delayed for 30 seconds. 3. The digital display of the Cab Control displays the box temperature. 4. Check that the temperature set point is correct by pressing the SET key. -
Page 14: Stopping The Unit
STOPPING THE UNIT 1. For a delivery stop: turn the unit off by the vehicle ignition key. 2. For a long stop (more than 2 hours): press the OFF key. 62-11850... -
Page 15: Temperature Setpoint
TEMPERATURE SETPOINT 1, 3 NOTE If, when settings are adjusted, no key is activated within five seconds, the system reverts to displaying the box tempera-ture. All changes made are recorded. 1. Press the SET key to display the setpoint temperature. 2. -
Page 16: Manual Defrost
MANUAL DEFROST 1. Check the display to verify that the box temperature is 40°F or lower. 2. Press the Defrost key to initiate manual defrost. 62-11850... -
Page 17: Defrost Interval
DEFROST INTERVAL NOTE If, when settings are adjusted, no key is activated within five seconds, the system reverts to displaying the box tempera-ture. All changes made are recorded. 1. Press the OFF key to shut down the unit. 2. Press simultaneously the Defrost and ON keys and hold for five seconds to display the last selected defrost interval. -
Page 18: Minimum Setpoint Lock
MINIMUM SETPOINT LOCK 1,3,6 1,3,6 To limit the temperature pull-down, it is possible to program the minimum set point lock: 1. Press consecutively the +, - and Defrost keys to access the functional parameters. 2. The display will show the previous Minimum Setpoint Lock value. •... - Page 19 MINIMUM SETPOINT LOCK - CONTINUED 8. The display will show the EFM (Evaporator Fan Motor) status in “Null” Mode. • Available values are: ON or OFF • Factory setting by default: OFF 9. Press the + or - key to modify the displayed value. 10.Press the SET key to validate the new selected value and return to the box temperature display.
-
Page 20: Displaying Unit Data
DISPLAYING UNIT DATA 1, 3, 4, 5 1. Press the SET key for five seconds to enable access to malfunction codes. 2. Press the + or - key to display active or passive alarms. 3. Press the SET key to display the software version. 4. -
Page 21: Product Loading
PRODUCT LOADING Before Loading • Pre-cool the inside of the insulated body by lowering the tempera- ture for about 15 minutes. • Evacuate the humidity existing inside the box by carrying out a manual defrost. This can only take place when enabled by the defrost thermostat (box temperature lower than 37°F during pull down and 46°F during heating). - Page 22 PRODUCT LOADING - CONTINUED Proper air circulation in the insulated box refers to air that can move around and through the load. This is a critical element in maintaining product quality during transport. If air cannot circulate completely around the load, hot spots or top-freeze can occur. The use of pallets is highly recommended.
-
Page 23: Recommended Transport Temperatures
These are included for reference only. The shipper or receiver may require different set points than those listed. More detailed information can be obtained from a Carrier Transicold dealer. Set Point Range Product °F... -
Page 24: General Troubleshooting
If, however you run into problems the following section may be of assistance. If you do not find the trouble that you have experienced listed, please call your Carrier Transicold dealer for assistance. Cooling Mode Unit will not cool Compressor drive belt broken. - Page 25 Low suction pressure No evaporator air flow or restricted air flow. Excessive frost on coil. Suction service valve partially closed. Filter-drier partially plugged. Low refrigerant charge. Expansion valve malfunction. Suction and discharge Compressor valves defective. pressure tend to equalize Hot gas (two-way) solenoid malfunction. when unit is operating.
-
Page 26: Alarm Description
ALARM DESCRIPTION There are three types of alarms: AXX: Active alarms that cannot be cleared until the malfunction has been corrected. The red LED is flashing rapidly. PXX: Passive alarms that stay in memory until the technician clears them. The red LED is flashing slowly. Direct Display: These alarm messages are displayed instead of temperature read-out as soon as the malfunction is detected, and remain displayed as long as malfunction persists. -
Page 27: Alarm List And Alarm Reset
ALARM LIST AND ALARM RESET ALARM ALARM / ERROR DESCRIPTION No malfunction. Unit is in operation. A01/A02/A03 Low pressure switch open / High pressure switch open / DC electrical motor over heated (displayed al- ternatively). Clutch compressor fault. Condenser fault. Evaporator fan fault. -
Page 28: Fuses
FUSES WARNING When replacing fuses, Lockout/Tagout the Negative Battery Cable and the High Voltage Power Supply. Main Road Fuse Ignition fuse (fuse box of the vehicle) FEFMM Evaporator fan motors protection DC motor protection (closed to condenser) 125A Main road fuse (near vehicle battery) FRPM + Micro protection (near vehicle battery) Micro protection... -
Page 29: Unit Maintenance
UNIT MAINTENANCE WARNING Use proper Lockout/Tagout procedures before inspect- ing/servicing this unit. All unit inspection/servicing must be performed by properly trained personnel only. WARNING Before any operation requiring an intervention on the unit, check that the unit (Cab Command) is off. Verify that it is impossible for the unit to automatically start- up during maintenance. - Page 30 CARRIER POLYOLESTER (POE) oil. The presence of a sticker indicates that the oil change has been correctly carried out in our CARRIER TRANSICOLD plant. Oils of PAG type are strictly incompatible with the operation of our units. Never use an oil other than those approved by CARRIER.
-
Page 31: Standby Operation Guidelines
STANDBY OPERATION GUIDELINES For safe, reliable operation in Standby mode, it is important to follow a few guidelines: • ALWAYS check that the unit is OFF (Cab command) before con- necting or disconnecting it from the power source. • The extension cable and fuse used for network connection must comply with the legislation currently applicable on the site of use and with the unit specifications as described in the table below: Maximum Amperage for Operation Equipment... -
Page 32: Emergency Road Service
EMERGENCY ROAD SERVICE At Carrier Transicold we are working hard to give you complete service when and where you need it. That means a worldwide network of dealers that offer 24-hour emergency service. These service centers are manned by factory trained service personnel and backed by extensive parts inventories that will assure you of prompt repair. - Page 33 INDEX Alarm Description 20 ON / OFF keys 6 ALARM LED - Red 6 Alarm List 21 Product Loading 15 C / F LED 6 Recommended Transport Tem- peratures 17 REGULATION LED - Green 6 Defrost 4 Reset Maintenance Interval Mes- Defrost Interval 11 sage SE 21 DEFROST key 6...
- Page 36 Central America and Mexico Carrier Transicold Carrier Transicold 700 Olympic Drive Ejercito Nacional 253-A Piso 5 Athens, GA 30601 USA Colonia Anahuac 11320 Mexico D.F. ©2020 Carrier Corporation. Printed in USA 04/20. Carrier, Carrier Transicold is a registered trademark of Carrier Corporation.
Need help?
Do you have a question about the Neos 100S and is the answer not in the manual?
Questions and answers