
Related Manuals for Carrier TRANSICOLD INTEGRA 30S


Summary of Contents for Carrier TRANSICOLD INTEGRA 30S
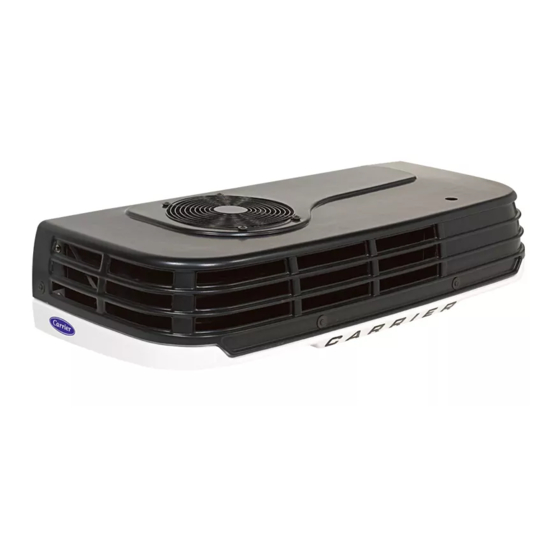
- Page 1 Truck Refrigeration EVAPORATOR TXV BULB CONDENSER RECEIVER Operation and Service Manual INTEGRA 30S Truck Refrigeration Units Beginning with S/N PB 225225 62-10848 Rev D...
- Page 3 Operation and Service Manual INTEGRA 30S Truck Refrigeration Units Beginning with S/N PB 225225 © 2018 Carrier Corporation Printed in USA June 2018 ●...
-
Page 5: Table Of Contents
Table of Contents PARAGRAPH NUMBER PAGE SAFETY SUMMARY ..............1–1 SAFETY PRECAUTIONS . - Page 6 START-UP ..............3–3 3.2.1 Inspection .
- Page 7 5.11 HIGH PRESSURE (HP1) AND CONDENSER PRESSURE (HP2) SWITCHES ... 5–7 5.11.1 Removing Switch ..........5–7 5.11.2 Checking Pressure Switch...
- Page 9 GLOSSARY Absolute Humidity Amount of moisture in the air, indicated in grains per cubic foot. Absolute Pressure Gauge pressure plus atmospheric pressure (14.7 lbs. per sq. in.) Absolute Temperature Temperature measured from absolute zero Absolute Zero Temperature Temperature at which molecular motion ceases Absorbent Substance with ability to take-up, or absorb another substance A solution or surface that is capable of soaking up (taking in) another substance...
- Page 10 GLOSSARY Single or dual rated (two posts vs. three posts) devise which limits current and is perma-nently (hence phrase PSC - Permanent Split Capacitor) installed, in series, between the motors run and start wind-ings. The current limiting Capacitor, Motor Running characteristics prevent the start winding from burning.
- Page 11 GLOSSARY Part of stator of motor which concentrates magnetic field of field winding. Field Pole Filter Device for removing small particles from a fluid. Tool which is principally a torch and when an air-refrigerant mixture is fed to Flame Test for Leaks flame, this flame will change color in presence of heated copper.
- Page 12 GLOSSARY Instrument to measuring pressure of gases and vapors. Gas pressure is Manometer balanced against column of liquid such as mercury, in U-shaped tube. TXV, capillary tube assembly, constant pressure expansion valve or bullet type piston orifice designed to regulate flow of liquid refrigerant entering the Metering Device evaporator.
- Page 13 GLOSSARY Process whereas additional sensible heat (as opposed to latent heat) is removed Sub-Cooling from condensed refrigerant liquid prior to the metering device. The proper method for charging a system utilizing a TXV. Degree of hotness or coldness as measured by a thermometer; measurement of Temperature speed of motion of molecules.
- Page 14 62-11868...
-
Page 15: Safety Summary
Safety Summary Safety Precautions Your Carrier Transicold refrigeration unit has been designed with the safety of the operator in mind. During normal operation, all moving parts are fully enclosed to help prevent injury. During all pre-trip inspections, daily inspec- tions, and problem troubleshooting, you may be exposed to moving parts. Stay clear of all moving parts when the unit is in operation and when the ON/OFF switch is in the ON position. -
Page 16: Specific Warning And Caution Statements
Specific Warning and Caution Statements To help identify the label hazards on the unit and explain the level of awareness each one carries, an explanation is given with the appropriate consequences: DANGER: Means an immediate hazard which WILL result in severe personal injury or death. WARNING: Means to warn against hazards or unsafe conditions which COULD result in severe personal injury or death. - Page 17 CAUTION Under no circumstances should anyone attempt to repair the microprocessor module or Cab Command! Should a problem develop with these components, contact your nearest Carrier Transicold dealer for replacement. CAUTION If starting the unit for the first time after installation or starting after adding/removing an optional feature or if Owner’s operating parameters have changed, the Configuration will need to be reset.
-
Page 19: Unit Description
This manual contains Operating Data, Electrical Data (see Figure 2.2 Figure 2.5). and Service Instructions for the Carrier Transicold Model 30S truck refrigeration units listed in Table 2–1. 2.3.1 Condenser/Subcooler Additional support manuals are listed in Table 2–2. -
Page 20: Oil Separator
Figure 2.1 Integra 30S Cab Command Figure 2.2 Top View 1. Nameplate 10. Sight Glass 2. Condenser Coil 11. Receiver 3. Transformer (TR) 12. Discharge Manifold 4. Oil Separator 13. Hot Gas Solenoid Valve (HGS1) 5. Standby Motor 14. Condenser Pressure Control Switch (HP2) 6. -
Page 21: Hot Gas Solenoid Valve (Hgs1)
Figure 2.3 Rear View Evaporator 4. Defrost Termination Thermostat (DTT) 1. Low Pressure Switch (LP) 5. Evaporator coil 2. Expansion Valve (TXV) 6. Compressor Pressure Regulating Valve 3. Quench Valve (BPV) (CPR)115V only 2.3.3 Oil Separator 2.3.5 Condenser Pressure Control Valve (HGS2) The condenser pressure control valve (or condenser The oil separator is installed in the discharge line from closing valve) is a normally open valve that is powered... - Page 22 2.3.9 High Pressure Switch (HP1) entering the compressor. The CPR valve is set to limit the maximum suction pressure. For CPR settings refer HP1 is a normally closed switch which monitors the Section 2.6.2. system for high pressure and shuts down the unit when The suction pressure is controlled to avoid overloading pressure rises above a predetermined setting.
- Page 23 Figure 2.5 Typical Standby Control Box 115/1/60 115/1/60 230/1/60 230/1/60 1. Standby clutch fuse (F2) - 30 Amp 8. Diode 2. Standby Fuse (F3) - 5 Amp 9. Rectifier Bridge Assembly (BR) 3. Transformer Fuse (F4) - 5 Amp 10. Filter Capacitor (C1) 4.
- Page 24 Figure 2.6 Standby Microprocessor Module 1. Connector 6. °C or °F Temperature Selector 2. Road Relay (RR) 7. Microprocessor (PC) 3. 12 Volt dc Road Connection 8. Road Fuse (F1) 30A 4. 12 Volt dc Standby Connection 9. Overload Relay (OL) 25A (115V Only)\ 5.
- Page 25 2.8) and the micro- processor module (Figure 2.6) located in the control box. The Carrier Transicold Control System incorporates the following features: a. Control return air temperature to tight limits by providing refrigeration control, heat and defrost to ensure conditioned air delivery to the load.
-
Page 26: High Pressure Switch (Hp1)
Unit Specifications 2.6.1 Compressor Data Table 2–3 Compressor Data Model TM16 Displacement 9.9 in (162 cm No. Cylinders Weight 15.5 lbs (7 kg) Oil Change 5.07 in (180 cm Approved Oil Mobil Arctic EAL68 2.6.2 Refrigeration System Data Compressor Pressure Regulating Valve (CPR) 115V only Defrost Timer 19 ±... -
Page 27: Electrical Data
2.6.3 Electrical Data Fan Motors Table 2–4 Fan Motors Data Evaporator Fan Motor (EFM) Condenser Fan Motor (CFM) Bearing Lubrication Factory Lubricated Bearing Lubrication Factory Lubricated Horsepower 0.1 kw Operating Amps 10.8 amps Operating Amps 10 amps Speed 2800/3000 rpm Speed 3300 rpm Standby Compressor Speed... -
Page 28: Safety Devices
Safety Devices System components are protected from damage caused by unsafe operating conditions by automatically shutting down the unit when such conditions occur. This is accomplished by the following fuses and safety devices. Table 2–7 Safety Devices Unsafe Conditions Safety Device Automatic Device Setting restart with... -
Page 29: Refrigerant Circuit
Refrigerant Circuit The evaporator tubes have aluminum fins to increase heat transfer; therefore heat is removed from the air 2.8.1 Cooling circulating through the evaporator. This cold air is circu- lated throughout the truck to maintain the cargo at the (See Figure 2.9) - Page 30 Figure 2.9 Refrigeration Circuit Cooling Cycle (BPV) TXV E (HGS1) 115V (BPT) 62-10848 2-12...
- Page 31 Figure 2.10 Refrigeration Circuit Heating Cycle 2-13 62-10848...
-
Page 33: Operation
The keypad and display serve to provide user access problem develop with the control system, and readouts of microprocessor information. The infor- contact your nearest Carrier Transicold mation is accessed by keypad selections and viewed dealer for replacement components. on the display. - Page 34 Unit operating LEDs c. Red Light Status After an alarm has been present for 15 minutes, the red a. Green Light Status for Standby Units unit indicating light flashes at 3 Hz. The light will con- Under normal operation, the green LED will indicate tinue to flash at 0.5 Hz until the temperature returns to the temperature control status as follows: set point ±...
-
Page 35: Start-Up
Start-Up 3.2.3 Starting 3.2.1 Inspection CAUTION Before starting the truck engine or connecting standby power check the following: If starting unit for the first time after installation the compressor pressure reg- a. Check condenser coil for cleanliness. ulating valve will need to be reset (refer b. -
Page 36: Manual Defrost
Manual Defrost NOTE Check that refrigerated compartment temperature is If no key is pressed within five seconds of 40°F (4.4°C) or lower. adjusting settings, the system reverts to dis- playing the refrigerated compartment tem- perature. Only validated changes are Press manual defrost key to initiate recorded. -
Page 37: Low Battery Voltage Alarm For Road Only Units
Table 3–2 Alarms For Standby Units Malfunction Alarm and Unit Description Alarm Only Codes Shut Down Red LED flashes No malfunction. Unit in operation. Low pressure switch X - after 3 successive faults High pressure switch X - after 5 successive faults Electric motor overload protection on start-up X - after 3 successive faults Road clutch malfunction... -
Page 38: Microprocessor Configuration
Microprocessor Configuration b. The defrost interval parameter is displayed next. This setting determines the time between defrosts in hours. The defrost inter- CAUTION val can be selected by scrolling through available options (0, 1, 1.5, 2, 2.5, 3, 4, 5, 6 If starting the unit for the first time after hours) using the (+) or (-) keys. -
Page 39: Road/Standby Functional Settings
3.9.2 Road/Standby Functional Settings 7. Press the + key, then - key, then Defrost keys. All keys should be held momentarily after press- The procedure for adjusting the functional parameters ing in the correct sequence. is as follows: NOTE 1. The temperature display is selectable between Fahrenheit and Celsius. -
Page 41: Temperature Control
SECTION 4 Temperature Control Sequence of Operation Figure 4.1 Operating Sequence - Perishable Mode General operation sequences for cooling, null, and heating are provided in the following paragraphs. The microprocessor automatically selects the mode neces- sary to maintain refrigerated compartment temperature at set point. -
Page 42: Defrost Cycle
Defrost Cycle the opening of the defrost termination thermostat. (See Section 2.8.2 for a description of the refrigeration cir- Defrost is an independent cycle overriding cooling and cuit during heat and defrost.) heating functions in order to melt frost and ice from the evaporator when necessary. -
Page 43: Service
SECTION 5 Service WARNING Beware of unannounced starting of the unit. The unit may cycle the fans and operating com- pressor unexpectedly as control requirements dictate. Press OFF key on the cab command and disconnect power plug. CAUTION Compressor failure will occur if inert gas brazing procedures are not used on units with R- 134A and POE oil. - Page 44 Table 5–2 Service Category Descriptions Service A 1. Check the tension of the compressor belt(s). 2. Check that the vehicle engine idles correctly with unit operating. Check compressor mounting hardware and belt tension. (Section 5.2) 3. Check the tightness of bolts and screws and that the unit is correctly fastened onto the box. Service B 1.
-
Page 45: Belt Maintenance And Adjustment
The Belt Tension gauge can be used to adjust all belts. Installing R-134A Manifold Gauge Set The readings which we specify for Carrier Transicold A R-134a manifold gauge/hose set with self-sealing units are applicable only for our belts and application,... -
Page 46: Removing The Manifold Gauge Set
5.3.3 Removing the Manifold Gauge Set Removing the Refrigerant Charge 1. While the compressor is still ON, backseat the NOTE high side service valve. To avoid damage to the earth’s ozone layer, 2. Midseat both hand valves on the manifold use a refrigerant recovery system whenever gauge set and allow the pressure in the mani- removing refrigerant. -
Page 47: Evacuation And Dehydration
Evacuation and Dehydration a thermocouple vacuum gauge (vacuum indica- tor). (Carrier P/N 0700414-00). 5.6.1 General Moisture can seriously damage refrigerant systems. NOTE The presence of moisture in a refrigeration system can Use of a compound gauge is not recom- have many undesirable effects. The most common are mended because of its inherent inaccuracy. -
Page 48: Charging The Refrigeration System
e. Evacuate unit until the electronic vacuum gauge 5.7.3 Adding a Partial Charge indicates 2000 microns. Close the electronic NOTE vacuum gauge and vacuum pump valves. Shut off the vacuum pump. Wait a few minutes to be When partially charging the refrigeration sys- sure the vacuum holds. -
Page 49: Installing Compressor
c. Release and remove belt. 5.11.2 Checking Pressure Switch d. Remove the bolts mounting the compressor. WARNING Remove the compressor from chassis. e. Remove the pulley from the compressor. Do not use a nitrogen cylinder without a pressure regulator. (See Figure 5.5) Cylin- 5.9.2... -
Page 50: Checking And Replacing Condenser Fan Motor Brushes
5.12 Checking and Replacing Condenser Fan Figure 5.7 Hot Gas or Condenser Pressure Control Solenoid Motor Brushes To maintain proper operation of the fan motors, the fan motor commutator and brushes should be checked periodically for cleanliness and wear. Figure 5.6 Fan Motor Brushes Brush Brush Cap 1. -
Page 51: Adjusting The Compressor Pressure Regulating Valve (Cpr) (115V Only)
Figure 5.8 Compressor Pressure Regulating Valve d. The txv bulb is located below the center of the suction line. This area must be clean to ensure Set Screw positive bulb contact. Strap bulb to suction line Jam Nut and insulate both. e. -
Page 52: 5.16 Diagnostic Tool
Cab Command! Should a prob- lem develop with these components, con- Remove all foreign material from the condenser coil by tact your nearest Carrier Transicold reversing the normal air flow. (Air is pulled in through dealer for replacement. - Page 53 Table 5–4 R-134A Temperature-Pressure Chart Temperature Pressure °F °C Psig 14.5 (in Hg) 1.00 (in Hg) 12.3 (in Hg) 0.85 (in Hg) 9.7 (in Hg) 0.67 (in Hg) 6.9 (in Hg) 0.48 (in Hg) 3.6 (in Hg) 0.25 (in Hg) 2.3 (in Hg) 0.16 (in Hg) 0.8 (in Hg)
- Page 54 Table 5–4 R-134A Temperature-Pressure Chart (Continued) Temperature Pressure °F °C Psig 27.8 1.92 29.5 2.04 31.3 2.16 33.2 2.29 35.1 2.42 37.0 2.55 39.1 2.70 41.1 2.84 43.3 2.99 45.5 3.14 51.2 3.53 57.5 3.97 64.1 4.42 71.2 4.91 78.7 5.43 86.8 5.99...
-
Page 55: Troubleshooting
SECTION 6 Troubleshooting WARNING Beware of unannounced starting of the unit. The unit may cycle the fans and operating com- pressor unexpectedly as control requirements dictate. Press OFF key on the cab command, turn vehicle engine off or disconnect power plug and open circuit breaker. CAUTION Under no circumstances should anyone attempt to service the microprocessor module and cab command. - Page 56 Table 6–1 Alarm Indications (Continued) Verify motor rotates freely Condenser Fan Motor (CFM) Verify condition of brushes 5.12 high amp draw Replace motor Verify motor rotates freely. Evaporator Fan Motor (EFM) high amp draw Replace motor Heating option control - Either the Verify coil resistance hot water control relay or the Check wiring to controls...
-
Page 57: Refrigeration
Table 6–2 Mechanical Indications Reference Indication/Trouble Possible Causes Section Refrigeration 6.2.1 Unit Will Not Cool Compressor drive (clutch) defective Replace Compressor malfunction Compressor defective Defrost cycle has not terminated 6.2.5 Refrigeration system Abnormal pressure 6.2.6 Hot gas solenoid malfunction (HGS1) 5.13 6.2.2 Unit Runs but has Insufficient Cooling... -
Page 58: Abnormal Pressure - Cooling
Table 6–2 Mechanical Indications (Continued) Reference Indication/Trouble Possible Causes Section 6.2.6 Abnormal Pressure - Cooling Condenser coil dirty 5.19 Non-condensibles in system High discharge pressure Refrigerant overcharge 5.7.1 Condenser fan/motor defective 5.12 Compressor defective Low discharge pressure Hot gas solenoid malfunction 5.13 Low refrigerant charge 5.7.1... -
Page 59: Cab Command Malfunction
Table 6–2 Mechanical Indications (Continued) Reference Indication/Trouble Possible Causes Section 6.2.9 Cab Command Malfunction Fuse open Replace Cab Command non-operational Microprocessor malfunction Replace Microprocessor/Cab command cable Check 6.2.10 No Evaporator Air Flow or Restricted Air Flow Evaporator coil blocked Heavy frost on coil Check Coil dirty 5.18... -
Page 61: Electrical Schematic Wiring Diagram
SECTION 7 Electrical Schematic Wiring Diagram Introduction This section contains electrical schematic wiring diagrams covering the models listed in Table 1-1. The following general safety notices supplement the specific warnings and cautions appearing elsewhere in this manual. They are recommended precautions that must be understood and applied during operation and maintenance of the equipment covered herein. - Page 63 wiring schematics ROAD ONLY LOCATION SYMBOL DESCRIPTION LOCATION IN UNIT B--9 LOW PRESSURE SWITCH EVAPORATOR B--8 QUENCH THERMOSTAT ROAD COMPRESSOR P--9 QUENCH VALVE EVAPORATOR A--5 CAB COMMAND P--7 CONDENSER FAN MOTOR CONDENSER P--4 CLHR ROAD CLUTCH ENGINE COMPARTMENT P--6 EVAPORATOR FAN MOTOR EVAPORATOR B--10 IGNITION FUSE...
- Page 65 ROAD ONLY Figure 7-2 Electrical Schematic Wiring Diagram - Based On Dwg. No. 62-61350 Rev E 62-10848...
-
Page 67: Index
INDEX Accessing Alarm Messages 4 Filter Drier Adjusting the Compressor Pressure Regulating Valve First Aid (CPR) Frozen Mode Alarm Display General Description Belt Maintenance and Adjustment 3 HGS1 HGS2 Cab Command High Pressure Switch (HP1) 4 Charging the Refrigeration System 6 Hot Gas Solenoid Valve (HGS1) 3 Checking and Replacing Condenser Fan Motor Brush- Checking and Replacing filter drier 7... - Page 68 Safety Precautions 1 Safety Devices Receiver Safety Precautions Refrigerant Circuit Sequence of Operation 1 Refrigerant Leak Checking 4 Set Point Adjustment Refrigerant Removal From a Non-Working Compressor Specific Warning and Caution Statements 2 Standby Motor Refrigerants Standby Motor-Compressor V-Belt 3 Refrigeration System Data 8 Start-Up Removing the Manifold Gauge Set 4...
- Page 70 State of California to cause cancer, birth defects, and other reproductive harm. North America Central America and Mexico Carrier Transicold Ejercito Nacional 253−A Piso 5 700 Olympic Drive Colonia Anahuac Athens, GA 30601 USA 11320 Mexico, D.F.
Need help?
Do you have a question about the INTEGRA 30S and is the answer not in the manual?
Questions and answers