Philips 32PF1700T/96 Service Manual
Hide thumbs
Also See for 32PF1700T/96:
- Specification sheet (3 pages) ,
- Installation and operation manual (140 pages)
Advertisement
Quick Links
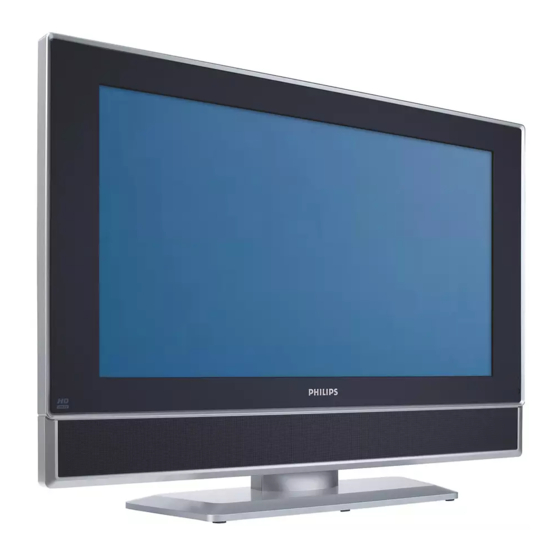
Colour Television
©
Copyright 2007 Philips Consumer Electronics B.V. Eindhoven, The Netherlands.
All rights reserved. No part of this publication may be reproduced, stored in a
retrieval system or transmitted, in any form or by any means, electronic,
mechanical, photocopying, or otherwise without the prior permission of Philips.
Published by CS 0771 BU CD Customer Service
Contents
1
Technical Specifications, connections, and chassis
Overview
2
Safety Instructions, Warnigs, and Notes
3
Directions for Use
4
Mechanical Instructions
5
Service Modes, Error Codes, and Fault Finding 26
6
Block Diagrams, Test Point Overview, and
Waveforms
Wiring Diagram
Block Diagram System Signal
Test Point Overview
7
Circuit Diagrams, and PWB Layouts
Diagrams
8
Alignments
9
Circuit Descriptions, Abbreviation List, and IC-Data
Sheets
IC-Data Sheets
10 Spare Parts List
11 Revision List
Printed in the Netherlands
IMP1.0A
32PF1700T/96
32PFL5422/96
37PFL5422/96
42PFL5422/96
Page
2
13
14
20
31
32
33
35
54
60
70
74
77
Subject to modification
Chassis
LA
H_17191_000.eps
250507
EN 3122 785 17191
Advertisement

Related Manuals for Philips 32PF1700T/96


Summary of Contents for Philips 32PF1700T/96
- Page 1 All rights reserved. No part of this publication may be reproduced, stored in a retrieval system or transmitted, in any form or by any means, electronic, mechanical, photocopying, or otherwise without the prior permission of Philips. Published by CS 0771 BU CD Customer Service...
- Page 2 IMP1.0A LA 2 1. Technical Data, Connections and Chassis Overview 1.1 Technical Data Items Spec Weight (Net) 15.14 Kg Dimensions (W × H × D) 847.76 × 657.38 × 220 mm LCD panel size 32" Aspect ratio 16:9 Native resolution 1366 ×...
- Page 3 IMP1.0A LA 3 1.2 Connections External terminals panel (left side view) Name Description Connect to the PC video D-SUB (D-Sub) output of a PC. Connect to the audio output to match that of the D-Sub AUDIO video output on a PC. Connecting the headset audio output This display provides a stereo headset Connecting the PC input...
- Page 4 IMP1.0A LA 4 WARNING: This display has been engineered and manufactured with the highest priority on safety, however, IMPROPER HANDLING OR USE CAN RESULT IN POTENTIAL ELECTRICAL SHOCK OR FIRE HAZARD. Please handle this display with care. If damaged, unplug the power cable from the display. Transport the display to your nearest authorized service centre for repair.
- Page 5 IMP1.0A LA 5 and remove all connected signal cables if the display is connected to other devices. • Make sure that there is sufficient space around the display for performing the installation. If not, it is suggested that you move the display to a suitable place to perform installation, and then move it back to its original location when installation is completed.
- Page 6 IMP1.0A LA 6 connectors: Yellow (video), White (left channel audio), and Red (right channel audio). Ensure that the colors of the plugs and terminals match when making connection. To view video image from this input, switch the input source to AV. Composite Video provides the least optimal image quality.
- Page 7 IMP1.0A LA 7 2. Connect the corresponding audio the AUDIO L/R input terminals using a output of the output equipment to the suitable audio cable. AUDIO L/R input terminals using a To view video image from this input, suitable audio cable. switch the input source to AV.
- Page 8 IMP1.0A LA 8 Connecting the DVI input Connecting the HDMI input 1. Connect the digital video output of your Connect the HDMI output of your output output equipment (for example, a PC or equipment to the HDMI terminal on the digital Set Top Box) to the HDMI terminal display using an HDMI cable (not on the display using a DVI to HDMI...
- Page 9 IMP1.0A LA 9 use high-quality and HDMI-certified cable for connection. Installing the tuner box Connecting the stereo audio output Before installing the tuner box, please pay attention to the following to ensure the This display provides a set of stereo audio safety of installation: output terminals (RCA type) for delivering •...
- Page 10 IMP1.0A LA 10 completed. 4. Peel off the protective film on the tuner box and then insert the tuner box into the 1. Turn the display to reveal its left side slot as shown. Pay attention to the and locate the tuner box slot (as shown in direction of the tuner box when inserting.
- Page 11 IMP1.0A LA 11 other for loop-through output of signals to other devices. Connect the aerial antenna (to be purchased separately) cable to the aerial antenna input connector. If necessary, you can also connect other devices to the loop-through output connector.
- Page 12 IMP1.0A LA 1.3 Chassis Overview Adapter Board Keypad Board IR Board Main Board Power Board...
- Page 13 * * Hereaf ter throughout this m anual, Philips Consumer El ectronics Co mpany w ill be referred t o a s Philips . * * Take care during handling the LCD module with backlight...
- Page 14 IMP1.0A LA 14 3. Direction for Use least two adult persons. Package contents • The LCD screen panel of the display is extremely fragile and vulnerable to Unpack the display and check that all the scratches. Avoid touching the screen or let following items are included: it come into contact with any objects when moving the display.
- Page 15 IMP1.0A LA 15 Name Description Left and right speakers for reproducing Speakers high-quality stereo audio. • Lights up green when the display is Power powered on. • Lights up red when the indicator display is in standby mode. Remote Receives command signals from the control remote control.
- Page 16 IMP1.0A LA 16 Name Description Connect to the PC video (D-Sub) D-SUB output of a PC. Connect to the audio output to match that of the D-Sub video AUDIO output on a PC.
- Page 17 IMP1.0A LA 17 3.1 On Screen Display OSD menu structure Input signal source Menu • Brightness PICTURE • Contrast • Colour Temp. Operations in the OSD menu • Auto • Phase • Synchronization • Press CH (Selection) make selections. • V. Position •...
- Page 18 IMP1.0A LA 18 Adjusting Brightness 1. Set the brightness to the lowest level. 2. Gradually increase the brightness level until you reach the point where the details in the dark areas of the image can be seen clearly. Do not further increase the brightness level to avoid the black areas from looking grayish.
- Page 19 IMP1.0A LA 19 and enter standby mode when no PC input signal is detected. Set the Sleep Timer and you can view the remaining time here. Once the time expires, the Sleep Timer display will be put to the standby mode automatically.
- Page 20 IMP1.0A LA 4. Mechanical Instructions 4.1 Cable Dressing stoppers and positioning holes 4.2 Disassemble TV Set should be in the same position. Base Removal Turn the TV set counterclockwise (30 degrees). Form Bars Draw the TV up from base set. Note...
- Page 21 IMP1.0A LA Remove the 6 screws in the stand neck, and then remove the back cover and stand neck. The foam bars (order code 3122 785 90580 for two pieces) can be used 2. DTV Tuner BOX for all types and sizes of Flat TVs. By Remove DTV tuner box from the laying the TV face down on the (ESD down side slot.
- Page 22 IMP1.0A LA 3. Remove Tuner Box Remove the tuner box from the upper site. 4. Parts Removal The next step is to remove the wires, PCBAs and frame. Screws Connectors **Notice** Inverter board is a part of panel. Do not remove inverter board in the AUO warranty period.
- Page 23 IMP1.0A LA 23 32PFL5422/96 disassembly process 3. Remove PCBAs 1. Remove Base 2. Remove back cover...
- Page 24 IMP1.0A LA 24 37PHL5422 Disassemble Process 3. Remove screws of parts 1. Remove Base 2. Remove Rear Cover...
- Page 25 IMP1.0A LA 25 42PFL5422/96 Disassem ble Process 1. Remove Stand 3. Remove PCBAs 2. Remove Back Cover...
- Page 26 IMP1.0A LA 5. Service Mode, Problems and Fault Finding 5.1 Firmware Upgarde The procedure of update new 3. Mode => flash , options => Reset software list below. Target After Download. download cable "RS232 <=>D-sub" PN: 5K.M7016.501 1. Use download cable to connect 4.Press "Flash"...
- Page 27 IMP1.0A LA 6.When download finishing ,it appear 9. "System Setting"> "Next Page" >"Reset All NV RAM" "OK" .Otherwise must do item 2~5 again. 7. When it ok ,re-plus power line, the procedure is completed. 8. Go into Factory mode, press "Menu" >"Info"...
- Page 28 IMP1.0A LA 5.3 Mainboard Fault Finding Tree LED OK? Check R702,R705,Q701,Q702 Check power +5vs OSD OK? Check +5VS, +2.5V_PW, +3.3V_PW, +1.8V_PW HDMI OK? Check Check DPMS, +5V_DPMS, U601 Check Q601 J601 connection Component OK? Check +9V_MSP, QC6, QC7, QC8, QC3, QC4, QC5 PC OK? Check U501, U601...
- Page 29 IMP1.0A LA 5.4 Panel Failure Mode...
- Page 30 IMP1.0A LA 30 5.5 Other Trouble Shooting Symptoms Possible causes No picture • Check that the power plug is securely inserted into both the AC-IN socket on the display and the wall outlet. • Check that the equipment connected is working properly. •...
- Page 31 IMP1.0A LA 6. Block Diagram and Test Point Overviews 6.1 Wiring Diagram...
- Page 32 IMP1.0A LA 6.2 System Signal Block Diagram...
- Page 33 IMP1.0A LA 6.3 Test Point Overview Main BD Top side C106 E4 D102 E4 RC13 B2 SWD1 A2 C943 B3 Q103 A1 RA10 E2 C108 E4 D107 D4 RC14 B2 T601 C3 C944 B3 Q501 A3 RA21 E2 C114 E4 D110 D4 RC2 B2 T701 E4...
- Page 34 IMP1.0A LA C116 A1 CE14 B1 C930 B3 RD45 C3 C130 A1 CE15 B1 C931 B3 U602 C3 C131 A1 CE16 B1 C940 B3 U603 C3 C138 A1 CG27 B1 C941 B3 U604 C3 C139 A1 CG3 B1 C953 B3 U606 C3 C140 A1 CG31 B1...
- Page 35 IMP1.0A LA 7. Circuit Diagrams Position J Position V Position T103 R147 AV3_SDET V122 C101 D2 J101 D5 V101 D2 +5VS C102 D2 J102 D3 V102 D4 J101 2B13140001 R108 L102 0.56U AV3_S_C J106 C103 D2 J103 B5 V103 A2 DN101BAV99_DNP V115 C114...
- Page 36 IMP1.0A LA C501 B3 R501 D4 U501 C4 V501 C504 D1 R503 D1 U502 B4 V502 C505 D1 R504 D4 U503 A4 V503 C506 D3 R506 D1 V504 C507 D3 R507 D4 V505 C508 D3 R509 D4 V506 V507 V504 V505 C509 C1 R510...
- Page 37 IMP1.0A LA Position C Position U Position J Position N601 D1 C601 D2 U601 D3 J602 HDMI INPUT N602 D1 C602 D3 U602 C5 J601 Vertical Type F601 N607 C1 C603 D3 U603 B3 L Position N608 C2 C604 D3 U604 B5 L601 VPLL VPLL2...
- Page 38 IMP1.0A LA Position R701 B3 R702 B4 R703 B3 R705 B4 R707 A3 R708 B4 Screw Holes Screw Holes Screw Holes Screw Holes Screw Holes Screw Holes Screw Holes R708 B4 Optical Points R709 A3 HOLE-V8 HOLE-V8 HOLE-V8 HOLE-V8 HOLE-V8 HOLE-V8 HOLE-V8 H701...
- Page 39 IMP1.0A LA C823 C4 C824 D4 C825 D4 C826 C4 C827 D4 C828 C4 C829 D4 C830 C4 C831 C2 C832 C2 C833 C1 C834 C1 C835 C2 C836 C4 C837 C4 D801 C1 C827 2.2U K +5V --> -5V AV3_AUD_L J801 B5 R830...
- Page 40 IMP1.0A LA Position D Position C903 D3 D902 B2 C904 D3 Position C905 D3 L902 D2 C910 D3 L905 C5 C911 D2 L906 B2 C912 D2 L907 A2 R906 C903 C904 C905 +5VA MCK_AMP C914 D3 L908 A3 C915 D3 Position 3.3P C 56P J...
- Page 41 IMP1.0A LA Position J Position CA39 B3 CA29 C1 Position CA23 C2 CA24 C2 CA17 C3 CA34 C3 AGND +3.3V_PW CA37 C3 CA38 C3 0.1U K CA4 C4 Position I2C Address=0x34=00110100x CA5 C4 RA30 B2 22U M R -N CA6 C4 RA34 B2 CA12 CA19...
- Page 42 IMP1.0A LA position CB1 C3 CB10 B4 CB11 B3 CB12 B4 CB13 B3 CB14 B3 CB15 A4 CB17 A4 CB2 C4 CB3 C3 CB4 C4 CB5 C2 HeadPhone AMP CB6 C2 1K_DNP [4,9] PHONE_DET CB7 C3 CB8 B4 CB9 B3 (100mW x2 typ.
- Page 43 IMP1.0A LA Position C Position HSC1 RC1 C3 CC13 D2 DIGITAL IN RC10 C3 CC14 D2 RC11 C3 CC15 D2 RC12 C3 CC16 D2 RC13 B3 CC17 D2 IN0CMP RC14 B3 CC18 D2 IN0_CLK IN0CLK IN0CLP RC2 C3 CC19 D2 IN0_PEN IN0PEN IN0CST...
- Page 44 IMP1.0A LA Position C Position Lab. phase : 7B.29320.E39 ADR24B line high, the Opal family RD1 C5 CD1 D5 of chips can handle 24 bit addressing. phase : 7B.29160.H39 RD10 D2 CD10 A5 32.768KHZ_DNP IC FLASH MX29LV160CBTC-70G TSOP48 RD11 D2 CD2 D5 RD12 D4 CD3 C5...
- Page 45 IMP1.0A LA Position +2.5V_PW MVREF 0.1U K 0.1U K 0.1U K RMCK1 RMCK0 NE10 C3 MCKn RMCK1n +2.5V_PW +2.5V_PW MREFIN0 NE11 A2 MVREF MCKn RMCK0n MREFIN1 NE12 C3 MVREF MVREF VREF VREF NE13 A2 BOTTOM NE14 C3 22 J MDM2 RMDM2 NE15 C3 MCKn...
- Page 46 IMP1.0A LA Cap. Position Position Position UC1C RF19 22 J DCLK TXE2- DCLKOUT D HS QXC24CD121UF D EN Position 22 J TXE2+ Position TXOCp_DR2 UC1C C5 RF10 22 J TXEC- TXOCm_DR3 Position TXO2p_DR4 TXO2m_DR5 QXC24CD121UF TF20 TF19 DCR_10 VBR_27 TXO3p_DR6 TF16 TF18 TXO3m_DR7...
- Page 47 IMP1.0A LA Cap. Position U CG1 C4 UC1E RG2 CG2 C3 CG3 C3 Position CG4 C3 RG2 C1 CG5 C2 RG3 C1 CG6 C2 CG7 C2 CG8 C2 CG9 C2 CG10 C2 CG11 C2 CG12 C2 CG13 C1 CG14 C1 CG15 C5 CG16 C5 CG17 C5...
- Page 48 IMP1.0A LA Position L Position POWER SUPPLY Switching Regulator RH2 D1 RH3 D1 RH5 D4 CONNECTOR (+5VS--> 1.8V) RH6 D4 LH13 B1 +1.8V_PW RH7 B5 LH14 B1 Z220 RH8 B5 LH15 C1 RH9 B5 Position RH10 B2 DH1 D2 +5VS RH11 A2 Position AP1507 D5LA (ADJ)
- Page 49 IMP1.0A LA 32PF1700T/96 FL 1 FL 2 CN 1 BD 1 L1 :1 NT C 2 CY 3 CY 4 R2 0 R1 6 CY 2 CY 5 R1 4 R1 2 R1 9 V cc1 R1 1 R1 5...
- Page 50 32PHL5422/96 IMP1.0A LA 50 FL 1 FL 2 CN 1 BD 1 L1 :1 NT C 2 CY 3 CY 4 R2 0 R1 6 CY 2 CY 5 R1 4 R1 2 R1 9 V cc1 R1 1 R1 5 R1 0 IC 5 VC C...
- Page 51 37PFL5422/96 IMP1.0A LA 51 ZD306 D311 R340 NTC2 D200 R202 D201 D803 L800 R828 R203 to 12V DC-DC Vin L200 C818 R201 to 12V DC-DC GND R151 NTC1 D150 R152 L150 IC801 R829A R829B R829C R829D R804 R824 IC303 R822 D804 R336 D304...
- Page 52 IMP1.0A LA 52 42PFL5422/96 ZD306 D311 R340 NTC2 D200 R202 D201 D803 L800 R828 R203 to 12V DC-DC Vin L200 C818 R201 to 12V DC-DC GND R151 NTC1 D150 R152 L150 IC801 R829A R829B R829C R829D R804 R824 IC303 R822 D804 R336 D304...
- Page 53 IMP1.0A LA MEMO...
- Page 54 IMP1.0A LA 8. Alignments 8.1 ADC Calibration 1. Preparation: 5. Setup input timing 800x600 60Hz & SMPTE pattern. 6. Enter factory OSD. 7. Enter the Auto Adjustment. 8. Setup unit and keep it warm up at least 1hour. 9. Backlight should set to “Bright”. 10.
- Page 55 IMP1.0A LA (4) If position is wrong, press “Auto Adjustment” function at factory OSD to check this function 3. RGB ADC Calibration : (1) Setup input timing 800x600 60Hz & 16-Grays pattern to DSUB (2) Select “TV source” to connector. “Component”.
- Page 56 IMP1.0A LA @factory OSD Cool Green offset Color temperature Blue offset 12300 K 0.277 0.01 0.268 0.01 (4) Table 3 : limit value of RGB drive & offset: (3) Table 2 : default value of Color temp item CVBS COMPONENT internal gain and RGB drive @factory OSD Cool...
- Page 57 IMP1.0A LA 8.2 Video Color Adjustment (8) Setup input timing to NTSC 1. Video Color adjustment: M with “30% level white” (1) Input source set the AV pattern. (CVBS) Video input. (9) Use CA210 read the color (2) set the picture to Standard coordinate.
- Page 58 IMP1.0A LA 2. YPbPr Color adjustment : (8) Setup input timing to 480P with “30% level white” pattern. (1) Input source set the Component Video input. (9) Use CA210 read the color coordinate. (2) set the picture to Standard mode at user OSD. (10) Adjust the Red, Blue offset (keep Green...
- Page 59 IMP1.0A LA 8.3 Manual Adjustment In case that service centers are not able to adjust LCD TV with proper 3. In “Color Temp. Fine Tunning” equipment, here are reference page, press “LEFT” or “RIGHT” to values for manual adjusting color select color mode, Warm, Cool, temperature in factory mode.
- Page 60 IMP1.0A LA 9. Circuit Description and IC Data Sheet 9.1 Circuit Description System Block Diagram AUO Panel Power INVERTER Board Main Board S-Video AC110/220V Scaler PW106B Audio Amp. STA323W RS232 SP323ECN PC/HDMI IR/Keypad Audio Processor Decoder MSP4440K Board AD9380 PC Audio IN DVI AUDIO HDMI Earphone...
- Page 61 IMP1.0A LA Diagram of Signal Flow Diagram of Audio Signal Flow AUD R COMPONENT AUD L AUDIO IN R/L AUD R AUD R HEADPHONE MUX 4052 AUD L AUDIO IN R/L AUD L AUD R AUDIO OUTPUT AUD L AUDIO IN R/L Sound Decoder/ Audio Processor AUD R...
- Page 62 IMP1.0A LA The LCD TV uses W XGA (1366x768) LCD Panel to display image. This LCD TV can accep t the input sources as follows: (1) HDMI connector (2) DVI audio (3) D-SUB connector (4) PC audio (5) Component (6) S-Video (7) Composite (8) Audio(L/R) (9) TV Tuner...
- Page 63 IMP1.0A LA The PC input connector can accept analog RGB form at signals. This input can support VGA ~ XGA (60Hz) PC signals. The Component can accept analog YPBPR (480i, 480P, 576i, 576p, 720p, 1080i) signals. Because a HDMI decoder (AD9380) is used, this LCD TV can also decode HDCP signals.
- Page 64 IMP1.0A LA A/D converter & HDMI receiver circuit HDMI INPUT Vertical Type F601 VPLL VPLL2 DVCC33 L601 Z120 VPLL AVDD AVDD J601 F602 D2P_ESD HDMI_D2+ D2N_ESD HDMI_D2- C601 SHELL2 VPLL2 D2 Shield D1P_ESD HDMI_D1+ 10U K D1N_ESD HDMI_D1- F603 D1 Shield VPLL2 D0P_ESD HDMI_D0+...
- Page 65 IMP1.0A LA 2.3 Video port input circuit 1. Video decoder PW106B: The video decoder can accept 480 i, 480P, 576i, 576p, 720P, 1080i via component input connectors. It also supports NTSC M, NTSC-J SECAM and PAL via S-Video, SCART connector and comp osite video connector. This decoder will decode video inputs to ITU-R BT.601 digital format.
- Page 66 IMP1.0A LA 2.4. De-interlace, scaler and micro-controller – PW106B The de-interlace processor accepts parallel digital ITU-R BT.601 data with H/V sync. It will converter the signal from interlace to non-interlace, form at is YPBPR 4:2:2. 2.5.Scaler and Micro-controller 1. The CPU was em bedded in PW106, used for controlling whole electronic boards and peripheral d e vices and IR receiv ing.
- Page 67 IMP1.0A LA 3. Audio pr ocessor and Power Amplifier Audio processor Circuit R906 C903 C904 C905 +5VA MCK_AMP 3.3P C 56P J C963 3.3P C NOTE:I2C ADDRESS SELECT Y901 [TUNER] L902 22P J_DNP Z220 BOM Replace 0 ohm 18.432MHZ TV_SIF T901 R904 R905...
- Page 68 IMP1.0A LA In the audio power amplif ier circu it, the STA323W is an integrated solution of digital Audio processing, digital amplifier control, and DDX-Power Output S t age, thereby creating a high power single-chip DDX® solution comprising of high-quality , high-efficiency, all digital amplification.
- Page 69 IMP1.0A LA AGND +3.3V_PW 0.1U K I2C Address=0x34=00110100x 22U M R -N CA12 CA19 0.1U K CA26 VCCD 0.1U K CA36 0.1U K 330P J CA18 0.1U K CA32 VSSD 0.1U K VDDD OUT2B CA30 GND_D VCC2B CA20 0.1U K 0.1U K I2S_SL_AMP BICKI...
- Page 70 IMP1.0A LA 9.2 IC Data Sheet This section shows the internal block diagrams and pin layouts of ICs that are drawn as "black boxes" in the electrical diagrams (with the exception of "memory" and "logic" ICs). PW106-10L(UC1) Block Diagram...
- Page 71 IMP1.0A LA Pin Configuration PW106B Pin Layout IN0CLP IN0VS IN0B5 IN0B3 IN0G3 IN0R9 IN0R3 PWM0 PORTC5 I2SOCLK I2SID1 RXD1 IN0CST IN0HS IN0B7 IN0B2 IN0G9 IN0R7 IN0R2 PWM2 PORTC6 PORTC1 I2SOD TXD0 ADCVSS IN1R5 IN0CLK IN0AHS IN0B9 IN0G7 IN0R5 PWM3 PORTC7 PORTC2 I2SICLK1 DCLKOUT...
- Page 72 IMP1.0A LA AD9380 (U601) Analog/HDMI Dual-display Interface Block Diagram Pin Configuration...
- Page 73 IMP1.0A LA MSP4440K (U901) Multistandard Sound Processor ’ Block Diagram Pin Configuration...
- Page 74 BAG LDPE+HDPE 1260*870 V42Y 4B.20019.002 BAG LDPE 253*355 4B.J1K09.011 BAG PE 125*210*0.04 ADHESIVE 4B.M7011.001 BAG PE 950*950 V32D 996510008679 4D.0D101.001 CTN AB PHILIPS MEGA32 996510008969 4D.0D201.001 CTN AB PHILIPS MEGA37 996510008978 4D.0D202.001 CTN BOTTOM AB MEGA37 996510008661 4D.0D301.001 CTN AB PHILIPS MEGA42 996510008662 4D.0D302.001...
- Page 75 ASSY BEZEL MEGA37 6K.0D302.001 ASSY STAND MEGA42 996510008678 6K.0D304.001 ASSY BEZEL MEGA42 Software Change Record Philips Model Latest Change Release Hex Code Number Version Effected Date 32PF1700T/96(AUO Panel) Philips_OTS_MP_Ver103 V130 2007/5/23 32PFL5422/96(AUO Panel) Philips_ME7_32_110 V110 2007/9/27 42PFL5422/96(AUO Panel) Philips_ME7_42_110 V110 2007/9/27...
- Page 76 IMP1.0A LA HDCP Key HDCP key has been burned in HDMI Chip AD9380. Both finish good and spare parts will have HDCP key set in chip. 32PF1700T/96 LCD FFC Cable and Main cord Philips Model 32PF1700T/96 5K.01E07.001 WIRE 30/30P 1571#28A 2G.04811.001...
- Page 77 Revision List IMP1.0A LA EN 77 11. Revision List Manual xxxx xxx xxxx.0 • First release. Manual xxxx xxx xxxx.1 • 32PFL5422/96 release added. • 37PFL5422/96 release added. • 42PFL5422/96 release added.
Need help?
Do you have a question about the 32PF1700T/96 and is the answer not in the manual?
Questions and answers