Table of Contents
Advertisement
Quick Links
Advertisement
Table of Contents

Related Manuals for VOLTRIUM Ion Max


Summary of Contents for VOLTRIUM Ion Max
- Page 1 Ion Max Owner's Manual...
- Page 2 Because to us at Voltrium, it's more than just a scooter. Hi, it's Jeff & Daniel here, the founders of Voltrium. We'll be popping up throughout this manual when we have a pro tip or valuable insider information to share about our scooters!
-
Page 3: Inside The Box
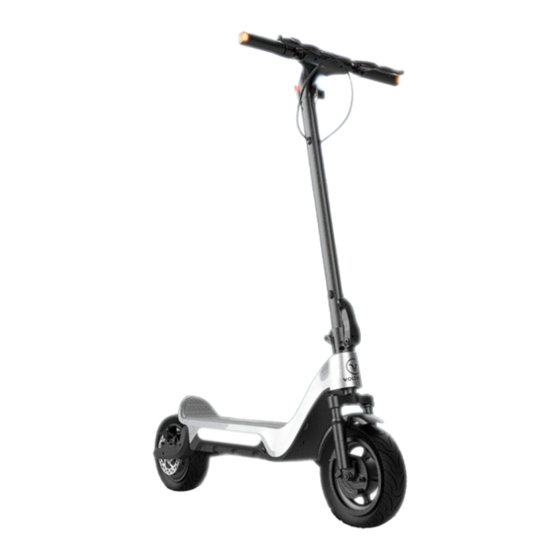
INSIDE THE BOX Woohoo! You have received the scooter. Now let's unbox it and hit the paths. Voltrium Ion MAX Charger LED Headlight Emergency Toolkit Voltrium NFC Card Accessories (If optioned) Pro Tip: Use this checklist and tick the boxes as you remove the packaging to ensure you have received everything. - Page 4 ION MAX DIAGRAM Pro Tip: Come back to this diagram if unsure which part of the scooter is being referred to in subsequent steps...
-
Page 5: Getting Started
GETTING STARTED Let's Unfold the scooter, it's as easy as 123 Remove the Ion MAX from the box. Unfold the handlebar stem and lock into place the quick release lever. Unfold the kick stand so the scooter can stand upright... - Page 6 GETTING STARTED Now, we'll attach the handlebars Plug in the display module connector, to the corresponding plug on the scooter side (emerging from the steering column). Mount the display module onto the steering column lining up the screw holes (see image). Fasten the display to the steering column by using the supplied screws.
- Page 7 GETTING STARTED Attatching the LED Headlight Locate the headlight and mounting screw for the headlight. Using the provided Allen Keys, Fasten the headlight the the steering column as shown. The angle of the light can also be tilted up or down to suit your needs.
-
Page 8: Pre-Ride Checks
PRE-RIDE CHECKS To ensure you get the most of your first ride, follow this checklist: Charge Scooter - Until the charger shuts off and illuminates green light Ensure lights are working especially if riding at dusk or night Ensure all nuts and bolts are tight on the scooter. Familiarise with the controls of the scooter. - Page 9 Check with your local State or Territory regarding specific laws governing the use of personal mobility devices (PMD). States and Territories have different laws in place that can prohibit the use of a Voltrium Scooter Do not ride in a manner that will endanger yourself and surroundings. High Performance riding should only be performed on private property Always ride whilst wearing safety gear.
- Page 10 Rear Brake Lever + Regen Braking Left indicator Right indicator Bell 5.1" Digital Display Thumb Throttle NFC Receiver CONTROLS...
-
Page 11: Starting The Scooter
STARTING THE SCOOTER Press and hold the button until the display powers on and shows “ -- “ . The scooter is now in standby mode and the Anti-theft feature is activated. The drive wheels are locked up and a beeping alarm will sound if anyone tries to move the scooter. -
Page 12: Using The Modes
USING THE MODES The Ion max is equipped with 4 Performance modes: 1: Walk Mode - Makes the scooter move at creeping speed 2: ECO Mode - Reduces acceleration and limits top speed. 3: D (Drive) Mode - Normal Acceleration and Limits top speed 4: Sport Mode - Full performance and top speed. -
Page 13: Maintenance
Servicing is recommended to be carried out by specialists or trained technicians. Pro Tip: Voltrium stocks the full range of parts and we have the most common consumables ready on hand usually. You can contact your local scooter shop or visit the Voltrium online parts shop to order in spares. - Page 14 Modifications that obstruct or disrupt the normal repair / servicing process will incur extra labour cost during servicing / repair time. Pro Tip: Consult with Voltrium's support team if you are planning to modify the scooter in any shape or form to prevent your warranty from being void.
Need help?
Do you have a question about the Ion Max and is the answer not in the manual?
Questions and answers