Advertisement
Quick Links
SERVICE MANUAL
COMPACT COMPONENT MD SYSTEM
2
2005
MB351
1
PRECAUTION. . . . . . . . . . . . . . . . . . . . . . . . . . . . . . . . . . . . . . . . . . . . . . . . . . . . . . . . . . . . . . . . . . . . . . . . . 1-4
2
SPECIFIC SERVICE INSTRUCTIONS . . . . . . . . . . . . . . . . . . . . . . . . . . . . . . . . . . . . . . . . . . . . . . . . . . . . . . 1-7
3
DISASSEMBLY . . . . . . . . . . . . . . . . . . . . . . . . . . . . . . . . . . . . . . . . . . . . . . . . . . . . . . . . . . . . . . . . . . . . . . . 1-8
4
ADJUSTMENT . . . . . . . . . . . . . . . . . . . . . . . . . . . . . . . . . . . . . . . . . . . . . . . . . . . . . . . . . . . . . . . . . . . . . . . 1-35
5
TROUBLESHOOTING . . . . . . . . . . . . . . . . . . . . . . . . . . . . . . . . . . . . . . . . . . . . . . . . . . . . . . . . . . . . . . . . . 1-41
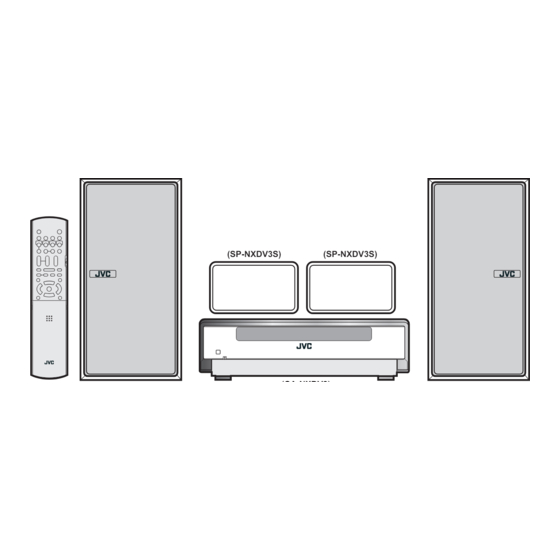
NX-DV3
(SP-NXDV3S)
(SP-NXDV3S)
TABLE OF CONTENTS
(SP-NXDV3S)
(CA-NXDV3)
Area suffix
UB -------------------- Hong Kong
UJ --------------------- U.S.Military
(SP-NXDV3S)
Advertisement

Related Manuals for JVC NX-DV3


Summary of Contents for JVC NX-DV3
-
Page 1: Table Of Contents
SERVICE MANUAL COMPACT COMPONENT MD SYSTEM MB351 2005 NX-DV3 Area suffix UB -------------------- Hong Kong UJ --------------------- U.S.Military (SP-NXDV3S) (SP-NXDV3S) (CA-NXDV3) (SP-NXDV3S) (SP-NXDV3S) TABLE OF CONTENTS PRECAUTION............... . . 1-4 SPECIFIC SERVICE INSTRUCTIONS . - Page 2 SPECIFICATION MD/DVD receiver (CA-NXDV3) 30 W + 30 W at 4 Ω (10% THD) Amplifier Output power Front Surround 30 W + 30 W at 4 Ω (10% THD) Input terminals Analog AUX×1, 500 mV/47 kΩ Digital optical input × 2 Digital -23 dBm to -15 dBm (Optical square terminal) (Compatible with frequency of 32 kHz 44.1 kHz and 48 kHz)
- Page 3 Speaker Front (SP-NXDV3F) System 2-way bass reflex type Magnetically shielded type Woofer: 10 cm × 1 Speakers Tweeter: 4 cm × 1 Power handling capacity 30 W 4 Ω Impedance Frequency range 56 Hz - 40 kHz Sound pressure level 85 dB/W·m 125 mm (W) ×...
-
Page 4: Precaution
SECTION 1 PRECAUTION Safety Precautions (1) This design of this product contains special hardware and voltmeter. many circuits and components specially for safety purpos- Move the resistor connection to each exposed metal es. For continued protection, no changes should be made part, particularly any exposed metal part having a return to the original design unless authorized in writing by the path to the chassis, and measure the AC voltage across... - Page 5 Preventing static electricity Electrostatic discharge (ESD), which occurs when static electricity stored in the body, fabric, etc. is discharged, can destroy the laser diode in the traverse unit (optical pickup). Take care to prevent this when performing repairs. 1.5.1 Grounding to prevent damage by static electricity Static electricity in the work area can destroy the optical pickup (laser diode) in devices such as laser products.
- Page 6 Important for laser products 5.CAUTION : If safety switches malfunction, the laser is able 1.CLASS 1 LASER PRODUCT to function. 2.DANGER : Invisible laser radiation when open and inter lock failed or defeated. Avoid direct exposure to beam. 6.CAUTION : Use of controls, adjustments or performance of procedures other than those specified here in may result in 3.CAUTION : There are no serviceable parts inside the hazardous radiation exposure.
-
Page 7: Specific Service Instructions
SECTION 2 SPECIFIC SERVICE INSTRUCTIONS This service manual does not describe SPECIFIC SERVICE INSTRUCTIONS. (No.MB351)1-7... -
Page 8: Disassembly
SECTION 3 DISASSEMBLY Main body section 3.1.1 Removing the metal cover (See Figs.1 to 3) (1) From the both sides of the main body, remove the four screws A attaching the metal cover. (See Figs.1 and 2) (2) From the back side of the main body, remove the two screws B attaching the metal cover to the rear cover. - Page 9 3.1.3 Removing the front panel assembly (See Figs.5 and 6) • Prior to performing the following procedure, remove the metal cover. Headphone board Front panel assembly (1) From the top side of the main body, disconnect the card CN221 CN791 wire from the connector CN703 on the micon board.
- Page 10 3.1.6 Removing the main board (See Fig.8) • Prior to performing the following procedures, remove the metal cover, tuner and micon board. (1) From the top side of the main body, remove the screw J and screw K attaching the main board. (2) Disconnect the card wires from the connectors (CN603 and CN604) on the main board.
- Page 11 3.1.7 Removing the speaker terminal board (See Fig.9) • Prior to performing the following procedures, remove the metal cover, tuner, micon board and main board. Earth wire (1) From the top side of the main body, remove the screw L at- taching the speaker terminal board.
- Page 12 3.1.9 Removing the fan motor (See Fig.13) • Prior to performing the following procedures, remove the metal cover, rear panel, tuner and micon board. Reference: Remove the main board as required. (Refer to 3.1.6 "Remov- ing the main board") (1) From the top side of the main body, remove the screw Q attaching the fan motor.
- Page 13 3.1.11 Removing the DVD mechanism assembly (See Fig.14) • Prior to performing the following procedures, remove the metal cover, front panel assembly and micon board. MD mechanism assembly DVD mechanism assembly (1) From the top side of the main body, disconnect the card Slot g wires from the connectors (CN603 and CN604) on the main board.
- Page 14 3.1.15 Removing the FL board (See Fig.17) • Prior to performing the following procedures, remove the metal cover and front panel assembly. (1) From the inside of the front panel assembly, remove the eight screws Y attaching the FL board. (2) Disconnect the connector CN881 on the FL board from the SW board, and take out the FL board from the front panel assembly.
- Page 15 3.1.17 Removing the SW board (See Figs.20 and 21) • Prior to performing the following procedures, remove the metal cover, front panel assembly and LED assembly. LED assembly Stopper board (1) From the inside of the LED assembly, remove the four screws AC attaching the stopper boards.
- Page 16 DVD mechanism assembly section • Prior to performing the following procedure "Removing the DVD mechanism assembly". 3.2.1 Removing the DVD cover (See Fig.1) (1) From the top side of the DVD mechanism assembly, re- move the two screws A attaching the DVD cover. Projection a (2) Lift up the DVD cover upward, then remove it from the pro- Joint b...
- Page 17 3.2.3 Removing the traverse mechanism assembly (See Figs.4) (1) From the bottom side of the DVD mechanism assembly, re- move the four screws C attaching the traverse mechanism DVD mechanism assembly assembly. DVD servo board (2) Take out the DVD traverse mechanism assembly with the DVD servo board.
- Page 18 3.2.5 Removing the pickup (See Figs.5, 7 to 9) • Prior to performing the following procedures, remove the traverse mechanism assembly. Thrust spring (1) From the side of the traverse mechanism assembly, solder Plate Joint h the short land sections d on the pickup. (See Fig.5) (2) Release the lock of the connector on the pickup in the di- rection of the arrow and disconnect the card wire.
- Page 19 3.2.6 Attaching the pickup (See Figs.5, 7 to 10) • See "3.2.5 Removing the pickup". (1) Attach the shaft, SW actuator and LEAD spring to the pick- Feed gear M up. (See Fig.9) (2) Align the pickup to the section k of the traverse mechanism assembly first, and set the both ends of the shaft of the pickup in the sections i and j of the traverse mechanism as- sembly.
- Page 20 3.2.7 Removing the feed motor (See Figs.11 to 13) • Prior to performing the following procedures, remove the traverse mechanism assembly. Feed gear M Lead screw (1) From the top side of the traverse mechanism assembly, re- move the screw G attaching the plate and thrust spring. Feed gear E Feed motor (See Fig.11)
- Page 21 3.2.9 Removing the switch board (See Fig.15) (1) From the bottom side of the DVD mechanism assembly, re- move the screw L attaching the SW board. Switch board Claw r (2) Disconnect the card wire from the connector on the Wire Motor switch board.
- Page 22 MD mechanism assembly section • Prior to performing the following procedure "Removing the MD mechanism assembly". 3.3.1 Removing the MD servo control board (See Figs.1 and 2) (1) From the bottom side of the main body, disconnect the card wire from the connector CN408 on the MD servo control MD servo control board...
- Page 23 3.3.2 Removing the mechanism cover (See Fig.3) (1) From the both sides of the main body, remove the four screws B attaching the mechanism cover. Joint c (2) From the front side of the main body, release the front hook of the mechanism cover from the joint c of internal loading Mechanism cover assembly.
- Page 24 3.3.3 Removing the head lifter (See Figs.4 to 6) (1) Remove the head lifter spring from the hook d of the main body. (See Fig.4) Head lifter Reference: Remove the head lifter spring from the head lifter as re- quired. (2) Move the head lifter in the direction of the arrow, and re- lease the joints e.
- Page 25 3.3.4 Removing the MD head assembly (See Figs.7 and 8) • Remove the MD servo control board. (1) From the bottom side of the main body, remove the wire Rest switch Pickup from the H.wire holder 1 of the MD head assembly. (See Fig.7) (2) From the top side of the main body, remove the screw C at- taching the MD head assembly.
- Page 26 3.3.5 Removing the loading assembly, traverse mechanism assembly and single frame (See Figs.9 and 10) Reference: The loading assembly, traverse mechanism assembly and sin- Loading assembly gle frame will be removable after removing the loading assem- bly from the main body. •...
- Page 27 3.3.6 Removing the slide base L and slide base R (See Fig.11) • Remove the MD servo control board, mechanism cover, head lifter and loading assembly. (1) From the top side of the loading assembly, remove the two Slide base R Joint g screws E attaching the slide base L and slide base R.
- Page 28 3.3.8 Removing the loading motor (See Figs.13 and 14) • Remove the MD servo control board, mechanism cover, head lifter, loading assembly and loading mechanism assembly. Loading motor assembly MD cam switch board (1) From the top side of the loading mechanism assembly, dis- Wire holder connect the wire from the connector CN612...
- Page 29 3.3.10 Removing the slide bar and cartridge holder assembly (See Figs.15 and 16) • Remove the MD servo control board, mechanism cover, head lifter, MD head assembly, loading assembly and loading mech- Cartridge holder assembly Slide bar anism assembly. (1) From the top side of the loading assembly, remove the two screws J attaching the slide bar to the cartridge holder as- sembly.
- Page 30 3.3.12 Removing the insulators (See Fig.17) • Remove the MD servo control board, mechanism cover, head lifter, MD head assembly and traverse mechanism assembly. Insulator (1) From top side of the traverse mechanism assembly, re- move the four insulators from the notches of the traverse Pickup unit mechanism chassis.
- Page 31 3.3.15 Removing the feed motor assembly (See Figs.20 and 21) • Remove the MD servo control board, mechanism cover, head lifter, MD head assembly, traverse mechanism assembly and Soldered section n Pickup insulators. Traverse mechanism board Spindle motor Reference: Remove the pickup unit as required. (1) From the reverse side of traverse mechanism assembly, remove the wires (White/Black) of the feed motor assembly from the soldered section m on the traverse mechanism...
- Page 32 3.3.17 Reattaching the loading assembly (See Figs.22 to 29) (1) Reattach the eject bar to the UD base. (See Figs.22 and (2) Reattach the slide bar to the loading mechanism chassis Slide bar while fitting the boss p of the slide bar to the groove of the eject bar.
- Page 33 Wire holder Cam switch board Slot t Triangle mark Hook s Slide bar Boss Triangle mark Cam switch Cam switch board Cam switch boss Loading motor assembly UD base CN612 Hook v Slide bar Wire holder Section q Eject bar Slot r Fig.23 Slot r...
- Page 34 Slide base R Cam gear Hook x Hook y Section w Section z Hook x Fig.28 Loading mechanism base Slide base R Slide base L Fig.26 Boss aa Slide base R Hook y Slide base L Boss aa Fig.29 Section z Fig.27 1-34 (No.MB351)
-
Page 35: Adjustment
SECTION 4 ADJUSTMENT DVD test mode While pressing both the [STOP] key and [DVD PLAY] key on the main unit, insert the AC power cord in an outlet. When test mode starts, area suffix is displayed on FL indication. FL indication TEST bb# TEST bb# Initialization state... - Page 36 FL indication Press the [1] key FL indication CHECK on the remote control unit. CHECK Starting & disc reproduction (from the started position) Press the [4] key FL indication on the remote control unit. Displaying CD&LD lighting and laser current Press the [5] key FL indication on the remote control unit.
- Page 37 Adjustment method for MD section Note: This set has an automatic adjustment function by test mode setting. In addition, pay attention not to have initialized EEPROM of this set. 4.2.1 Adjustment method by a test mode (1) Setting of TEST MODE 1 While pressing both the [EJECT] key and [MD PLAY] key on the main unit, insert the AC power cord in an outlet.
- Page 38 (3) Adjustment of stray light offset TEST MODE 1 Press the [10] key on the remote controller. Adjust the laser power. FL indication TEST MODE1 Confirm that a disc is not in a MD slot. Wait for 10 seconds. Adjustment of stray light offset is complete.
- Page 39 Judgment table of NG error code Recordable Premastered Adjustment NG section Disc Disc No error (normal) Focus ON Tracking error gain balance adjustment Tracking error gain balance adjustment Spindle constant voltage drive Tracking ON Spindle ADIP/EFM rough servo ON Focal loop gain adjustment Focal balance adjustment Tracking error gain balance adjustment Lens position servo sensitivity adjustment...
- Page 40 (6) Setting of TEST MODE 2 Set TEST MODE 1 Press both the [MD EJECT] FL indication key and [STOP] key on TEST MODE 2 the main unit. Setting is complete. (7) Displaying change value of a pickup adjustment Set TEST MODE 2 FL indication Press the [6] key FL indication...
-
Page 41: Troubleshooting
SECTION 5 TROUBLESHOOTING Maintenance of laser pickup (MD) Replacement of laser pickup (MD) 1. Confirm the life of a laser diode Change the pickup by referring to "Removing When the life of the laser diode has expired, the following the pickup" in the Disassembly method. symptoms will appear. - Page 42 Block diagram MD servo control section Main section D.OUT OPTICAL OUT IC390 SDAR, SWS IC460 SCL, FS384 DRAM RX, TX RDT0A to RDT3A IC493 RAD0A to RAD11A OPTICAL IN IC411 LM+, LM- NWEA, NRASA OPT MIX SWITCH Din0 IC508 LOADING MDLOUT, MDROUT IC503 DIN0, LOUT, ROUT...
- Page 43 Standard schematic diagrams Regulator section R 2 0 2 2 R 2 0 2 6 2 . 2 k Q 2 0 0 9 U N 2 1 1 5 - X L 2 2 0 1 Q Q L 2 8 A K - 4 7 0 D V D 4 .
- Page 44 Micom section R 8 3 0 3 R 8 3 0 4 R 8 3 0 5 R 8 3 0 6 R 8 3 0 7 R 8 3 0 9 1 . 5 K 2 . 2 K 2 .
- Page 45 Volume IC section I C 5 0 8 I C 5 0 2 4 . 4 I C 5 0 3 3 . 3 3 . 3 4 . 4 2 . 4 I C 5 0 4 3 . 3 4 .
- Page 46 AHB section OPTICAL OUT OPTICAL IN 1 OPTICAL IN 2 LVB10538-A2 I C 6 1 1 I C 6 1 2 I C 6 1 3 G P 1 F A 5 5 3 T Z 0 F G P 1 F A 3 5 2 R Z G P 1 F A 3 5 2 R Z HEADPHONE AMP E X C E P T D O V E R .
- Page 47 Video output section T O D E U S LVS20146-001A COMPONENT Ver. UB/UJ VIDEO OUT C N 6 0 5 To CN321 To CN301 1 . 5 (SHEET 6) 4 . 7 4 . 3 (SHEET 6) G N D G N D 3 .
- Page 48 Amplifier section L V B 1 0 5 3 9 - A 1 I C 1 2 2 I C 1 2 1 Q 1 2 0 2 R 1 2 0 9 C 1 2 0 6 C 1 2 0 8 I C 1 4 1 Q 1 4 0 2 2 .
- Page 49 MD mechanism section VREF C370 IC390 IC41LV44002-50T TP939 X300 NAX0476-001X RDT0A RDT3A C360 TP941 RDT1A RDT2A R319 NWEA NCASA TP940 TP942 R320 NRASA TP943 R322 TP944 RAD11A RAD9A R323 R321 TP317 2.2K R350 NRFSTBY ADIP APCD TEMP RFSWPG R351 RAD10A RAD8A C363 C310...
- Page 50 DVD servo section (1/2) IC302 P3.3V D1.2V BA00HC5WF-X TP321 R301 1.2k C360 DGND DVDPWR MDQ9 MDQ5 MDQ10 TP325 MDQ4 R330 ADCRST R331 DAC1CS MDQ11 R332 DAC2CS MDQ3 R333 TP320 R307 MDQ12 DEMP TP319 MDQ2 R306 TP317 MDQ13 C315 CPURST MDQ1 R362 MDQ14 R364...
- Page 51 DVD servo section (2/2) IC505 IC551 IC509 C552 EDS6432AFTA-6B C559 MBD32TF70TN IC512 SN74LVC373APW-X LADD15 EXADR16 MDQ0 MDQ15 LADD14 C551 LADD13 LADD0 LADD7 MDQ1 MDQ14 R551 LADD12 EXADT15 EXADT0 EXADT7 MDQ2 MDQ13 K591 NQR0251-004X LADD11 EXADT7 EXADT1 EXADT6 LADD10 EXADT14 LADD1 LADD6 MDQ3 MDQ12...
- Page 52 DVD loading section < M E M O > QSW1074-001 QGF1016F3-05 SHEET 10 2-11...
- Page 53 Printed circuit boards Main board (Video board) J6003 J6004 C6076 C6096 C6095 C6098 R6078 R6073 C6075 C6025 C6024 J6002 C6074 R6021 C6026 R6022 R6074 R6093 R6023 B3502 R6072 C6094 WC601 R4804 (Stopper (L) board) R4803 R4393 Q4391 R4812 R4806 R4808 R6016 C4492 Q4492...
- Page 54 Micom board (Micom board) R2719 Q7502 Q4814 Q4813 EP201 D7501 CN221 C2751 CN222 Q4812 Q4816 C4612 CN751 C4228 C2752 Q4815 C7501 C2753 CN201 W401 C5212 Q2008 C5114 C4907 Q4101 Q2001 C4101 R5914 C4201 Q2010 C4818 C4204 C5214 Q2003 IC212 C5911 TP201 IC401 C4128...
- Page 55 Digital amplifier board Forward side Reverse side (Amplifier board) (Amplifier board) R1123 C3044 Q1302 C1311 R1318 R3043 R1303 C1306 R1122 R1314 R1316 Q3041 R1131 R1304 R1323 R1130 R1311 L1101 R1315 R1319 C1307 L1102 C1116 R1302 R3042 R1307 IC131 R1322 R1317 R1320 R1305 D3701...
- Page 56 MD servo board Forward side Reverse side (Mechanism board) (Mechanism board) MT602 MT601 S601 (MD servo board) (MD servo board) R460 C496 C422 R421 C421 C466 C464 C450 CN500 C497 IC460 R506 R373 R374 R503 C314 TP573 R436 R313 TP572 C412 R315 R471...
- Page 57 DVD servo board Forward side Reverse side R356 R355 R561 R371 R368 R370 K562 TP310 R535 K563 TP311 TP312 C329 K564 K565 TP95 K567 TP31 IC453 K568 TP32 K566 TP33 TP34 TP35 TP37 C328 TP38 IC301 C310 TP36 C455 R530 K594 R309 K593...
- Page 58 < M E M O >...
- Page 59 PARTS LIST [ NX-DV3 ] * All printed circuit boards and its assemblies are not available as service parts. Area suffix UB --------------------- Hong Kong UJ --------------------- U.S.Military - Contents - 3- 2 Exploded view of general assembly and parts list (Block No.M1) 3- 6 Speaker assembly and parts list(Front speaker) (Block No.M2)
- Page 60 Exploded view of general assembly and parts list Block No. FL board Stopper(L) board 56 55 Stopper(R) board SW board...
- Page 61 Amplifier board Micom board Holder board Video board 61 64 56 55 Headphone board Speaker terminal board...
- Page 62 General Assembly Block No. [M][1][M][M] Symbol No. Part No. Part Name Description Local LV10975-002A FRONT PANEL LV30225-0Y3A SPACER (x4) LV40301-002A FELT SPACER (x2) LV43975-001A P.C.MAGNET (x2) LV43976-001A MAGNET BRACKET (x2) LV30225-0V6A SPACER (x2) GV30489-006A MD LID LV43984-001A SPRING LV21834-002A FRONT LENS E69897-002 CUSHION...
- Page 63 Symbol No. Part No. Part Name Description Local QYSDSF3010ZA TAP SCREW M3 x 10mm LV35315-005A REAR PANEL LV35315-006A REAR PANEL QYSBSGY3008EA TAP SCREW M3 x 8mm(x3) QYSBSGY3008EA TAP SCREW M3 x 8mm QYSBSGY3008EA TAP SCREW M3 x 8mm(x2) QYSBSGY3008EA TAP SCREW M3 x 8mm QYSBSGY3008EA...
- Page 64 Speaker assembly and parts list Block No. (Front speaker) The parts without symbol number are not service. Speaker(Front speaker) Block No. [M][2][M][M] Symbol No. Part No. Part Name Description Local 5600003311 HOLDER (x8) 9000007941 FOOT (x8) LV21851-007A SPK NET-L LV21851-008A SPK NET-R...
- Page 65 MD mechanism assembly and parts list Block No. FMU-S6M-21M Grease =JVG-31N =CFD-4007ZY2 10.0 0.2mm 38 40 61.5 0.1mm MD cam switch board 7.0 0.2mm MD servo control board The parts without symbol number are not service.
- Page 66 MD mechanism Block No. [M][E][M][M] Symbol No. Part No. Part Name Description Local LV20548-033A LOADING ASSY LV31472-004A CAM GEAR QYWDL1230252 SLIT WASHER 3mm/1.2mm x 0.25mm LV41477-004A MINI TAP SCREW (x2) LV32168-002A WIRE HOLDER LV31710-002A L.MOTOR ASSY QAR0251-002 MOTOR WJM0117-003A E-SI C WIRE C-F LV41341-001A MOTOR PULLEY...
- Page 67 DVD mechanism assembly and parts list Block No. FTU-LZ2-1M Grease =JVG-31N =CFD-4007ZY2 =PG-641 =1401C < Back side > < Back side > 63.3mm 0.1mm DVD module board 10.5mm 0.1mm The parts without symbol number are not service.
- Page 68 DVD mechanism Block No. [M][J][M][M] Symbol No. Part No. Part Name Description Local LV21814-001A MECHA BASE LE20731-001A SPINDLE BASE QYSDST2605M TAP SCREW M2.6 x 5mm(x2) LE40931-001A SHAFT LE40995-001A BAR SPRING QYSPSTU2080M TAP SCREW M2 x 8mm LE20730-002A FEED HOLDER QAR0165-001 FEED MOTOR LV30225-0X5A...
- Page 69 DVD loading base assembly and parts list Block No. FMU-LZ2-1M Grease FL-7750E JC-803B < Back side > Backside Switch board The parts without symbol number are not service. 3-11...
- Page 70 DVD loading base Block No. [M][N][M][M] Symbol No. Part No. Part Name Description Local LV11064-001A LOADER SUB ASSY E407140-001SS C.D ROLLER E407149-001SS RUBBER TUBE LV10979-001A TRAY LV35383-002A SHAFT GUIDE LV44022-001A SHAFT QYSSSF2008ZA TAP SCREW M2 x 8mm QYSDSF2008ZA TAP SCREW M2 x 8mm(x2) QAR0197-001 MOTOR...
- Page 71 Electrical parts list Main board Symbol No. Part No. Part Name Description Local Block No. [0][1] C6097 NCB31HK-103X C CAPACITOR 0.01uF 50V K Symbol No. Part No. Part Name Description Local C6098 NCB31HK-103X C CAPACITOR 0.01uF 50V K C8501 QER61CM-226Z E CAPACITOR...
- Page 72 Symbol No. Symbol No. Part No. Part Name Description Local Part No. Part Name Description Local R8805 NRSA63J-222X MG RESISTOR 2.2kΩ 1/16W J Q2004 UN211L-X TRANSISTOR R8806 NRSA63J-272X MG RESISTOR 2.7kΩ 1/16W J Q2005 2SB709A/R/-X TRANSISTOR Q2008 R8807 NRSA63J-392X MG RESISTOR...
- Page 73 Symbol No. Symbol No. Part No. Part Name Description Local Part No. Part Name Description Local Q7502 KTC3875/YG/-X SI TRANSISTOR C2402 QETN1HM-475Z E CAPACITOR 4.7uF 50V M Q7601 UN2214-X TRANSISTOR C2404 QETN1CM-477Z E CAPACITOR 470uF 16V M Q7602 UN2113-X DIGI TRANSISTOR C2405...
- Page 74 Symbol No. Symbol No. Part No. Part Name Description Local Part No. Part Name Description Local C5206 QETN1HM-335Z E CAPACITOR 3.3uF 50V M C7904 QCBB1HK-103Y C CAPACITOR 0.01uF 50V K C5208 QETN1HM-225Z E CAPACITOR 2.2uF 50V M C7905 QCFB1HZ-105Y C CAPACITOR 1uF 50V Z...
- Page 75 Symbol No. Symbol No. Part No. Part Name Description Local Part No. Part Name Description Local R2501 QRT01DJ-R39X MF RESISTOR 0.39Ω 1W J R4274 NRSA63J-102X MG RESISTOR 1kΩ 1/16W J R2502 QRT01DJ-R56X MF RESISTOR 0.56Ω 1W J R4275 NRSA63J-273X MG RESISTOR 27kΩ...
- Page 76 Symbol No. Symbol No. Part No. Part Name Description Local Part No. Part Name Description Local R5509 NRSA63J-333X MG RESISTOR 33kΩ 1/16W J R7048 NRSA63J-222X MG RESISTOR 2.2kΩ 1/16W J R5510 NRSA63J-473X MG RESISTOR 47kΩ 1/16W J R7049 NRSA63J-222X MG RESISTOR 2.2kΩ...
- Page 77 Symbol No. Symbol No. Part No. Part Name Description Local Part No. Part Name Description Local R7804 NRSA63J-221X MG RESISTOR 220Ω 1/16W J IC301 SN74HCU04ANS-X R7805 NRSA63J-101X MG RESISTOR 100Ω 1/16W J IC302 SN74LV00ANS-X IC303 R7806 NRSA63J-151X MG RESISTOR 150Ω...
- Page 78 Symbol No. Symbol No. Part No. Part Name Description Local Part No. Part Name Description Local C1206 NCB31HK-222X C CAPACITOR 2200pF 50V K C1426 NCB21HK-104X C CAPACITOR 0.1uF 50V K C1207 NCB31EK-104X C CAPACITOR 0.1uF 25V K C1427 NCB21HK-104X C CAPACITOR 0.1uF 50V K...
- Page 79 Symbol No. Symbol No. Part No. Part Name Description Local Part No. Part Name Description Local R1112 NRSA63J-103X MG RESISTOR 10kΩ 1/16W J R1320 NRSA63J-223X MG RESISTOR 22kΩ 1/16W J R1113 NRSA63J-331X MG RESISTOR 330Ω 1/16W J R1321 NRSA63J-183X MG RESISTOR 18kΩ...
- Page 80 Symbol No. Symbol No. Part No. Part Name Description Local Part No. Part Name Description Local R3034 NRSA63J-472X MG RESISTOR 4.7kΩ 1/16W J IC390 GM71VS17400CLT5 R3035 NRSA63J-103X MG RESISTOR 10kΩ 1/16W J IC390 or IC41LV44002A50T R3036 NRSA63J-472X MG RESISTOR 4.7kΩ...
- Page 81 Symbol No. Symbol No. Part No. Part Name Description Local Part No. Part Name Description Local C467 NEAG1CM-106X E CAPACITOR 10uF 16V M R412 NRS181J-100X MG RESISTOR 10Ω 1/8W J C468 NCB31CK-103X C CAPACITOR 0.01uF 16V K R413 NRS181J-100X MG RESISTOR 10Ω...
- Page 82 Symbol No. Symbol No. Part No. Part Name Description Local Part No. Part Name Description Local CN407 QGF1006F2-08W CONNECTOR FFC/FPC (1-8) C101 NCF31CZ-104X C CAPACITOR 0.1uF 16V Z CN408 QGF1006F2-09W CONNECTOR FFC/FPC (1-9) C102 NCF31CZ-104X C CAPACITOR 0.1uF 16V Z CN521 QGF1006F2-21W CONNECTOR...
- Page 83 Symbol No. Symbol No. Part No. Part Name Description Local Part No. Part Name Description Local C381 NCB21AK-225X C CAPACITOR 2.2uF 10V K R320 NRSA63J-103X MG RESISTOR 10kΩ 1/16W J C382 NCB31HK-471X C CAPACITOR 470pF 50V K R330 NRSA63J-331X MG RESISTOR 330Ω...
- Page 84 Symbol No. Part No. Part Name Description Local CN503 QGF1016F2-17W CONNECTOR FFC/FPC (1-17) CN504 QGF1016F2-15W CONNECTOR FFC/FPC (1-15) CN506 QGF1016F2-08W CONNECTOR FFC/FPC (1-8) K350 NQR0502-001X FERRITE BEADS K351 NQR0502-001X FERRITE BEADS K352 NQR0502-001X FERRITE BEADS K551 NQR0129-002X FERRITE BEADS K552 NQR0129-002X FERRITE BEADS...
- Page 85 <MEMO> 3-27...
- Page 86 Packing materials and accessories parts list Block No. A1,A10 A 13 A19, 3-28...
- Page 87 Packing and Accessories Block No. [M][3][M][M] Symbol No. Part No. Part Name Description Local LVT1256-003A INST BOOK ENG,CHI(PEKIN) LVT1256-002A INST BOOK RM-SNXDV3U REMOCON ------------------ BATTERY (x2) QAM0646-001 SPEAKER CORD QAM0718-001 SPEAKER CORD QAM0216-001 SIGNAL CORD QMPP060-183-JD POWER CORD(EK) 1.83m BLACK ...
- Page 88 Victor Company of Japan, Limited AV & MULTIMEDIA COMPANY AUDIO/VIDEO SYSTEMS CATEGORY 10-1,1chome,Ohwatari-machi,Maebashi-city,371-8543,Japan (No.MB351) Printed in Japan...
Need help?
Do you have a question about the NX-DV3 and is the answer not in the manual?
Questions and answers