
Related Manuals for XOCECO LC-19KT42

Summary of Contents for XOCECO LC-19KT42
- Page 1 LCD TV Operating Manual LC-19KT42 Before connecting, operating or adjusting this product, please read the manual completely. Please keep this manual for future reference.
-
Page 2: Table Of Contents
Table of Contents Important Information ........................1 Important Safety Instructions......................2 Important Notice ..........................5 Preparations ............................6 Identification of Controls ........................8 Connections .............................11 Basic Operations..........................14 Getting Started ..........................18 Adjusting PICTURE Menu Options ....................19 Adjusting AUDIO Menu Options ....................2 Adjusting SETUP Menu Options ....................2 Parental Controls.........................22 Closed Caption ..........................25 Time &... -
Page 3: Important Information
Important Information WARNING: TO REDUCE THE RISK OF FIRE OR ELECTRIC SHOCK, DO NOT EXPOSE THIS APPARATUS TO RAIN OR MOISTURE. The lightning flash with arrowhead symbol, within an equilateral triangle is intended to CAUTION alert the user to the presence of uninsulated dangerous voltage within the product's RISK OF ELECTRIC SHOCK enclosure that may be of sufficient magnitude to... -
Page 4: Important Safety Instructions
Important Safety Instructions Electrical energy can perform many useful functions, but it can also cause personal injuries and property damage if improperly handled. This product has been engineered and manufactured with the highest priority on safety. But IMPROPER USE CAN RESULT IN POTENTIAL ELECTRICAL SHOCK OR FIRE HAZARD. - Page 5 Important Safety Instructions (Continued) 12. Stand---Use only with the cart, stand, tripod, bracket, or table specified by the manufacturer, or sold with the apparatus. Do not place the product on an unstable trolley, stand, tripod or table. Placing the product on an unstable base can cause the product to fall, resulting inserious personal injuries as well as damage to the product.
- Page 6 Important Safety Instructions (Continued) 22. Power source---This product is intended to be supplied by a listed power supply indicated on the marking label. If you are not sure of the type of power supply to your home, consult your product dealer or local power company. For added protection for this product during a lightning storm, or when it is left unattended and unused for long periods of time, unplug it from the wall outlet and disconnect the cable system.
-
Page 7: Important Notice
Important Notice Do not use in hot and cold rooms (locations) About Temperature When the unit is used in rooms (locations) with low temperature, the picture may leave trails or appear slightly delayed. This is not a malfunction, and the unit will recover when the temperature returns to normal. -
Page 8: Preparations
Preparations Using the Remote Control Use the remote control by pointing it towards the remote sensor window of the < set. Objects between the remote control and sensor window may prevent proper operation. Cautions regarding use of remote control Do not expose the remote control to shock. In addition, do not expose the remote <... - Page 9 Preparations (Continued) Antenna Connection INSTALL the unit in a room where direct light will not fall upon the screen. Total darkness or a reflection on the picture screen may cause eyestrain. Soft and indirect lighting is recommended for comfortable viewing. Optimum reception of colour requires a good signal and will generally mean that an outdoor antenna must be used.
-
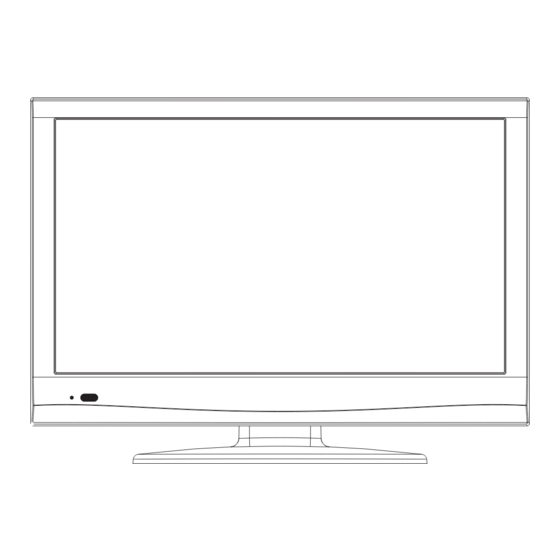
Page 10: Identification Of Controls
Identification of Controls Main Unit (control panel) Remote Sensor Power Indicator Channel Up/Down Volume Up/Down MENU Input Source Select Power On / Standby 1. POWER Press this button to turn the unit ON from STANDBY mode. Press it again to turn the set back to STANDBY. 2. - Page 11 Identification of Controls (Continued) Main Unit (connectors) 1 SERVICE PORT: For software update only. Do not use. HDMI: HDMI (High-Definition Multimedia Interface) provides an uncompressed, all-digital audio/video interface between this TV and any HDMI-equipped audio/video component, such as a set-top box and DVD player. HDMI supports enhanced, or high-definition video, plus two-channel digital audio.
- Page 12 Identification of Controls (Continued) Remote Control Unit POWER : Switches the TV power on or Standby. ZOOM: Selects the screen size. INPUT: Displays input source menu. COMP/HDMI/VIDEO/TV: Direct input source select COMP: Press to access Component mode. HDMI: Press to access HDMI mode. VIDEO: Press once to access AV1 mode, press twice to access AV2 mode, press the third time to access S-Video mode.
-
Page 13: Connections
Connections Cautions Before Connecting Carefully check the terminals for position and type before making any connections. The illustration of the external equipment may be different depending on your model. Loose connectors can result in image or colour problems. Make sure that all connectors are securely inserted into their terminals. - Page 14 Connections (Continued) Connecting a Camcorder TV Side Cables are often color-coded to connectors. Connect red to Camcorder “PlayStation” red, white to white, etc. AV cable How to connect: Connect the Audio/Video cables between the Audio (L/R)/Video jacks on the unit and camcorder. To playback Camcorder 1.
- Page 15 Connections (Continued) Connecting an HDMI device TV REAR Device with HDMI output HDMI cable How to connect a device using HDMI Connection: Connect the HDMI cable between the HDMI interface on the unit and HDMI output on the device. To play from the device using HDMI: 1.
-
Page 16: Basic Operations
Basic Operations Turning On/Off the Power Turning On Insert the power cord into the wall outlet. Press the Power button on the unit or on the remote control, the unit will be turned on and you will be ready to use its features. - Page 17 Basic Operations (Continued) Main Menu Overview (TV mode) List of main menus to help you with operations Picture menu Picture Mode Picture Audio Setup Channel Contrast Picture Mode Custom Brightness (Refer to <Adjusting PICTURE Menu Contrast Color Options> section for details.) Brightness Tint Color...
- Page 18 Basic Operations (Continued) Menu Navigation Note: To clearly introduce the menu operations, this Press to display the Main menu. operation manual provides a description based on operation with the remote control. Press to select menu. Press to enter the menu field. Press to select menu items.
- Page 19 Basic Operations (Continued) Adjusting the Volume Using the volume buttons (VOL+ and VOL – ) Press the VOL + or VOL- to increase or decrease the volume. Using the Mute Press the MUTE button to temporarily turn off all sound. To restore the sound, press the MUTE button again. Displaying the Information Banner You can press DISPLAY button to display information banner.
-
Page 20: Getting Started
Getting Started Running Initial Setup Perform the following steps before you press POWER on the remote control to turn on your TV set. 1. Insert the batteries into the remote control unit. 2. Connect the antenna cable to the TV. 3. -
Page 21: Adjusting Picture Menu Options
Adjusting PICTURE Menu Options Adjusting the Picture Picture Audio Setup Channel press 6 Press MENU and the Picture menu appears, to access Picture Mode Custom Contrast Brightness Press 5 or 6 to select items, press 3 to adjust the selected Color items. -
Page 22: Adjusting Audio Menu Options
Adjusting AUDIO Menu Options Adjusting the Sound Picture Audio Setup Channel Press MENU, and then use to highlight Audio, press 6 to access Sound Mode Custom Audio menu. Bass Treble Balance Press 5 or 6 to select items, press 3 to adjust the selected items. -
Page 23: Adjusting Setup Menu Options
Adjusting SETUP Menu Options Accessing the Setup Menu Options You may change system settings such as Parental Controls, timer, closed caption, OSD language, menu transparency, etc. by making use of Setup menu. Press MENU, use 3 to select Setup menu, press 6 to access. - Page 24 Adjusting SETUP Menu Options — Parental Controls Setting Parental Controls Parental Control enables parents to prevent their children from watching inappropriate material on TV. Parental Control reads the ratings for programming (except for news, sports, unedited movies on premium cable and Emergency System signals ), then denies access to programming if the program's rating meets the limitations you select.
- Page 25 Adjusting SETUP Menu Options — Parental Controls (Continued) Setting Parental Controls Picture Audio Setup Channel You can set Parental Controls for the U.S. and Canada. Change Password System Lock Setting US Ratings Canada Use password to access Setup-Parental Controls menu. RRT Setting Reset RRT Press 5...
- Page 26 Adjusting SETUP Menu Options — Parental Controls (Continued) Setting Parental Controls Picture Audio Setup Channel Setting Canada Ratings Change Password System Lock Use password to access Setup-Parental Controls menu. Canada RRT Setting Press 5 to select Canada, then press ENTER. Reset RRT Select Canada English if you want to set controls for Canada English Select...
-
Page 27: Closed Caption
Adjusting SETUP Menu Options — Closed Caption Closed Caption You can turn on/off Closed Caption, to set Closed Caption type, to customize digital closed captions, etc. through the menu. Picture Audio Setup Channel Press MENU, use 3 to select Setup menu, press 6 to access. -
Page 28: Time & Menu Settings
Adjusting SETUP Menu Options — Time & Menu Settings Setting Sleep Timer and Auto Clock Picture Audio Setup Channel Press MENU, use 3 to select Setup menu, press 6 to access. Sleep Timer Time Zone Pacific Select Time item, then press ENTER to open the Time setting screen. Clock 2009/12/31 04:15PM Press 5... -
Page 29: Input Label/Restore Default/Audio Only
Adjusting SETUP Menu Options — Input Label/Restore Default/Audio Only Labeling an Input Source Press MENU, use 3 to select Setup menu, press 6 to access. Picture Audio Setup Channel Parental Controls Select Input Label item, press ENTER to open the Input Label screen. Time Then use 6 to operate. -
Page 30: Adjusting Channel Menu Options
Adjusting CHANNEL Menu Options Accessing the Channel Settings Picture Audio Setup Channel Cable Air/Cable Press MENU, use to select Channel menu, press 6 to access Auto Scan Favorite Press 5 or 6 to select items, press 3 to adjust the selected items. If Show/Hide the selected item has sub-menu, press ENTER to access. - Page 31 Adjusting CHANNEL Menu Options (Continued) Option Description Show/Hide Lets you delete channels from the channel list so your TV skips the channels when you press Channel up/down button. You can still tune to the channel using the number buttons. In Channel menu, select Show/Hide item, press ENTER to access. Press 5 to select, press ENTER to mark the channel.
-
Page 32: Image Adjustments For Vga(Pc) Mode
Image Adjustments for VGA(PC) Mode Before adjusting the image, make sure that you select the correct source (VGA). Adjusting Computer Settings Picture Audio Setup Channel Parental Controls In VGA mode, press MENU and the main menu screen displays. Time Closed Caption Press 3 to select Setup menu, press 6 to access the menu. -
Page 33: Troubleshooting
Troubleshooting If, after reading these operating instructions, you have additional questions related to the use of your television, please call the services center in your local area. Before calling service, please check the symptoms and follow suggested solutions. Remote Control Problem Possible Solutions The batteries could be weak. - Page 34 Troubleshooting (Continued) General Problem Possible Solutions These channels may be blocked. Please unblock them (see <Setting Parental One or some channels can’t be Controls> section). displayed These channels may be set hidden. You may set it to show or select them with 0-9 number buttons.
-
Page 35: Specifications
Specifications Type: LCD TV Panel: 19” TFT LCD TV system: NTSC-M, ATSC Receiving Channel: VHF 2-13, UHF 14-69, CATV 1-125, CADTV 1-135, DTV 2-69 Audio multiplex: BTSC System Audio out: 3W × 2 Power Requirement: AC 120 V, 60 Hz Power Consumption: 35 W Dimensions (W x H x D, with stand):... -
Page 36: Assembling The Stand And Removing The Stand Column
Assembling the stand and removing the stand column(Option) If the stand is provided, please read these instructions thoroughly before attempting this installation. afety Precautions: 1.Please read these instructions thoroughly prior to attempting this installation. 2.Be sure to handle this product very carefully when attempting assembly. If you are unsure of your capability, or the use of tools necessary to complete this activity, refer to a professional installer or service personnel. - Page 37 Assembling the stand and removing the stand column(Option) Detaching the Stand 1.Place carefully the display on its front side with a soft cushion below, shake the stand forward or backward to adjust angle between the stand and the display, let the angle ≤...
- Page 38 SKU 76139041 PRINTED ON RECYCLED PAPER Ver.1.0 2050042997743...
Need help?
Do you have a question about the LC-19KT42 and is the answer not in the manual?
Questions and answers