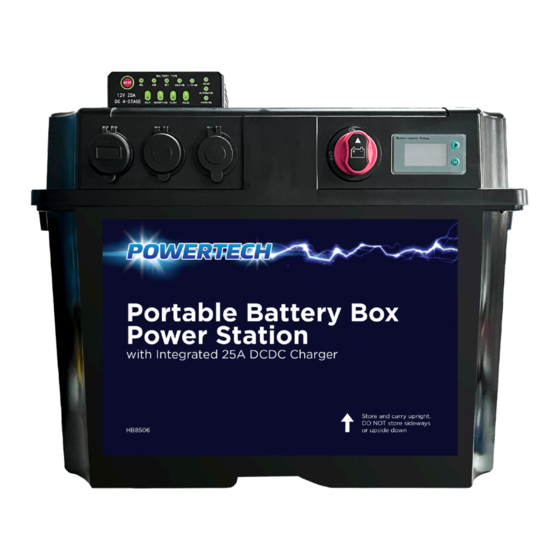
Summary of Contents for PowerTech HB8506
- Page 1 HB8506 Portable Battery Box Power Station with Integrated 25A DCDC Charger Instruction Manual...
-
Page 2: Important Safety Instructions
IMPORTANT SAFETY INSTRUCTIONS: • For charging 12V rechargeable batteries only. • Never attempt to recharge non-rechargeable batteries. • The lid of the battery box must remain shut at all times while charging a battery or powering a device from an outlet. •... - Page 3 ACCESSORIES: Step 1: Peel off the plastic film to expose Step 2: Place your battery carefully into the non-slip surface of the silicone pads. the battery box base, positioning it as centrally as you can on the non-slip Note: the pads may be washed to regain stickiness pads.
- Page 4 BATTERY TO USE: Max.Battery Dimensions: 340mm x 185mm W x 235mm H (with Silicone Mat) Max.Battery Weight: 35kg Supported Chemistries: AGM, Calcium, Wet, Gel or Lithium LiFePO4 (Deep Cycle Bateries)
-
Page 5: Wiring Diagram
WIRING DIAGRAM:... - Page 6 SWITCH/BUTTONS: The Master Switch The master switch disconnects everything (except for the large 175 amp High Current Connectors) from the battery including the DC-DC Charger. Tuming it off is a quick way to disconnect all devices to ensure your battery is not being drained. Note: The DC-DC Charger and Solar Regulator cannot charge the internal battery while the Master Switch is in the OFF position, nor can an external battery.
- Page 7 CONNECTIONS: Outputs 3 X Cigarette Socket Outputs • Maximum 15A output per socket 2 X Dual USB Outputs • 1 x 4.2A High Powered USB • 1 x QC3.0+2.4A USB Output Benefits of Quick Charge Q When paired with compatible devices, a Quick Charge-enabled charger delivers more power, allowing the connected device to charge faster.
- Page 8 CONNECTIONS: NOTE: THE 6 HIGH CURRENT CONNECTORS INDICATED CANNOT EXCEED A TOTAL OF 50 AMPS COMBINED. 1X (175A) High Current Connectors • High Current Inverter Output • Emergency 600A Jump Starter Output (7 seconds) • Connected directly to battery WARNING: •...
- Page 9 CONNECTIONS: Inputs Alternator 1 X Triple High Current Connectors • 9-32V DC Starter Battery Input(+/-) • Ignition source connection MPPT Solar 1 X (50A) High Current Connectors • Minimum Solar Input Voltage: 9V DC • Maximum Solar Input Voltage: 23V DC •...
- Page 10 CONNECTION DC-DC CHARGER: The 12V BATTERY BOX includes a built-in DC-DC Charger suitable for charging from a vehicle alternator. The easiest way to connect the Power Station to your vehicle is by using the Plug & Play Wiring Kit (sold separately). The triple High Current connector fitted to the Battery Box interfaces with the Plug &...
- Page 11 DC-DC CHARGER GUIDE: Understanding Solar, Alternator & Charging Lights NOTE: • Alternator has priority over solar therefore, if both solar and the alternator are connected, only alternator LED is Solid and the alternator is charging. • 30 second delay between the cut-in voltage being reached and charging beginning and a 60 second delay before disconnecting when under cut-out voltage.
- Page 12 DC-DC CHARGER GUIDE: Choosing the battery type: The default battery setting is AGM. When the auxiliary battery is connected, press and hold the mode button for 5 seconds or until the battery light starts flashing. Then select from either GEL, AGM,WET,CALCIUM or LITHIUM and wait for the battery light to stop flashing.
- Page 13 DC-DC CHARGER GUIDE: IMPORTANT: You must select ‘LITHIUM’ as the battery type by using the ‘MODE’ button prior to connecting it to a lithium battery in sleep mode to attempt recovery. How to Wake a Lithium Battery to Begin Recovery Mode 1.
- Page 14 DC-DC CHARGER GUIDE: Fault Codes If all battery type selection lights are flashing simultaneously please see troubleshooting guide below. There are error codes that may be displayed. These will be displayed in the following way: Stage LED Cause Remedy Solar input Output voltage is Check solar panel open high voltage...
-
Page 15: Technical Specifications
TECHNICAL SPECIFICATIONS: Battery Box Information Material Tempetature Range -10°C - 60°C+ Battery Information Supported Chemistries AGM, Calcium, Wet, Gel or Lithium (Deep Cycle Only) MAX Battery Dimensions 340mm L x 185mm W x 235mm H (with Silicone Mat) MAX Battery Weight 35kg Ports (Input/Output) Input/Output Capable... -
Page 16: Frequently Asked Questions
FREQUENTLY ASKED QUESTIONS: Q. What types of batteries can | charge with this battery box? The battery box is compatible with most 12V deep cycle batteries. This includes AGM, Calcium, Wet, Gel or Lithium LiFePO4. Q. If storing my 12 Power Box for long periods, what should I do to look after my battery’s health? An AGM battery is best stored fully charged. - Page 18 Distributed by: Electus Distribution Pty Ltd 46 Eastern Creek Dr, Eastern Creek NSW 2766 Australia Ph 1300 738 555 Int’l +61 2 8832 3200 Fax 1300 738 500 www.electusdistribution.com.au...


Need help?
Do you have a question about the HB8506 and is the answer not in the manual?
Questions and answers