Table of Contents
Advertisement
Quick Links
Advertisement
Table of Contents

Related Manuals for Ronix 8600


Summary of Contents for Ronix 8600
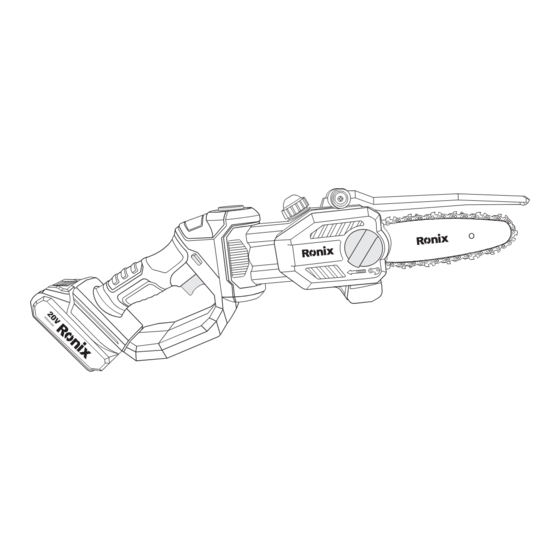
- Page 1 CORDLESS MINI CHAIN SAW 8600...
-
Page 2: Technical Specifications
TECHNICAL SPECIFICATIONS Model 8600 Voltage Battery Type Lithium-ion Battery Capacity 2.0Ah Maximum Cutting Diameter 6"/150mm Shain Size 1/4" Chain Bar Length 195mm Chain Wheel Teeth No-load Speed 3800RPM Chain Speed 4.8m/s Oil Tank Capacity 50ml Run Time Full-load: 15 min... -
Page 3: Part List
PART LIST Front Hand Oil Bottle Safety Switch Protection Sword Handle Saw chain Sprocket Cover Battery pack Rear Handguard Fastening Screw On/Off Switch The operating instructions are part of this device. It contains important information on safety, use and disposal. Before using the device, make yourself familiar with all operating and safety instructions. - Page 4 instructions in the user manual. The user must wear appropriate personal protective equipment (PPE). Only wood may be sawed with the wood cutter. Materials such as plastic, stone, metal or wood that contain foreign bodies (e.g. nails or screws) must not be processed! Security 1) Safety switch To switch on the device, the switch-on lock must be unlocked.
- Page 5 yourself well with all of the controls. Read and follow the operating instructions for the machine! Wear protective glasses. Be careful of the chainsaw kickback and avoid touching the tip of the guide bar. wearing earplugs wear a hard hat Wear safety shoes Please stay away from others Remove the battery before servicing.
-
Page 6: General Power Tool Safety Warnings
lock loose Turn indicator GENERAL POWER TOOL SAFETY WARNINGS WARNING! Read all safety warnings, instructions, illustrations and specifications provided with this power tool. Failure to follow all instructions listed below may result in electric shock, fire and/or serious injury. SAVE ALL WARNINGS AND INSTRUCTIONS FOR FUTURE REFERENCE. - Page 7 power tool will increase the risk of electric shock. d) Do not abuse the cord. Never use the cord for carrying, pulling or unplugging the power tool. Keep cord away from heat, oil, sharp edges or moving parts. Damaged or entangled cords increase the risk of electric shock.
- Page 8 Do not use the power tool if the switch does not turn it on and off. Any power tool that cannot be controlled with the switch is dangerous and must be repaired by Ronix Service Center. c) Disconnect the plug from the power source and/or remove the battery pack, if detachable, from the power tool before making any adjustments, changing accessories, or storing power tools.
- Page 9 5) BATTERY TOOL USE AND CARE a) Recharge only with the charger specified by the Ronix. A charger that is suitable for one type of battery pack may create a risk of fire when used with another battery pack.
- Page 10 SAFETY INSTRUCTIONS FOR PRUNING SAWS 1) GENERAL PRUNING SAW SAFETY WARNINGS: a) Keep all parts of the body away from the pruning saw when the pruning saw is operating. Before you start the pruning saw, make sure the saw chain is not contacting anything. A moment of inattention while operating pruning saw may cause entanglement of your clothing or body with the saw chain.
- Page 11 pruning saw will reduce the likelihood of accidental contact with the moving saw chain. j) Follow instructions for lubricating, chain tensioning and changing the bar and chain. Improperly tensioned or lubricated chain may either break or increase the chance for kickback. k) Cut wood only.
-
Page 12: Further Safety Information
Only use replacement guide bars and saw chains specified by the Ronix replacement guide bars and saw chains may cause chain breakage and/orkickback. d) Follow the manufacturer’s sharpening and maintenance instructions for the saw chain. - Page 13 2.) Turn the sprocket cover fixing screw counterclockwise to remove the sprocket cover . 3.) Spread out the saw chain in a loop so that the cut edges are aligned clockwise. To align the saw chain, use the symbols on the Casingor above the sprocket cover as a guide.
-
Page 14: Insert / Remove Battery
Do not retension or change the saw chain when it is hot, as it contracts again a little after it has cooled down. Failure to observe this can lead to damage to the guide bar or the motor, as the saw chain is now too tight on the sword. -
Page 15: Change Direction
cover are correctly installed. Make sure you have a secure footing when starting. Before starting, make sure that the wood cutter is not touching any objects. TURN ON 1.) If necessary, insert the battery into the device (see “Inserting / removing the battery”). -
Page 16: Sawing Techniques
CHANGE SWORD 1.) Switch off the device and remove the battery from the device. 2.) Place the device on a flat surface. 3.) Turn the fastening screw of the sprocket cover counterclockwise to loosen the chain tension and remove the sprocket cover. 4.) Remove the sword and the chain . - Page 17 Use only original spare parts. Let the machine cool down before any maintenance and cleaning work. There is a risk of burns! Use cut-resistant gloves when handling the chain or the sword. Risk of lacerations. cloth. Do not use liquids for cleaning. CLEANING - Clean the machine thoroughly after each use.
- Page 18 When filling the oil bottle of the equipment, the oil bottle cap shall be tightened in time and shall not be placed randomly. SHARPEN CUTTING TEETH An incorrectly sharpened saw chain increases the risk of kickback! Use cut-resistant gloves when handling the chain or sword. A sharp chain ensures optimum cutting performance.
-
Page 19: Troubleshooting
Problem Possible Cause Troubleshooting Check battery charge Battery empty or not statue, if necessary call inserted Ronix Service Center Device does not start On/Off switch defective Ronix Service Center Motor defective Install the saw chain Mount the saw chain incorrectly...
Need help?
Do you have a question about the 8600 and is the answer not in the manual?
Questions and answers