Advertisement
Quick Links
Advertisement

Related Manuals for KELISS T16


Summary of Contents for KELISS T16
- Page 1 Instruction manual Smart Toilet Instruction manual Instruction manual...
- Page 2 Safety precautions................ Safety precautions................ Components.................. Components.................. Functions introduction ..............Functions introduction ..............Parts name ..................Parts name ..................Product drawing ................Product drawing ................Power and water connection............Power and water connection............Installation precaution..............Installation precaution..............Product installation..............Product installation..............Instructions for remote control installation......
-
Page 3: Safety Precautions
Safety precautions warnings. Please be sure to carefully read through the user's manual before installation. Symbols and meanings WARNING The following symbols are used to indicate important safety precautions when using the product. Prohibited. Pay close attention; caution. - Page 4 Unusual sound or odor Prohibited Do not operate the product or handle the plug with wet hands. This may result Handling the plug during thunderstorms and lightning may cause electrical Do not attempt to disassemble or repair this product yourself. It needs to be Do not use while bathing.
- Page 5 the product and do not apply water directly to it. Persons with special health conditions should only use this product with the be necessary when using the product. Caution All electrical cords and plugs must be waterproof. and replace them with the included hose assemblies. Do not reuse the old The grounding wire must conform to local codes and must use a three-pronged grounding plug for use.
- Page 6 Components...
- Page 7 Power cord length About 1.5m (59.1 in) Rear wash About Water Bidet wash Swing Cleaning Massage press twice for continuous cleaning Water temperature range Warm wind temperature Drying Surface temperature Seat Thermal fuse Self-cleaning Self-cleaning Pre-wetting Spray a circle of water after sitting Auto open/close lid/seat method Flush consumption...
- Page 8 Rear wash Cleaning posterior. Bidet wash Cleaning feminine body. Spray position Massage cleaning Swing cleaning Seat heated Drying Warm wind to dry the body parts. Temperature Seat sensor User can open or close the lid by remote control or foot sensing. Lid open/close The lid will be automatically close after about 2 mins.
-
Page 9: Parts Name
Parts name Seat Rear wash hole Bidet wash hole connector Knob Ceramic toilet Foot sensing Power indicator Seat temp status indicator Flushing status indicator Water temp indicator Seat temp indicator Water temp indicator Seat temp indicator... -
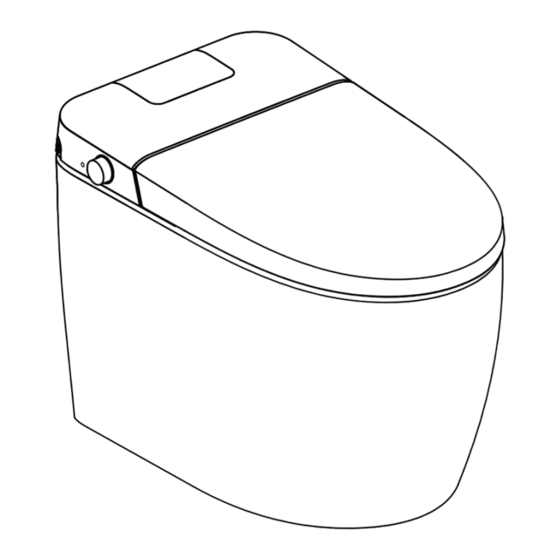
Page 10: Product Drawings
Product drawings About 680mm( 26.8 in ) Power and water connection tip Connect to grounded outlet GFCI outlet... -
Page 11: Installation Precaution
Installation precaution humidity). rooms or shower curtains. product failure or damage). The toilet cannot reach full cleaning functionality if the water pressure cannot reach 0.15MPa. sediment Installation Tools Percussion Drill Glue gun Tape Pliers Gradienter Steel saw Knife pencil... -
Page 12: Product Installation
Product installation 1. Install the water inlet valve Connect to grounded outlet GFCI outlet 3 0 5 ( 1 2 . 0 i n i n ) Drain outlet 2. Mark the curve of ceramics later installation. wall 305mm(12.0in) -10-... - Page 13 Product installation 3.Toilet installation(Method 1) Gently tilt the toilet sideways until it rests on the side surface. ring facing the toilet. outline and position the toilet base. Sealing ring Draining hose the ceramic down (can be pressed by the weight of the human body) so that the sealing ring fully contacts the ground.
- Page 14 Product installation 4.Toilet installation(Method 2) Decoration panel Screw Washer Sealing ring Flange -12-...
- Page 15 Product installation Glue the edge of toilet bottom with glass cement. outline and position the toilet base. Pay attention to the tightness of the pipes connection. -13-...
- Page 16 Product installation 5. Connection of water inlet valve NOTE: keep the toilet dry. If the water pressure is less than restrictor G1/2 G3/4 6.Connect to power Connect the electricity plug with protection unit. Press rear/bidet wash button in the remote control -14-...
- Page 17 Instructions for remote control Installation Magnet Double sided tape Figure 1 the diameter of 6mm(0.24 in). on the seat. Magnet Figure 2 NOTE: down) -15-...
- Page 18 Signal window Signal light Stop Rear Bidet Flush Minus Plus Water temp Flow Massage Seat temp Swing User 1 User 2 Lid open/close Seat open/close remote at the same rear wash/bidet wash/stop You can cancel the -16-...
- Page 19 the stop button. pressing the stop button. the medium ). to increase water POSITION is in the medium. press plus button to to decrease the seat temperature. -17-...
- Page 20 Flush Press . Press plus button pressing the stop button. for rear/bidet wash. function. cleaning . -18-...
- Page 21 Knob function description Press Forward opens. automatically open; opens; function. -19-...
- Page 22 detergent in the gap between the top unit and the bowl unit. Doing so could damage or malfunction. 1. Disconnect the power. of bowl. damage the surface of bowl. 3. Connect the power. clogging toilet. G1/2 it with clean water. the inlet hose.
- Page 23 When the toilet can' pipelines are cleaned before use. the water inside inlet hose. -21-...
- Page 24 Whether the power supply is plugged in. Wait until the power is restored. Power failure. reset button on the plug. Has a water failure occurred? Press the “stop” button and wait until the water out. Rear cleaning Bidet cleaning Low water temperature setting pressed.
- Page 25 The dry temperature is Lower dry temperature is set. not enough. temperature. when the button is pressed. Waste material does not The water supply to the toilet may disrupted the toilet. Flush the toilet again. If the bowl is not consistency of the waste material.
- Page 26 Maintenance Service Sheet Product Product code The selling store Purchase date City Maintenance content warranty. repair within two years from the purchase date. NOTE: cause harmful interference to radio communications. Made in China -24-...
Need help?
Do you have a question about the T16 and is the answer not in the manual?
Questions and answers