Table of Contents
Advertisement
Advertisement
Table of Contents

Related Manuals for KELISS T162A Series


Summary of Contents for KELISS T162A Series
- Page 1 Instruction manual T162A SERIES Smart Toilet...
- Page 2 ※ Please read this manual thoroughly before using the product. ※ Please do not hesitate to contact us if you have any questions in the installation or usage. ※ Please keep this manual available for future maintenance or reference.
-
Page 3: Table Of Contents
Contents Safety precautions................ Components.................. Specification................. Functions introduction ..............Parts name ..................Product drawing ................Power and water connection............Installation precaution..............Product installation..............Instructions for remote control installation......Remote control panel overview..........Using instructions................ Knob function description............Cleaning & maintenance............. Measures for special cases............Trouble shooting................. -
Page 4: Safety Precautions
Safety precautions To prevent damage to the unit and possible injury to users, please follow the safety warnings. Please be sure to carefully read through the user's manual before installation. Keep the user's manual after installation to refer to for troubleshooting advice. Symbols and meanings WARNING Could result in serious injury or death. - Page 5 WARNING Stop using the product immediately if you observe: Smoke Unusual sound or odor Leakage, breakage or other damage Blocked toilet pan Continued use under these conditions could cause electrical shock, injury, or water leakage. Do not clean the smart bidet with heavy chemical cleaning agents such as paint thinner, gasoline, putty powder, nylon brush, etc.
- Page 6 WARNING Make sure the product is installed in a well-ventilated area. Excess humidity and moisture could cause electrical shock or fire. Disconnect the power supply before removing this product from the toilet to prevent electrical shock or fire. To prevent electrical shock or fire, disconnect the power supply before cleaning the product and do not apply water directly to it.
-
Page 7: Components
Components SMART TOILET REMOTE EXPANSION DOUBLE-FACED REMOTE CONTROL REMOTE CONTROL SCREW GROUP ADHESIVE TAPE HOLDER (EACH 2pcs) INLET VALVE USER'S MANUAL SEALING RING User's Manual FLOW RESTRICTOR... -
Page 8: Specification
Specifications Rated voltage 100-130V~ 50/60Hz Power cord length About 1.5m (59.1 in) Rear wash About 0.5L (0.13 gal)-0.7L ( 0.18 gal) /min Water volume (water pressure 0.2MPa, 3 levels adjustment) Bidet wash Swing Oscillating cleaning forward and backward Cleaning Two options: press once for interval cleaning, Massage press twice for continuous cleaning Water volume... -
Page 9: Functions Introduction
Functions introduction Washing function Rear wash Cleaning posterior. Bidet wash Cleaning feminine body. Spray position Adjust nozzle position to expand cleaning scope. adjustment Water flow adjustment Adjust water flow rate. Massage cleaning The nozzle spray variable intensity water column to massage. Swing cleaning Swing back and forth to cleansing most area. -
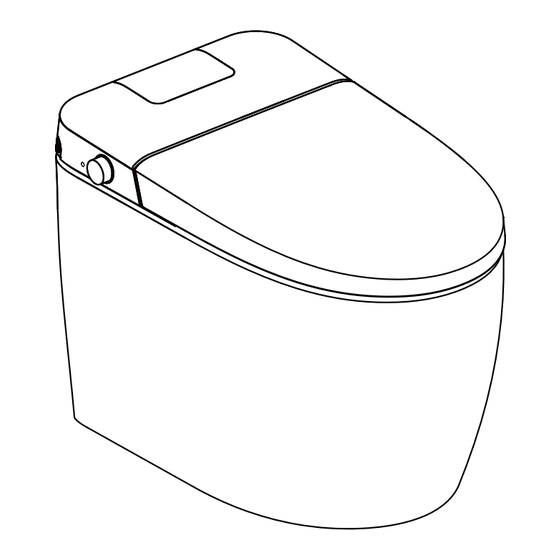
Page 10: Parts Name
Parts name Seat Rear wash hole Bidet wash hole Power-off flush connector Drying baffle Nozzle baffle Knob Nozzle Ceramic toilet Foot sensing n so Power indicator Seat temp status indicator Flushing status indicator Water temp indicator Seat temp indicator Water temp indicator Seat temp indicator... -
Page 11: Product Drawing
Product drawings About 680mm( 26.8 in ) Power and water connection tip Connect to grounded outlet Caution electric shock! GFCI outlet ※ If the power cord is not long enough, please do not use a extension cord. ※ Only for reference. Bathroom sizes and configurations may vary. -
Page 12: Installation Precaution
Installation precaution (1) Don't install our product in the room with more than 90%RH humidity (relative humidity). It is suggested to separate dry space from moist one, such as installing shower rooms or shower curtains. (2) Only the specified power supply can be used. (Other power sources may cause product failure or damage). -
Page 13: Product Installation
Product installation 1. Install the water inlet valve Clean the ground and dry the water before installation. Mark the central lines of the draining outlet, and install the inlet valve on the wall. Connect to grounded outlet Caution electric shock! GFCI outlet 3 0 5 ( 1 2 . - Page 14 Product installation 3.Toilet installation(Method 1) ① Sealing ring installation Gently tilt the toilet sideways until it rests on the side surface. Install the sealing ring evenly along the outlet, and the small end of the sealing ring facing the toilet. Glue the edge of toilet bottom with glass cement, place the toilet base along the outline and position the toilet base.
- Page 15 Product installation 4.Toilet installation(Method 2) ① Remove the bidet seat Remove the fixing screws of the toilet; remove the connecting pipes and wires of the toilet, separate the bidet seat from the toilet. Decoration panel Screw Washer Fixed hole ② Sealing ring installation Place the sealing ring on to the flange.
- Page 16 Product installation ③ Ceramic installation Glue the edge of toilet bottom with glass cement. Line up the toilet base over the flage screws. Place the toilet base and secure the flange bolts. Glue the edge of toilet bottom with glass cement, place the toilet base along the outline and position the toilet base.
- Page 17 Product installation 5. Connection of water inlet valve Connect the water inlet braided pipe to the water inlet angle valve; if the water pressure is high, you can install a flow restrictor or adjust the position of the angle valve to achieve the best flushing effect. NOTE: Clean the floor and tools, do not use the toilet immediately, it takes 48 hours to cure and keep the toilet dry.
-
Page 18: Instructions For Remote Control Installation
Instructions for remote control Installation Method 1: ① Install the remote control fixing panel with a magnet on the remote control fixed seat and lock tightly. Note: Pay attention to the polarity when installing the magnet. Place the larger side of the magnet hole outside the fixed panel and enclose the small hole surface inside the fixed panel, as shown in the below figure 1. -
Page 19: Remote Control Panel Overview
Remote control panel overview Signal window Signal light Stop Rear Bidet Flush REAR STOP BIDET Minus Plus FLUSH Water temp Flow Nozzle position FLOW TEMP POSITION Massage Seat temp Swing SEAT SWING MASSAGE User 1 User 2 USER1 USER2 Lid open/close Seat open/close Remote control alignment: After the product is connected to the power supply, the remote control alignment operation can be carried out within 1 minute from the buzzer call. -
Page 20: Using Instructions
Using instructions STOP Press the button, all functions off. REAR Press the button, rear spray function turns on, auto off after 2 mins or off by pressing the stop button. Function will stop if user leaves. BIDET Press the button, bidet/front spray function turns on, auto off after 2 mins or off by pressing the stop button. - Page 21 Using instructions FLUSH Flush Press "flush" button to activate flushing. Press the button, drying function turns on.(Initial level is in the medium. Press plus button to increase warm dry temp. Press minus button to decrease warm dry temp, total 5 levels, and corresponding indicator will on under different level)...
-
Page 22: Knob Function Description
Knob function description Knob function description No need to reset the stepless knob after use Backward Press Forward Sitting Bidet wash: Knob forward, spray bar extend, bidet wash works about 2 minutes. ● Rear wash: Knob backward, spray bar extend, rear wash works about 2 minutes. ●... -
Page 23: Cleaning & Maintenance
Cleaning Maintenance and cleaning of lid and seat. 1. Disconnect the power, turn off tee valve. 2. In case of using a mixture of washing agent and water as well as any available solution for seat cleaning, use soft and wet sponge or cloth to clean the seat. Use a soft towel to make the seat dry, or let it dry naturally. -
Page 24: Measures For Special Cases
Measures for special cases When the toilet can't be flushed automatically due to power interruption. USB TPYE-C When the power is off, connect to the USB TPYE-C with a power bank to achieve the power off flushing. When the toilet can't be flushed automatically due to water interruption. ①... -
Page 25: Trouble Shooting
Trouble shooting Phenomenon Reasons Measures Whether the power supply is plugged in. Insert the plug or detect the power socket. Power failure. Wait until the power is restored. The product out of work Insert the plug the power socket, press The leakage protector is disconnected. - Page 26 Trouble shooting Phenomenon Reasons Measures The dry temperature is Use the remote control to adjust dry Lower dry temperature is set. not enough. temperature. Water is not available from the water supply. Use a bucket full of water to flush. The toilet does not flush when the button is pressed.
-
Page 27: Maintenance Service Sheet
Maintenance Service Sheet Product Product code The selling store Purchase date Province City Dealer ( signature ): Maintenance content Free maintain regulation: 1、 Free maintenance is provided when you use it properly in accordance with instructions and under warranty. 2、 Please contact the dealer or the company if the fault occurs under warranty. 3、... - Page 28 KELISS TRADING CO., LTD ADD: RM4, 16/F, HO KING COMM CTR, 2-16 FAYUEN ST, MONGKOK KOWLOON, HONG KONG...
Need help?
Do you have a question about the T162A Series and is the answer not in the manual?
Questions and answers