Advertisement
Questions, problems, missing parts? Before
returning to your retailer, call our customer service
department at 1-800-288-4002, 6 a.m. - 5 p.m.,PT
and 9 a.m. - 8 p.m.,ET, Monday - Friday.
ATTACH YOUR RECEIPT HERE
Serial Number ___________________
Purchase Date ___________________
SAFETY INFORMATION
Please read and understand this entire manual before attempting to assemble, operate, or install the product.
WARNING:
•
Follow the installation instructions carefully. Proper installation is the installer's responsibility.
•
Failure to follow correct installation procedures can result in the faucet being loose, which can result in serious injury.
CAUTION:
•
Check local building codes before beginning installation to ensure compliance.
PREPARATION
Before beginning the assembly of this product, make sure all parts are present. Compare parts with the package
contents and hardware contents list. If any part is missing or damaged, do not attempt to assemble the product.
Estimated Assembly Time: 90 minutes (including removal of old faucet)
Tools Required for Assembly (not included): Adjustable Wrench, Silicone Sealant, Phillips Screwdriver, Pencil, Electric Drill
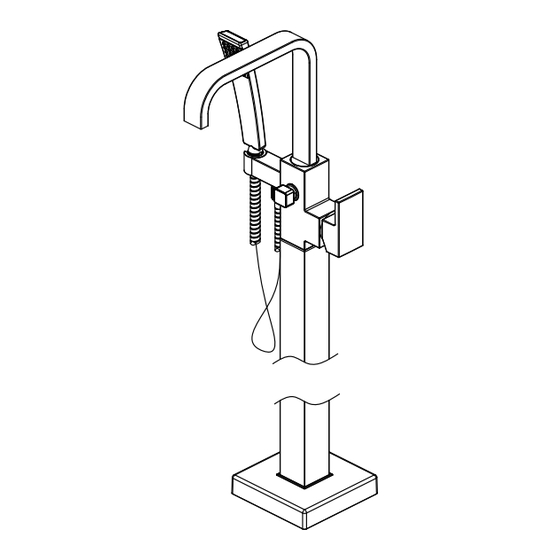
Jacuzzi Item # NW 55826 / NW 55827
TUB FILLER FAUCET
MODEL # 67661-W5104 / 67661-W5101
1
2016/05/13 V1
Advertisement
Table of Contents

Related Manuals for Jacuzzi 67661-W5104


Summary of Contents for Jacuzzi 67661-W5104
- Page 1 Jacuzzi Item # NW 55826 / NW 55827 TUB FILLER FAUCET MODEL # 67661-W5104 / 67661-W5101 Questions, problems, missing parts? Before returning to your retailer, call our customer service department at 1-800-288-4002, 6 a.m. - 5 p.m.,PT and 9 a.m. - 8 p.m.,ET, Monday - Friday.
- Page 2 ASSEMBLY INSTRUCTIONS 1/4 in. dia. Floor Floor Drill a hole min 2 1/4 in. diameter-max 2 9/16 in. Loosen the set screw (1) pre-assembled to the Place the escutcheon (1) over the standpipe (2) diameter in the floor with an electric drill (1). Mark spout (2), rotate the spout (2) about 90°...
- Page 3 ASSEMBLY INSTRUCTIONS Connect the flexible supply lines (1) to the water Flushing and checking for leaks supplies (2). Important: After installation is completed, turn on the hot and cold water supplies. Check for leaks. Flush the water lines for one minute. Press the pin (1) to the bottom position, and flush water lines for one minute.
- Page 4 REPLACEMENT PARTS LIST For replacement parts, call our customer service department at 1-800-288-4002, 6 a.m. - 5 p.m., PT and 9 a.m. - 8 p.m.,ET, Monday - Friday. PART DESCRIPTION PART# Hand Shower RP38310* Washer RP64219 Shower Hose RP38236 Spout assembly RP80499* O-Ring RP60107...
Need help?
Do you have a question about the 67661-W5104 and is the answer not in the manual?
Questions and answers