
Related Manuals for PRC-Saltillo NovaChat 5 4th Generation


Summary of Contents for PRC-Saltillo NovaChat 5 4th Generation
- Page 1 NovaChat User’s Guide ® Dedicated and Non-Dedicated Devices NovaChat 5 ∙ 4 Generation ® NovaChat 8 ∙ 5 Generation ® NovaChat 10 ∙ 7 Generation ® NovaChat 12 ∙ 1 Generation ® 10021 Version 3.25...
- Page 2 Copyright and Trademark Information © 2015-2023 PRC-Saltillo. Non-commercial reprint rights for clinical or personal use granted with inclusion of copyright notice. Commercial use prohibited; may not be used for resale. Contact PRC-Saltillo for questions regarding permissible uses. AAC Coaching Corner™, AAC Language Lab®, AAC Learning Journey™, Accent , AeroSwitch , AeroText™, ChatEditor™,...
-
Page 3: Table Of Contents
Document Version / Software Version 10021v3.25 · 08/13/2023 / Chat software version 2.44 Applies to: Models NC5.4, NC8.5, NC10.7, NC12.1; dedicated and non-dedicated devices Table of Contents Welcome to NovaChat....................13 Safety Information .....................15 What’s Included ......................19 NovaChat 5 Device Features ..................20 NovaChat 8 Device Features ..................22 NovaChat 10 Device Features ..................25 NovaChat 12 Device Features ..................28... - Page 4 Attaching a Strap with Loops ..................55 Attaching a Strap with Metal Rings ................56 Using the Touchscreen ....................57 Using the Stylus ......................57 Cleaning and Disinfecting Your Device ................58 Routine Cleaning and Disinfecting ................58 Disinfecting a Device for Use by Multiple Clients ............58 Using the Home Screen ....................60 Using the Status Bar ....................
- Page 5 Intermediate Scan ....................... 80 MultiChat 15 ....................... 80 myCore........................81 myQuickChat ....................... 81 Spelling ........................81 VocabPC ........................81 Choosing a Language and Voice ..................82 Choosing a Language ....................82 Selecting a Speech Synthesizer and Voice ..............82 Non-Dedicated Devices: Adding an Android Voice............83 Using the Speech Display Bar (SDB) ................84 Changing SDB Settings ....................
- Page 6 Modifying Button Text ..................... 108 Displaying the Button Text to Edit ................108 Editing the Button Text ..................... 109 Using Images with No Text ..................109 Adding or Modifying a Button Image ................ 110 Finding an Image from the Device Library ..............111 Searching for an Image in the Device Library............
- Page 7 Modifying a Button that is Reused on Multiple Pages ..........146 Using a Button in Multiple Places ................146 Prioritizing Buttons ....................147 Rearranging Buttons ....................147 Resizing a Button ...................... 147 Working with Button Sets ..................148 Creating a Page ......................150 Creating a New Page ....................
- Page 8 Setting a Time to Prevent Selection of a Button Twice ..........175 Setting up a Visual Indication when a Button is Selected ......... 176 Using Visual Effects ....................177 Setting up an Auditory Effect when a Button is Selected ......... 178 Using Auditory Effects ....................
- Page 9 Finding a Word using the Word Finder Menu Item ............217 Using the Word Finder Menu Item ................217 Hiding or Showing the Word Finder Menu Item ............217 Finding a Word using a Button Action ............... 218 Setting up a Button with the Find Word Action ............218 Setting the Display Time for Word Finder Results in the SDB ........
- Page 10 Creating and Loading Profiles ................... 235 Creating a Profile ...................... 235 Loading a Profile ....................... 235 Deleting a Profile ...................... 236 Restoring Default Profile Settings ................236 Changing Display Settings ..................236 Setting the Date and Time ..................237 Changing Date and Time Settings ................237 Creating a Date/Time Button ..................
- Page 11 Backing up and Restoring Information to Cloud Storage ........... 267 Transferring Vocabulary Files between NovaChat Devices ........268 Transferring Vocabulary Files between Devices using ChatEditor ......268 Transferring Vocabulary Files between Devices using a USB Flash Drive ....269 Clearing Custom Vocabularies and Settings .............. 270 Clearing Custom Vocabulary ..................
- Page 12 Appendix A: Advanced Grammar Features ............... 306 Identifying Parts of Speech ..................306 Creating a Grammar Rule Button ................308 Using Dynamic Grammar Labels ................310 Using Your Grammar Rule Button ................311 Clearing a Grammar Rule ..................313 Appendix B: Connecting Your Device to a Computer for the First Time ..... 314 Appendix C: Working with Apps ................
-
Page 13: Welcome To Novachat
Welcome to NovaChat This information is provided to help you to set up and use your NovaChat device. Additional information and support are available. ® Support articles can be found on the Saltillo website: http://saltillo.com/support/ Training opportunities can be found on the Saltillo website: http://saltillo.com/webinars Saltillo Operational or Technical support: If you need assistance in setting up, using, or maintaining your... - Page 14 Chat Software Version: To view the version of Chat software installed on your device, choose Menu > Help > Check for updates. The version number appears above the update progress bar. User’s Guide and Application Help: To view or download the user’s guide, go to https://saltillo.com/support/downloads.
-
Page 15: Safety Information
Safety Information Emergencies This device is not intended to be an emergency call device or sole communication aid. Cleaning, Maintaining, and Servicing Do not attempt to service or maintain the device while it is in use. Disconnect the charger and turn off the device before cleaning or disinfecting the device. Do not remove the screws on the back of your device that secure the hard plastic frame and back cover. - Page 16 Ports and Connectors Keep the device ports and mating cable connectors clean so that they make the best possible contact and are able to maximize the service life of your device. Dirty cable connectors will transfer the contaminate to the mating connector on the device and may degrade performance.
- Page 17 Interference When operating this device in a medical environment, do not use with any product that is not medically approved. Follow all rules for appropriate wireless device use. Do not use this device close to sources of RF/RFID radiation or you may encounter interference.
- Page 18 Heat Do not place the device in an appliance such as a microwave or oven, near an open flame, or on or near a source of heat such as a stove or heater. Do not leave the device in a hot vehicle for a prolonged period. Oxygen-Rich Environment Do not take the device into an oxygen-rich environment (operating room, oxygen tent, etc.).
-
Page 19: What's Included
What’s Included The following were included in your NovaChat package. Your NovaChat device (one of the following) NovaChat 5 NovaChat 8 NovaChat 10 with Active Wrap NovaChat 10 with Classic Wrap NovaChat 12 Additional Items Battery charger Loops or rings for attaching a strap Colored wraps (except NovaChat 5) NovaChat User’s Guide USB or USB-C flash drive... -
Page 20: Novachat 5 Device Features
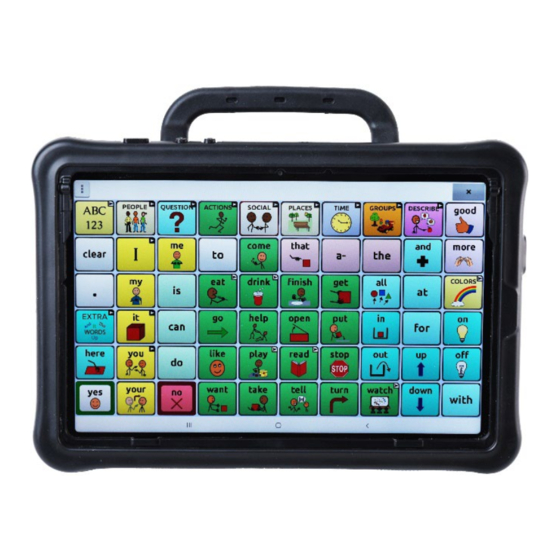
NovaChat 5 Device Features NovaChat 5 Front View Volume button: Press one end to increase volume; press the other end to decrease volume Power button: Press and hold to turn device on or off USB port: Pull the port cover off and connect a USB cable to charge the device or transfer vocabulary. - Page 21 NovaChat 5 Back View Speakers Stand Camera sensors Rear cameras NovaChat User’s Guide...
-
Page 22: Novachat 8 Device Features
NovaChat 8 Device Features NovaChat 8 Front View Handle Volume button: Press the ends of the button to turn the volume up or down. Side key: Tap to wake the screen. Press and hold to display the power down option on the screen; then tap to confirm. Active key: Tap to open the Chat software when other apps are running. - Page 23 NovaChat 8 Back View Handle Active key: Tap to open the Chat software when other apps are running. Press and hold to open another app. You can set the Active key to open different apps. For details, see “Using and Resetting the Active Key”...
- Page 24 NovaChat 8 Side View USB-C port for charging the device or transferring vocabulary Charging LED Switch jack A Switch jack B Headset jack Bluetooth ® NovaChat User’s Guide...
-
Page 25: Novachat 10 Device Features
NovaChat 10 Device Features NovaChat 10 Front View Power button: Press and hold to turn the device on or off Volume button: Press to turn the volume up or down Handle Touchscreen/display: Displays the application screens NovaChat User’s Guide... - Page 26 NovaChat 10 Back View Handle Amplifier power button Wheelchair mounting plate screw holes Stand NovaChat User’s Guide...
- Page 27 NovaChat 10 Side View Charging LED USB-C port for charging the device and amplifier or transferring vocabulary Switch jack A Switch jack B Headset jack Bluetooth LED NovaChat User’s Guide...
-
Page 28: Novachat 12 Device Features
NovaChat 12 Device Features NovaChat 12 Front View Power button: Press and hold to turn the device on or off Volume button: Press to turn the volume up or down Handle USB port: Connect a USB cable for charging the device or transferring vocabulary Back: Tap to return to the previous screen or menu. - Page 29 NovaChat 12 Side and Back View USB port for charging the device or transferring vocabulary Amplifier charging port and LED Switch jack A Switch jack B Headset jack Amplifier power button and LED Handle USB port for a USB mouse or keyboard Dedicated devices: You cannot use a USB mouse or keyboard with a dedicated device.
-
Page 30: Using Menu, Back, And Home
Using Menu, Back, and Home Note: This section applies to NovaChat 5 · 4 Generation and NovaChat 12 · 1 Generation devices. It does not apply to NovaChat 8 · 4 Generation or NovaChat 10 · 7 Generation devices. Note: For information on using the Back button to access menus on NovaChat 8 ·... -
Page 31: Charging The Device: Novachat 5
Charging the Device: NovaChat 5 We suggest charging the device each night. A battery charger was included in the box with your device. Use only the battery charger provided with your NovaChat 5 device: GlobTek, Inc. GTM96180-1507-2.0. Cords and cables are potential entanglement or strangulation hazards. Please consider this prior to placing these items with device users. - Page 32 To connect the charger and cable: 1. Tap the device’s power button to turn off the display. 2. Plug the charger into an electrical outlet—a surge protector is recommended. 3. Pull the port cover off the device’s USB port. 4. Plug the USB connector into the USB port on the device. When the device is fully charged: 1.
-
Page 33: Charging The Device: Novachat 8
Charging the Device: NovaChat 8 We suggest charging the device and amplifier each night. A battery charger was included in the box with your device. You can charge the device and the amplifier at the same time with a single cable connection. Use only the battery charger provided with your device. - Page 34 Connecting the Charger and Cable 1. Tap the device’s power button to turn off the display. 2. Plug the charger into an electrical outlet—a surge protector is recommended. 3. Plug the USB-C connector on the end of the charger cable into the USB-C port on the device.
-
Page 35: Charging The Device: Novachat 10
Charging the Device: NovaChat 10 We suggest charging both the device and amplifier each night. A battery charger was included in the box with your device. You can charge the device and the amplifier at the same time with a single cable connection. Use only the battery charger provided with your device. - Page 36 To connect the charger and cable: 1. Tap the device’s power button to turn off the display. 2. Plug the charger into an electrical outlet—a surge protector is recommended. 3. Plug the USB-C connector on the end of the charger cable into the USB-C port on the device.
-
Page 37: Charging The Device: Novachat 12
Charging the Device: NovaChat 12 We suggest charging both the device and amplifier each night. A battery charger was included in the box with your device. The charger cables allow you to charge the device and the amplifier at the same time. - Page 38 To connect the charger and cables: 1. Tap the device’s power button to turn off the display. 2. Plug the charger into an electrical outlet—a surge protector is recommended. 3. Plug the mini connector into the mini USB port on the amplifier case and plug the micro connector into the micro USB port on the device.
-
Page 39: Checking Battery Status Using A Button
Checking Battery Status Using a Button Some Saltillo-provided vocabulary files already include buttons for checking the battery status. For example: WordPower® offers the option from the last page of Groups, and MultiChat 15 offers the button on the Device Tools page from the second page of “Things”. To create a button that checks the battery status of both the device and the amplifier, create a button on a vocabulary page that contains the action “Battery Status”. -
Page 40: Viewing Battery Status Icons
Viewing Battery Status Icons When your tablet or amplifier batteries reach low or critically low levels, an icon will appear in the notifications area of the Speech Display Bar (SDB). When you connect a charger, the icon will disappear. Note: To view battery status icons, the notifications bar must be turned on. -
Page 41: Turning The Device On And Off
Turning the Device On and Off The power button is located on the edge of the device. Note: On the NovaChat 8, the power button is called the Side key. NovaChat 5 NovaChat 10 NovaChat 8 (Side key) NovaChat 12 To turn your device on from a complete power-down: Press and hold the power button (NovaChat 8: Side key). -
Page 42: Turning The Screen On And Off
Turning the Screen On and Off When using the device on a daily basis, tap the power button (NovaChat 8: Side key) quickly—do not hold it— to turn just the screen on and off. Waking the Screen (“Tap to Wake”) Three methods are available to wake the screen after tapping the power button (NovaChat 8: Side key) to put the device to sleep or allowing the device to power down automatically after a timeout. -
Page 43: Turning The Amplifier On And Off
Turning the Amplifier On and Off Typically, the amplifier should be left on. When the amplifier is off, speech is still available, but it comes from the device’s internal speaker. NovaChat 8 NovaChat 10 NovaChat 12 The amplifier power buttons (labeled “I/O” on some devices) are recessed. - Page 44 To turn the amplifier off: Press and hold the amplifier power button until both the amber and blue lights come on. Then release the button. To turn the amplifier on: Press the amplifier power button for a second. The light will flash to indicate the amplifier is on and working properly.
-
Page 45: Turning Bluetooth On And Off
Turning Bluetooth On and Off During air travel and in some medical facilities, you may need to turn Bluetooth off. How you turn Bluetooth off depends on the version of Android on your device. These options may not be available on your device. -
Page 46: Turning Airplane Mode On And Off
Turning Airplane Mode On and Off During air travel and in some medical facilities, you may need to put your device in Airplane mode. How you activate Airplane mode depends on the version of Android on your device. These options may not be available on your device. -
Page 47: Controlling Volume
Controlling Volume To prevent possible hearing damage, do not listen to earphones at high volume levels for long periods. The volume buttons are located on the edge of the device. NovaChat 5, 8, and 12: Press the ends of the button to increase or decrease volume. -
Page 48: Disabling The Device Volume Buttons
Disabling the Device Volume Buttons Other people may intentionally or inadvertently adjust the volume of your device to a level that affects your ability to communicate. The setting Disable Device Volume Buttons gives you more control over setting and maintaining the volume level. When the setting Disable Device Volume Buttons is turned on, the device volume buttons will not adjust the volume while you are using the Chat software. -
Page 49: Positioning The Stand: Novachat 5
Positioning the Stand: NovaChat 5 Use the amplifier to position the device at an angle for easy viewing. Pull the end of the stand out as far as it will go. Then position the device in landscape orientation. The user could pinch a finger when closing the stand. NovaChat User’s Guide... -
Page 50: Positioning The Stand: Novachat 8
Positioning the Stand: NovaChat 8 The stand is adjustable. It will remain in any position you move it to. To position the device at an angle for easy viewing of the screen, grab the stand’s bottom support and pull away from the back of the device. When the stand is positioned at the angle you want, let go. -
Page 51: Positioning The Stand: Novachat 10
Positioning the Stand: NovaChat 10 The stand is adjustable. It will remain in any position you move it to. To position the device at an angle for easy viewing of the screen, grab the rounded area on the stand’s bottom support and pull away from the back of the device. -
Page 52: Positioning The Stand: Novachat 12
Positioning the Stand: NovaChat 12 To position the device at an angle for easy viewing of the screen, do the following: 1. Place the device face-down on a flat surface. 2. While holding your thumb on the edge of the device below the stand’s bottom support, press on the inside of the support with the tip of your index finger (or the tips of several fingers) to pull the support away from the latch. -
Page 53: Removing Or Replacing The Handle
Removing or Replacing the Handle If you do not plan to use the handle, you can remove it by removing the screws that hold it in place. NovaChat 8 NovaChat 10 NovaChat 12 When removed, the screws are a potential choking hazard. If you are replacing the handle, align the ends of the new handle with the screw holes at the top of the device. -
Page 54: Replacing The Wheelchair Mounting Plate: Novachat 12
Replacing the Wheelchair Mounting Plate: NovaChat 12 Your NovaChat 12 device shipped with the wheelchair mounting plate installed. If you need to replace it, follow these instructions. 1. Place the device face-down on a flat surface. Be careful not to scratch the display. -
Page 55: Attaching A Strap With Loops
Attaching a Strap with Loops For hands-free transport, attach a strap to your device. For convenience, there are four strap holders on the device—one on each corner or one set on the handle and another set near the bottom of the device. If you received loops with your strap, attach them to the appropriate holders. -
Page 56: Attaching A Strap With Metal Rings
Attaching a Strap with Metal Rings For hands-free transport, attach a strap to your device. For convenience, there are four strap holders on the device—one on each corner or one set on the handle and another set near the bottom of the device. If you received metal rings with your strap, attach them to the appropriate holders. -
Page 57: Using The Touchscreen
Using the Touchscreen Your device comes with a capacitive touchscreen. It responds best to a light touch from the pad of your finger. You can also use the stylus that was provided with your device. See “Using the Stylus”. Important! Using excessive force or a metallic object when pressing on the touchscreen may damage the tempered glass surface. -
Page 58: Cleaning And Disinfecting Your Device
Cleaning and Disinfecting Your Device To get the most from your device, keep it clean and disinfected. If your device will only be used by one person, routine cleaning and disinfecting should be sufficient. If, however, multiple persons will be using the device, take additional measures to clean and disinfect the device after it has been used by one person before allowing it to be used by another person. - Page 59 Next Step: Disinfect the device and accessories 1. Wipe down the device and accessories with a new disinfectant wipe (Virucidal, Bactericidal, Pseudomonacidal, Tuberculocidal, Fungicidal)—Metrex CaviWipes. Follow the disinfectant product manufacturer’s instructions for disinfecting. 2. Make sure to clean inside all cracks and corners, and wipe more than once if necessary to keep the device wet for a minimum of three (3) minutes.
-
Page 60: Using The Home Screen
Using the Home Screen The home screen allows you to place shortcuts, widgets, and other items to customize the device to your needs. To display the home screen, choose Home. Dedicated devices or devices with Kiosk Mode turned on: Dedicated (locked) devices do not have access to the home screen. -
Page 61: Non-Dedicated Devices: Opening And Closing The Application
Non-Dedicated Devices: Opening and Closing the Application From the home screen or Apps folder, tap the NovaChat shortcut. When the application is open, choosing Home will minimize the application and display the operating system’s home screen. To close the NovaChat application, choose Menu and tap Exit. Using the power button to turn off the device will also close the application and all open apps. -
Page 62: Choosing How To Access Menus
Choosing How to Access Menus When you update your device to Chat software version 2.28 or later, options are available for accessing the menus. On NovaChat 5 · 4 Generation and NovaChat 12 · 1 Generation devices, you can access the menus as you always have. See “Using Menu, Back, and Home”... - Page 63 If you select Speech Display Bar from the Menu Access window: The Menu button will appear in the Speech Display Bar (SDB). When you select the Menu button, the menu will appear along the left side of the screen. Select an option to open the feature. When you select Edit Mode, the menu options change.
- Page 64 If you select Menu Bar from the Menu Access window: The Menu Bar with a single button will appear across the top of the screen. Select the button on the Menu Bar to open the menu below the Menu Bar, along the left side of the screen.
- Page 65 When you select Edit Mode, the menu options change. Select an option to open the feature. Use the Menu Bar arrow close the menu. NovaChat User’s Guide...
-
Page 66: Using The Menus
Using the Menus After choosing Menu, groupings of menus appear. These menus vary depending on other settings in the application. In Edit Mode, all the buttons are outlined, indicating that they can be edited. The words “Edit Mode”, followed by the name of the vocabulary file and the name of the current page, appear in red across the bottom of the screen. -
Page 67: Changing Application Settings
Changing Application Settings 1. To use the Application Settings, choose the Menu button. 2. The menu will open along the left side of the screen. 3. Select Application Settings to open a list of submenus. 4. Select a submenu to open a list of settings. For example, select Speech Output to display speech settings. - Page 68 5. Many settings lead to additional options. In this example, select Voice to open a page of voice options. Then select Synthesizer to select the voice synthesizer you want. In this user’s guide, navigating to a setting is abbreviated: Menu > Application Settings > Speech Output > Voice > Synthesizer. NovaChat User’s Guide...
-
Page 69: Viewing Explanations Of Unavailable Settings
Viewing Explanations of Unavailable Settings When a menu item in the Application Settings is disabled, the text below the menu item explains why the item is disabled and how you can enable it. For example: Menu > Application Settings > Style Menu >... -
Page 70: Choosing A Vocabulary File
Choosing a Vocabulary File Choosing an appropriate vocabulary file is imperative to the success of the device user. A qualified speech language pathologist, teaching staff, parents, and device user are all part of the decision process of choosing an appropriate vocabulary file. When choosing a vocabulary file, consider the following: •... - Page 71 Access Practice Access Practice allows the individual to get hands-on experience using a specific access method such as touchscreen, switch, or head-mouse. The practice exercises help teach the individual the necessary physical movements to make the device speak through cause and effect or establishing a specific target that the individual must select—the target can be self-determined or requested by a support person.
- Page 72 Intermediate and Advanced Concepts speak the name of the selected item instead of using a sound. Although these three concepts are divided by age and experience, there is room for an individual to investigate all areas of the Explore Access file to best meet his or her needs.
- Page 73 Once the level of device experience is selected, there are three different activities to choose: find a requested breed of dog; find a requested flower; and find a specific planet. In the Intermediate Concept Beginner button, all the activities have one button on the screen at a time.
-
Page 74: Considering The User's Access Capabilities
Considering the User’s Access Capabilities The user’s access capabilities depend on the number of buttons on a page. File Buttons per Page 4 Basic Provides 4 buttons per page VocabPC Provides 12 buttons per page MultiChat Provides 15 buttons per page WordPower Offers 20, 25, 42, 48, 60, 80, 108, and 140 buttons per page... -
Page 75: Exploring Vocabulary Files
Exploring Vocabulary Files The application provides a variety of vocabulary files. To view these files, choose Menu > Library. Available vocabulary files will be listed. The vocabulary file that is currently open. An original vocabulary file that cannot be modified or deleted. To customize a vocabulary file, make a copy of it and customize the copy. -
Page 76: Available Vocabulary Files
Available Vocabulary Files From the list of available vocabulary files, tap on a file name, choose Open, and explore the file. Take some time to explore each of these files and see if one might be appropriate for the device user or get some ideas for creating your own. -
Page 77: Wordpower42
WordPower42 WordPower42 is a word-based vocabulary that allows for easy and intuitive communication. WordPower42 is a generative language system that will be familiar to those using WordPower on other systems, and it is easy to learn for new users. WordPower42 Basic WordPower42 Basic is a simplified version of WordPower42. -
Page 78: Wordpower80
WordPower80 WordPower80 is for someone who has good vision, motor skills, and literacy skills. WordPower80 vocabulary pages consist of core vocabulary, spelling, and word prediction. WordPower108 WordPower108 consists of a large number of high-frequency words on the main page, resulting in fast communication and quick access to core words. -
Page 79: Basic Scan
Basic Scan Basic Scan is primarily a phrase-based vocabulary for emerging communicators who access communication through auditory and/or visual scanning. Basic Scan was developed by Lisa Nobel Martin, MA, CCC-SLP, specifically for ChatFusion and NovaChat devices. Lisa has years of experience working with nonverbal pediatric patients at all stages of communication. -
Page 80: Intermediate Scan
Symbols, photographs, visual scenes, videos, or words can be used on the message, topic, and script pages. Included are pages that facilitate supported communication techniques, self-advocacy, directing care, and repair of communication breakdowns. Types of information typically included in communication books—such as pain and emotion scales, maps, and templates for personal information and life stories—... -
Page 81: Mycore
myCore myCore is a combination of core and phrase-based vocabulary geared toward individuals who have literacy skills. myQuickChat myQuickChat is an introductory communication system geared toward child and adult AAC users with complex communication needs. myQuickChat is available for both children and adults in 4, 8, and 12 locations, each with an identical 16-location Support Master Home Page. -
Page 82: Choosing A Language And Voice
Choosing a Language and Voice When you select a language, you can then select the voice you want to use for that language. For example, you can select one voice for Spanish and a different voice for English. Then, when you switch from one language to the other, the appropriate voice will be available. -
Page 83: Non-Dedicated Devices: Adding An Android Voice
If you are using ChatEditor: If you are using ChatEditor, you will not have access to the synthesizer voices. “SAPI” voices were provided with the installer for your computer. You should be able to select them from the Voice pull-down list. Note: ChatEditor is not intended to function as a speech generating device. -
Page 84: Using The Speech Display Bar (Sdb)
Using the Speech Display Bar (SDB) The Speech Display Bar (SDB) displays text that you enter or generate in the application. You can change the size of the text and the number of lines of text that appear in the window. Tapping on the SDB can speak all text generated. -
Page 85: Changing Sdb Settings
Changing SDB Settings To access the options for changing Speech Display Bar settings, choose Menu > Application Settings > Input. Option Description Tap to Speak This option toggles the option for the SDB to speak when chosen or not Tap to Expand This option toggles the option for the SDB to expand when chosen or not Enable Menu... -
Page 86: Clearing Text In The Sdb
Clearing Text in the SDB Set what happens to text in the Speech Display Bar after it is spoken. Choose Menu > Application Settings > Speech Output > Auto Clear. The Auto Clear options are displayed. Spoken text remains in the Speech Display Bar until you clear it. Immediate Text is cleared automatically from the Speech Display Bar as soon as it is spoken. - Page 87 To configure the SDB to display icons in addition to text: 1. Choose Menu > Application Settings > Style. 2. Tap SDB Icons to insert a checkmark. To return the SDB to a text-only display, tap SDB Icons to remove the checkmark.
-
Page 88: Highlighting Words As They Are Spoken In The Sdb
Highlighting Words as They are Spoken in the SDB To help with literacy, the Highlight when Spoken setting allows you to see the words highlighted in the SDB as they are spoken. When you select a color, words will be highlighted in that color one at a time in the SDB as they are spoken. - Page 89 4. Select Highlight Color. A color selection window opens. Yellow is the default color. 5. Select the color you want. The color you select will appear in the circle to the right of the Highlight Color option. 6. Return to your vocabulary. As the device speaks words in the SDB, they are highlighted one at a time in the color you selected.
-
Page 90: Holding Two Conversations At A Time
Holding Two Conversations at a Time Use the Side Chat feature to set up and hold two conversations at the same time. Select Menu > Application Settings > Speech Output. Turn Side Chat on. When you return to your home page, an icon with the number 1 appears in the SDB. -
Page 91: Changing The Sdb And Side Chat Sdb Background Colors
Changing the SDB and Side Chat SDB Background Colors You can change the SDB background color and the Side Chat SDB background color. As you toggle between conversations, you can see more easily which conversation is displayed. Conversation 1: Conversation 2: To change the SDB background color: 1. - Page 92 To change the Side Chat SDB background color: 1. Choose Menu > Application Settings > Style > Side Chat Background Color. A color selection window opens. White is the default color. 2. Select the color you want. The color you select will appear in the circle to the right of the Side Chat Background Color option.
-
Page 93: Using The Menu In The Sdb To Copy And Share Text
Using the Menu in the SDB to Copy and Share Text The menu in the SDB provides options for copying, pasting, and sharing the text currently in the SDB. Choose Menu > Application Settings > Input. Scroll to the Speech Display Bar section and select Enable Menu to turn the option on. -
Page 94: Working With Speech
Share Share the text in the SDB with an app that is available on your device. When you select this option, a list of app icons will be displayed. Select the app you want to use to share the text. An example of sending text from the Chat Software would be sending an email. -
Page 95: Adding Words To The Pronunciation Dictionary
Adding Words to the Pronunciation Dictionary Each synthesizer speaks words in its own way. You can add pronunciation exceptions to a dictionary for each synthesizer. The voice synthesizer on the Editor is not the same as the one on the device, and the two will not pronounce words in the same way. -
Page 96: Determining How A Word With Multiple Pronunciations Is Spoken
Determining How a Word with Multiple Pronunciations is Spoken Use the button pronunciation feature to determine how a word with multiple pronunciations is spoken for a specific button. This will not affect any other buttons in the vocabulary or in any other vocabularies. If you need to edit the pronunciation of all occurrences of the word in the application, that method is found in Application Settings. -
Page 97: Speaking After Every Character, Word, Or Sentence
Speaking after Every Character, Word, or Sentence You can configure the Chat software to speak after every character, every word, every sentence, or any combination of these settings. Choose Menu > Application Settings > Speech Output. Check one or more options. Setting Description Character... -
Page 98: Installing, Setting Up, And Using Chateditor
Installing, Setting up, and Using ChatEditor ChatEditor is a supplemental program that runs on a desktop or laptop computer running Microsoft Windows . It allows you to customize ® ® vocabulary files. Although customizing is also possible on the device itself, the Editor allows the family and/or professionals to customize the vocabulary when the device is not present. -
Page 99: Configuring Chateditor
Configuring ChatEditor The first time you open ChatEditor after installing it, you will be prompted to set up a configuration. 1. Select NovaChat/ChatFusion from the Choose Product window and click OK. 2. Select your language from the Choose Language window and click OK. 3. -
Page 100: Enabling Speech And Symbols In Chateditor
Enabling Speech and Symbols in ChatEditor When you install ChatEditor, messages similar to the following will be displayed: You must attach a PCS-configured NovaChat Device to enable and display PCS Symbols. Click OK to continue. Speech is currently disabled. Please connect a NovaChat/ChatFusion device to this computer to enable speech. Choose OK to close the message. -
Page 101: Using Vocabulary Files With Chateditor
Using Vocabulary Files with ChatEditor The ChatEditor Library contains the same vocabulary files as the device. “Available Vocabulary Files”. To explore files using ChatEditor, choose Library. My Resources stores all custom files. All default files are stored in the folder specifying the symbol set and language used. -
Page 102: Importing A Vocabulary File On Your Computer Into Chateditor
Importing a Vocabulary File on Your Computer into ChatEditor If you received a vocabulary file on a USB flash drive or attached to an email, and saved it to your computer, you can import it into ChatEditor. To import a vocabulary file using ChatEditor menu options: 1. - Page 103 4. Choose Open. A window shows the progress of the import. 5. When the import is complete, the file will be added to the My Resources folder in ChatEditor. Note: The file name you see in the My Resources folder may not match the file name in step 3 (above).
-
Page 104: Device And Editor Differences
Device and Editor Differences ChatEditor is not intended to function as a speech generating device. It is a support tool for modifying the client’s vocabulary so that the client can continue using the device while modifications are being made. Dialog boxes will appear slightly different and a couple of the options are modified for the computer. - Page 105 3. When you finish capturing a sequence of buttons, choose Copy to Clipboard. The sequence will be cleared from the Button Capture window. 4. In your document, insert the cursor and select Paste. The sequence will be pasted into the document. 5.
-
Page 106: Turning Edit Mode On
Turning Edit Mode On To edit a vocabulary file or any resource linked to it (pages, buttons, etc.), you must activate Edit Mode. You can edit a vocabulary file on the device or by using ChatEditor. Device: Choose Menu > Edit Mode. All the buttons are outlined, and the words “Edit Mode”, followed by the current vocabulary and page names, appear in red across the bottom row of keys. -
Page 107: Creating A Customized Vocabulary File
Creating a Customized Vocabulary File The original vocabulary files cannot be modified. This maintains the original, default vocabularies in case they may be needed at a later time. To create your own customized vocabulary file: 1. Determine which original vocabulary file will work as a starting point. -
Page 108: Modifying Button Text
Modifying Button Text You can modify the label or message text for any button. Or you can remove the text and fill the button with an image. Displaying the Button Text to Edit Choose Menu > Edit Mode. Then press and hold on the button. (Right- click if you are using the Editor.) A menu will open. -
Page 109: Editing The Button Text
Editing the Button Text In ChatEditor, click in the Label or Message box and enter your new text. In the application, tap in the Label or Message box to display the keyboard. Enter your new text. If you tap in the Label box, choose Next to move to the Message box. -
Page 110: Adding Or Modifying A Button Image
Adding or Modifying a Button Image Choose Menu > Edit Mode. Then press and hold on the button. (Right- click if you are using the Editor.) A menu will open. Choose Edit Button to display the Button Properties. Choose the image you want to use. To locate the image, you can choose Find, Browse, Search, or Import. -
Page 111: Finding An Image From The Device Library
Finding an Image from the Device Library From the Button Properties, choose Find or Browse to open a list of categories. Choose a category to open a list of images. Then choose the image you want. The image will be displayed in the Button Properties. Choose Save. Searching for an Image in the Device Library From the Button Properties in the Editor, choose Search to search for images with the label name. -
Page 112: Creating Your Own Image
Creating Your Own Image 1. Choose Menu > Edit Mode. 2. Press and hold on the button. A menu will open. 3. Choose Edit Button to display the Button Properties. 4. From the Button Properties, choose Camera. 5. Tap the camera button. Note: The camera button may look different on your device. -
Page 113: Using An Existing Image
Using an Existing Image If you find that the image you need is not available from the device library, you can use your own digital, scanned, downloaded, or homemade image and import that image directly into the button. Note: If you are using the Editor, the image must be on the same computer. -
Page 114: Changing Skin Tones
Changing Skin Tones You can change the skin tones that appear on buttons. Apply a specific skin tone an entire vocabulary • Apply random skin tones to a vocabulary • • Apply a skin tone to a specific button Setting a Skin Tone for an Entire Vocabulary File Use the Skin Tone feature to apply a specific skin tone to buttons in the current vocabulary. - Page 115 4. Select the skin tone you want. Your selection will appear in the circle after “Skin Tone”. 5. Close the Vocabulary Settings and exit Edit Mode. As you navigate through your vocabulary, images of people will display the skin tone you selected.
-
Page 116: Applying Random Skin Tones To Buttons In A Vocabulary
Applying Random Skin Tones to Buttons in a Vocabulary Use the Skin Tone feature to apply random skin tones to buttons in a vocabulary. The random skin tone pattern will apply to the current vocabulary only. Note: This feature currently applies only to symbols from the SymbolStix symbols set that allow the skin tone to be changed. - Page 117 4. Close the Vocabulary Settings and exit Edit Mode. Navigate through your vocabulary file and note how the images with skin tones have been randomized. 5. If you do not like how the images now appear, an option is available to re-randomize the images.
-
Page 118: Changing The Skin Tone Of A Specific Button's Symbol
Changing the Skin Tone of a Specific Button’s Symbol Use the Skin Tone button option to change the skin tone on a specific button. This will change the skin tone for the button in that location only. It will not affect any other buttons in the vocabulary. For information on changing the skin tone for an entire vocabulary, see “Setting a Skin Tone for an Entire Vocabulary File”. - Page 119 3. Choose Edit Button to display the Button Properties. 4. Select Skin Tone. The skin tone options will be displayed. Select the skin tone you want. Use vocabulary setting If the button has a skin tone set, it overrides the vocabulary skin tone setting within Vocabulary Settings.
- Page 120 5. Select the skin tone you want. The selected skin tone will appear on the button preview. 6. Choose Save. 7. Choose Menu > Edit Mode to exit Edit Mode. The button will show the new skin tone. NovaChat User’s Guide...
-
Page 121: Hiding Buttons
Hiding Buttons It may be useful to hide some of the buttons when initially presenting a vocabulary to the device user. Presenting all buttons at once may be overwhelming. Hiding some of the buttons will allow the device user to more easily focus on specific vocabulary being presented. -
Page 122: Hiding Or Showing Multiple Buttons
5. Choose Save and exit Edit Mode. The button is hidden and the button action is disabled automatically. To hide a single button using the Editor, right-click, select Edit Button, choose the Style tab, and uncheck the Visible box. Hiding or Showing Multiple Buttons To choose buttons one by one to hide or show. -
Page 123: Saving Hidden Button Settings
Saving Hidden Button Settings If you hide buttons to work on a particular curriculum and would like to save those settings for your next session, choose Menu > Application Settings > Input and check Show Hidden Buttons. The device or Editor will remember all of the currently hidden buttons. -
Page 124: Hiding And Showing Button Images
Hiding and Showing Button Images If you prefer buttons to display the text labels only, with no images, choose Menu > Application Settings > Style. Then deselect Show Button Images. Buttons that have both labels and images will now display the labels only. In some vocabularies, buttons that have images only (such as the Home and the Next and Back arrows) will retain their images. -
Page 125: Using Vocabulary Builder
Using Vocabulary Builder Note: This feature is not available in all NovaChat models. Vocabulary Builder is a therapeutic tool designed to teach new vocabulary by creating and managing word lists. Show only the words you want and the paths to get to them, and hide the rest. Vocabulary Builder assists one step at a time as you introduce small sets of vocabulary within the language system. - Page 126 To build a list using words in the vocabulary file: 1. Choose Menu. 2. Choose Vocabulary Builder. 3. Choose New. 4. Name the list and select Save. 5. Either scroll through the list and select the words you want or type the word and then select it.
- Page 127 To edit a list: When the individual learns these words and you want to add more, turn on Vocabulary Builder and select the words you want to add. 1. Choose Menu. 2. Choose Vocabulary Builder. 3. Choose the list to edit. 4.
-
Page 128: Modifying Button Styles
Modifying Button Styles You can modify styles and color saturation for individual buttons, all buttons on a page, or all buttons in a vocabulary file. You can also override button styles set up for pages and vocabulary files for a single button. Modifying a Button Style You can only modify a button’s style in Edit Mode. -
Page 129: Modifying Button Color Saturation
5. Change the font, body color, font color, border color, font size, or border width. Tap or click the Font list arrow to open a list of available fonts. • Tap or click Body, Font, or Border and select a color. •... -
Page 130: Overriding A Vocabulary Button Style
Overriding a Vocabulary Button Style You can modify the style of all buttons in a vocabulary file at one time. 1. Open the vocabulary file you want to modify. 2. Choose Menu > Edit Mode. 3. Press and hold anywhere on the page. (Right-click if you are using the Editor.) A list of button options appears. -
Page 131: Overriding A Specific Button's Style
Overriding a Specific Button’s Style You can override a page style or vocabulary file style by changing one or more attributes of a specific button. 1. Choose Menu > Edit Mode. 2. Press and hold on the button you want to modify. (Right-click if you are using the Editor.) A list of button options appears. -
Page 132: Modifying A Button Arrow Link
Modifying a Button Arrow Link Linking buttons display a linking arrow in the upper right corner of the button. The arrow indicates that the button will take you to a different page. You can resize or hide the linking arrow. To resize a linking arrow: 1. -
Page 133: Adding Or Modifying A Button Action
Adding or Modifying a Button Action A single button can perform a number of different actions. For example: different speaking options; adding grammatical endings to words; clearing the display; or backspacing. To add or modify a button’s action: 1. Choose Menu > Edit Mode. 2. -
Page 134: Available Button Actions
Available Button Actions Action Name Description No Action Performs no action Add Message to Displays the text of the button’s message in Display the Speech Display Bar (SDB), but does not speak the words Add Time/Date to Displays the current date and time in the SDB Display Apply Grammar Identifies a word as an adjective, noun, or... - Page 135 Action Name Description Clear Last Word Deletes the last word in the SDB Computer Control Set up buttons on your device that will execute - Command keyboard commands on an external computer. For details see “Appendix E: Using InputStick to Control Your Computer”...
- Page 136 Action Name Description Load Display Recalls text that had been saved and adds it to the display Note: If a person who uses scanning needs to use this button action, a profile can be set up to access the feature. For information on setting up a profile, see “Creating and Loading Profiles”...
- Page 137 Action Name Description Record Speech Records someone speaking Note: If a person who uses scanning needs to use this button action, a profile can be set up to access the feature. For information on setting up a profile, see “Creating and Loading Profiles”...
- Page 138 Action Name Description Select Profile Changes Application Settings to match the saved set of settings that was saved as a profile Speak Speaks all the content in the SDB Speak Label Only Speaks the button’s label, but doesn’t display the text in the SDB Speak Last Speaks the last sentence in the SDB Sentence...
- Page 139 Action Name Description Texting - Add Adds a new contact from a received text Number as message. Contact Texting - Compose Creates a message to text to one of your Message contacts. This action is used on the Reply button. When you choose Reply, the action takes you to Home, with the “Enter the text to send”...
- Page 140 Action Name Description Texting - Navigate Navigates to your list of conversations. to Conversations Texting - Navigate Navigates to the text message details page, to Message which displays the text, date, and time of the Details selected message. Note: This action displays the date only if the message is older than one day.
- Page 141 Action Name Description Visit Exception If you have one button on a Visit page that you don’t want to return to the previous page, use a Visit Exception action to leave it on the page for one additional hit. Volume Down Turns down the volume.
-
Page 142: Using Navigate, Visit, And Jump To Page
Using Navigate, Visit, and Jump to Page Action Description Navigate Navigate takes you to a new page and leaves you there. You can edit a button to add animation to a page transition, change the order of actions, or remove an action. -
Page 143: Storing Text From The Sdb On A Button
Storing Text from the SDB on a Button The button action Store Text to Button stores the text currently displayed in the Speech Display Bar on the next button you choose. You may find this to be a good alternative to choosing Edit Mode and using the Edit Button Properties to add text to a button. -
Page 144: Example: Using The Store Text To Button Action
Example: Using the Store Text to Button Action This example from the WordPower60 Basic vocabulary uses a button that is already set up with the Store Text to Button action. 1. Enter your text in the SDB. 2. Choose Groups > Stories & Scripts. 3. -
Page 145: Copying Buttons
Copying Buttons The Chat software allows you to copy a button, copy and reuse the same button, copy a button style, and use a button in multiple places. Copying and Pasting a Button Buttons can be copied and pasted to new locations. If you modify a copy of a button, you will edit only the copy. -
Page 146: Modifying A Button That Is Reused On Multiple Pages
Modifying a Button that is Reused on Multiple Pages When you want to modify a button that was copied using the menu option Use Same Button, you can choose to modify that one instance of the button or all instances of the button. 1. -
Page 147: Prioritizing Buttons
Prioritizing Buttons Buttons can be prioritized by their position on the page or by their size. These procedures are performed with Edit Mode on. Rearranging Buttons You can quickly rearrange the layout of buttons on a page using “drag- and-drop swapping”. This procedure allows you to swap the contents of two buttons. -
Page 148: Working With Button Sets
Working with Button Sets A button set is a group of buttons “stacked” in the same location. For example, consider how a keyboard works. When you press the Shift key, uppercase letter keys are available in the same key locations as, or “on top of”, lowercase letter keys. - Page 149 If you chose the key, different symbols are displayed in the same locations as, or on top of, the previous symbol keys. In each location, a lowercase letter, an uppercase letter, a symbol, and a different symbol are “stacked”. This is a button set. Button sets on a vocabulary page work the same way.
-
Page 150: Creating A Page
Creating a Page Pages are levels of specific vocabulary linked together to create a vocabulary file specific to the device user. You can create a page by using any of these methods: Create a new page; create a copy of a page; create a page from a template;... -
Page 151: Copying A Page From A Different Vocabulary File
Copying a Page from a Different Vocabulary File You can copy one or more pages from a different vocabulary file to use in the current vocabulary file. 1. Choose Menu > Pages > Menu > Import. 2. Choose the vocabulary file that includes the page you want. 3. -
Page 152: Working With Special Pages
Working with Special Pages You can set a vocabulary page as a special page. Your home page and texting pages are special pages. You can use special pages as follows: Set any vocabulary page as your home page • Set an imported texting pages as a special page •... -
Page 153: Setting An Imported Texting Page As A Special Page
Setting an Imported Texting Page as a Special Page 1. Choose Menu > Edit Mode > Pages to open a list of available pages. 2. Scroll to the text page name. 3. Press and hold on the page name. A list of options appears. 4. -
Page 154: Setting A Special Page As Your Home Page
Setting a Special Page as Your Home Page This example shows how to use a texting special page, Texting Conversations, as your home page. 1. Choose Menu > Edit Mode > Pages to open a list of available pages. An icon precedes the name of each special page in the list. For example, your home page and texting pages: Note: The checkmark indicates that this page is currently open in... - Page 155 4. Select Home and select Text Conversations. 5. Select Save. 6. When you make a special page your home page, two icons precede the page name. If the page is currently open, a checkmark also appears. 7. Choose Back to exit the list of pages. 8.
-
Page 156: Using A Special Page As A Template
Using a Special Page as a Template You can use a copy of an existing vocabulary page as a template to create new pages quickly. 1. Select Menu > Edit Mode > Pages to open a list of available pages. 2. -
Page 157: Creating A Whiteboard Page
Creating a Whiteboard Page Whiteboards can be used for drawing, collaborating, and sharing. To create a whiteboard page, create a new page that has a large button and select the Whiteboard button action. Note: WordPower vocabularies already include a whiteboard page. Choose Groups >... - Page 158 Note: You won't want to overwrite the column of buttons that contains the Home and Go Back buttons. For example: 14. Choose Save. 15. Push and hold the large button, choose the Actions tab, and tap the list arrow to open a list of actions. 16.
- Page 159 20. Your whiteboard is ready to use. Tool Description This tool toggles between the pencil and eraser. It defaults to pencil so drawing is possible immediately upon opening the page. When the eraser is chosen, instead of erasing anything you move it over, when tapping the screen it erases the last addition.
-
Page 160: Creating A Visual Scene
Creating a Visual Scene You can create visual scenes that include any of the following: Hotspots on the image that speak • Hotspots on the image that produce sounds • • Hotspots on the image that navigate to other vocabulary pages Buttons surrounding the image that speak or navigate to other •... -
Page 161: Create A Linking Button
Create a Linking Button 1. Go to the page that you want to link to your new scene. 2. Choose Menu > Edit Mode. 3. Press and hold the button you want to link to the visual scene and choose Edit Button. The Button Properties will be displayed 4. -
Page 162: Create A Visual Scene Page
Create a Visual Scene Page 1. From the Button Properties, choose the Actions tab and tap the list arrow to open a list of actions. 2. Choose Navigate. A list of pages will open, allowing you to select the page to navigate to. 3. - Page 163 7. Under “Alignment”, select Center or Fit. Fit will stretch the image to fill the page. If you stretch the image, the aspect ratio will not change, so it might not totally fill the page. 8. Choose Save. “Navigate (My Farm, No Animation)” will be displayed below “Add an action”.
-
Page 164: Add A Transparent Button To The Visual Scene Page
Add a Transparent Button to the Visual Scene Page In Edit Mode, the page created in Create a Visual Scene Page appears as follows: You could create a button that speaks the name of an animal, makes a sound, and/or navigates to another vocabulary page. This button will act as a hotspot when touched. - Page 165 5. Choose Transparent. This will allow the image to show through the button. The image preview will display a checkerboard pattern to indicate transparency. Note: If you do not want to add a sound or navigation, skip steps 6 and 7 and proceed to step 8. 6.
- Page 166 10. Press and hold the transparent button, choose Change Button Size, and adjust the vertical and horizontal cells. For example: 11. Choose Save. The transparent pattern will expand to the size you specified, showing the area the button will cover. Note: You may need to change the button size several times to cover the area you want.
-
Page 167: Modify A Button's Actions
Modify a Button’s Actions In the example above, choosing the cow button would display and speak “cow”, play a “moo” sound, and display a page about dairy food. If you decided to modify the button so that it would clear existing text from the Speech Display Bar (SDB), then display and speak “cow”, play a “moo”... -
Page 168: Alternative: Create The Scene And Then The Linking Button
Alternative: Create the Scene and then the Linking Button If you prefer to create your visual scene first, and then create the linking button, do the following: 1. Choose Menu > Edit Mode > Pages. 2. Choose Menu > New Page. 3. -
Page 169: Create A Visual Scene With Buttons Surrounding The Image
Create a Visual Scene with Buttons Surrounding the Image You may prefer to create a visual scene with buttons outside the image instead of hotspots on the image. Copy basic function buttons from other pages and paste them onto your visual scene page. -
Page 170: Using Keyboards
Using Keyboards A number of keyboards are available throughout the system. For example, WordPower files offer ABC and QWERTY options, MultiChat 15 provides a keyboard option for those using a keyguard, and each default file provides variations of keyboards to choose from. You can select the specific keyboard you need or link a button to a keyboard. -
Page 171: Adding Acapela Vocal Smileys
Adding Acapela Vocal Smileys Acapela-Group has created the capability of using Voice Sounds and Exclamations. Adding a Sound Sounds are produced by the speaker’s voice for laughing, breathing, sneezing, coughing, or whatever sounds our voices can produce to mimic sounds we make in our daily lives. Sounds are always between two pound signs;... -
Page 172: Example: Add A Smiley Face And Laugh Sound To A Button
Example: Add a Smiley Face and Laugh Sound to a Button A button can be set up with the command in the message. However, if you use the “speech message” action, the command appears in the Speech Display Bar (SDB), which isn't ideal. A better way may be to set up a button with an emoticon symbol in the message. -
Page 173: Setting Access Options
Setting Access Options Some people may have trouble reliably selecting individual buttons or keys due to tremors or lack of fine motor control. To assist these individuals, the Chat software provides several different methods of "filtering" user input to make selections more reliable. Choose Menu >... -
Page 174: Activating Buttons On Touch Or Release
Activating Buttons on Touch or Release When you set Activate on Release, you can touch anywhere on the screen and drag your finger (or stylus) around until you are on the button you want. Releasing the button will select it. Activate on Release toggles between activating the screen immediately upon touch or upon release. -
Page 175: Setting A Time To Prevent Selection Of A Button Twice
Setting a Time to Prevent Selection of a Button Twice Note: Starting with Chat software release 2.26, Release Time affects the SDB as well as buttons. Setting a Release Time helps prevent accidental selection of the same button twice. After a button selection, another button cannot be selected until the release time expires. -
Page 176: Setting Up A Visual Indication When A Button Is Selected
Setting up a Visual Indication when a Button is Selected Some people may benefit from a visual indication when a button is selected. The Button Press Draw setting allows you to set the type of visual indication. Choose Menu > Application Settings > Input > Button Press Draw. -
Page 177: Using Visual Effects
Using Visual Effects Visual effects help you identify selected items. They provide feedback when you select a button, helping you better understand the relationship between buttons and their associated actions. Choose Menu > Application Settings > Input > Visual Effects to access the visual effects settings Effect Description... -
Page 178: Setting Up An Auditory Effect When A Button Is Selected
Effect Description Magnify When Magnify is turned on, the active area is magnified. Magnify When Magnify is turned on, Magnify Multiplier Multiplier allows you to set the amount by which the active area is magnified. To increase the amount of magnification, tap +. To decrease the amount of magnification, tap –. -
Page 179: Using Auditory Effects
Using Auditory Effects Auditory effects (auditory prompts) are used to help the user identify selected items. They provide feedback when a button is selected, helping the user better understand the relationship between buttons and their associated actions. To access the auditory effects settings, choose Menu > Application Settings >... - Page 180 Setting Description Button Auditory Choose to hear the button label or message Effect used during button activations. See “To set what you hear when a button is activated”. Listen to Entire Some individuals may benefit from hearing the Effect entire auditory effect while auditory Fishing is turned on but cannot physically maintain the button until it is heard.
- Page 181 To set the auditory effects volume: Use the Effect Volume setting to set how loud the auditory effect is when using the device speaker or an earphone or headset. This allows you to set a volume level for auditory effects that is different from the volume level for speech.
- Page 182 To select the voice for auditory effects: 1. With Enable Auditory Effects selected, choose Voice Settings. The Voice window opens. 2. Tap the arrow to the right of the currently selected voice to open a list of voices. Choose the voice you want. If necessary, adjust the voice’s talking speed.
-
Page 183: Using Visual And Auditory Effects To Locate A Button
Using Visual and Auditory Effects to Locate a Button An individual with visual or cognitive impairment or attention disorder may benefit from using visual and/or auditory effects (auditory prompts) to identify which button to select on a vocabulary page. These effects provide cues to help the user identify buttons. -
Page 184: Working With Gestures
Working with Gestures A gesture is a motion that can be made to the screen to trigger a specific action. An example of a gesture might be a “swipe down” on the screen that would clear the text from the Speech Display Bar. A gesture can apply to a particular page (see “Creating a Gesture for a Page”), or it can be applied to all pages in a vocabulary file (see... -
Page 185: Creating A Gesture For All Pages
Creating a Gesture for All Pages To create a gesture for all pages in a vocabulary file: 1. Open the vocabulary file. 2. Choose Menu > Edit Mode > Edit Vocabulary > Gestures. 3. Choose the gesture from the list. For example: “One Finger Swipe Down”. -
Page 186: Setting Up Switch Scanning
Setting up Switch Scanning As an alternative to directly selecting each button on the screen, the application offers single-switch scanning and two-switch scanning. You can choose to have scanning activate automatically, or you can choose to either hold the switch or step to each location. With Auto Scan off, a switch activation is required to move the scan through each button, one at a time. - Page 187 Setting Description Enable Turns scanning on or off. You must turn Scanning scanning on to access the other settings. Note: Some button actions require physical contact with the screen that a person who uses scanning may not be able to provide. We have avoided these button actions when scanning is turned on to maintain the person’s independence: Record Speech, Load Display,...
-
Page 188: Setting Up Wired Switches
Setting up Wired Switches 1. Plug the switch into switch jack A or switch jack B on the device. If you are using two switches, plug a switch into each jack. Cords and cables are potential entanglement or strangulation hazards. Please consider this prior to placing these items with device users. -
Page 189: Setting Up A Bluetooth (Wireless) Switch On A Device With Android 10 Or Below
Setting up a Bluetooth (Wireless) Switch on a Device with Android 10 or Below Bluetooth switches are typically set up as a keyboard. PRC-Saltillo has developed an AeroSwitch® that offers a proprietary Broadcast mode. See the switch setup instructions for the mode that is compatible with your device. - Page 190 4. Choose Switch Configuration and choose the number of switches you plan to use. If you select One Switch in the Switch Configuration window, Switch 1 will be active and Switch 2 will be grayed out. If you select Two Switch, both Switch 1 and Switch 2 will be active.
-
Page 191: Setting Up A Bluetooth (Wireless) Switch On A Device With Android 11 Or Higher
Setting up a Bluetooth (Wireless) Switch on a Device with Android 11 or Higher Bluetooth switches are typically set up as a keyboard. PRC-Saltillo has developed an AeroSwitch that offers a proprietary Broadcast mode. See the switch setup instructions for the mode that is compatible with your device. - Page 192 4. Choose Switch Configuration and choose the number of switches you plan to use. If you select One Switch in the Switch Configuration window, Switch 1 will be active and Switch 2 will be grayed out. If you select Two Switch, both Switch 1 and Switch 2 will be active.
-
Page 193: Selecting The Scan Pattern
Selecting the Scan Pattern To select the scan mode: 1. Choose Menu > Application Settings > Input > Scanning > Patterns > Mode. The Mode window will be displayed. 2. Tap the arrow to the right of the currently selected mode. A menu of mode options will be displayed. -
Page 194: Using Linear Scan Mode
Using Linear Scan Mode A linear scan steps through the buttons from left to right beginning in the first row. When the button you want is highlighted, activate your switch. To select linear scan mode, choose Menu > Application Settings > Input >... -
Page 195: Using Linear Step Scan Mode With A Single Switch
Using Linear Step Scan Mode with a Single Switch 1. Verify that Enable Scanning is selected. Choose Menu > Application Settings > Input > Scanning. A checkmark should appear in the Enable Scanning checkbox. 2. Turn Auto Scan off. Choose Switch Access and verify that Auto Scan is not selected. -
Page 196: Using Row/Column Scan Mode
Using Row/Column Scan Mode A row/column scan highlights each row of buttons beginning with the top row and move down the screen. When the row that contains the button you want is highlighted, activate your switch. The scan will then step through the buttons from left to right across the row. -
Page 197: Using Block Scan Mode
Using Block Scan Mode A block scan highlights blocks of buttons. The blocks are defined by the settings in the Mode window. When the block that contains the button you want is highlighted, activate your switch. The scan will then highlight smaller blocks, rows, or columns within the block, depending on your settings. -
Page 198: Using Flow Scan Mode
Using Flow Scan Mode A flow scan highlights groups of buttons that flow from one row into the next. The flows are defined by the settings in the Mode window. When the flow that contains the button you want is highlighted, activate your switch. Flow scanning is provided as a scanning option for individuals who do not require consistency within a scan pattern. -
Page 199: Optimizing Block And Flow Scans
Optimizing Block and Flow Scans Scan Optimization only works in Block Scan Mode and Flow Scan Mode. To optimize block and flow scans, Choose Menu > Application Settings > Input > Scanning > Patterns. Then turn on Scan Optimization. When Scan Optimization is turned on, blocks or flows are scanned in the most efficient way on each page. -
Page 200: Configuring Speech Display Bar (Sdb) Scans
Configuring Speech Display Bar (SDB) Scans To include the SDB in scans: Selecting the SDB speaks the current text. Turn scanning of the Speech Display Bar on or off by choosing Menu > Application Settings > Input > Scanning > Patterns > Scan SDB. To include the SDB Clear button ( ) in scans: Turn scanning of the Speech Display Bar’s Clear button ( ) on or off by choosing Menu >... -
Page 201: Configuring Notification Scans
Configuring Notification Scans Turn scanning of notifications in the SDB on or off by choosing Menu > Application Settings > Input > Scanning > Patterns > Scan Notifications. When Scan Notifications is turned on and a text message notification is scanned and selected, the conversations list opens. -
Page 202: Configuring Re-Scans
Configuring Re-scans Select the number of times you want your device to scan the page automatically. Once you reach the set number of re-scans, the scan will stop until a switch is activated again. To set the number of re-scans, choose Menu > Application Settings > Input >... -
Page 203: Turning On Auto Restart
Turning on Auto Restart This option allows you to restart a scan cycle automatically after an activation. To turn on auto restart, choose Menu > Application Settings > Input > Scanning > Scan Timing > Auto Restart. Configuring Custom Scan Patterns Use the Scan Editor to create and save custom scan patterns for the user. -
Page 204: Working With Groups And Subgroups
5. Select either All pages or Just this page. The Scan Editor will open at the default top level. 6. Top Level (Default) is selected and the Scan Editor menu options appear in the lower left corner. Working with Groups and Subgroups The Scan Editor allows you to set up groups and subgroups of buttons for scan patterns on a page. -
Page 205: Using The Scan Editor Menu Options
Using the Scan Editor Menu Options For an easy way to get started, select Create Subgroups Automatically or Create All Automatic Subgroups. A list of groups will appear under “Top Level”. From the list of groups, select the group you want to include in the scan. When you select a group, its name will appear in bold and the corresponding group of buttons in the preview screen will be highlighted. - Page 206 Edit Name & Scan Mode The name is what will be spoken as the auditory prompt. You can modify the name and scan mode of the selected group or subgroup. 1. Select Edit Name & Scan Mode. 2. Tap in the Name field and enter the new name. 3.
- Page 207 Add SDB Add the Speech Display Bar SDB) to the group list. 1. Tap Top Level. 2. Tap Add SDB. 3. “Speech Display Bar” appears at the bottom of your group list. 4. Either leave “Speech Display Bar” where it is or tap Move Up as many times as necessary to move the SDB to the top of the list or wherever else you want it.
-
Page 208: Creating A Custom Scan Pattern
Delete Subgroups Delete all the subgroups for the selected group. 1. Tap the group you want to delete. 2. Select Delete Subgroups. 3. All subgroups for the group will be deleted. Delete Group and Subgroups Delete the selected group and all its subgroups or delete the selected subgroup and all its subgroups. - Page 209 7. Choose Create Subgroups Automatically. A list of groups will appear under “Top Level”. Note: The number of groups listed is controlled by the scan mode setting: Menu > Application Settings > Input > Scanning > Patterns > Mode. 8. From the list of groups, select the group you want to include in the scan.
- Page 210 Example: Tapping a highlighted button on the preview screen will remove it from the scan pattern. Tapping an unhighlighted button will add it to the scan pattern. 11. Choose Menu. Two menu options are displayed: Set as Default and Delete Scan Pattern & Quit. Choose Set As Default. The following prompt will be displayed: Setting this scan pattern as the default will overwrite the scan patterns of other pages.
-
Page 211: Deleting A Custom Scan Pattern From One Page
Deleting a Custom Scan Pattern from One Page If you no longer need a custom scan pattern that you applied to a page, follow these steps to delete it. 1. Choose Menu > Edit Mode > Pages. 2. Choose the page that has the custom scan pattern. The following menu will open: 3. -
Page 212: Deleting A Custom Scan Pattern From All Pages
Deleting a Custom Scan Pattern from All Pages If you no longer need a custom scan pattern that you applied to all pages, follow these steps to delete it. 1. Choose Menu > Edit Mode > Pages. 2. Choose any page in the vocabulary that has the custom scan pattern. -
Page 213: Setting Up Button Message Pop-Ups To Develop Literacy Skills
Setting up Button Message Pop-ups to Develop Literacy Skills When the Button Message Pop-up feature is turned on, selecting a button that speaks will display a pop-up of the spoken word or phrase. Some people may benefit from the display of an animated word along with the spoken word when a button is selected. - Page 214 Hint: You may want to create a profile with the Button Message Pop-Up setting turned on and a separate profile with the setting turned off. For example, when you want to spend some time working on a page of animated words or working on the literacy of core words, you could load the profile that has the setting turned on.
-
Page 215: Changing Device Orientation Settings
Changing Device Orientation Settings The NovaChat device allows the screen to rotate automatically when the device is tilted. This can be quite handy or a nuisance for some users. The application allows you to change orientation settings and use orientation tilt with the Speech Display Bar (SDB). Changing Orientation Settings Depending on the button layout, one orientation may be more helpful than another. -
Page 216: Using Orientation Tilt With The Sdb
Using Orientation Tilt with the SDB We know there are times that using the voice output might not be appropriate but communication is still needed. This might be a library or church setting. The tilt option offers an Expand option of the Speech Display Bar to offer the communication partner an expanded version of the text. -
Page 217: Finding A Word Using The Word Finder Menu Item
Finding a Word using the Word Finder Menu Item When you don’t know where a word is located in your vocabulary, use Word Finder to find the path to the word. Important! This feature has limited functionality when you are working with vocabulary files that have button sets, including WordPower files. -
Page 218: Finding A Word Using A Button Action
When Show Menu Item is turned off, Word Finder does not appear as a menu item. Finding a Word using a Button Action When you don’t know where a word is located in your vocabulary, use Word Finder to find the path to the word. Important! This feature has limited functionality when you are working with vocabulary files that have button sets, including WordPower files. -
Page 219: Setting The Display Time For Word Finder Results In The Sdb
Setting the Display Time for Word Finder Results in the To set the amount of time each Word Finder result is displayed in the Speech Display Bar, Choose Menu > Application Settings > Word Finder > Flip Interval. The current interval is displayed. The default flip interval is 6 seconds. -
Page 220: Setting Up And Using Word Prediction
Setting up and Using Word Prediction Word prediction helps improve your ability to communicate by “predicting” a word you intend to speak, thereby reducing the number of letters you need to enter. When you enter the first letter on the keyboard, the Chat software displays a list of words beginning with that letter. -
Page 221: Choosing The Default Dictionary
Type Description Learning + Static Word prediction includes the ability to learn and add words to the large word prediction dictionary. The settings that apply to learning are available. Choosing the Default Dictionary The default is the word prediction dictionary that will be used as the basic source of words for predicting. -
Page 222: Adding Words Using The Add Learned Words Screen
Adding Words using the Add Learned Words Screen Use the Add Learned Words screen to add words directly to the learning word prediction dictionary. This screen accumulates an alphabetical list of all words you added from all sources—a vocabulary keyboard, the Add Learned Words screen, or an imported text file. -
Page 223: Adding Words By Entering Them In The Vocabulary
To review your learning prediction dictionary: Choose Menu > Application Settings > Literacy > Prediction > Add Words. The Add Learned Words screen opens. Either scroll through the list or enter letters in the text field to jump to specific locations in the list. Adding Words by Entering them in the Vocabulary In your vocabulary, choose the keyboard button to display the keyboard. -
Page 224: Reviewing New Words For Prediction
Reviewing New Words for Prediction The Review Words setting opens the screen from which you can review words before they are added to the word prediction dictionary. Only words entered from the keyboard in a vocabulary will be reviewed. Words added from the Add Learned Words screen or an imported text file will not be reviewed. -
Page 225: Excluding Words From Prediction
Excluding Words from Prediction Use the banned words list to prevent specific words from being predicted. To add a word to the banned words list: 1. Choose Menu > Application Settings > Literacy > Prediction > Banned Words. 2. The Prediction Banned Words screen opens. 3. -
Page 226: Importing Predictions
Importing Predictions You can add words by importing them for learning prediction from a text file (.txt). The text can be in the form of individual words, sentences, or paragraphs. 1. Create a text file by either of these methods: Copy and Copy the text you want from your source file and paste... -
Page 227: Deleting Prediction Words
4. After you copy the file, return to the Chat software and choose Menu > Application Settings > Literacy > Prediction > Import Predictions. The Prediction Import screen displays the text file you created with a checkmark to the right. 5. - Page 228 To delete individual learned words: Choose Delete Words. The Delete Learned Words screen lists words that can be deleted. When the list of words is long, either scroll through the list or enter letters in the text field to jump to specific locations in the list. To list words in order by frequency of use, select Order by count.
-
Page 229: Using Abbreviation Expansion
Using Abbreviation Expansion Abbreviations can be used instead of entering an entire word. Some abbreviations have been provided in the Chat software. Those abbreviations cannot be modified or deleted. To view the existing abbreviation library: Choose Menu > Application Settings > Abbreviations. To add a new abbreviation: 1. -
Page 230: Non-Dedicated Devices: Restricting Access
Non-Dedicated Devices: Restricting Access Important! This section only applies to non-dedicated devices. For information on restricting access on a dedicated device, see “Dedicated Devices: Restricting Access”. When you want to prevent the user from changing application settings, accessing operating system features, or using apps, you can do any of the following: Block access to application settings;... -
Page 231: Blocking Access To The Operating System And Apps
Blocking Access to the Operating System and Apps Not everyone will benefit from having access to the operating system and apps. To make your NovaChat device a “closed” device that will only allow the end user to access the application, enable Kiosk Mode. Important! If the Kiosk Mode option is not available, you have a dedicated device with an operating system older than Android 5. -
Page 232: Resetting Your Passwords
Resetting Your Passwords If you forget your Menu Lock password, enter BOSCO to overwrite the existing password. If you set a Kiosk Mode password and you forget it, enter bazinga to overwrite the existing password. Disabling the Power and Volume Buttons If you need to disable the device power button and/or volume button, use the Android operating system to toggle interaction control. -
Page 233: Dedicated Devices: Restricting Access
Dedicated Devices: Restricting Access Important! This section only applies to dedicated devices. For information on restricting access on a non-dedicated device, see “Non- Dedicated Devices: Restricting Access”. By default, the user will have access to the application settings and the advanced system settings, but will not have access to apps. -
Page 234: Creating A Kiosk Mode Password
Creating a Kiosk Mode Password If you want to require a password to disable Kiosk Mode, do the following before you enable Kiosk Mode. 1. Choose Menu > Application Settings > System > Kiosk Mode. 2. Choose Require Password. A Password prompt will be displayed with a keyboard. -
Page 235: Creating And Loading Profiles
Creating and Loading Profiles Profiles provide a snapshot of the current settings of the system to be saved for easy access at a later time. You can save multiple profiles to be used when needed. Creating multiple profiles allows you to switch between groups of settings. -
Page 236: Deleting A Profile
Deleting a Profile 1. Choose Menu > Application Settings > Profiles > Delete. 2. Choose the profile to delete from the list. 3. Choose Yes at the confirmation prompt. Restoring Default Profile Settings At any time, you can restore the default settings. 1. -
Page 237: Setting The Date And Time
Setting the Date and Time You can set the date and time from the Application Settings menu, and you can create a button that speaks and shows the date, time, or both in the Speech Display Bar (SDB). Changing Date and Time Settings Choose Menu >... -
Page 238: Adjusting Audible And Haptic Feedback
9. Select the list arrow to list the date and time options. 10. Select Date and Time, Date, or Time. The option you select will appear after “Add”. 11. Select Save. The current actions for the button will be listed. Optional: Remove any existing actions for the button that you do not want to include. -
Page 239: Analyzing Language Development
Analyzing Language Development Important! This section only applies to non-dedicated devices. You can use the data logging capabilities of your device to collect information on a person’s language development. Then you can upload that information to the Realize Language website. Collect data on Upload the data to the Create easy-to-... -
Page 240: Creating A Privacy Password
Creating a Privacy Password Data logging provides the option to create a privacy password to protect the data you collect against unauthorized access. 1. Choose Menu > Application Settings > Data Logging. The first time you use Data Logging, the following message will appear: Data logging collects personal communication. -
Page 241: Uploading Data For Analysis
When data logging is turned on, the data logging icon appears in the Speech Display Bar. Important! If you plan to use the Realize Language website to analyze data, set up a person before you start collecting data. Uploading Data for Analysis After you turn data logging on, your device will start collecting usage data. -
Page 242: Configuring Data Uploading
Configuring Data Uploading Note: You must be connected to Wi-Fi to upload data. If you have a dedicated NovaChat 12 device, you will not be able to configure the device for data uploading. 1. Choose Realize Language from the Data Logging menu. The first time you select Realize Language, the following message will appear: “Access to personal communication requires authorization. -
Page 243: Selecting A Person
Selecting a Person A warning icon following “Person” indicates that no person is selected. If you collect data before selecting a person, that data will be associated with a “default user”. The best practice is to select a person immediately. 1. -
Page 244: Setting Up Automatic Data Uploads
Setting up Automatic Data Uploads From the Account/Upload screen, select Auto Upload to insert a checkmark. Data collected since the last upload will upload immediately, and data will continue to upload automatically every 24 hours. To set a specific upload time, deselect Auto Upload and then select it again at the time of day you want data uploaded. -
Page 245: Initiating An Immediate Data Upload
Initiating an Immediate Data Upload Any time you want to upload data immediately, choose Upload Now. Data collected since your last upload will be uploaded immediately. The button label will change to “Uploading” while the upload is in progress. When the upload is complete, “Upload Completed”... - Page 246 5. Choose Save to File. The following message will appear: “Data logging collects personal communication. Do you want to save personal communication?” 6. Select Yes. The Android explorer will open and let you choose where you want to save the file. 7.
-
Page 247: Clearing Usage Data
Clearing Usage Data To clear usage data for a person: 1. Choose Clear Log from the Data Logging menu. The Person to Clear window will be displayed. 2. Choose the person whose usage data you want to clear. Note: A green dot will appear to the right of the person who is selected currently. -
Page 248: Recovering From A Forgotten Or Lost Privacy Password
To remove your privacy password: If you prefer not to enter a password each time you save data to a file, use this procedure. Keep in mind, however, that you will also lose the privacy protection a password provides. 1. Choose Change Privacy Password from the Data Logging menu. 2. -
Page 249: Saving Usage Data To A Usb Flash Drive
Saving Usage Data to a USB Flash Drive This procedure applies to dedicated devices and non-dedicated devices. PRC-Saltillo provided a USB flash drive that is appropriate for your device. The other end plugs into your computer. The drive rotates in its holder for easy access to each. - Page 250 3. Select an option: “Since last save on”, “From / to”, or All. 4. Choose Save to File. Select the USB drive in the left pane of the window that opens. 5. If you want, select the folder icon and create a folder to store the file.
-
Page 251: Taking Pictures
Taking Pictures From the home screen or Apps folder, tap the camera shortcut Using the display as a viewfinder, compose your photo by aiming the lens at the subject. To take the photo, tap the camera button. Note: The camera button may look different on your device. NovaChat User’s Guide... -
Page 252: Creating And Using A Camera Button
Creating and Using a Camera Button You can create a button that allows you to take a picture that will be displayed on the button automatically every time you tap the button. The picture will also be added to the Gallery app or the Pictures folder in Gallery. -
Page 253: Deleting Photos
Deleting Photos To delete photos on a non-dedicated device, do either of the following: Choose Gallery or the Pictures folder, select the photo, and tap • the Delete icon. Turn off your device and turn it back on. Then connect the •... -
Page 254: Updating The Chat Software Using Wi-Fi
Updating the Chat Software using Wi-Fi Note: If you cannot update your device using Wi-Fi, you can download an update file from the Saltillo website. See “Updating the Chat Software from the Saltillo Website”. Be sure to check for available software updates on a regular basis. Important! You must be connected to Wi-Fi to download updates automatically. -
Page 255: Updating The Chat Software From The Saltillo Website
Alternative #1: Download Updates Automatically and Install Them Manually Important! You must be connected to Wi-Fi to download updates automatically. Leave “Allow WiFi Download” selected, but de-select “Auto Install”. To do this, choose Menu > Help > Check for Updates > Menu. Update files will download automatically, but will not be installed. - Page 256 5. When the download is complete, make sure the file is named update.c4c. If it is named something like “update(2).c4c”, rename it to update.c4c. 6. Connect the device to your computer using the USB cable provided with the device. On the device screen, “Transfer Mode” will be displayed. •...
-
Page 257: Backing Up Your Vocabulary Files
Backing Up Your Vocabulary Files It’s important to back up your vocabulary files to guard against losing changes you made. If a problem occurs, you can then restore the backed-up files to your device. How you back up your vocabulary files depends on the backup media you have access to. - Page 258 To back up one or more vocabulary files to a USB flash drive: PRC-Saltillo provided a USB flash drive that is appropriate for your device. The other end plugs into your computer. The drive rotates in its holder for easy access to each.
- Page 259 3. A window will list the customized files under “Device” on the left. Any files already on the USB drive are listed under “Backup Folder” on the right. 4. Select each file on the device that you want to copy to the USB drive.
- Page 260 Restoring a Backed-up File If you need to restore a backed-up file to your device, do the following: 1. Connect your USB drive to the USB port on your device. Note: If the device’s file manager opens, use the device’s Back arrow to close it.
-
Page 261: Transferring Vocabulary Files Between Your Device And Chateditor
Transferring Vocabulary Files between Your Device and ChatEditor If you have a computer, you can transfer vocabulary files between your device and the computer using ChatEditor. 1. On the computer, start ChatEditor. 2. Attach a USB cable to the device and to the computer that is running the Editor. -
Page 262: Restoring A Library Of Vocabulary Files On Your Device
Copying Vocabulary Files from the Device to the Editor From the Transfer screen, select the vocabulary file or files you want to transfer from the device to the computer and click the To Editor button. When the transfer is complete, the name of the file should be listed in the ChatEditor section of the Transfer screen. -
Page 263: Backing Up And Restoring Your Vocabularies With Settings
Backing up a Library in the Editor 1. Click Library. 2. Click Backup. 3. Type Yes to proceed. 4. Click Continue. Restoring a Library to the Editor 1. Click Library. 2. Click Restore. 3. Type Yes to proceed. 4. Click Continue. Backing up and Restoring Your Vocabularies with Settings You can back up and restore all user settings, including pronunciation... -
Page 264: Backing Up User Data To A Usb Flash Drive
Backing up User Data to a USB Flash Drive 1. Insert the USB flash drive provided by PRC-Saltillo into your device’s USB port. Note: If the device’s file manager opens, use the device’s Back arrow to close it. 2. From the User Backup/Restore menu, select User Backup. A keyboard page will open with a default name for the backup. - Page 265 5. Click on the icon in the upper left corner. Be sure that the USB drive is selected. Note: This is an example only. The backup screen is different on some devices. 6. A backup screen will show the backup file name and “Save”. Choose Save.
-
Page 266: Restoring User Data From A Usb Flash Drive
Restoring User Data from a USB Flash Drive Important! User Restore will overwrite existing user data on the device. Before using this option, verify that there is no unique information on the device that you need to keep. 1. Insert the USB flash drive provided by Saltillo into the USB port of the device to which you want to transfer the data. -
Page 267: Backing Up And Restoring Information To Cloud Storage
This section explains how to back up information from your NovaChat device to Google Drive™. These instructions apply to Dropbox™ as well. Important! PRC-Saltillo has no control over third-party products. And we cannot be of assistance if you lose your password. -
Page 268: Transferring Vocabulary Files Between Novachat Devices
Transferring Vocabulary Files between NovaChat Devices There are two options for transferring custom vocabulary files from one NovaChat device to another. Use ChatEditor running on a Windows-based computer • Use the USB flash drives included with the NovaChat devices • Transferring Vocabulary Files between Devices using ChatEditor Transferring Files between the Device and ChatEditor... -
Page 269: Transferring Vocabulary Files Between Devices Using A Usb Flash Drive
Note: You must have Chat software version 2.15 or higher to use this method. PRC-Saltillo provided a USB flash drive that is appropriate for your device. The other end plugs into your computer. The drive rotates in its holder for easy access to each. -
Page 270: Clearing Custom Vocabularies And Settings
To transfer files from your device to the USB drive: Select each file on the device that you want to copy to the USB • drive. Select To Backup, which is now highlighted. The files will be • copied to the USB drive. When the files finish copying, they will be listed under Backup Folder. -
Page 271: Restoring The Default Settings
Restoring the Default Settings If you only want to restore the default Chat software settings, use this procedure. 1. Choose Menu > Application Settings > Profiles > Load. 2. Choose Load Default Settings. 3. Manually set up the appropriate synthesizer and voice by choosing Menu >... -
Page 272: Setting Up And Using Texting
Installing the AeroText Application on Your Phone 1. On your phone, open your internet browser. 2. Go to https://www.prc-saltillo.com/texting. Check "I agree to the End User License Agreement” and then click the Download AeroText button. -
Page 273: Connecting Your Novachat Device To Your Phone
7. Tap Apps > File Manager. Note: This will be named differently depending on your brand of phone. If your phone does not have a file manager, Google Play has several to choose from. Choose the one that best fits your needs. 8. - Page 274 3. Choose Connect to Phone. The device will scan for available phones and list them on the screen. 4. Select your phone. “Connecting to device” will be displayed. When the device connects to the phone, “-Connected” will be displayed after the phone name at the top of the screen and a “Connected” message will appear briefly at the bottom of the display.
-
Page 275: Using Texting In A Default Vocabulary File
Button Description Home button: Go to your home page. Scrolling arrows: Scroll through your conversations. Previous arrow: Go to the previous page. Conversations list: Each conversation shows the first few words of the most recent message. To view the entire conversation, select the conversation to open the texting messages page. -
Page 276: Copying The Done Button To A Different Page
Copying the Done Button to a Different Page Done provides an alternative button that may be easier for the user to access than the Send or Create Contact buttons. You may want to copy the button to your keyboard or another convenient page so you don’t need to return to the Social or More Things page. -
Page 277: Adding Texting To A Customized Vocabulary File
Adding Texting to a Customized Vocabulary File As you prepare to add texting pages to a customized vocabulary file, first consider the following: • The vocabulary file’s layout (number of buttons) The vocabulary file’s symbol set (SymbolStix or PCS symbols) •... -
Page 278: Using A Different Texting Keyboard Page
10. Select Texting - Navigate to Conversations. 11. Choose Save. 12. While still in Edit Mode, choose Menu > Pages and set each of the imported texting pages as a special page. Press and hold on a page name and select Set as Special Page. Then select the applicable special page designation: page name “Texting Contacts”... -
Page 279: Deactivating Or Reactivating Texting
11. Choose Save again. 12. Repeat steps 1 through 11 for the Texting Message Details page. 13. Change the texting keyboard destination for the Texting Contacts page by doing the following: • Touch and hold one of the “Contact” buttons. •... -
Page 280: Adding A Contact From A Received Message
Adding a Contact from a Received Message Use this procedure when you receive a message from someone you want to add as a contact. 1. From the texting conversations page, select the phone number of the person you want to add as a contact. The list of messages for that number will open with an additional “Add as New Contact”... - Page 281 2. Choose the Add as New Contact button. The SDB will display an “Enter contact name” prompt and a Create Contact button. 3. Enter the contact’s name in the SDB. 4. Choose the Create Contact button. The list of messages for the contact will be displayed with the new name in place of the phone number.
-
Page 282: Composing And Sending A Message
Composing and Sending a Message You can use the texting pages that are set up in the vocabulary on your device. Or, if you want to customize the texting interface, see “Advanced Texting Setup” on page 291. 1. To send a message, choose the Texting button in your vocabulary. The texting conversations page opens. - Page 283 4. Compose your message just as you would enter any text. The message appears in the SDB. Hint: If you aren’t using a keyguard, you may want to increase the size of the SDB. This will increase the size of the Send button, making it easier to access.
- Page 284 Note: All text messages you sent to the contact and received from the contact in the current conversation are listed. Messages sent by you to the contact appear on the right; messages received from the contact appear on the left. Feature Description Send Display...
-
Page 285: Speaking A Text Message
Speaking a Text Message You can speak any text message in a conversation. 1. From the list of messages for a contact, select the message you want to speak. 2. When you select the message, the text message details page is displayed with additional buttons. -
Page 286: Copying A Text Message
Copying a Text Message You can copy a text message and paste it into a text message you want to send to someone else. 1. From the list of messages for a contact, select the message you want to copy. 2. -
Page 287: Creating A Draft Message (To Finish Later)
5. Press and hold on the SDB. A menu will open. 6. Choose Paste. The copied message will be copied to the SDB. 7. Tap Send Display. Creating a Draft Message (to finish later) If you start a text message and are interrupted or don’t have time to finish it, you can create a draft to save the text you entered. -
Page 288: The Role Of Conversations When Creating A Message
To save this text, press Back ( , , or ) several times. A popup note, “Message saved as draft”, will appear briefly near the bottom of the display, and your in-progress message will be preceded by “(DRAFT)”. To finish the message later, select the draft, add the remaining text, and choose Send. -
Page 289: Deleting Conversations And Messages
Deleting Conversations and Messages Important! Deleting a conversation permanently deletes all messages to or from the contact. If you want to retain the conversation, delete an individual message from the conversation using Delete Message. To delete a conversation (all messages to and from a contact): 1. -
Page 290: Viewing Notifications
Viewing Notifications To make sure you see notifications, choose Menu > Application Settings > Input. In the Speech Display Bar section, verify that Enable Notification Bar is selected. Notifications appear in the notifications area of the SDB. For example: Icon Indication You have one unread text message. -
Page 291: Advanced Texting Setup
Advanced Texting Setup If you want to modify the appearance and operation of the texting pages, you can edit buttons and select different actions just as you can on any vocabulary page. Texting Actions Action Description Done Functions only when Send or Create Contact is displayed in the SDB. - Page 292 Action Description Texting - Delete Text Deletes the selected text message. Message Texting - Message Displays the text, date, and time for the Details selected text message. Note: This action displays the date only if the message is older than one day. Texting - Navigate to Navigates to your list of contacts.
-
Page 293: Adding A Webhook Event To A Button
Adding a Webhook Event to a Button Do you know about webhooks and would you like to use them with your device? Here’s how the Chat software supports them. Please note that this section requires a basic understanding of webhooks and programming skills. - Page 294 Term Meaning Payload examples: Add content to your document (see “webhook event” above); format the content The webhook service/provider defines the payload. Here's what a small portion of a payload looks like when it's delivered to a webhook service: "event_id": "LtWXD3crgy", "event_type": "form_response", "form_response": { "form_id": "lT4Z3j",...
-
Page 295: Adding A Webhook Event
Adding a Webhook Event You can create as many webhook buttons as you want, but you can only specify one URL for each button. Examples of webhook events: send the latest weather report to your device; trigger a payment; send an alert when something happens; turn on a light;... -
Page 296: Viewing Webhook Examples
Note: Chat software provides two placeholders: (1) The content of the Speech Display Bar and (2) The message [in the Message box] contained on the button. The placeholders must appear as follows: ${SDB} and ${MESSAGE} 10. Choose Save. 11. Make sure you have an active Wi-Fi connection and choose the button you created. -
Page 297: Troubleshooting
Troubleshooting The device no longer produces sound. / The amplifier no longer produces sound. / The volume is limited to just the device’s speakers. Airplane mode may have been turned on, the device sound may be turned off, or the Bluetooth connection to the amplifier may be lost. How you check Airplane mode, device sound, and Bluetooth depends on the version of Android on your device. - Page 298 Check the device Bluetooth setting Option #1: Go to the Android home page and swipe down from the top of the screen. On some devices, you may need to swipe down twice. The Bluetooth icon shows that Bluetooth is turned off Tap the icon to turn Bluetooth on Option #2: Open the Android Settings and select Bluetooth in the left pane.
- Page 299 Resetting the Device If you need to reset the device, try a soft reset by cycling power with the device’s power button. A hard reset is not recommended. NovaChat 8.5: If the device is frozen, press and hold the Side key and Volume Down key at the same time for more than seven seconds to restart.
- Page 300 . It only appears on trial devices. Choose the icon to open a message. Don’t Forget! This is a trial device that must be returned to PRC-Saltillo. Have questions? Call 800-268-5224 to be connected with your PRC-Saltillo Consultant. NovaChat User’s Guide...
- Page 301 Read the message and select OK. This message will reappear every seven days until you complete and submit your funding/trial device paperwork. Service can step you through turning off the message if you need the dot removed prior to receiving your new device. Icons show up in the SDB.
- Page 302 An error message is displayed while doing Chat software updates Find the message in the table below and follow the instructions provided. If the problem persists, contact Saltillo technical support. Support contact information is available under “Welcome to NovaChat” on page 13. Message What to do An intermediate operation failed.
- Page 303 Message What to do There is not enough space to Try an update via Wi-Fi connection or complete the update. try deleting pictures, apps, and/or videos. An original NovaChat 5 device might not be able to update from a file, but an update via Wi-Fi will work. Unable to download update.
- Page 304 Message What to do Your device ID cannot be Turn Airplane mode off, reregister determined. Please turn off your software, and try the update airplane mode and try again. again. To turn Airplane mode off, see “Check the Airplane mode setting” above. To reregister your software, go to Menu >...
-
Page 305: Care And Maintenance
When charging the device, use only the AC charger that came with the device. The batteries for the device are not field replaceable, and the system will need to be returned to PRC-Saltillo (USA) for servicing. Replacement and repair of any electronic components of your device should only be done by qualified service personnel. -
Page 306: Appendix A: Advanced Grammar Features
Appendix A: Advanced Grammar Features The features explained in this appendix are intended for persons with extensive knowledge of grammar. The functionality described here was intended to support pre-morphing. The current Grammar Actions are still intended as a good solution for post-morphing. For languages such as German, pre-morphing is much more important. - Page 307 7. Select the applicable part of speech. In this example, noun was selected. 8. Choose Save. In this example Apply Grammar Property (noun), will appear at the bottom of the list of actions defined for the button. Important! The grammar property must appear first in the list of actions.
-
Page 308: Creating A Grammar Rule Button
Creating a Grammar Rule Button 1. Press and hold the button you want to set up as a pluralize button, choose Edit Button, enter a label for the button (for example “-s”), and choose the Actions tab. 2. Tap the “Add an action” list box arrow to open the list of actions. 3. - Page 309 7. Remove any other actions that were already on the list. 8. Choose Save. In this example, a button labeled “-s” is now available to pluralize all words identified as nouns. NovaChat User’s Guide...
-
Page 310: Using Dynamic Grammar Labels
Using Dynamic Grammar Labels The setting Dynamic Grammar Labels displays on button labels the changes that will be made to words when grammar rules are applied. Important! If you are working with a person learning language, it is best not to turn on Dynamic Labels. The grammar features can create invalid words that will show up with dynamic labeling turned on. -
Page 311: Using Your Grammar Rule Button
Example: Dynamic Grammar Labels turned on: When the “-s” grammar rule key is chosen, “video game” and “computer game” change to “video games” and “computer games”, showing how either word will change when selected. Using Your Grammar Rule Button Place the grammar rule button on a page of applicable items. For example, place a pluralize button on a page of things (nouns). - Page 312 2. Tap your “-s” button. If Dynamic Grammar Labels is turned off: There will be no change to the button labels. If Dynamic Grammar Labels is turned on: The letter “s” will be added to the “video game” and “computer game” labels. 3.
-
Page 313: Clearing A Grammar Rule
Clearing a Grammar Rule You may find it useful to create a Clear Grammar State button. If you tap the pluralize button and decide you don’t want to pluralize a word on the current page, you can move to another page of things, select a noun from that page, and that noun will be pluralized. -
Page 314: Appendix B: Connecting Your Device To A Computer For The First Time
Appendix B: Connecting Your Device to a Computer for the First Time On some models, when you connect your device to a computer for the first time to perform an update or transfer files, a message prompts you to allow access. You must tap Allow to proceed. You will need to repeat this procedure the first time you connect your device to a different computer. -
Page 315: Appendix C: Working With Apps
Appendix C: Working with Apps The features in this appendix apply to non-dedicated devices only. You cannot download, open, or delete apps on a dedicated device. Using and Resetting the Active Key Important! The Active key button does not function on a dedicated device. - Page 316 Changing the Active key settings: For example, you might want to leave Press set to open NovaChat and change the calendar to open the camera or another app. Or you might want to change both Press and Press and Hold. 1.
- Page 317 Note: “Use while screen locked” is turned off by default. 4. Tap Press to list the apps on your device. 5. Select the app you want to open when you press the Active key once. 6. Tap Press and Hold and select the app you want to open when you press and hold the Active key.
-
Page 318: Removing Downloaded Apps And Files
Removing Downloaded Apps and Files Important! This section does not apply to dedicated devices. If you suspect that the device user may have downloaded new apps that should be deleted from the system, contact Saltillo technical support for details or visit our Support site for details on removing these items. Images can be removed manually by choosing the Gallery App and choosing to delete the images and image albums. -
Page 319: Appendix D: Reporting Software Use Information Anonymously
Appendix D: Reporting Software Use Information Anonymously Sharing use information with the Chat software developers allows them to improve the software for all users. Shared information includes such items as settings and error messages. This shared information is collected anonymously—it does not include any personally identifiable information. -
Page 320: Appendix E: Using Inputstick To Control Your Computer
Computer Important! This feature requires use of InputStick, a specific wireless USB receiver. Please note that InputStick is available for purchase from PRC-Saltillo. To purchase InputStick, go to https://store.prc- saltillo.com/input-stick-20096 InputStick is a USB accessory that provides wireless control over a Windows®-based PC, a Mac®... -
Page 321: Plugging The Inputstick Into The Computer
Plugging the InputStick into the Computer Plug the InputStick into a PC, Mac, or Chromebook. You do not need to set up anything on the computer. The Input stick has a USB-A connector. If your computer has a USB-A port, simply plug the InputStick into the port. InputStick Example: InputStick plugged into a laptop computer’s USB-A port... -
Page 322: Additional Bluetooth Connection Information
Additional Bluetooth Connection Information Once you set the connection from your device to the InputStick, the device will continue to recognize the Input stick and reconnect automatically as long as the device and computer are within the Bluetooth connection range—approximately 32 feet (10 meters). Even if you shut down either the device or the computer or unplug the InputStick from the computer, they will reconnect immediately when you restart the device or computer or plug the Input stick back in. -
Page 323: Selecting A Keyboard Layout
Selecting a Keyboard Layout To tell your device the language of your computer keyboard, select a keyboard layout that allows your device to act as though it is a keyboard connected to the computer. To select a keyboard layout, choose Menu > Application Settings > System >... -
Page 324: Understanding Connection Modes
Understanding Connection Modes Icons appear in the Speech Display Bar (SDB) notification area to indicate the current connection mode. Icon Mode Description Connected and in Text entered in the SDB will be sent computer mode immediately to the computer that has the InputStick attached. -
Page 325: Toggling Computer Control On And Off
Toggling Computer Control On and Off You can quickly connect and disconnect your device and the computer by using a button action. You can also toggle between talking and writing to your computer by tapping the icon in the Speech Display Bar (SDB). Method See …... -
Page 326: Creating And Using A Computer Control On/Off Button
Creating and Using a Computer Control On/Off Button Create a button in your vocabulary that you can tap anytime you want to quickly toggle the connection on or off. To create the button: Add the button action Computer Control - On/Off to a button in your vocabulary. - Page 327 To use the button: Tap the button you created. A message near the bottom of the screen will briefly show “Connecting” and then “Connected”. The icon will be displayed in the SDB. When you tap the button again, the icon in the SDB will disappear and a message near the bottom of the screen will briefly show “Disconnected”.
-
Page 328: Tapping The Icon In The Sdb
Tapping the Icon in the SDB Tap the icon in the SDB to quickly toggle between talking and writing to your computer. The next time you tap the icon, will appear. NovaChat User’s Guide... -
Page 329: Working With Computer Commands
Working with Computer Commands Important! Be sure to create computer commands that will work with the computer. If you plan to use different computers at different times, you could set up a page of commands for one of them or label your command buttons to show which computer they apply to. -
Page 330: Example: Adding Computer Commands To Device Buttons
If you change your mind while editing, remove the special key currently selected (showing after “Special Key”), tap the list arrow , scroll to the top of list, and select the empty row. For more details on setting up buttons, see “Modifying Button Text”... - Page 331 7. Tap the list arrow to open the list of actions. 8. Choose the action Computer Control - Command. The Commands window will open. Enter the commands you want to use by combining modifiers and characters or by selecting special keys. (For details, see “Working with Computer Commands”...
-
Page 332: Example: Entering Text In A Computer Document
9. For example, to print a Word document from a Windows-based PC, you would do the following: Select Control. • Tap the Character box to open a keyboard and type the letter P. • Choose Save. In this example, “Computer Control - Command •... - Page 333 Note: When backspacing or clearing text, the computer only recognizes tools it also has—for example, Backspace. • Choosing Backspace on your vocabulary page will backspace in the SDB and on the computer. But your vocabulary page might include a Clear button. This is •...
-
Page 334: Appendix F: Compliance Information
(1) This device may not cause harmful interference, and (2) this device must accept any interference received, including interference that may cause undesired operation. Changes or modifications to this device not expressly approved by PRC-Saltillo could void the user’s authority to operate the equipment. - Page 335 Additional uses may require further clinical determinations beyond the scope of an evaluation for speech generation devices. • PRC-Saltillo assumes no responsibility for any loss or claims by third parties which may arise through the use of this product. •...
- Page 336 There is no need to turn the device or amplifier off when using the device on a daily basis. It is recommended to restart the device once per week and put it to sleep daily. • To report any serious incident associated with the device, contact PRC-Saltillo and your national authority. •...
- Page 337 Symbol Explanation Keep dry. The device needs to be protected from moisture. The range of temperatures to which the device can be exposed while in use. Caution: If the device has been stored in an environment in which the temperature range is different from “the range of temperatures to which the device can be exposed while in use”, let the device stand for at least 30 minutes before using it.
- Page 338 Specifications: NovaChat 5 Weight 0.7 lbs. Dimensions 6.8 in. x 3.7 in. x 0.95 in. Battery life 10-12 hours, depending on individual usage and power settings Software/operating system Chat software/Android Standard components Tablet, amplifier, stand, battery charger, USB-C cable, USB-C flash drive, stylus Accessories Shoulder strap, waist belt, strap attachments, hand support...
- Page 339 Specifications: NovaChat 10 Classic Weight 2.75 lbs. Dimensions 11.2 in. x 8.8 in. x 1.8 in. (including handle) Display 11 in. capacitive touch screen Battery life 10-12 hours, depending on individual usage and power settings Software/operating system Chat software/Android Standard components Tablet, amplifier, handle, stand, wrap, battery charger, USB-C cable, USB-C flash drive, stylus Accessories...
- Page 340 Transport and Storage Environment: NovaChat 5, 8, 10, and 12 While in transport or storage, the range of temperatures to which the device can be exposed is - 25°C (-13°F) without relative humidity control to 70°C (158°F) at a relative humidity up to 93%, non- condensing.
-
Page 341: Index
Index Apply grammar state 308 Clear grammar state 313 Clearing grammar rules 313 Creating and using a computer control on/off button to work 4-Basic (vocabulary file) 78 with InputStick 326 List of available button actions 134 Using your grammar rule button 311 Abbreviations Working with computer commands Using abbreviation expansion 229... - Page 342 Connecting your device to a Using and resetting the Active key computer for the first time 314 Amplifier Working with apps 315 Charging a NovaChat 10 device 35 Audible feedback Charging a NovaChat 10 or 12 device Adjusting audible and haptic feedback 238 Charging a NovaChat 5 device 31 Auditory effects...
- Page 343 Charging 39 Setting up a Bluetooth (wireless) switch on a device with Android Checking battery status 39 10 or below 189 Troubleshooting battery status icons Setting up a Bluetooth (wireless) in the SDB 301 switch on a device with Android Viewing battery status icons 40 11 or higher 191 Beep...
- Page 344 Creating and using a camera button Show hidden buttons notification Determining how a word with Side key 22 multiple pronunciations is Storing text from the SDB on a spoken 96 button 143 Evaluating an individual’s ability to Using and resetting the Active key select buttons 70 Example of storing text from the SDB Using the timing settings 173...
- Page 345 Using the menu in the SDB to copy Changing the highlight color of words and share text 93 as they are spoken in the SDB 88 Using the menus 66 Copying and Pasting a Button Style Viewing explanations of unavailable settings 69 Modifying a button style 128 ChatEditor...
- Page 346 Working with computer commands Pages 150 when using InputStick 329, 330 Transferring images between Computer control computer and device 113 Creating and using a computer Using the menu in the SDB to copy control on/off button to work and share text 93 with InputStick 326 Customer support Toggling computer control on and off...
- Page 347 Date Routine 58 Changing date and time settings 237 Use by multiple clients 58 Creating a button to show and speak Display the date and/or time 237 Adjusting brightness 236 Deleting Adjusting horizontal calibration 236 Deleting All Custom Vocabularies Adjusting screen timeout 236 and Settings 271 Changing settings 236 Deleting a custom scan pattern from...
- Page 348 Using visual and auditory effects to Finding a word using a button action locate buttons 183 Using visual effects 177 Fishing Email Using auditory effects 179 Using the menu in the SDB to copy Using visual and auditory effects to and share text 93 locate buttons 183 Emoticons...
- Page 349 Backing up and restoring information Show hidden buttons notification to cloud storage 267 Backing up information to cloud Highlighting storage 267 Highlighting words as they are Restoring information to cloud spoken in the SDB 88 storage 267 Home button 30 Gradient fill Home icon 30 Modifying button color saturation...
- Page 350 Backing up and restoring specified vocabulary files to a USB flash Keyboard page drive 257 Using a different texting keyboard Images 113 page 278 Importing a vocabulary file on your Keyboard shortcuts computer into ChatEditor 102 Working with computer commands InputStick when using InputStick 329 Bluetooth connection information...
- Page 351 Enabling Menu Lock on a non- Charging 31 dedicated device 230 Features 20 Menus Positioning the stand 49 Choosing how to access menus 62 NovaChat 8 Using the menu in the SDB to copy Active key 22 and share text 93 Charging 33 Using the menus 66 Features 22...
- Page 352 Setting a special page as your home Profiles page 154 Creating 235 Setting an imported texting page as a Deleting 236 special page 153 Loading 235 Using a special page as a template Restoring settings 236 Prompts Working with special pages 152 Setting up a button beep 178, 181 Password Pronunciation...
- Page 353 Disabling the power and volume Linear step scan mode with a single buttons 232 switch 195 Restricting access on a dedicated Notifications 201 device 233 Options 186 Restricting access on a non- Rescans 202 dedicated device 230 Row/Column 196 Scan Editor 203, 208 Scan Editor menu 205 Safety and compliance Information 334 SDB 200...
- Page 354 Restoring all default settings 271 Setting a skin tone for an entire vocabulary file 114 Restoring default settings 270, 271 Sleep Restoring user data to a device 266 Turning the screen on and off 42 Restoring vocabulary files with settings 266 Waking the screen 42 Restricting access on a dedicated Software...
- Page 355 Determining how a word with Tapping the icon in the SDB to toggle multiple pronunciations is between talking and writing to spoken 96 your computer when using InputStick 328 Enabling speech and symbols in ChatEditor 100, 299 Toggling computer control on and off when using InputStick 325 Highlighting words as they are spoken in the SDB 88...
- Page 356 Setting up a Bluetooth (wireless) Using the menu in the SDB to copy switch on a device with Android and share text 93 11 or higher 191 Text options Setting up wired switches 188 Abbreviation expansion 229 Using linear scan with two switches Automatic capitalization 229 Selecting the type of word prediction Using linear step scan mode with a...
- Page 357 Using a different texting keyboard Downloading from the Saltillo page 278 website 255 Using the Back icon 289 Error messages 302 Viewing notifications 290 Uploads Tilt Automatic 244 Orientation tilt with the SDB 216 Immediate 245 Time Adding a webhook event to a button Changing date and time settings 237 Creating a button to show and speak the date and/or time 237...
- Page 358 Using visual effects 177 Exploring available files 75 Visual scene Importing a vocabulary file on your computer into ChatEditor 102 Add a transparent button to a visual scene 164 Importing predictions 226 Create a linking button 161 Intermediate Scan 80 Create a visual scene 160 List of available files 76 Create a visual scene page 162...
- Page 359 WordPower25 Touch & Scan 76 Widgets WordPower42 77 Adding shortcuts to widgets 60 WordPower42 Basic 77 Wi-Fi Updating the Chat software using WordPower48 77 Wi-Fi 254 WordPower60 77 Windows-based computers WordPower60-Basic 77 Plugging InputStick into a computer WordPower80 78 Vocal Smileys 171 Wireless switches Voice AeroSwitch 189, 191...
- Page 360 Working with computer commands when using InputStick 329, 330 Word Finder Finding a word using a button action Finding a word using the Word Finder menu item 217 Finding specific words 219 Hiding or showing the Word Finder menu item 217 Setting the display time for Word Finder results in the SDB 219 Setting up a button with the Find...
Need help?
Do you have a question about the NovaChat 5 4th Generation and is the answer not in the manual?
Questions and answers