
Related Manuals for PRC-Saltillo ViaPro11.2


Summary of Contents for PRC-Saltillo ViaPro11.2
- Page 1 Via Pro Model ViaPro11.2 Pro / Via Mini User's Guide ® Dialogue AAC English Edition ® Via Mini Model ViaMini8.1 19076 Version 2.00...
- Page 2 The Bluetooth® word mark and logos are registered trademarks owned by the Bluetooth SIG, Inc. and any use of such marks by PRC-Saltillo is under license.
-
Page 3: Table Of Contents
Contents Introduction ................................7 Safety Information: Via Pro and Via Mini ....................... 8 Identifying Via Pro Features ..........................10 Identifying Via Mini Features ..........................12 Charging the Device and Amplifier ........................14 Non-Dedicated Devices: Turning the Device On and Off ..................16 Turning the Amplifier On and Off......................... - Page 4 Working with Buttons ............................. 46 Storing Text on a Button ............................. 46 Editing a Button ..............................47 Changing a Button Label or Message ........................47 Changing the Pronunciation of a Word in a Button Message ................48 Inserting Special Characters in Text ........................49 Adding or Changing a Button Action ........................
- Page 5 Enlarging Text in the Speech Display Bar ........................ 78 Changing Text Size or Number of Lines in the SDB ..................... 78 Creating a Tap Action ............................78 Highlighting Words as They are Spoken in the SDB ....................79 Highlighting Words as They are Spoken during a Telephony Call ................81 Setting up Switch Scanning in the Dialogue App .....................
- Page 6 Appendix A: Advanced Grammar Features ......................104 Creating a Grammar Button ..........................104 Identifying Parts of Speech ............................ 105 Creating a Grammar Rule Button .......................... 106 Using Your Grammar Rule Button ......................... 107 Clearing a Grammar Rule ............................107 Appendix B: Setting up and Using Head Tracking ....................108 Setting up Head Tracking ............................
-
Page 7: Introduction
Introduction Via® Pro and Via Mini are electronic speech generating devices that augment communication for an individual with speech/language impairment. Each device and its language programs give the user the power to initiate conversation, seek information, state opinions, and share feelings. The wrap and shell provide protection while the Bluetooth®... -
Page 8: Safety Information: Via Pro And Via Mini
Safety Information: Via Pro and Via Mini Emergencies This device is not intended to be an emergency call device or sole communication aid. Cleaning, Maintaining, and Servicing Do not attempt to service or maintain the device while it is in use. Disconnect the charger and turn off the device before cleaning or disinfecting the device. - Page 9 Screen Do not use the device if the screen is cracked or broken. Do not remove the screen protector from the device. The screen protector protects the device user from any glass shards in case of screen breakage. Interference When operating this device in a medical environment, do not use with any product that is not medically approved. Follow all rules for appropriate wireless device use.
-
Page 10: Identifying Via Pro Features
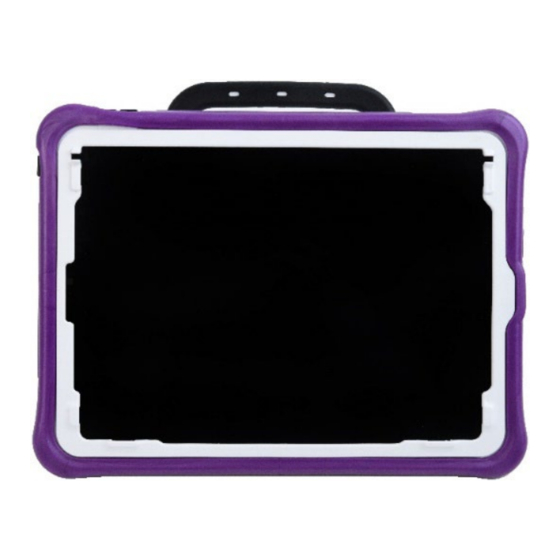
Identifying Via Pro Features Via Pro Rear View 1 Handle 6 Wheelchair mounting plate holes 2 Volume buttons 7 Stand 3 Rear camera 8 Amplifier reset button 4 Sleep/wake button 9 Strap holders 5 Amplifier speakers 10 Colored wrap Via Pro/Via Mini User’s Guide: Dialogue AAC... - Page 11 Via Pro Front View 1 Handle 4 Touchscreen 2 Colored wrap 5 Sleep/wake button 3 Frame* 6 Volume buttons * Attach a keyguard or TouchGuide Via Pro Side View 1 Charging LED (amber) 4 Headset jack 2 Switch jack A 5 Amplifier LED (blue) 3 Switch jack B 6 Device charging port...
-
Page 12: Identifying Via Mini Features
Identifying Via Mini Features Via Mini Front View 1 Handle 4 Touchscreen 2 Colored wrap 5 Sleep/wake button 6 Volume buttons 3 Attachment points for a keyguard or TouchGuide 7 Strap holders Via Pro/Via Mini User’s Guide: Dialogue AAC... - Page 13 Via Mini Rear View 1 Handle 6 Wheelchair mounting plate holes 2 Sleep/wake button 7 Stand 3 Volume buttons 8 Amplifier reset button 4 Rear camera 9 Strap holders 5 Amplifier speakers 10 Colored wrap Via Mini Side View 1 Charging port 4 Switch jack B 2 Charging LED (amber) 5 Headset jack...
-
Page 14: Charging The Device And Amplifier
Charging the Device and Amplifier Connecting the Charger You received a battery charger with your device. One end of the charger plugs into a wall outlet—a surge protector is recommended. The other end has a USB-C connector, allowing you to charge the device and amplifier at the same time. - Page 15 Checking Battery Status To check the battery level or charging status at any time, create a button with the Battery Status action or find and tap a battery status button in your vocabulary. For more information, see “Creating a Battery Status Button”...
-
Page 16: Non-Dedicated Devices: Turning The Device On And Off
Non-Dedicated Devices: Turning the Device On and Off The sleep/wake button allows you to turn the device on and off. Sleep/wake button Sleep/wake button Via Pro Via Mini To turn the device on: Hold down the sleep/wake button until the Apple® logo appears on the screen. To turn the device off: Hold down the sleep/wake button and the volume up or volume down button until you see the Power Off screen. -
Page 17: Turning The Amplifier On And Off
Turning the Amplifier On and Off The device and amplifier communicate using a Bluetooth® connection. Typically, the amplifier should be left on. During air travel and in some medical facilities the Bluetooth option is required to be turned off. When the amplifier is off, speech is still present but comes from the device’s internal speaker. Non-Dedicated Devices: Turning Bluetooth Off 1. -
Page 18: Adjusting The Volume And Muting Sounds
Adjusting the Volume and Muting Sounds Excessive volume or sound pressure level when using earphones or headphones can cause hearing loss over extended periods of time. Using the Volume Buttons The volume buttons are located on the top edge of the device. Pressing one button increases the volume and pressing the other lowers the volume Volume buttons Volume buttons... -
Page 19: Positioning The Stand
Positioning the Stand Your device comes with a stand that can be positioned for easy viewing. Via Pro Via Mini Stand in closed position Stand in closed position To position the device at an angle for easy viewing of the screen, do the following: 1. -
Page 20: Removing The Handle
Removing the Handle If you do not plan to use the handle, you can remove it by removing the screws that hold it in place. The handle and screws are potential choking hazards. Via Pro: Remove six screws Via Mini: Remove three screws Via Pro/Via Mini User’s Guide: Dialogue AAC... -
Page 21: Attaching A Wheelchair Mounting Plate
Attaching a Wheelchair Mounting Plate Three threaded holes are provided on the back of the device for attaching an optional wheelchair mounting plate. Mounting plate attached Threaded holes for attaching a mounting plate If you purchased the wheelchair mounting plate accessory, follow these instructions to attach the plate to your device. -
Page 22: Changing The Colored Wrap On A Via Pro Device
Changing the Colored Wrap on a Via Pro Device You can replace the wrap on your device with a wrap of a different color. This section applies to either an Active wrap or a Classic wrap. The main difference is that only the Active wrap includes slits along the bottom for easier replacement. -
Page 23: Changing The Colored Wrap On A Via Mini Device
Changing the Colored Wrap on a Via Mini Device You can replace the wrap on your device with a wrap of a different color. Via Mini devices come with an Active wrap. Via Pro devices come with either an Active wrap or Classic wrap. For details, see “Changing the Colored Wrap on a Via Pro Device”. - Page 24 3. Push the sides and bottom of the wrap into place. 4. Pull one of the top corners of the wrap over the top corner of the device. You will need to stretch the wrap to pull it into place. Pull the other top corner into place. 5.
-
Page 25: Attaching A Strap
Attaching a Strap If you want to carry your device with a shoulder strap, first decide whether you want to carry the device in landscape or portrait orientation. Straps are potential entanglement or strangulation hazards. Please consider this prior to placing these items with device users. -
Page 26: Cleaning And Disinfecting The Device
Cleaning and Disinfecting the Device If your device will only be used by one person, routine cleaning and disinfecting should be sufficient. If, however, more than one person will be using the unit, take additional measures to clean and disinfect the unit after it has been used by one person before allowing it to be used by another. -
Page 27: Disinfecting The Device And Accessories For Multiple Users
Disinfecting the Device and Accessories for Multiple Users Note: This section applies only when more than one person will be using the same unit. In that situation, it is vital to effectively disinfect the unit and accessories that have been used by one person before allowing them to be used by another. -
Page 28: Using The Dialogue Aac App
Using the Dialogue AAC App The Essence™ vocabulary allows individuals to use spelling and word prediction to say anything they want. Built-in Message Banking lets you import messages that use your own voice, and free synthesized voice creation lets you create a voice that is uniquely yours. Customizing with specific, personalized sentences is easy to do, allowing the system to grow with an individual’s needs. -
Page 29: Agreeing To The End User License Agreement
Agreeing to the End User License Agreement After you download the app and open it the first time, a message asks you to agree to the End User License Agreement. If necessary, tap the website link in the message to get started with the app. Finding the App Version 1. -
Page 30: Working With Vocabulary Files
Working with Vocabulary Files The Essence vocabulary is available in 60 and 84 locations to accommodate different visual and motor abilities. Loading a Vocabulary File 1. Tap Vocab. Choose New Vocab will be displayed. 2. Tap Choose New Vocab. A page will display a list of the available vocabulary files. Hint: To make sure that you are working with the latest version of a vocabulary file, view the Modified date and time that appear after the vocabulary name. -
Page 31: Copying A Vocabulary File
Copying a Vocabulary File To customize a vocabulary file, you must first make a copy of the original file. Once you make a copy, you can edit the copy. This keeps the original files in place in case they are needed at a later time. 1. -
Page 32: Deleting A Customized Vocabulary File
Deleting a Customized Vocabulary File 1. From the home page of the vocabulary file, tap Vocab. 2. Tap Choose New Vocab. 3. Tap Edit. 4. A delete icon will appear to the left of each padlock image. You will only be able to delete custom vocabulary files. -
Page 33: Backing Up A Customized Vocabulary File Using Itunes
Backing up a Customized Vocabulary File using iTunes ® It’s a good idea to keep copies of all custom files on a computer for safekeeping. We suggest always using a wired connection to a computer to copy files consistently. 1. Connect the device to the computer. 2. -
Page 34: Backing Up A Customized Vocabulary File Using Airdrop ® , Google Drive ™ , Or Email
Backing up a Customized Vocabulary File using AirDrop ® , Google Drive ™ , or Email 1. In the Dialogue app, select Vocab and Choose New Vocab. 2. Tap Menu and select Import/Export Vocab. 3. Select Export and Share. 4. Select the vocabulary file you want to export. 5. -
Page 35: Exporting Vocabulary Files To A Usb-C Drive From Your Device
Exporting Vocabulary Files to a USB-C Drive from Your Device Important! You can use this procedure only if you have updated your device to iPadOS® 13, iOS® 13, or higher. 1. Plug the smaller connector on the USB-C flash drive into your device. 2. -
Page 36: Importing A Vocabulary File From A Usb Drive To Your Device
Importing a Vocabulary File from a USB Drive to Your Device Important! You can use this procedure only if you have updated your device to iPadOS® 13, iOS® 13, or higher. You can use this procedure when Guided Access is Enabled on your device. 1. -
Page 37: Choosing A Voice
Choosing a Voice You can adjust the rate of speech for the voice you select. For some voices, you can also adjust the pitch. To select a voice and adjust speech settings, tap Menu and select Settings. Changing the Voice To change the voice you use to communicate, scroll down to the Speech section. -
Page 38: Adjusting The Voice
Adjusting the Voice Adjusting the Rate of Speech In the Speech section, use the Rate slide bar to modify the rate of speech. Adjusting the Pitch To adjust the pitch, select Voice Pitch and then choose Lowest, Lower, Low, Normal, High, Higher, or Highest. -
Page 39: Adding Voices In Additional Languages
Adding Voices in Additional Languages 1. Choose Menu > Settings. 2. Scroll down to the Speech section. The Voice setting displays the voice currently selected. 3. Tap Voice to open a list of available voices. Voices are listed by language. 4. - Page 40 5. Tap Add Language to open a list of available voice languages. 6. Select the language you want. It will be added to the list of available voice languages. For example: 7. Tap Save. The list of voices will now include voices available in that language. Via Pro/Via Mini User’s Guide: Dialogue AAC...
-
Page 41: Deleting A Voice Language
Deleting a Voice Language 1. Choose Menu > Settings. 2. Scroll down to the Speech section. The Voice setting displays the voice currently selected. 3. Tap Voice to open a list of available voices. Voices are listed by language. 4. Tap Voice Languages. The current voice languages are listed. For example: Via Pro/Via Mini User’s Guide: Dialogue AAC... - Page 42 5. Tap Edit. Delete icons appear in front of each voice language. 6. Tap the icon for the voice language you want to delete. Delete will appear after the voice language. 7. Tap Delete. The language will be removed from the List. 8.
-
Page 43: Creating Your Voice With Voice Keeper
• Re-record a sentence if you make a mistake. 10. Try out your voice on the website. If you decide to use it with your PRC-Saltillo app, follow the instructions on the website to deploy the voice to your app. -
Page 44: Changing How A Word Is Pronounced By A Voice
Changing How a Word is Pronounced by a Voice Note: Before changing the pronunciation of a word, be sure that the voice you want to use is selected. Pronunciation lists are unique for each voice synthesizer. For example, Apple voices and Voice Keeper voices have separate pronunciation lists. -
Page 45: Activating Edit Mode
Activating Edit Mode You can only edit a copy of a vocabulary file, not the original. To make a copy, see “Copying a Vocabulary File”. 1. Go to the page you want to edit. 2. Tap Menu. 3. Select Edit Page. The page is now in Edit Mode. Via Pro/Via Mini User’s Guide: Dialogue AAC... -
Page 46: Working With Buttons
Working with Buttons When customizing a vocabulary, you can change how a button speaks, operates, and appears. You can also create new buttons, and copy, move, and hide buttons. Storing Text on a Button Most categories in the Essence files contain a button labelled Store Text on a Button in the bottom right corner of the page. -
Page 47: Editing A Button
Editing a Button You can change what a button speaks, how it appears, what icon is shown, what action the button performs, and the location of a button. 1. Go to the page you want to edit and tap Menu. 2. -
Page 48: Changing The Pronunciation Of A Word In A Button Message
Changing the Pronunciation of a Word in a Button Message 1. Navigate to the page that contains the button you want to edit. 2. Tap Menu and select Edit Page. 3. Tap the button and select Edit This Button. The Edit Button window opens. 4. -
Page 49: Inserting Special Characters In Text
Inserting Special Characters in Text Sometimes you may need to insert a special character in a word, such as a letter with an accent. On the editing keyboard, press and hold the applicable character key. A small menu of special characters available for that character will open above the key. -
Page 50: Adding Or Changing A Button Action
Adding or Changing a Button Action To add a button action: 1. Tap Menu, select Edit Page, tap the button you want to modify, and select Edit This Button. 2. Scroll down to the Button Actions section. 3. Tap Add. 4. -
Page 51: Storing Text On A Button Using A Button Action
Storing Text on a Button using a Button Action 1. Go to the page that includes the button on which you want to store text. 2. Tap Menu and select Edit Page. 3. Tap the button on which you want to store text. 4. -
Page 52: Available Button Actions
Available Button Actions Action Description Add Message to Display Inserts text from the button’s Message box in the Speech Display Bar (SDB), but the words are not spoken Add Time/Date Displays the current date and time in the SDB Apply Grammar Property Identifies a word as an adjective, noun, or verb Apply Grammar State Applies a grammar rule to a word... - Page 53 Action Description Play Recorded Speech Plays recordings of someone speaking Play Video Plays a video file or YouTube video file. The file must be stored on the device. Add the Play Video action to a vocabulary button and tap the button whenever you want to play the video.
- Page 54 Action Description Texting - Navigate to Allows to you add a texting button to a customized vocabulary. Use the button Conversations to open your texting app. Toggle Mute/Unmute If the device is currently speaking a long message, selecting this button will not stop the speech but stop the speech from being spoken aloud.
-
Page 55: Adding An Image To A Button: Enter A Label And Browse
Adding an Image to a Button: Enter a Label and Browse 1. Tap Menu and select Edit Page. 2. Tap the button and select Edit This Button. 3. Enter a label and message for the button. 4. Tap the small arrow that appears to the right of the Image area. -
Page 56: Adding An Image To A Button: Search
Adding an Image to a Button: Search 1. Tap Menu and select Edit Page. 2. Tap the button and select Edit This Button. 3. Tap Select Image. 4. Tap the magnifying glass icon at the top right. 5. Enter an image name or description. 6. -
Page 57: Adding An Image To A Button: Import
Adding an Image to a Button: Import This option provides access to pictures that have already been taken and saved on the device. 1. Tap Menu and select Edit Page. 2. Tap the button and select Edit This Button. 3. Tap Import Image. A small menu will open. 4. -
Page 58: Adding An Image To A Button: Take A Picture
Adding an Image to a Button: Take a Picture 1. Tap Menu and select Edit Page. 2. Tap the button and select Edit This Button. 3. Tap Import Image. A small menu will open. 4. Tap Camera. 5. Press the camera button. 6. -
Page 59: Creating A Camera Button
Creating a Camera Button Note: This feature provides an alternative so you don’t need to enter Edit Mode to add a picture to a button. You can create a button that allows you to take a picture that will be imported to the button automatically every time you tap the button. -
Page 60: Resizing A Button
Resizing a Button 1. Tap Menu and select Edit Page. 2. Tap the button you want to resize and select Change Button Size. 3. Select the number of rows and columns you want. 4. Tap Save. Changing a Button Style 1. -
Page 61: Customizing A Button's Colors
Customizing a Button’s Colors 1. Tap Menu and select Edit Page. 2. Tap the button you want to modify and select Edit This Button. 3. Scroll down to the color settings and select Text Color, Body Color, or Border Color. 4. -
Page 62: Creating A Button To Link To A Page
Creating a Button to Link to a Page When a button action is set to Navigate or Visit you can determine what page that button will take you to. Navigate will take you to a New Page and leave you there requiring an additional button to be hit to return to your previous page or to the home page. -
Page 63: Creating A Volume Control Button
Creating a Volume Control Button Excessive volume or sound pressure level when using earphones or headphones can cause hearing loss over extended periods of time. You can add volume controls to buttons within vocabulary pages. 1. Go to the page on which you want to create the button. 2. -
Page 64: Copying And Pasting A Button
Copying and Pasting a Button You can copy and paste buttons to new locations. Note: If you later modify a copy of a button, you will edit only the copy. The original will not change. 1. Tap Menu and select Edit Page. 2. -
Page 65: Copying And Pasting The Same Button
Copying and Pasting the Same Button If you modify a button that is used in multiple locations, the button will also be modified automatically everywhere else it appears. You may want to use this technique on buttons that contain tools used on each page. -
Page 66: Moving A Button
Moving a Button 1. Tap Menu and select Edit Page. 2. Touch and hold on the button you want to move and drag it to another location. Note: When you start to drag the button, the original location will be outlined in red. As you move into the new location, the red outline will move to that location. -
Page 67: Hiding Or Showing Multiple Buttons At Once
Hiding or Showing Multiple Buttons at Once 1. Tap Menu and select Edit Page. 2. Tap Menu and select Hide Mode. 3. Tap the buttons you want to hide or show. 4. Tap Menu and select Normal Mode. Changing Button Timing Tap Menu and select Settings. -
Page 68: Using, Hiding, And Showing Button Navigation Arrows
Using, Hiding, and Showing Button Navigation Arrows Buttons that navigate to other pages can be set to display small arrows in the top right or left corner. The back arrow in the upper left corner of the Home button indicates that tapping the button will take you to the home page of the vocabulary. -
Page 69: Adding Extra Space Around Buttons
Adding Extra Space around Buttons 1. Tap Menu and select Settings. 2. Scroll to the Buttons section. 3. Select Button Margin. 4. Select a margin size. The default size is None. To increase the margin, select an option between 1 Point and 100 Point. -
Page 70: Working With Pages
Working with Pages The Dialogue app allows you to rename, duplicate, load, and create pages, choose a different keyboard, copy a page from a different vocabulary, and add gestures to pages. Renaming a Page 1. Tap Menu and select Edit Page. 2. -
Page 71: Creating A New Page
Creating a New Page 1. Tap Menu and select Edit Page. 2. Tap Menu and select Add New Page. 3. Give the page a name. 4. Select how many rows and columns you would like. Note: The number of rows and columns from the page currently displayed appear by default. -
Page 72: Creating A New Page From A Navigate Action
Creating a New Page from a Navigate Action 1. Display the page from which you want to navigate. 2. Tap Menu and select Edit Page. 3. Tap the location for a button that will navigate to the page you want to create. 4. -
Page 73: Copying A Page From A Different Vocabulary File
Copying a Page from a Different Vocabulary File There are times that borrowing previously created pages could be a time saver. The Dialogue app allows you to import multiple pages at one time. 1. Have your vocabulary file open. 2. Tap Menu and select Edit Page. 3. -
Page 74: Adding A Gesture To A Page
Adding a Gesture to a Page 1. Tap Menu and select Edit Page. 2. Tap Menu and select Edit Gestures. 3. Tap +. 4. Add a label and message. 5. To add gestures to an entire vocabulary file at one time, tap Apply to All Pages. -
Page 75: Editing An Abbreviation Expansion
Editing an Abbreviation Expansion 1. Tap Menu and select Edit Abbreviations. 2. Tap +. 3. In the space under Abbreviation, type the abbreviated form. 4. In the space under Expands to, type the full word, phrase, or sentence that it will expand to. 5. -
Page 76: Creating A Whiteboard Page
Creating a Whiteboard Page Whiteboards can used for drawing, collaborating, and sharing. To create a whiteboard page, create a new page that has a single button and select the Whiteboard button action. 1. Tap Menu and select Edit Page. 2. Tap the button you want to link to your whiteboard page and select Edit This Button. 3. - Page 77 Tool Function Back Return to the page with the button that links to the whiteboard. Open a menu. Tap the whiteboard outside the drawing to close a menu. When there is no drawing on the whiteboard, the options are Color, Width, Save, and Load.
-
Page 78: Enlarging Text In The Speech Display Bar
Enlarging Text in the Speech Display Bar There are a number of ways to enlarge text in the Speech Display Bar (SDB). Changing Text Size or Number of Lines in the SDB 1. Tap Menu and select Settings. 2. Scroll to the Speech Display Bar section. 3. -
Page 79: Highlighting Words As They Are Spoken In The Sdb
Highlighting Words as They are Spoken in the SDB To help with literacy, the Highlight Spoken Word setting allows users to see the words highlighted in the SDB as they are spoken. When you select a color, words will be highlighted in that color one at a time in the SDB as they are spoken. - Page 80 5. As you select words from a page, they are highlighted one at a time in the SDB in the color you selected. To change the highlight color, choose Menu > Settings, scroll to the Speech Display Bar section, • select Highlight Spoken Word, choose a different color, and select Done.
-
Page 81: Highlighting Words As They Are Spoken During A Telephony Call
Highlighting Words as They are Spoken during a Telephony Call To help with literacy, the Highlight Color Phone/FaceTime setting allows users to see words highlighted as they are spoken during a telephony call. Otherwise, there is no voice output on the device user's end when they are speaking allowing them to ensure their message was spoken. -
Page 82: Setting Up Switch Scanning In The Dialogue App
Setting up Switch Scanning in the Dialogue App As an alternative to directly selecting each button on the screen, the Dialogue app offers single switch and two-switch scanning. Setting up One or Two Switches You can set up one or two wired or wireless switches to work with scanning in the Dialogue app. 1. -
Page 83: Using The Scanning Settings
Using the Scanning Settings To access the options for customizing a scanning technique, tap Menu and select Settings. Scroll to the Scanning section. Setting Description Scanning Enabled Turns scanning on or off. You must turn scanning on to access the other scanning settings. -
Page 84: Including The Speech Display Bar (Sdb) In Scans
Using Row/Column Scan Mode: A row/column scan highlights each row of buttons beginning with the top row and move down the screen. When the row that contains the button you want is highlighted, activate your switch. The scan will then step through the buttons from left to right across the row. When the button you want is highlighted, activate your switch. -
Page 85: Setting Up A Button To Play A Video
Setting up a Button to Play a Video 1. In the Dialogue app, display the page that has the button you want to use to play the video. 2. Choose Menu > Edit Page. 3. Tap the button you want to use and choose Edit This Button. 4. -
Page 86: Setting Up A Button To Play A Youtube™ Video
Setting up a Button to Play a YouTube™ Video Note: You must have an active Wi-Fi connection. 1. On your device, select the YouTube video you want. 2. Tap the Share icon and then tap the Copy Link icon. A “Copied” message should appear. 3. -
Page 87: Setting Up A Button To Open An App
Setting up a Button to Open an App Note: This feature is not available in dedicated systems. 1. Go to the page that has the button you want to use and tap Menu. 2. Select Edit Page. The page is now in Edit Mode. 3. -
Page 88: Blocking And Restoring Access To The Editing Menus
Blocking and Restoring Access to the Editing Menus There may be times when you need to block access to the Editing menus. To do this, the Use Menu Passcode setting can be turned on or off. When this setting is turned on, the Menu and Vocab items can only be accessed by entering a password. -
Page 89: Working With Profiles
Working with Profiles Profiles provide a snapshot of the current settings of the system to be saved for easy access at a later time. You can save multiple profiles to be used when needed. Creating multiple profiles allows you to switch between groups of settings. -
Page 90: Renaming Or Deleting A Profile
Renaming or Deleting a Profile 1. Tap Menu, select Settings, and select Load Profile. Profiles that you have created will be listed. 2. Choose Edit. The delete icon will appear to the left of each profile name. 3. Tap the delete icon for the profile you want to rename. Rename and Delete buttons will appear. 4. -
Page 91: Changing Dialogue App Settings
Changing Dialogue App Settings To open the Dialogue app settings, tap Menu and select Settings. From the Settings screen, scroll to see all available settings. When you finish changing settings, tap Done in the upper left corner of the settings. Note: For Head tracking settings, see “Appendix B: Setting up and Using Head Tracking”... - Page 92 Setting Description Phone/FaceTime Voice Select the voice you want to use for phone calls. The Phone/FaceTime Voice setting displays the voice currently selected. To download and install a different voice, tap Phone/FaceTime Voice to open a list of available voices. To hear how a voice sounds, select the icon.
- Page 93 Speak Setting Description Speak Characters When this setting is turned on, each character will be spoken as entered. Speak Words When this setting is turned on, each word will be spoken as entered. Speak Sentences When this setting is turned on, each sentence will be spoken as entered. Auto Clear Set what happens to text in the Speech Display Bar after it is spoken.
- Page 94 Message Banking Setting Description PRC-Saltillo Message Takes you to the PRC-Saltillo Message Bank site. To return to the Dialogue app, tap Bank Site Dialogue in the upper left corner of the screen. MyMessageBanking Site Takes you to MyMessageBanking.com. To return to the Dialogue app, tap Dialogue in the upper left corner of the screen.
-
Page 95: Updating The Dialogue App Software
Updating the Dialogue App Software Updating the Dialogue App using the App Store Icon ® When an update is available, the App Store icon will appear with a number on the right-hand corner of the icon. Important! Wi-Fi must be turned on. 1. -
Page 96: Analyzing Language Development
Analyzing Language Development You can use the data logging capabilities of your device to collect information on a person’s language development. Then you can upload that information to the Realize Language™ website. Collect data on Upload the data to the Create easy-to- your device Realize Language website... -
Page 97: Turning On Data Logging From Your Device
Turning on Data Logging from Your Device When data logging is turned on, your device collects language usage data which you can upload to the Realize Language website for web-based analysis or save to a file to analyze manually. 1. In the Dialogue app tap Menu and select Settings. 2. -
Page 98: Clearing Usage Data
Clearing Usage Data To clear usage data for the current person: 1. Under Data Logging, tap the Clear button. 2. The Privacy Password prompt and keyboard will be displayed. Type your privacy password and tap Enter. 3. “Do you really want to Clear Log?” will be displayed. Choose Yes to clear the data log. 4. -
Page 99: Adding A Webhook Event To A Button
Adding a Webhook Event to a Button Do you know about webhooks and would you like to use them with your device? Here’s how the Dialogue app supports them. Please note that this section requires a basic understanding of webhooks and programming skills. -
Page 100: Adding A Webhook Event
Adding a Webhook Event You can create as many webhook buttons as you want, but you can only specify one URL for each button. Examples of webhook events: send the latest weather report to your device; trigger a payment; send an alert when something happens;... -
Page 101: Non-Dedicated Devices: Viewing Dialogue And Another App Side-By-Side
Non-Dedicated Devices: Viewing Dialogue and Another App Side-by- Side On a non-dedicated device, iOS Split View allows you to view two apps side-by side at the same time. Not all apps support this feature. Split View should function by default. If Split View does not function by default, open the iOS Settings, select Home Screen &... -
Page 102: Telephony: Using The Dialogue App To Make Phone Calls
Telephony: Using the Dialogue App to Make Phone Calls Important! • You must be using the Dialogue app on a non-dedicated device. If you are using a dedicated device, you will not be able to use the phone functionality. You must have version 2.28 or later of the Dialogue app, and your device must be running iOS 13 •... - Page 103 4. From the FaceTime app, select the person you want to call. 5. When the person you are calling answers, use the Dialogue app to start speaking. Note: During the call, dialogue will switch from your usual device voice to the Phone/FaceTime voice you selected.
-
Page 104: Backing Up Your Device
Backing up Your Device Important! These procedures explain how to back up and restore device files only. They do not apply to Essence vocabulary files. 1. Open the iTunes application on the computer. 2. Connect your device to the computer using a USB cable. 3. -
Page 105: Identifying Parts Of Speech
1. Go to the page with the button location you want. 2. Tap Menu and select Edit Page. 3. Tap the button you want to use. 4. Select Edit This Button. 5. Add a label. For example, enter -s. 6. Scroll down to the Button Actions section. 7. -
Page 106: Creating A Grammar Rule Button
7. Choose Save. In this example Apply Grammar Property (noun), will appear at the bottom of the list of actions defined for the button. Important! The grammar property must appear first in the list of actions. You’ll need to move it to the top of the list. -
Page 107: Using Your Grammar Rule Button
Using Your Grammar Rule Button Place the grammar rule button on a page of applicable items. For example, place a pluralize button on a page of things (nouns). If you tap your pluralize button and then choose a thing, you will need to tap the pluralize button again before pluralizing another thing. -
Page 108: Appendix B: Setting Up And Using Head Tracking
Appendix B: Setting up and Using Head Tracking This section explains how to set up and use head tracking with the Dialogue app. Setting up Head Tracking Note: Head tracking is only available on iOS devices or iPadOS devices that have a front-facing TrueDepth®... -
Page 109: Available Settings
Available Settings Note: The default setting for each option in this section is indicated by an asterisk *. Tracking Speed The relative speed at which the cursor moves on the screen for each head movement. Choose from the following tracking speeds: Very Slow, Slow*, Normal, Fast, and Very Fast. The slower settings require greater head movement;... - Page 110 Trigger Action The head or face action that will make an activation. When you stop moving your head to point at the item you want, the cursor appears on that item or the item is highlighted. The selected action then activates the item.
- Page 111 Highlight Buttons When Highlight Buttons is turned on, buttons are highlighted by a colored outline to indicate head position as you move your head. Tap to turn on the highlight. You can indicate head position by cursor, by highlight, or by both at the same time. Note: Highlight Buttons is turned on by default.
- Page 112 Cursor Smoothing Smoothing compensates for minor shakiness or tremors to reduce accidental button activations. The greater the user’s involuntary head movement, the more you may need to increase the smoothing value to compensate. A lower smoothing value will also make the cursor more responsive. Choose one of these options: The cursor will appear less stable, but will be more responsive to head movements.
-
Page 113: Head Tracking Tips
Additional Setting – Auto-Lock Time If the device screen dims while you are using head tracking, change the Auto-Lock time. Change the time only as much as necessary. Longer auto-lock times will use more battery charge. 1. Open the iPad settings. 2. -
Page 114: Appendix C: Using Message Banking
Accessing a Message Banking Website 1. Tap Menu, select Settings, and scroll to the Message Banking section. 2. To access one of the message banking sites, tap either PRC-Saltillo Message Bank Site or MyMessageBanking Site and log in. 3. Record your messages, combine them into a .zip file, and download them to your device. -
Page 115: Appendix D: Compliance Information
PRC-Saltillo assumes no responsibility for any loss or claims by third parties which may arise through the use of this product. • PRC-Saltillo assumes no responsibility for any damage or loss caused by the deletion of data as a result of malfunction repairs or •... - Page 116 There is no need to turn the device or amplifier off when using the device on a daily basis. It is recommended to restart the device once per week and put it to sleep daily. • To report any serious incident associated with the device, contact PRC-Saltillo and your national authority. • For information on cleaning the device, see “Cleaning and Disinfecting the Device”.
- Page 117 Classifications Protection against electrical shock Class II / internally powered Protection against solid objects IP44 over 1mm and water splashed in all directions Mode of operation Continuous Type of applied part Via Pro Specifications: Active Wrap Weight 2.65 lbs. Dimensions 11 1/4 in.
- Page 118 Transport and Storage Environment While in transport or storage, the range of temperatures to which the device can be exposed is -25°C (-13°F) without relative humidity control to 70°C (158°F) at a relative humidity up to 93%, non-condensing. Temperature Conditions for Direct Contact At an ambient temperature of 40°C (104°F), the surface temperature of the back of the device can increase as much as 11°C (51.8°F) during charging to a temperature of 51°C (123.8°F).
Need help?
Do you have a question about the ViaPro11.2 and is the answer not in the manual?
Questions and answers