
Related Manuals for Ickle Bubba STOMP


Summary of Contents for Ickle Bubba STOMP
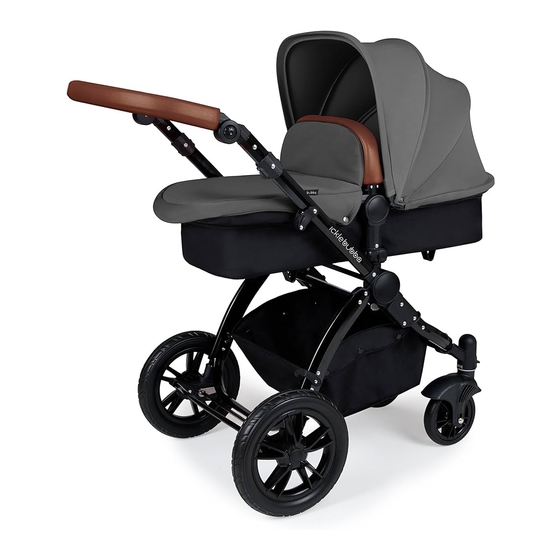
- Page 1 STOMP travel system INSTRUCTIONS FOR USE Product may differ slightly from image shown...
-
Page 2: Table Of Contents
FEATURES Dear Parents Congratulations on the purchase of your Stomp Travel System! Your child’s safety can only be guaranteed if this product is used according to these instructions. Therefore, please take time to read through this instruction manual carefully and keep for future reference. -
Page 3: Components
COMPONENTS Components Handlebar & Cover Rear Wheel Seat/Carry Cot Frame* Handlebar Adjuster Wheel Disassembly Button Carry Cot Fabric Right Folding Button Canopy Seat Unit Fabric Left Folding Button Bumper Bar Chassis Seat Unit Canopy Connector Carry Cot Apron Seat Disassembly Button Recline Buttons Raincover Brake Bar... -
Page 4: Important Safety Information
The Stomp carry cot unit is suitable for children from birth. It is suitable for a child who cannot sit up unaided, roll over and cannot push itself up on its hands and knees. - Page 5 Brake Bar Installation Front Wheel Installation Rear Wheel Installation Brake Bar Installation 1. Please ensure the chassis is unfolded before installing the brake bar and wheels. Attach the brake bar to the rear of the chassis as shown above. 2. Ensure the silver locking clips are visible on each side and test this by pulling the brake bar downwards once it has been installed.
-
Page 6: Carrycot Set Up
Canopy Installation CARRYCOT SET UP Preparing the Carry cot 1. The carry cot fabric should already be attached to the carry cot/seat unit frame. IMPORTANT: The position of the carry cot may need to be adjusted to make it level. This can be done by firmly pressing on the recline buttons and making sure this all points vertically downwards (a) located either side of the carry cot frame, as shown above. -
Page 7: Seat Unit Set Up
SEAT UNIT SET UP CARRY COT/STROLLER ATTACHMENT Preparing the Seat Unit Installation 1. Line up the release clips with the chassis and then push down until both sides click into place. Please test this by pulling upwards. IMPORTANT: There may be a slight movement to the carry cot when it is locked onto the chassis. Disassembly 2. -
Page 8: How To Use The Stroller
HOW TO USE THE STROLLER Reversing the Seat Unit Pram Brake To reverse the seat unit direction, simply To apply the brake simply push down. To follow the same steps as indicated remove the brake function lift upwards. on page 13 as the seat unit can be Parent Facing or World Facing. -
Page 9: Adapter/Capsule Attatchment
ADAPTER/CAPSULE ATTATCHMENT Folding The Stroller “Click” Capsule Adapter Attachment 1. Insert each adapter into the capsule before attaching to the chassis. Capsule Attachment 2. Line up the capsule adapters with the chassis and apply even pressure on both sides until you here a click. Removing the Capsule 3. -
Page 10: Accessories
ACCESSORIES CARE AND MAINTENANCE • Always check the stroller for any wear or damage. • Storage – Store the stroller in a dry place, do not store in a damp or hot environment. Never leave in sunlight for prolonged periods. •... - Page 11 The warranty applied to the first owner and is non transferrable. What to Do in Case of Defects If you feel there is a problem with your Ickle Bubba product then please contact your original approved reseller. Ickle Bubba Ltd, 10-12 Flushcombe Rd, Blackstown, NSW 2148 Email Contact : sales@rogerarmstrong.com.au...
- Page 12 NOTES NOTES icklebubba.com icklebubba.com...
- Page 13 Atlantic House, Unit 2, Atlantic Close, Swansea, SA7 9FJ Ickle Bubba Ltd, 10-12 Flushcombe Rd, Blackstown, NSW 2148 www.icklebubba.com...
Need help?
Do you have a question about the STOMP and is the answer not in the manual?
Questions and answers