Advertisement
Table of Contents
- 1 Table of Contents
- 2 Thank You Letter
- 3 Safety Instructions
- 4 Specifications
- 5 Product Overview
- 6 Product Installation
- 7 Operation Instructions
- 8 Cleaning and Maintenance
- 9 Troubleshooting
- 10 Trademarks, Copyrights and Legal Statement
- 11 Disposal and Recycling
- 12 Data Protection Notice
- Download this manual
Water Dispenser
USER MANUAL
YL2037S-B
YL1632S-W
Warning notices: Before using this product, please read this manual carefully and keep it for future reference.
The design and specifications are subject to change without prior notice for product improvement.
Consult with your dealer or manufacturer for details.
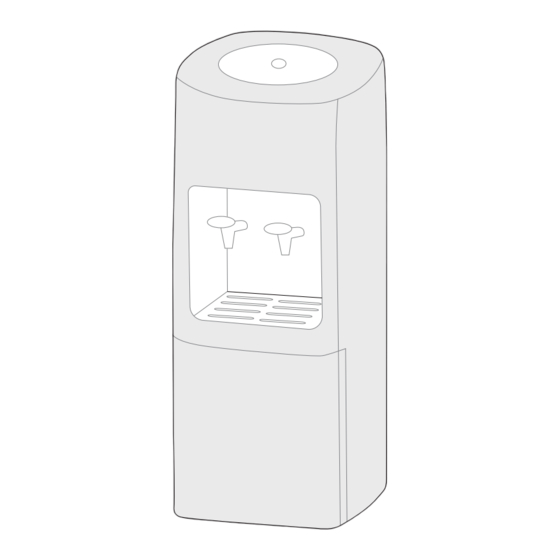
The diagram above is just for reference. Please take the appearance of the actual product as the standard.
Advertisement
Table of Contents

Related Manuals for Midea YL2037S-B


Summary of Contents for Midea YL2037S-B
- Page 1 Water Dispenser USER MANUAL YL2037S-B YL1632S-W Warning notices: Before using this product, please read this manual carefully and keep it for future reference. The design and specifications are subject to change without prior notice for product improvement. Consult with your dealer or manufacturer for details.
-
Page 2: Table Of Contents
THANK YOU LETTER Thank you for choosing Midea! Before using your new Midea product, please read this manual thoroughly to ensure that you know how to operate the features and functions that your new appliance o ers in a safe way. -
Page 3: Safety Instructions
SAFETY INSTRUCTIONS Intended Use The following safety guidelines are intended to prevent unforeseen risks or damage from unsafe or incorrect operation of the appliance. Please check the packaging and appliance on arrival to make sure everything is intact to ensure safe operation. If you find any damage, please contact the retailer or dealer. - Page 4 SAFETY INSTRUCTIONS DANGER: Risk of Fire/Flammable materials Do not store explosive substances such as aerosol cans with a flammable propellant in ● this appliance. The appliance must be disconnected from the main safter use and before user-per- ● formable maintenance is carried out. ●...
- Page 5 SAFETY INSTRUCTIONS WARNING: When positioning the appliance, ensure the supply cord is not trapped or ● damaged. WARNING: Do not locate multiple portable socket-outlets or portable power supplies ● at the rear of the appliance. WARNING: To avoid a hazard due to instability of the appliance, it must be fixed in ●...
-
Page 6: Specifications
SPECIFICATIONS Product Model YL2037S-B Rated Voltage 220-240V~ Rated Frequency 50/60Hz Rated power 520W 420W Heating power Cooling current 1.0A Hot water 4L/h(≥85°C) Cold water 2L/h(≤10°C) REFRIGERANT R134a(36g) Product Model YL1632S-W Rated Voltage 220-240V~ Rated Frequency 50/60Hz Rated power 520W Heating power... -
Page 7: Product Overview
PRODUCT OVERVIEW Product YL2037S-B Bottle supporter Button of hot water Top cover Button of normal water Button of cold water Indicator lights Heating switch Water faucet Cooling switch Water drip tray Door Power supply cord Outlet of hot water Condenser... - Page 8 PRODUCT OVERVIEW Product YL1632S-W Button of hot water Button of normal water Power pilot lamp Button of cold water Heating pilot lamp Cooling pilot lamp Spout Water collector Door Bottle supporter Heating switch Top cover Cooling switch Power supply cord Condenser Outlet of hot water...
- Page 9 Accessories YL2037S-B Instruction Manual x1 Warranty Card x1 screw x2 Anchor bolt x1 fixed block x1 YL1632S-W Instruction Manual x1 Warranty Card x1 screw x1 Anchor bolt x1...
-
Page 10: Product Installation
PRODUCT INSTALLATION GETTING STARTED Locate Dispenser 1. Use the appliance indoors, where is no likelihood of rain or bad weather, as there is damage risk to the product electrical system. 2. Place dispenser upright the product must be installed in as easily accessible location in case of repairs. - Page 11 - If you do not want to cool water, push bottom side of green switch to the OFF position. MACHINE INSTALLATION YL2037S-B 1. Use the screw to fix the bracket on the hole of the middle bottom of the water dispenser.
-
Page 12: Operation Instructions
OPERATION INSTRUCTIONS Operation Panel YL1632S-W YL2037S-B Description Power Indicator Plug cord into a properly grounded wall outlet, the ● Light power pilot lamp is on, and o when unplug; Plug the power supply cord into a wall outlet, the ●... - Page 13 OPERATION INSTRUCTIONS Dispensing Ambient Water 1. Position bottle, glass, pitcher or cooking pot below tap. 2. Depress ambient water button downward to start ambient water flow. 3. Release button once desired fill level is achieved. Dispensing Hot Water Hot water is ready after 15 minutes for the 1 install. The water will be heated again. You have to wait until the heating light is o .
-
Page 14: Cleaning And Maintenance
CLEANING AND MAINTENANCE To avoid accident, cut o the power supply before operation according to the following instructions. 1. The machine had been disinfected before departing from factory. Clean the Clean the dispenser prior to installing a full bottle of water for the fist time. 2. -
Page 15: Troubleshooting
TROUBLESHOOTING Please check the followings before having the machine repaired. Problem Possible reason Solution Just wait a moment, then hot Over consumption of hot or ● or cold water is available again. cold water in short time. No hot or cold water No power supply. -
Page 16: Trademarks, Copyrights And Legal Statement
Midea may constitute trademark infringement or unfair competition in violation of relevant laws. This manual is created by Midea and Midea reserves all copyrights thereof. No entity or individual may use, duplicate, modify, distribute in whole or in part this manual, or bundle or sell with other products without the prior written consent of Midea. -
Page 17: Disposal And Recycling
DISPOSAL AND RECYCLING Important instructions for environment Compliance with the WEEE Directive and Disposing of the Waster Product: This product complies with EU WEEE Directive (2012/19/EU). This product bears a classification symbol for waster electrical and electronic equipment (WEEE). This symbol indicates that this product shall not be disposed with other household wastes at the end of its service life. -
Page 18: Data Protection Notice
European Economic Area. Further information are provided on request. You can contact our Data Protection O cer via MideaDPO@midea.com. To exercise your rights such as right to object your personal date being processed for direct marketing purposes, please contact us via... - Page 20 Midea 2023 all rights reserved...
Need help?
Do you have a question about the YL2037S-B and is the answer not in the manual?
Questions and answers