Advertisement
Quick Links
Advertisement

Related Manuals for Zebronics ZEB JUKE BAR 9102 PRO DOLBY


Summary of Contents for Zebronics ZEB JUKE BAR 9102 PRO DOLBY
- Page 1 User Manual www.zebronics.com...
- Page 2 Important Safety Instruction Thank you for purchasing the ZEB-JUKE BAR 9102 PRO DOLBY. Please read this user manual carefully and keep for future reference. Warning Caution: To reduce the risk of electric shock, do not Ÿ dismantle the product and do not expose the apparatus to rain or moisture.
- Page 3 The lightning flash within an e q u i l a t e r a l t r i a n g l e i s intended to alert you to the presence of uninsulated dangerous voltage within the product’s enclosure that may be of sufficient magnitude to constitute an electric shock to a person or persons.
- Page 4 5. Before operating this system, check the voltage of this system to see if it is identical to the voltage of your local power supply. 6. The unit should not be impeded by covering the ventilation opening with items such as newspaper, table-cloths, curtains etc.
-
Page 5: Important Safety Instructions
13. Do not attempt to clean the unit with chemical solvents as this might damage the finish. Wipe with a clean, dry or slightly damp cloth. 14. When removing the power plug from the wall outlet, always pull directly on the plug, never pull on the cord. - Page 6 6. Protect the power cord from being walked o n o r p i n c h e d p a r t i c u l a r l y a t p l u g s , convenience receptacles or at the point where they exit from the apparatus.
- Page 7 2. Remove any descriptive labels or stickers on the front or top of the cabinet. Do not remove any labels or stickers from the back or bottom of the cabinet. 3. Place your Sound bar on a level surface such as a table, desk or shelf, convenient to an AC outlet, out of direct sunlight, and away from sources of excess heat, dirt, dust, moisture,...
- Page 8 To prevent any damage to your furniture we strongly recommend that you purchase small self-adhesive felt pads, available at hardware stores and home improvement center everywhere, and apply these pads to the bottom of the rubber 'feet' before you place the unit.
- Page 9 For safety reasons, do not remove any Ÿ covers or attempt to gain access to the inside of the product. Refer any servicing to qualified personnel. Do not attempt to remove any screws, or Ÿ open the casing of the unit; there are no user serviceable parts inside.
-
Page 10: Remote Control
LED Display SW OUT OPTICAL HDMI(ARC) AC IN Power/Standby INPUT 10. VOL- 11. VOL+ Remote Control... - Page 11 : Standby mode for power on/off. 2. PAIR: 2. RESET/PLAY: (Reset EQ and volume in any mode, high and low tuning )Reset: Press and hold the button more than 3 sec. to Set all functions to manufacturer defaults. 3. VOL+ : Master Volume Up. 4.
- Page 12 Positioning the Sound Bar Place on a flat Surface Place the sound bar horizontally on a flat surface such as a TV unit or shelves and align it centrally with the TV screen. Allow some space between the speaker and the wall. Don’t place inside a cabinet or an a walled shelf.
- Page 13 Follow below steps to mount the sound bar on the wall 1. Make 2 holes on the wall with distance same as the wall bracket on the soundbar 2. Put the plastic anchors onto the wall and secure the screws to the plastic clip, do not tighten the screws all the way make sure leave some space 3.
- Page 14 OPERATE INSTRUCTIONS Setting the Soundbar 1. Plug in the power cord and the display will light up (Standby mode) 2. Switch on the soundbar by using power button on soundbar or by using STANDBY button on remote. After switching on, the default input mode will appear on display.
- Page 15 Powering On/Off Plug the power cord of sound bar into a wall outlet, it will automatically enter standby mode Short-press the “STANDBY” button on sound bar or on remote controller to turn on the sound bar To turn off, press and hold the “STANDBY” button for 2 seconds, then unplug from wall outlet.
- Page 16 Playing Audio via BT Connection Turn on sound bar and then short-press the multi-function button to switch to BT mode and the LED will show BT Activate the pairing function on your phone of other compatible device and select "ZEB-JUKE BAR 9102 PRO DOLBY”. When successfully paired, you will hear a tone and the LED Display will stay on.
- Page 17 Playing Audio via USB Port The sound bar automatically switches to USB input mode with the LED display US when a USB flash drive is inserted (this mode isn't selectable on the sound bar or remote control unless a USB flash drive is connected). 1.
- Page 18 Note: For some computers, you may need to access the audio control panel to manually set the soundbar as shown steps on above. HDMI (ARC) Mode 1. The soundbar supports HDMI (ARC) with audio return channel (ARC). You can hear the TV audio through your soundbar by using a single HDMI (ARC) cable.
- Page 19 5. Use the volume buttons to adjust the volume to your requirements. 6. You can also change the audio settings by using the relevant buttons on the remote control. Note: 1. When connecting a device such as a TV/Set- top box/DVD/ game console with HDMI (ARC) cable, set the audio output mode of the device to Dolby or Auto mode <digital HDMI (ARC) output>.
- Page 20 -The TV must have an optical digital output. Use the optical cable to make the connection as follows: 1. Connect the optical cable to the optical digital output of your TV. 2. Connect the optical cable to the optical digital input of your soundbar. 3.
-
Page 21: Troubleshooting
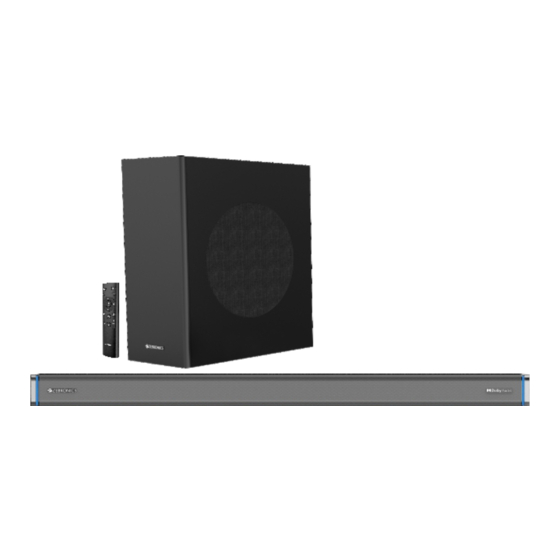
Troubleshooting... - Page 22 Features: (BT v5.0 | HDMI (ARC) | Optical IN | USB | AUX) Dolby Audio 16.51cm Subwoofer Remote control LED Display Volume/Media Control Wall Mountable Sound Bar with Quad Drivers Glossy Finish Specifications Output Power (RMS) Subwoofer : 120W Soundbar : 30W x 4 Total : 240W...
- Page 23 : 19 x 31 x 37 cm Sound bar : 96 x 10 x 7 cm Package Dimension (W x D x H) Net.Weight Subwoofer : 4.3 kg Sound bar : 2 kg Total : 6.3 kg ISO 9001:2015 Certified Company www.zebronics.com...
Need help?
Do you have a question about the ZEB JUKE BAR 9102 PRO DOLBY and is the answer not in the manual?
Questions and answers