Advertisement
Quick Links
Advertisement

Related Manuals for Zebronics Zeb-Juke Bar 9530WS


Summary of Contents for Zebronics Zeb-Juke Bar 9530WS
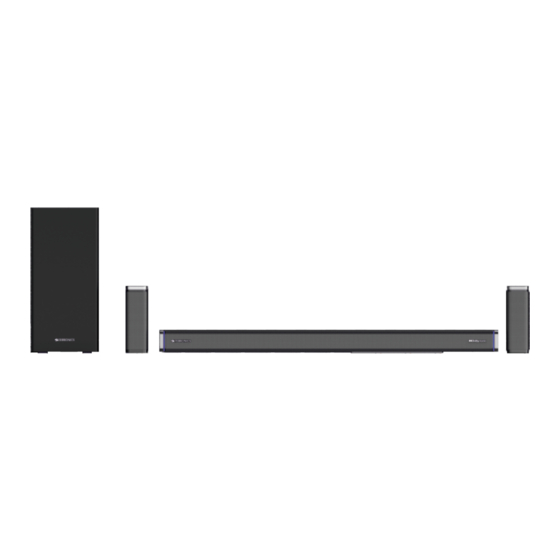
- Page 1 Juke Bar 9530WS Pro Dolby 5.1 User Manual www.zebronics.com...
-
Page 2: Important Safety Instruction
Important Safety Instruction Thank you for purchasing the ZEB-JUKE BAR 9350WS DOLBY 5.1 Soundbar. Please read this user manual carefully and keep for future reference. Warning Caution: To reduce the risk of electric shock, do not Ÿ dismantle the product and do not expose the device to rain or moisture. - Page 3 The lightning flash within an e q u i l a t e r a l t r i a n g l e i s intended to alert you to the presence of uninsulated dangerous voltage within the product’s enclosure that may be of sufficient magnitude to constitute an electric shock to a person or persons.
- Page 4 volume levels for long time periods or a sudden high volume level. 2. Never use the device unsupervised! Switch off the device whenever you are not using it, even if not using it only for a short while. 3. The device is not intended to be operated by means of an external timer or separate remote control system.
- Page 5 or swimming pools. Ensure that you place the unit on a dry, stable surface. 10. Do not place this unit close to a strong magnetic field. 11. Do not place the unit on a amplifier or receiver. 12. Do not place this unit in a damp area as the moisture will affect the life of electric components.
-
Page 6: Important Safety Instructions
Important Safety Instructions 1. Read these instructions. Keep these instructions. Follow all instructions. Heed all warnings. 2. Do not use this device near water. 3. Clean only with dry cloth. 4. Do not block any ventilation openings. Install in accordance with the manufacturer's instructions. - Page 7 10. The AC plug is used to disconnect the device, the disconnected device should remain readily operable. In order to disconnect the device from the AC power completely, the AC plug must be removed from the AC power socket completely. Preparation for Use Unpacking and Set Up Remove the Sound bar from the carton...
- Page 8 Protect Your Furniture This model is equipped with non-skid rubber 'feet' to prevent the product from moving when you operate the controls. These 'feet' are made from non-migrating rubber material specially formulated to avoid leaving any marks or stains on your furniture. However c e r t a i n t y p e s o f o i l b a s e d f u r n i t u r e polishes, wood preservatives, or cleaning sprays may cause the rubber 'feet' to soften,...
- Page 9 Ÿ On top of other stereo equipment that radiate too much heat -Blocking ventilation or in a dusty area. Ÿ Areas where there is constant vibration. Ÿ Humid or moist places. Ÿ Do not place near candles or other flames. Ÿ...
- Page 10 Product Representation Sound Bar 1. LED DISPLAY 2. AC IN 3. SR OUT 4. SL OUT 5. SW OUT 6. USB 7. OPTICAL 8. LINE IN(AUX) 9. FOR UPDATE 10. HDMI(ARC) 11. POWER/STAND BY 12. INPUT 13. VOL - 14. VOL +...
-
Page 11: Remote Control
Remote Control... - Page 12 : Standby mode for power on/off. 2. PAIR : Connect or disconnect to the pairing device. (Press the button more than 2 seconds). 3. RESET : Reset all CH volume levels to default of factory setting and switch EQ to Music mode when press and hold button more than 2 seconds.
- Page 13 Positioning the Sound Bar Place on a flat Surface Place the sound bar horizontally on a flat surface such as a TV unit or shelves and align it centrally with the TV screen. Allow some space between the speaker and the wall. Don’t place inside a cabinet or an a walled shelf.
- Page 14 Pair up with the surround 1. Plug the soundbar into the main socket and press "POWER/STANDBY" to turn on the soundbar, then press" "INPUT" on the soundbar to switch to the bluetooth (BT) mode. 2. Power on rear surround speakers. The blue LED indicator on the surround will blink slowly which indicates entering into pairing mode between soundbar and the wireless surround.
- Page 15 switched off and on. 6. If you want to pair your wireless surround with another soundbar, please repeat step 1 to step 4 above. Ensure that the soundbar you want to pair with the surround are within range turned on and any other pairing devices are switched off...
- Page 16 Follow below steps to mount the sound bar on the wall 1. Paste 2 pieces of EVA foam (with holes) on the two wall brackets aligning at the hole position of wall brackets. 2. Remove 4 screws from the rear housing of sound bar, then insert the 4 screws over the wall bracket screw holes aligning (on the side of EVA foam pasted), and then fasten the screws...
- Page 17 Follow below steps to mount the surround speaker on the wall 1. Make 2 holes on the wall with distance of two surround speakers you needed. 2. Put the plastic anchors onto the wall and secure the screws to the plastic clip, do not tighten the screws all the way make sure leave some space 3.
- Page 18 OPERATE INSTRUCTIONS Setting the Soundbar 1. Plug in the power cord and the display will light up (Standby mode) 2. Switch on the sound bar by pressing “STANDBY” button on sound bar or on remote controller. After switching on, the default input mode will appear on display.
- Page 19 Powering On/Off 5. Plug the power cord of sound bar into a power socket, it will automatically enter standby mode. 6. Short-press the “STANDBY” button on sound bar or on remote controller to turn on the sound bar. 7. To turn off, press and hold the “STANDBY” button for 2 seconds, then unplug from power socket.
- Page 20 Notes: Playing Audio via USB Port The sound bar automatically switches to USB input mode with the LED display “ Usb ” when a USB flash drive is inserted (this mode isn't selectable on the sound bar or remote control unless a USB flash drive is connected).
- Page 21 Using the Soundbar...
- Page 22 Audio input (Aux) Connection 1. Firstly connect the soundbar to your PC, laptop, smart-phone, TV, or other audio devices by using an AUX cable provided. Make sure that these devices have both AUX IN and AUX OUT terminals. 2. Then press the STANDBY button or INPUT button on remote control to switch the soundbar to Aux mode, once the soundbar is connected in Aux mode, the screen will display...
- Page 23 setting in “sound output” mode should be set as <external Dolby or Auto mode>, in addition, digital audio output mode should be set as <automatic> or <decoded output as Dolby>. When the HDMI (ARC) cable is connected, the TV digital audio output is set as Dolby or Auto mode.
- Page 24 Optical Mode Check the direction of the plug. Connect the soundbar and TV with the optical cable. Use this mode to play music from a TV with optical digital output on the sound bar. In TV sound settings, select the soundbar optical connection (output for audio).
- Page 25 Features: Multi Connectivity (BT v5.0 | HDMI (ARC) | Optical IN | USB | AUX) 16.51cm Subwoofer Remote control Wall Mountable LED Display Dolby Audio Volume/Media Control Specifications Output Power Subwoofer : 140 watts Soundbar : 120 watts Satellites : 40 watts x 2 Total : 340 watts Driver Size...
- Page 26 S/N Ratio : ≥65dB Separation : ≥40dB File format support (USB): Mp3 Line input : AUX, Optical IN, HDMI (ARC) Max supported memory size (USB) : 32GB BT name : ZEB-JUKE BAR 9530WS PRO DOLBY BT version : v5.0 Product Dimension (W x D x H) Subwoofer : 19 x 30.6 x 36.8 cm Sound bar...
-
Page 27: Troubleshooting
Troubleshooting PROBLEM/TROUBLE POSSIBLE CAUSE SOLUTION Another input source is selected. Select an appropriate input source. The mute function is activated. Cancel the mute function. The volume of sound bar or TV/other device Increase the volume level on sound bar or is adjusted too low. - Page 28 3. Press and hold the subwoofer’s rear plate WPS button to reset the connection, so that the sound bar and subwoofer can be reconnected again. ISO 9001:2015 Certified Company www.zebronics.com...
Need help?
Do you have a question about the Zeb-Juke Bar 9530WS and is the answer not in the manual?
Questions and answers
I need latest firmware for my zukebar 9530ws pro , because it get disconnected automatically after connecting to hdmi arc port