
Related Manuals for Sanus WSSA2-W2


Summary of Contents for Sanus WSSA2-W2
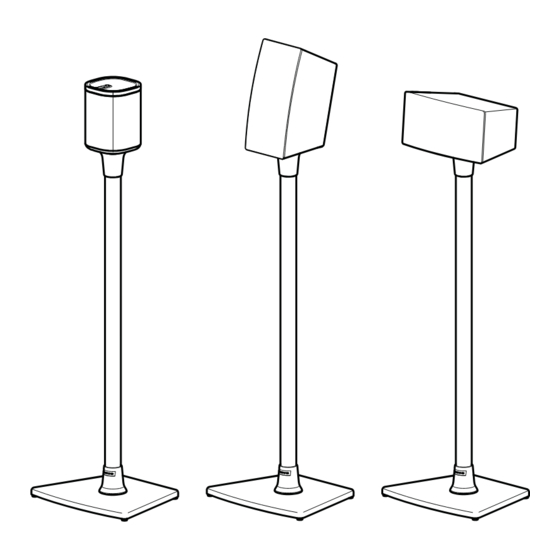
- Page 1 User Manual of Product 1: Sanus WSSA2-W2 Height Adjustable Wireless Speaker Stand in Pair for SONOS ONE PLAY: 1 and PLAY: 3 - White...
- Page 2 WSS1 / WSS2 SPEAKER STAND INSTRUCTION MANUAL We’ll Make It Stress-Free If you have any questions along the way, just give us a call. 1-800-359-5520. We’re ready to help!
- Page 3 IMPORTANT SAFETY INSTRUCTIONS – SAVE THESE INSTRUCTIONS – PLEASE READ ENTIRE MANUAL PRIOR TO USE Before getting started, let’s make sure this product is perfect for you! ® Do you own a Sonos PLAY:1™ or PLAY:3™ speaker? The speaker stands are designed to support only PLAY:1 and PLAY:3 speakers. Weight Limit: 5.8 lb (2.6 kg) Do you have the tool that is needed? Ready to begin?
- Page 4 Dimensions 13 in. (322 mm) 34 in. 10 in. (866 mm) (254 mm) Top View Front View...
-
Page 5: Parts And Hardware
Parts and Hardware WARNING: This product contains small items that could be a choking hazard if swallowed. Before starting assembly, verify all parts are included and undamaged. If any parts are missing or damaged, do not return the damaged item to your dealer;... - Page 6 Parts and Hardware for STEP 5 Hardware for STEP 6 Bracket Screw ® Sonos PLAY:1™ Bracket 1/4-20 x 5/8 in. ® Sonos PLAY:3™ Horizontal Bracket 2.7 in. Felt Pad Speaker Screw 1/4-20 x 3/8 in. ® Sonos PLAY:3™ Vertical Bracket...
- Page 7 STEP 1 Install Base onto Tube 1/4-20 x 3/4 in.
- Page 8 STEP 2 Slide Collars onto Tube...
- Page 9 STEP 3 Route Speaker Power Cord NOTE: Ethernet cord, if required (see speaker manual), should always be installed after the appropriate power cord. (See page 10) PLAY:1 PLAY:3 Ethernet...
- Page 10 STEP 4 Install Rubber Isolation Pads or Carpet Spikes Rubber Isolation Pads Optional Carpet Spikes WARNING: Twist rubber isolation pads into the base The ends of the carpet spikes are sharp and may scratch flooring, damage wiring, or be hazardous to small children.
- Page 11 Install Ethernet Cord If ethernet cord is required: Set assembled stand upright and feed one end of ethernet cord into the top opening. Work the cord through the tube and pull the end through the bottom opening. NOTE: Ethernet cord should always be installed after the appropriate power cord.
- Page 12 STEP 5 Attach Speaker Bracket 1/4-20 x 5/8 in. PLAY:1 PLAY:3 Horizontal PLAY:3 Vertical...
- Page 13 STEP 6 Attach Speaker - PLAY:1 1/4-20 x 3/8 in.
- Page 14 STEP 6 Attach Speaker - PLAY:3 Horizontal Vertical 1/4-20 x 3/8 in. 1/4-20 x 3/8 in.
- Page 15 STEP 7 Pull Wires STEP 8 Position Collars...
- Page 17 ESPAÑOL INSTRUCCIONES IMPORTANTES DE SEGURIDAD: GUARDE ESTAS INSTRUCCIONES Y LEA TODO EL MANUAL ANTES DE UTILIZAR ESTE PRODUCTO. Antes de comenzar, verifi quemos que este producto sea el ideal para sus necesidades. ® ¿Posee unos altavoces Sonos PLAY:1™ o PLAY:3™? Los soportes para altavoces fueron concebidos para sostener altavoces PLAY:1 y PLAY:3, exclusivamente.
- Page 18 ESPAÑOL Dimensiones (consulte la página 3) Piezas y elementos de sujeción (consulte la página 4) ADVERTENCIA: Este producto contiene piezas pequeñas que, si fuesen tragadas, podrían producir asfixia. Antes de iniciar el ensamblaje, compruebe que todas las piezas estén incluidas y en buenas condiciones. Si faltan piezas o alguna está dañada, no devuelva el artículo al distribuidor. Póngase NOTA: NOTA: en contacto con el servicio de atención al cliente.
- Page 21 Thank you for choosing Sanus! Please take a moment to let us know how we did: Call us: 1-800-359-5520 Email us: info@sanus.com Leave a review: sanus.com UK: 0800 056 2853 Milestone AV Technologies and its affi liated corporations and subsidiaries (collectively, “Milestone”), intend to make this manual accurate and complete. However, Milestone makes no claim that the information contained herein covers all details, conditions, or variations.
Need help?
Do you have a question about the WSSA2-W2 and is the answer not in the manual?
Questions and answers