
Related Manuals for Sherwood Industries UPTOWN UE44


Summary of Contents for Sherwood Industries UPTOWN UE44
- Page 1 INSTALLATION & USER MANUAL APPLICABLE FOR THE UE44 | UE56 | UE68 | UE80 C-16843 INSTALLER: Leave this manual with the appliance. CONSUMER: Retain this manual for future reference.
-
Page 2: Safety Precautions
Safety Precautions Read these instructions completely before beginning installation. Failure to follow them could cause a heater malfunction resulting in serious injury and/or property damage. WARNING: All electric heaters have hot and arcing or sparking parts inside. Do not use it in areas where gasoline, paint or flammable liquids are or are stored. -
Page 3: Table Of Contents
Table of Contents Safety Precautions ........................2 Table of Contents ........................3 Specifications ..........................4 Dimensions: ..........................4 Box Contents ..........................5 Initial Installation ........................6 Electrical Requirements: ........................ 6 Installation - Wiring ........................7 Standard 1500W: .......................... 7 Optional 3000W: ........................... 7 Installation - Framing &... -
Page 4: Specifications
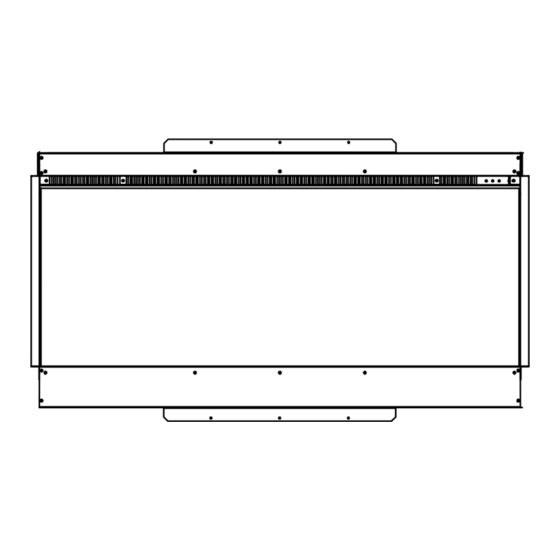
Specifications ImeNsIONs ODel 44” Ue44 (1120 56” Ue56 (1421 23.3” 11.5” 7.34” 17.4” 25.78” (592 (291.5 (186.5 (442 (655 68” Ue68 (1726 80” Ue80 (2032 Figure 1: Fireplace Dimensions Finishing Edges Finishing Edges Figure 2: Drywall / Tiling Finishing Edges... -
Page 5: Box Contents
Box Contents (Items shown not to scale) emOTe ONTrOl IreplACe OUNTINg l -B Overs rACkeTs lAss rONT lAss & l IreBOx eDIA sUpplIeD sepArATely... -
Page 6: Initial Installation
Initial Installation WARNING: If the information in these instructions is not followed exactly, a fire or explosion may result causing property damage, personal injury or death WARNING: RISK OF FIRE! To prevent a possible fire, do not block air intake or exhaust in any manner. Do not use on soft surfaces where openings may become blocked. -
Page 7: Installation - Wiring
Installation - Wiring To be performed by a qualified electrician according to local building codes. To prepare for installation locate and remove the electrical cover on the top rear of the fireplace. Connect the incoming hard wire to the terminal block according to the figure below, using a wiring connector type approved by local building codes. -
Page 8: Installation - Framing & Finishing
Installation - Framing & Finishing 3 Side (Bay) Installation rAmINg ImeNsIONs ODel IDTH epTH eIgHT 44 5/16” Ue44 (1126 56 5/16” Ue56 (1430 11 7/8” 23 7/8” (302 (606 68 5/16” Ue68 (1735 80 5/16” Ue80 (2040 Figure 7: Framing Dimensions Prepare the framed opening according to the chart above. -
Page 9: 2 Side (Left/ Right Corner) Installation
Installation - Framing & Finishing 2 Side (Left/ Right Corner) Installation 1. Follow steps 1 & 2 from the 3 sided installation instructions. 2. Remove the corresponding finishing edges according to your chosen installation (in the figure shown, the finishing edges on the left side would be removed.) 3. -
Page 10: Flush (Linear) Installation
Installation - Framing & Finishing Flush (Linear) Installation 1. Follow steps 1 & 2 from the 3 sided installation instructions. 2. Remove the finishing edges on both sides of the fireplace. 3. Install the side glass on both sides of the fireplace. -
Page 11: Partial Recess
Installation - Framing & Finishing Partial Recess Installation This installation style is optimized for 2x4 framed walls. Prepare the framed opening following the required width and height of the selected model in the table on page 8. *Provide appropriate dedicated circuit for hard wire install at the top right of framed opening. -
Page 12: Installation - Front & Side Glass
Installation - Front & Side Glass Side Glass Installation The fireplace has a top and bottom channel on each side to hold the side glass in place. 1. Insert side glass at an angle into the top channel 2. Swing the bottom edge of the side glass into the firebox 3. -
Page 13: Operation - Manual Controls
Operation - Manual Controls For manual control of the fireplace there is a control panel located just above the front glass at the top right hand side. The control panel consists of 3 black buttons which are Power, Heat and Colour from left to right. To the right of the Colour button is the Reset button. -
Page 14: Operation - Remote Controls
Operation - Remote Controls The fireplace may also be controlled using the supplied remote. The remote control is capable of making many fireplace setting adjustments that are not possible with the manual controls. To use the remote it must first be paired to the fireplace. -
Page 15: Operation - Wi-Fi Controls
Operation - Wi-Fi Controls This fireplace is also capable of being controlled over Wi-Fi using an Apple or Android mobile device. Scan the QR code for an instructional walk through video on how to download and setup the app needed to control your Uptown Electric fireplace. - Page 16 Operation - Wi-Fi Controls Next you will be prompted to connect to your existing home wireless network. Select the appropriate 2.4Ghz network and log in. Note - Only 2.4GHz wireless networks are compatible, 5GHz wireless networks cannot be used. If not available, contact your wireless service provider for further information on setting up a 2.4GHz wireless network.
-
Page 17: Creating A Heat Program
Operation - Wi-Fi Controls With the fireplace now successfully paired Creating a Heat Program it can be controlled in the same manner as the remote controls (see page 14). Added capabilities like Sleep Timer and Heat Program are only possible when using the app. Figure 33: Heat Program - Step 1 Zone Controls Sync... - Page 18 Operation - Wi-Fi Controls Next, in the pop-up window select the desired The Heat Program is now set to turn the program settings: fireplace and heater on at 1:00PM every Wednesday to maintain a temperature of 20˚C until Switch - Turn fireplace on or off 6:00PM.
-
Page 19: Cleaning & Maintenance
Cleaning & Maintenance On a semi-annual basis disconnect the fireplace from main power, wait for the heating element to cool and dust the fireplace with a dry cloth. Be careful not to brush any wires that may be exposed. • To clean the glass of the fireplace simply use any household desired glass cleaner with paper towels. •... -
Page 20: Troubleshooting
Troubleshooting Problem Possible Cause Solution Tripped circuit breaker, circuit · Reset breaker. Test circuit for incoming power has no power Fireplace needs to be reset · Turn off main power breaker to fireplace for 60 seconds, then turn back on Fireplace will ·... -
Page 21: Parts List
Parts List Figure 38: Parts Diagram Replacement Parts Part Part Part Description Part Description Number Number Remote Control 50-4376 Side Glass (1 pce.) 50-4383 Fan Heater 50-4377 UE44 Front Glass 50-4379 Fan Heater (220V) 50-4386 UE56 Front Glass 50-4380 Thermostat Sensor 50-4398 UE68 Front Glass 50-4381... -
Page 22: Notes
Notes... -
Page 23: Warranty
ƒ Sign and verify that work and information are correct. ƒ The warranty does not cover removal and re-installation costs. ƒ Sherwood Industries Ltd. reserves the right to make changes without notice. Sherwood Industries Ltd. 6782 Oldfield Road, Victoria, BC. Canada V8M 2A3 ƒ... -
Page 24: Installation Data Sheet
NAME OF INSTALLER: SERIAL NUMBER:___________________________ _________________________________________ DATE OF PURCHASE: _____________ (dd/mm/yyyy) ADDRESS: DATE OF INSTALLATION:___________ (dd/mm/yyyy) _________________________________________ _________________________________________ INSTALLER’S SIGNATURE: _________________________________________ _________________________________________ PHONE:___________________________________ MANUFACTURED BY: SHERWOOD INDUSTRIES LTD. 6782 OLDFIELD RD. SAANICHTON, BC, CANADA V8M 2A3 www.Uptownfireplaces.com January 2024 C-16843...
Need help?
Do you have a question about the UPTOWN UE44 and is the answer not in the manual?
Questions and answers