Table of Contents
Advertisement
Quick Links
Advertisement
Table of Contents

Related Manuals for Sakar 98309v2


Summary of Contents for Sakar 98309v2
- Page 1 98309v2 Digital Camera User Manual © 2009-2014 Sakar International, Inc. All rights reserved. Windows and the Windows logo are registered trademarks of Microsoft Corporation. All other trademarks are the property of their respective companies.
-
Page 2: Table Of Contents
Connecting the Camera to the Computer............. 25 Getting Photos and Videos from the Camera to the Computer ......25 Getting Started! ....................27 Technical Specifications..................28 Sakar Warranty Card ................... 29 Technical Support ....................30 Frequently Asked Questions ................30... -
Page 3: Introduction
Introduction Thank you for purchasing the 98309v2 Digital Camera. Everything you need to take quality digital photos and videos is included with your device. Please read this manual carefully first in order to get the most out of your digital camera. -
Page 4: Key Features
Key Features Still Camera – Holds Up to 120 Photos 1.5 Inch Color LCD monitor Shoots Video Clips 8MB Internal Memory ‘Hello Kitty Snap n’ Share’ Software for uploading and managing photos and videos to or from the most popular photo sharing and social network websites Also included in the software is the Creative Corner to create your own –... -
Page 5: Computer System Requirements
Computer System Requirements To be able to download photos and videos to your computer, you will need the following minimum configuration: WINDOWS OS MICROSOFT® Windows XP SP3, Windows Vista SP1, Windows 7 or higher Pentium® 4 processor or above ... -
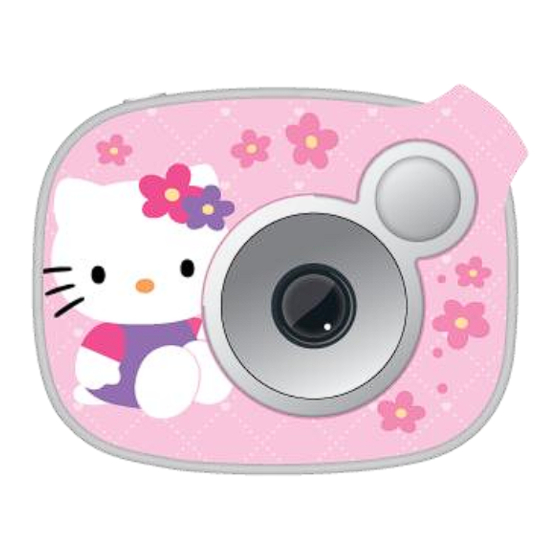
Page 6: A Quick Look At Your Digital Camera
A Quick Look at Your Digital Camera... -
Page 7: Inserting The Batteries
Inserting the Batteries Your camera requires 3 x AAA batteries. Alkaline batteries recommended. To insert the batteries into the camera: 1. Loosen the screw on the battery compartment cover with a screw driver (not included) and then slide open the battery compartment cover. - Page 8 REMOVING BATTERIES Loosen the screw on the battery compartment cover with a screw driver (not included). Slide open the battery compartment cover. Replace the batteries with 3 fresh ones. Close the battery compartment cover and tighten the screw.
- Page 9 BATTERY CAPACITY An icon appears on the top right corner of your Preview Screen, showing the amount of battery power available. Once the battery indicator falls below 35% it is advisable to download the images to your computer as quickly as possible so as not to lose them. ...
- Page 10 Note: Do not open the battery compartment to replace the batteries until you have downloaded the images to the computer. The message continually appears each time you try to power on your camera. This means that the camera has reserved battery power to allow you to save your images. ...
-
Page 11: Getting Started
Getting Started In order to download the photos and videos captured with this camera you need to install the ‘Hello Kitty Snap n’ Share’ Software and camera specific driver for this device. See “Installing the ‘Hello Kitty Snap n’ Share’ Software” section of this manual to learn how to install the software BEFORE connecting the camera to your computer. -
Page 12: Camera Navigation
POWERING OFF THE CAMERA Press the POWER button to switch the camera off. ENERGY SAVE MODE To conserve battery power, if the camera is not in use for 30 seconds, it automatically switches off. Camera Navigation MAIN MENU The Main Menu allows you to select the Camera Mode and change the Camera Settings. 1. - Page 13 MAIN MENU OPTIONS CAPTURE MODE: First icon (top left): Submenu Options: Photo, Self-Timer, Video and Continuous 3 Shot RESOLUTION SETTING: Second icon (top middle): Submenu Options: 2.1M, 1.3M, QUALITY SETTING: Third icon (top right): Submenu Options: High Quality, Normal Quality ...
-
Page 14: Camera Modes
Camera Modes The Camera Modes include: Capture Mode Playback Mode CAPTURE MODE The Capture Mode allows you to capture images, both photos and videos, with your digital camera. Note: Make sure you have sufficient lighting to capture your images. If the scene you would like to capture does not have adequate lighting, the message ‘Too Dark’... - Page 15 PHOTO CAPTURE The Photo Capture Mode allows you to capture pictures with your digital camera. 1. Press the POWER button to power on the camera. 2. The camera opens by default to Photo Capture Mode. A camera icon is displayed on top left of the Preview Screen. 3.
- Page 16 2. Delete all the photos from your camera after the photos have been downloaded and appear on your computer. 3. Continue to capture more photos and videos once your camera memory is empty. SELF-TIMER The Self Timer option allows you to delay the time that the camera’s Shutter button is pressed and the actual capture of the picture.
- Page 17 VIDEO CAPTURE The Video Capture Mode allows you to take videos with your digital camera. 1. Press the MENU button to enter the Main Menu. The Capture Mode icon is selected by default. 2. Press the Shutter button until the Video icon appears. 3.
- Page 18 2. Press the Shutter button until the Continuous 3 Shot icon appears. 3. Press the MENU button again to save the Continuous 3 Shot option and exit the menu 4. The Continuous 3 Shot icon appears at the top left corner of the LCD Screen. 5.
- Page 19 2. The Preview Screen displays the last photo or video file that was taken. Photos appear with the Photo Icon on the top left. Videos appear with the Video Icon on the top left. Note: The message ‘No Photo’ appears on the Preview Screen if you have no captured images saved to your camera’s memory.
-
Page 20: Camera Settings
Camera Settings RESOLUTION SETTING The Resolution Setting allows you to choose the desired size of the images taken by your camera. Keep in mind that images with a higher resolution will take up more of your camera’s memory. The Image Resolution Setting includes the following options: The icon with 3 stars represents the resolution: 2.1M (1600 x 1280) The icon with 2 stars represents the resolution: 1.3M (1280 x 1024) The icon with 1 star represents the resolution: VGA (640 x 480) - Page 21 QUALITY SETTING The Quality Setting allows you to select the desired quality level of the images taken by your camera. Keep in mind that images with a higher image quality will take up more of your camera’s memory. The Quality Setting includes the following options: High Quality: large file size, less photos stored in memory Normal Quality: smaller file size, more photos stored in memory To select the desired Quality Setting:...
- Page 22 Memory Usage Reference Table: Photo Resolution Photo Quality Total Number of Photos 15 photos High Quality 2.1M 30 photos Normal Quality 2.1M 20 photos High Quality 1.3M 40 photos Normal Quality 1.3M 46 photos High Quality 120 photos Normal Quality FREQUENCY SETTING Set the camera for the correct frequency according to the electric current frequency in the area where you are.
- Page 23 3. Press the Shutter button until the desired Frequency Setting option appears. 4. Press the MENU button to save the selected Frequency Setting and exit to the Capture Mode. Note: Images taken will be saved with the selected Frequency Setting. This setting can be changed as desired.
- Page 24 PLAYBACK MODE > DELETE A SINGLE FILE Enter the Playback Mode to delete a single photo or video that you have captured. 1. Press the Playback button to enter the Playback Mode. 2. Press the LEFT/RIGHT button to scroll through your captured images and select the image you would like to delete.
-
Page 25: Installing The 'Hello Kitty Snap N' Share' Software
Installing the ‘Hello Kitty Snap n’ Share’ Software Warning: Do not plug your camera into the computer until the ‘Hello Kitty Snap n’ Share’ Software installation is complete. 1. Insert the installation CD into your CD-ROM drive. WINDOWS OS: The ‘Hello Kitty Snap n’ Share’ will begin to install. MACINTOSH OS: Click icon to begin installation then click “Continue”. -
Page 26: Connecting The Camera To The Computer
Connecting the Camera to the Computer 1. Use the supplied USB cable to connect your camera to your computer. 2. Plug the smaller end of the USB cable into the USB slot on the side of the camera, and then plug the other end into an available USB port on your computer. - Page 27 1. Select the “Get Images” button from the Main menu. 2. The “Get media from device” window opens. 3. Both photos and videos (if you have captured any) will get downloaded. 4. Select your camera model from the device window. If your camera is the only device connected then it will be selected automatically.
-
Page 28: Getting Started
8. Click the “Get Media” button to transfer the photos and videos from your camera to your computer. 9. A media download progress window appears in the middle of the screen showing the number of media files downloading to your computer. A message appears when the download is complete. 10. -
Page 29: Technical Specifications
Technical Specifications Image Sensor 1.3M Bytes Photo Resolution 2.1M (1600x1280), 1.3M (1280x1024), VGA (640x480) Video Resolution QVGA Focus Auto Image Variation 0.5m - Infinity Lens 1G1P LCD Display Screen 1.5 inch File Format JPEG / AVI File Storage 8 MB Resolution Quality Number of Photos... -
Page 30: Sakar Warranty Card
Sakar Warranty Card This warranty covers for the original consumer purchaser only and is not transferable. Products that fail to function properly UNDER NORMAL USAGE, due to defects in material or workmanship. Your product will be repaired at no charge for parts or labor for a period of one year. -
Page 31: Technical Support
Technical Support For technical support issues please visit our website at www.sakar.com. You can find manuals, software and FAQ’s at the website. Can’t find what you are looking for? E-mail us at support@sakar.com and one of our technical support team members will answer your questions. - Page 32 __ Increase the separation between the equipment and receiver. __ Connect the equipment into an outlet on a circuit different from that to which the receiver is connected. __ Consult the dealer or experienced radio/ TV technician for help. 98309v2-2.0-EN-060614-TA_FW8921...
Need help?
Do you have a question about the 98309v2 and is the answer not in the manual?
Questions and answers