Anritsu MG3692A Series Maintenance Manual
Synthesized cw generators
Hide thumbs
Also See for MG3692A Series:
- Operator's manual (270 pages) ,
- Maintenance manual (348 pages)

Subscribe to Our Youtube Channel
Related Manuals for Anritsu MG3692A Series


Summary of Contents for Anritsu MG3692A Series
- Page 1 SERIES MG3692A, MG3693A, MG3694A SYNTHESIZED CW GENERATORS MAINTENANCE MANUAL 490 JARVIS DRIVE P/N: 10370-10355 MORGAN HILL, CA 95037-2809 REVISION: A PRINTED: FEBRUARY 2002 COPYRIGHT 2002 ANRITSU CO.
- Page 2 WARRANTY The Anritsu product(s) listed on the title page is (are) warranted against defects in materials and workmanship for three years from the date of shipment. Anritsu's obligation covers repairing or replacing products which prove to be defective during the warranty period.
-
Page 4: Table Of Contents
Table of Contents Chapter 1 General Information Scope of Manual ....1-3 Introduction ..... . 1-3 Description. - Page 5 Table of Contents (Continued) Overall Operation ....2-10 RF Outputs 0.01 MHz to 40 GHz ..2-14 Step Sweep Mode ....2-15 ALC and Leveling .
- Page 6 Table of Contents (Continued) Test Setup ....3-18 Test Procedure ....3-19 3-11 Power Accuracy and Flatness .
- Page 7 Table of Contents (Continued) Normal Operation Error and Warning/Status Messages ... . 5-7 No Error Message ....5-9 Troubleshooting Tables .
- Page 8 6-10 Anritsu Customer Service Centers ..6-19 Appendix A Test Records Introduction ..... . A-1 Appendix B Performance Specifications MG369XA Product Data Sheet .
- Page 9 Chapter 1 General Information Table of Contents Scope of Manual ....1-3 Introduction ..... . 1-3 Description.
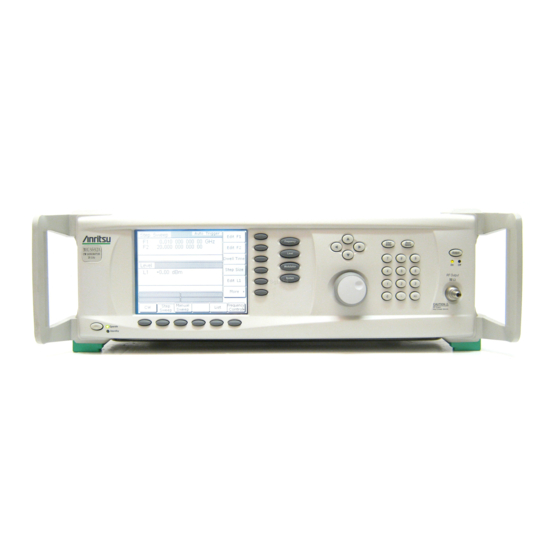
- Page 10 Figure 1-1. Typical Series MG3690A Synthesized CW/Signal Generator (Model MG3692A Shown)
-
Page 11: Scope Of Manual
Chapter 1 General Information Scope of Manual This manual provides service information for the Model MG3692A, MG3693A, and MG3694A CW Signal Generators. The service informa- tion includes replaceable parts information, troubleshooting, perfor- mance verification tests, calibration procedures, functional circuit de- scriptions and block diagrams, and assembly/subassembly removal and replacement. - Page 12 Description General Information Table 1-1. Series MG369XA Models Max Leveled Max Leveled Model Frequency Max Leveled Output Power Configuration Output Power Number Range Output Power w/Electronic w/Step Attenuator Step Attenuator ³0.1 Hz – £10 MHz Option 22 +13.0 dBm +11.0 dBm +9.0 dBm ³0.01 –...
-
Page 13: Identification Number
General Information Identification Number Identification Number All Anritsu instruments are assigned a unique six-digit ID number, such as “875012.” The ID number is imprinted on a decal that is af- fixed to the rear panel of the unit. Special-order instrument configura- tions also have an additional special serial number tag attached to the rear panel of the unit. -
Page 14: Level Of Maintenance
Level of Maintenance General Information Level of Maintenance Maintenance of the MG369XA consists of: Troubleshooting the instrument to a replaceable subassembly or RF component. Repair by replacing the failed subassembly or RF component. Calibration. Preventive maintenance. Trouble- The MG369XA firmware includes internal diagnos- shooting tics that self-test most of the internal assemblies. - Page 15 General Information Component Handling 1. Do not touch exposed contacts 2. Do not slide static sensitive 3. Do not handle static sensitive on any static sensitive component across any surface. components in areas where the component. floor or work surface covering is capable of generating a static charge.
-
Page 16: Preventive Maintenance
Preventive Maintenance General Information 1-10 Preventive The MG369XA must always receive adequate ventilation. A blocked fan filter can cause the instrument to overheat and shut down. Check Maintenance and clean the rear panel fan honeycomb filter periodically. Clean the fan honeycomb filter more frequently in dusty environments. Clean the filter as follows. -
Page 17: Startup Configurations
General Information Startup Configurations 1-11 Startup The MG369XA comes from the factory with a jumper across pins 2 and 3 of the A2 microprocessor PCB connector JP1 (Figure 1-4). In this Configurations configuration, connecting the instrument to line power automatically places it in operate mode (front panel OPERATE LED on). -
Page 18: Recommended Test Equipment
C, P –12 Accuracy: 5 x 10 parts/day Local Oscillator Frequency: 0.01 to 40 GHz Anritsu Model MG3694A w/ Option 4 Single Side Band Phase Noise Attenuator Frequency Range: DC to 40 GHz Anritsu, Model 41KC-10 C, P Max Input Power: >+17 dBm... - Page 19 General Information Recommended Test Equipment Table Recommended Test Equipment (continued) 1-2. CRITICAL RECOMMENDED INSTRUMENT USAGE* SPECIFICATION MANUFACTURER/MODEL Digital Multimeter Resolution: 4-1/2 digits (to 20V) John Fluke, Inc., Model 8840A, with C, T DC Accuracy: 0.002% +2 counts Option 8840A-09K (True RMS AC) DC Input Impedance: 10 MW AC Accuracy: 0.07% +100 counts (to 20 kHz)
- Page 20 Chapter 2 Functional Description Table of Contents Introduction ..... . 2-3 Major Subsystems ....2-3 Digital Control.
-
Page 21: Introduction
Chapter 2 Functional Description Introduction This chapter provides brief functional descriptions of the major sub- systems that are contained in each model of the MG369XA. In addi- tion, the operation of the frequency synthesis, automatic level control (ALC), and RF deck subsystems is described so that the reader may better understand the overall operation of the instrument. -
Page 22: Front Panel Assembly
Major Subsystems Functional Description Front Panel This circuit subsystem consists of the Front Panel, Assembly the front panel Rotary Data Knob, the Front Panel Control PCB, and the Liquid Crystal Display (LCD). The subsystem interfaces the front panel LCD, LEDs, and keys to the CPU via the dedicated data and address bus. -
Page 23: A9 Yig Assembly
Functional Description Major Subsystems A9 YIG The A9 YIG Assembly contains the YIG-tuned oscil- Assembly lator and associated PCB assembly. The PCB assem- bly contains the driver circuitry that provides the tuning current and bias voltages for the YIG-tuned oscillator. It also provides bias voltages for the A11 Down Converter assembly and the A10 Switched Filter assembly. -
Page 24: Inputs/Outputs
Major Subsystems Functional Description Inputs/ The A21 Rear Panel PCB and the A2 Microprocessor Outputs PCB contain the interface circuits for the majority of the rear panel input and output connectors, includ- ing the AUX I/O connector. The A5 Auxiliary PCB provides a 0V to +10V ramp signal to the rear panel HORIZ OUT connector, a V/GHz signal to the rear panel AUX I/O connector, and a SLOPE signal to the A10 ALC PCB for... - Page 25 Functional Description Overall Block Diagram Rear Panel Front Panel Inputs Outputs Connectors Power Input From RF Deck RF OUTPUT RF OUTPUT From RF Deck Power Supply Assembly 110/220 VAC (Option 9) Serial Data To A3 10 MHz REF IN Reference Loop From A3 10 MHZ REF OUT Reference Loop...
- Page 26 Overall Block Diagram Functional Description Serial Data 10 MHz 500 MHz Serial Data Coarse Loop 500 MHz Reference 219.5 - 245 MHz SDM Bias Loop 100 MHz Auxiliary Fine Loop YIG Loop 21.5 - 40 MHz 26.8435456 MHz YIG Control to A8 (Option 22) (to A9 YIG Module) Tune (YIG Error)
-
Page 27: Frequency Synthesis
Functional Description Frequency Synthesis Frequency Synthesis The frequency synthesis subsystem provides phase-lock control of the MG369XA output frequency. It consists of four phase-lock loops, the Reference Loop, the Coarse Loop, the Fine Loop, and the YIG Loop. The four phase-lock loops, operating together, produce an accurately synthesized, low-noise RF output signal. -
Page 28: Overall Operation
Frequency Synthesis Functional Description If a programmable frequency divider is used, a number of frequencies can be phase-locked to the same reference. The limitation is that all must be exact multiples of the reference. The A4 Coarse Loop and A3 Fine Loop section both use program- mable frequency dividers. - Page 29 Functional Description Overall Block Diagram A3 Reference / Fine Loop Mixer Phase Frequency 100 MHz to Detector A4 (Option 3) Loop AMP 100 MHz 10 MHz VCXO or Option 16 VCXO 10 MHz Output 10 MHz Filter Loop AMP Fine Tune Coil Driver CW Filter (From A5)
- Page 30 Overall Block Diagram Functional Description P/O RF Deck To Step Level Attenuator Detector 0.01 - 20 GHz Switched Filter RF Output P/O A6 PCB Switched 2 - 20 GHz Detector 1 Doubler 0.01 - Module Oscillator 40 GHz 0.01 - 2 GHz Down Switched Filter Converter...
- Page 31 Functional Description Frequency Synthesis Phase locking the instrument's output frequency over a broad frequency range is accomplished by programming the coarse-loop oscillator's output to various frequencies that have harmonics close to the desired operating frequencies. Exact frequency tun- ing for each desired operating frequency is accom- plished by programming the fine-loop oscillator.
-
Page 32: Rf Outputs 0.01 Mhz To 40 Ghz
Frequency Synthesis Functional Description RF Outputs Refer to the block diagram of the RF Deck shown in 0.01 MHz to Figure 2-4 (page 2-21) for the following description. 40 GHz The MG369XA uses one YIG-tuned oscillator capa- ble of generating RF signals in the frequency range of 2.0 to 20 GHz. -
Page 33: Step Sweep Mode
Functional Description ALC and Leveling by Option 22). Precise control of the output frequen- cies to 0.1 Hz resolution is achieved by phase-lock control of the 26.8435456 MHz signal generated by the Fine Loop circuitry on the A3 PCB. Step Sweep Step (digital) frequency sweeps of the YIG-tuned os- Mode cillator RF output consist of a series of discrete, syn-... - Page 34 ALC and Leveling Functional Description pler. The signal from this detector is routed to the A6 ALC PCB as the Detector 1 input. The Level Reference DAC, under the control of the CPU, provides the RF level reference voltage. By setting the output of this DAC to the appropriate voltage, the CPU adjusts the RF output power to the level selected by the user.
-
Page 35: Rf Deck Assemblies
Functional Description RF Deck Assemblies RF Deck Assemblies The primary purpose of the RF deck assembly is to generate CW RF signals and route these signals to the front panel RF OUTPUT connec- tor. It is capable of generating RF signals in the frequency range of 0.01 to 40 GHz (0.1Hz to 40 GHz with Option 22). -
Page 36: Rf Signal Filtering
RF Deck Assemblies Functional Description justs the oscillator's FINE tuning coil current to make the output frequency exact. RF Signal The RF signal from the YIG-tuned oscillator is Filtering routed to the level control circuits located on the A10 Switched Filter Assembly and then, via PIN switches, to switched low-pass filters. -
Page 37: To 2.2 Ghz Digital Down Converter (Option 4)
Functional Description RF Deck Assemblies VCO's phase-lock condition is monitored by the CPU. The 6.5 GHz VCO is on at all times; however, the down converter amplifier is powered on by the A5 NOTE AUX PCB only when the 0.01 – 2 GHz frequency In units with Option 22 and without range is selected. -
Page 38: Step Attenuators
RF Deck Assemblies Functional Description The RF signal from the switched filter assembly is input to the SDM at J1. During CW or step fre- quency operations in the 20 to 40 GHz frequency range, the 10 to 20 GHz RF signal input is routed by PIN switches to the Doubler/amplifiers. - Page 39 RF Deck Circuits Overall Block Diagram 20 - 40 GHz >+8.5 dBm A12 Switched Doubler Module - D28540 2-20 GHz A10 Switched Filter Assy. - D45194 (Std) (Models MG3693A/4A only) YIG Oscillator - D45198 (Opt 15A) P/O A9 20 - 25 GHz BPF 3.3 GHz LPF Directional RF Output...
- Page 40 Chapter 3 Performance Verification Table of Contents Introduction ..... . 3-3 Recommended Test Equipment ... . 3-3 Test Records .
- Page 41 NOTE Specifications shown in this chapter and in other chapters are for reference only. Refer to the performance specifications for the MG369XA data sheet, part number 11410-00262, located in the back of this manual...
-
Page 42: Introduction
In some cases, the user may substitute test equipment hav- ing the same critical specifications as those on the recommended test equipment list. Contact your local Anritsu service center (refer to Table 6-2 on page 6-19) if you need clarification of any equipment or procedural ref- erence. -
Page 43: Connector And Key Notation
Absolute Time Corp., Model 300 –12 Accuracy: 5 x 10 parts/day Local Oscillator Frequency: 0.01 to 40 GHz Anritsu Model MG3694A w/Option 3 3-10 Single Side Band Phase Noise or 69067B w/Option 11 Attenuator Frequency Range: DC to 40 GHz... -
Page 44: Power Levels
Performance Verification Power Levels Power Levels Table 3-2 is a listing of the Series MG369XA Synthesized CW/Signal Generator models and their typical maximum leveled output power levels. Certain test procedures will refer you to this table for the maxi- mum leveled output power level setting of the instrument model being tested. -
Page 45: Internal Time Base Aging Rate
Internal Time Base Aging Rate Performance Verification Internal Time Base The following test can be used to verify that the MG369XA 10 MHz time base is within its aging specification. The instrument derives its Aging Rate frequency accuracy from an internal 10 MHz crystal oscillator stan- dard. -
Page 46: Test Procedure
Performance Verification Internal Time Base Aging Rate NOTE Before beginning this procedure, always let the MG369XA warm up for a minimum of 120 hours. Failure to do so can cause inac- curate aging rate measurements. Test The frequency error is measured at the start and Procedure finish of the test time period of 24 hours. - Page 47 Internal Time Base Aging Rate Performance Verification The frequency error display is continuously up- dated as a running 5000-second average. The av- eraging smooths out the short-term instability of the oscillator. 4. Record the frequency error value, displayed on the Frequency Reference, on the Test Record. 5.
-
Page 48: Frequency Synthesis Tests
Performance Verification Frequency Synthesis Tests Frequency Synthesis The following tests can be used to verify correct operation of the fre- quency synthesis circuits. Frequency synthesis testing is divided into Tests two parts—coarse loop/YIG loop tests and fine loop tests. M G 3 6 9 X A . -
Page 49: Fine Loop Test Procedure
Frequency Synthesis Tests Performance Verification 2. Record the Frequency Counter reading on the Test Record. The Frequency Counter reading must be within ±100 Hz of the displayed NOTE MG369XA frequency to accurately complete this The Frequency Counter reading is test. typically within ±1 Hz because the instruments use a common time 3. -
Page 50: Spurious Signals Test £2 Ghz
Spurious Signals Test £2 GHz Performance Verification Spurious Signals Test The following tests can be used to verify that the CW generator meets £2 GHz it spurious signal specifications for RF output signals from 0.01 to 2 GHz (0.01 to 2.2 GHz for models with Option 4). The test procedure that begins on this page is applicable only to in- struments which cover the frequency range 0.01 to 2 GHz. - Page 51 Spurious Signals Test £2 GHz Performance Verification 2. Set up the MG369XA as follows: a. Reset the instrument by pressing SYSTEM, then Reset. Upon reset the CW Menu is dis- played. b. Press Edit L1 to open the current power level parameter for editing.
- Page 52 Spurious Signals Test £2 GHz Performance Verification 8. Repeat step 3 with F1 set to 350 MHz. Measure the worst case harmonic and non-harmonic sig- nals for the 350 MHz carrier and record their presence by entering their levels on the Test Re- cord.
-
Page 53: 2.2 Ghz (Option 4) Test Procedure
Spurious Signals Test £2 GHz Performance Verification 0.01 - 2.2 GHz The following procedure lets you measure the 0.01 (Option 4) to 2.2 GHz RF output harmonic levels and verify Test that they meet specifications. Procedure 1. Set up the MG369XA as follows: a. -
Page 54: Harmonics Test 2 To 20 Ghz
Performance Verification Harmonics Test 2 to 20 GHz Harmonics Test The following test can be used to verify that the MG369XA meets its harmonic specifications for RF output signals from 2 to 20 GHz (2.2 to 2 to 20 GHz 20 GHz for units with Option 4). -
Page 55: Test Procedure
Harmonics Test 2 to 20 GHz Performance Verification Test The following procedure lets you measure the 2 to Procedure 20 GHz (2.2 to 20 GHz for Option 4) RF output har- monic levels to verify that they meet specifications. 1. Set up the MG369XA as follows: a. -
Page 56: Single Sideband Phase Noise
Single Sideband The following test can be used to verify that the MG369XA meets its single sideband phase noise specifications. For this test, an Anritsu Phase Noise MG3694A w/ Option 4 signal generator is required to act as a local os- cillator (LO). -
Page 57: Test Setup
Single Sideband Phase Noise Performance Verification P N 9 0 0 0 6 9 X X X B ( L O ) P h a s e N o i s e M e a s u r e m e n t S y s t e m M G 3 6 9 X A ( D U T ) . -
Page 58: Test Procedure
Performance Verification Single Sideband Phase Noise Test The following procedure lets you measure the RF Procedure output single sideband phase noise levels to verify that they meet specifications. 1. Set the MG369XA (DUT) GPIB address as fol- lows: a. Press SYSTEM, then Config. The System Con- figuration Menu is displayed. - Page 59 Single Sideband Phase Noise Performance Verification c. Set “Vcontrol = 5 Volts” (in the bottom Status bar) by pressing Tab; <ENTER>; 5; Esc on the keyboard. This sets the “VCO-100MHz” frequency tune control to the middle of its range. d. Select the Calib/Input menu: (1) Set Source RF driver to Wiltron 6700 (2) Set Source LO driver to Wiltron 6700 (3) Set Offset LO to 100 MHz...
- Page 60 Performance Verification Single Sideband Phase Noise 4. Calibrate and lock the PN9000 system as follows: Table 3-6. Single Sideband Phase Noise a. Offset the frequency of either the 69XXXB Test Specification (LO) or MG369XA (DUT) as follows: Test Test (1) Press Local to return the instrument to lo- CW Carrier Offset From Specification...
-
Page 61: Power Accuracy And Flatness
2. Connect the Power Sensor to the RF OUTPUT of the MG369XA. 3. Connect the special AUX I/O interface cable (Anritsu Part No. 806-90) to the MG369XA rear panel AUX I/O connector. Connect the cable BNC connectors as follows: a. Connect the cable labeled “SEQ SYNC” to the Power Meter rear panel INPUT 1 DIGITAL con- nector. -
Page 62: Power Level Accuracy Test Procedure
Performance Verification Power Accuracy and Flatness Power Level Power level accuracy is tested by stepping the out- Accuracy Test put power level down in 1 dB increments from its Procedure maximum rated power level and measuring the out- put power level at each step. 1. -
Page 63: Power Level Flatness Test Procedure
Power Accuracy and Flatness Performance Verification Power Level Power level flatness is tested by measuring the out- Flatness Test put power level variation during a full band sweep; Procedure first in the manual sweep mode. 1. Set up the MG369XA as follows for a manual sweep power level flatness test: a. - Page 64 Chapter 4 Calibration Table of Contents Introduction ..... . 4-3 Recommended Test Equipment ... . 4-3 Test Records .
-
Page 65: Introduction
In some cases, the user may substitute test equipment having the same critical specifications as those on the recommended test equipment list. Contact your local Anritsu service center (refer to Table 6-2 on page 6-19) if you need clarification of any equipment or procedural reference. -
Page 66: Subassembly Replacement
Frequency Reference Frequency: 10 MHz Absolute Time Corp., Model 300 –12 Accuracy: 5 ´ 10 parts/day Scalar Network Frequency Range: 0.01 to 40 GHz Anritsu Model 56100A, with Analyzer, with RF Detector: RF Detector 560-7K50 (0.01 to 40 GHz) Anritsu, Model 41KC-10 Attenuator Frequency Range: DC to 40 GHz Max Input Power: >+17 dBm... -
Page 67: Connector And Key Notation
Calibration Connector and Key Notation Table 4-2. Calibration Following Subassembly/RF Component Replacement Perform the Following Subassembly/RF Component Replaced Calibration(s) in Section(s): Front Panel Assembly None A2 Microprocessor PCB 4-7 thru 4-10 A3 Reference Loop PCB A4 Coarse Loop PCB A5 Auxiliary PCB None A6 ALC PCB 4-8, 4-9, 4-10... -
Page 68: Initial Setup
MG369XA IBM-Compatible PC Figure 4-1. PC to MG369XA Interconnection for Calibration Interconnec- Using the Anritsu P/N T1678 serial interface assem- tion bly, connect the PC to the MG369XA as follows: 1. Connect the wide flat cable between the MG369XA rear panel SERIAL I/O connector and the P1 connector on the T1678 serial interface PCB. -
Page 69: Pc Setup
Calibration Initial Setup PC Setup Configure the PC with the Windows 95/98/ME/NT/2000 operating system to interface with the MG369XA as follows: 1. Power up the MG369XA. 2. Power up the PC in the Windows operating system. 3. Go to Start/Programs/Accessories to highlight the Hyperterminal menu. - Page 70 Initial Setup Calibration 6. Click on Hyperterm (Hyperterm.exe) to bring up the New Connection window. 7. In the New Connection Name box, type a name for the connection, then click on the OK button. The window below is now displayed. 8.
- Page 71 Calibration Initial Setup 9. Click on OK. The Communications Port Proper- ties window is displayed. 10. In the Properties window, make the following se- lections: Bits per second 19200 Data bits Parity None Stop bits Flow control Xon / Xoff 11.
-
Page 72: Preliminary Calibration
Preliminary Calibration Calibration Preliminary This procedure provides the steps necessary to initially calibrate the coarse loop, fine loop, frequency instruction, internal DVM circuitry Calibration and the 10 MHz reference oscillator of the MG369XA. If Option 16 is installed, the 10 MHz reference oscillator is calibrated. I B M - C o m p a t i b l e P C . -
Page 73: Calibration Steps
Calibration Preliminary Calibration Calibration Each of the steps in this procedure provides initial Steps calibration of a specific MG369XA circuit or compo- nent. To ensure accurate instrument calibration, each step of this procedure must be performed in se- quence. 1. Calibrate the internal DVM circuitry as follows: calterm 119 a. - Page 74 Preliminary Calibration Calibration . r e q u e n c y R e f e r e n c e E S C M G 3 6 9 X A D E L M O D E N T E R .
- Page 75 Calibration Preliminary Calibration 7. Calibrate the Sweep Width DAC as follows: calterm 133 a. At the prompt, type: and press <ENTER>. The prompt will appear on the screen when the calibration is complete. b. Record step completion on the test record. 8.
-
Page 76: Alternate 10 Mhz
Preliminary Calibration Calibration . r e q u e n c y R e f e r e n c e E S C M G 3 6 9 X A D E L M O D E N T E R . - Page 77 Calibration Preliminary Calibration e. Using the key pad, enter the current date (in any desired format). Then, press any termina- tor key. The Calibration Status Menu display changes to indicate calibration is in progress. f. When the reference oscillator calibration is complete, the Calibration Menu is displayed.
-
Page 78: Switched Filter Shaper
Switched Filter Shaper Calibration Switched Filter This procedure provides the steps necessary to adjust the Switched Filter Shaper Amplifier gain to produce a more constant level ampli- Shaper fier gain with power level changes. 5 6 1 0 0 A N e t w o r k A n a l y z e r M G 3 6 9 X A I B M - C o m p a t i b l e P C . -
Page 79: Log Amplifier Zero Calibration
Calibration Switched Filter Shaper Log Amplifier Before the Switched Filter Shaper Amplifier can be Zero adjusted, zero calibration of the ALC Log amplifier Calibration must be performed to eliminate any DC offsets. 1. Perform ALC Log amplifier zero calibration as follows: a. - Page 80 Switched Filter Shaper Calibration 2. Adjust the Switched Filter Limiter DAC for each of the frequency bands as follows: a. At the prompt on the PC display, type: calterm 145 and press <ENTER> b. On the 56100A Network Analyzer, set the Shaper Resolution to 0.2 dB and adjust the offset to Amplifier...
-
Page 81: Shaper Dac Adjustment
Calibration Switched Filter Shaper Shaper DAC The following step in the procedure adjusts the Adjustment Switch Filter Shaper DAC which controls the gain of the Switched Filter Shaper Amplifier. Each fre- quency band will be scanned for the minimum un- leveled power point before automatic adjustment of the shaper DAC. -
Page 82: Rf Level Calibration
Down Converter Assembly, the Digital Down Converter Assembly (Op- tion 4), the Switched Doubler Module (SDM), the Forward Coupler, the Directional Coupler, or the Step Attenuator. The RF level calibration software is available from Anritsu (Part num- ber 2300-104). This calibration program warrants level accuracy specifications from maximum power to –70 dBm. -
Page 83: Alc Bandwidth Calibration
Calibration ALC Bandwidth Calibration 4-10 ALC Bandwidth This procedure provides the steps necessary to perform ALC Band- width calibration. The ALC Bandwidth is adjusted to compensate for Calibration gain variations of the modulator. The adjustment is performed for each frequency band. This provides a more consistent bandwidth throughout the frequency range of the instrument. - Page 84 ALC Bandwidth Calibration Calibration This can take up to 15 minutes depending on the frequency range of the MG369XA. b. Record step completion on the Test Record. 2. Store the calibration data as follows: calterm 787 a. At the prompt, type: and press <ENTER>.
- Page 85 Chapter 5 Troubleshooting Table of Contents Introduction ..... . 5-3 Recommended Test Equipment ... . 5-3 Error Messages .
- Page 86 Troubleshooting procedures presented in this chapter may require the removal of the instrument covers to gain access to test points on printed circuit boards and other subassemblies. WARNING Hazardous voltages are present inside the MG369XA when- ever AC line power is connected. Turn off the instrument and remove the line cord before removing any covers or panels.
-
Page 87: Introduction
Chapter 5 Troubleshooting Introduction This chapter provides information for troubleshooting the MG369XA. The troubleshooting procedures presented in this chapter support fault isolation to a replaceable subassembly or RF component. Remove and replace procedures for the subassemblies and RF components are found in Chapter 6. - Page 88 Error Messages Troubleshooting Table 5-1. Self-Test Error Messages (1 of 3) Troubleshooting Page Error Message Table Number Error 100 Table 5-5 5-15 DVM Ground Offset Failed Error 101 Table 5-5 5-15 DVM Positive 10V Reference Error 102 Table 5-5 5-15 DVM Negative 10V Reference Error 108 Table 5-6...
- Page 89 Troubleshooting Error Messages Table 5-1. Self-Test Error Messages (2 of 3) Troubleshooting Page Error Message Table Number Error 124 Full Band Unlocked and Table 5-12 5-26 Unleveled Error 125 8.4 – 20 GHz Unlocked and Table 5-12 5-26 Unleveled Error 126 2 –...
- Page 90 Error Messages Troubleshooting Table 5-1. Self-Test Error Messages (3 of 3) Troubleshooting Page Error Message Table Number Error 149 Table 5-7 5-20 Coarse Loop C Osc Failed Error 152 Table 5-7 5-20 Coarse Loop Module Failed MG369XA Models with SDM Error 138 Table 5-17 5-36...
-
Page 91: Normal Operation Error And Warning/Status Messages
Troubleshooting Error Messages Normal When an abnormal condition is detected during op- Operation eration, the instrument displays an error message Error and to indicate that the output is abnormal or that a sig- Warning/ nal input or data entry is invalid. It also displays Status warning messages to alert the operator to conditions Messages... - Page 92 Error Messages Troubleshooting Table 5-3. Possible Warning/Status Messages during Normal Operation Warning/Status Description Message This warning message indicates that the 100 MHz COLD crystal oven (or the 10 MHz crystal oven if Option 16 is installed) has not reached operating temperature. Normally displayed during a cold start of the instrument.
- Page 93 Troubleshooting No Error Message No Error Message The MG369XA must be operating to run self-test. Therefore, malfunc- tions that cause the instrument to be non-operational do not produce error messages. These problems generally are a failure of the MG369XA to power up properly. Table 5-4, beginning on page 5-12, provides troubleshooting procedures for these malfunctions.
-
Page 94: Troubleshooting Tables
Troubleshooting Tables Troubleshooting COUPLER ATTENUATOR SWITCHED FILTER MODULE A9J1 A7J5 A6J3 A5J1 POWER SUPPLY ASSEMBLY VIEW OF A4 WITH OPTION 3 Figure 5-1a. Top View of the MG369XA Showing Connector and Test Point Locations 5-10 MG369XA MM... - Page 95 Troubleshooting Troubleshooting Tables A1 MOTHERBOARD A4 MOUNTING SCREWS CPU-1 P4 A20 J5 A5 J4 A4 J3 A3 A1B1C1 J6 A6 P1 A21 J7 A7 CPU-2 J8 A8 J9 A9 GPIB A9 MOUNTING SCREWS P2 A14 A1B1C1 A4 MOUNTING SCREWS J10 A10 J11 A11 J13 A13 J12 A12-1...
- Page 96 If no defect is found, go to step 6. Step 6. Replace the standby and main power supplies. If the instrument powers up, the problem is cleared. If the instrument fails to power up, contact your local Anritsu service center for assistance. 5-12 MG369XA MM...
- Page 97 CPU malfunction. Replace the A2 PCB. Step 5. Check for normal operation. If the instrument powers up, the problem is cleared. If the instrument fails to power up, contact your local Anritsu service center for assistance. MG369XA MM 5-13...
- Page 98 Troubleshooting Tables Troubleshooting Table 5-4a. Power Supply Module Regulated Outputs A1P4 Regulator Output Related Source Pin # Standby Power Supply (13VS) Main Power Supply (26V) Main Power Supply (16V) Main Power Supply (6.75V) Main Power Supply (-16V) 5-14 MG369XA MM...
- Page 99 Troubleshooting Troubleshooting Tables Table 5-5 Error Messages 100, 101 and 102 (1 of 2) Internal DVM Tests Error 100 DVM Ground Offset Failed, or Error 101 DVM Positive 10V Reference, or Error 102 DVM Negative 10V Reference Description: The DVM circuitry, located on the A2 CPU PCB, is calibrated using the ±10 volts from the reference supplies on the A5 Auxiliary PCB.
- Page 100 Replace the A2 PCB, perform a manual pre-calibration and run self-test. If no error message is displayed, the problem is cleared. If any of the error messages, 100, 101, and 102, are displayed, contact your local Anritsu service center for assistance. 5-16 MG369XA MM...
- Page 101 Replace the A2 PCB. Allow a 30 minute warm up, then run self-test. If error 108 is not displayed, the problem is cleared. If error 108 is displayed, contact your local Anritsu service cen- ter for assistance. Error 109 The 100 MHz Reference is not phase-locked to the External...
- Page 102 If error 110 is displayed, go to step 2. Step 2. Replace the A2 PCB. If error 110 is not displayed, the problem is cleared. If error 110 is displayed, contact your local Anritsu service cen- ter for assistance. 5-18 MG369XA MM...
- Page 103 Troubleshooting Troubleshooting Tables Table 5-7 Error Messages 112, 149 and 152 (1 of 3) A4 Coarse Loop Error 112 Coarse Loop Osc Failed (Units without option 3) Description: The coarse loop oscillator is not phase-locked. Step 1. Disconnect the MCX cable W151 at A4J1 and the MCX cable W154 at A4J6.
- Page 104 Reconnect the MCX cable W158 to A4J3 and run self-test again. If error 112 is not displayed, the problem is cleared. If error 112 is still displayed, contact your local Anritsu service center for assistance. Error 112 Coarse Loop B Osc Failed (Units with Option 3)
- Page 105 Reconnect the MCX cable W157 to A4J2 and run self-test again. If error 112, 149 or 152 is not displayed, the problem is cleared. If error 112, 149 or 152 is still displayed, contact your local Anritsu service center for assistance. Table 5-7b. Coarse Loop Frequencies MG369XA...
- Page 106 A7 YIG Loop PCB. Step 8. Run self-test. If error 113 or 115 are not displayed, the problem is cleared. If either error 113 or 115 are displayed, contact your local Anritsu service center for assistance. 5-22 MG369XA MM...
- Page 107 Troubleshooting Troubleshooting Tables Table 5-9 Error Message 114 A11 Down Converter Error 114 Down Converter LO not Locked (option 5 only) Description: The local oscillator in the down converter assembly is not phase-locked. Step 1. Disconnect the MCX cable W152 at A3J5. Using a spectrum analyzer, verify the presence of a +7 dBm ±4 dB, Step 2.
- Page 108 Step 3. Perform a preliminary calibration and run self-test again. If no error message is displayed, the problem is cleared. If any of the error messages, listed above, is displayed, contact your local Anritsu service center for assistance. 5-24 MG369XA MM...
- Page 109 Step 1. Replace the A6 PCB, and run self-test. If no error message is displayed, the problem is cleared. If any of the error messages, listed above, is displayed, contact your local Anritsu service center for assistance. MG369XA MM 5-25...
- Page 110 Troubleshooting Tables Troubleshooting Table 5-12 Error Messages 124, 125 and 126 (1 of 2) A9 YIG-tuned Oscillator Module Error 124 Full Band Unlocked and Unleveled Error 125 8.4-20 GHz Unlocked and Unleveled Error 126 2-8.4 GHz Unlocked and Unleveled Description: These error messages indicate a failure of the YIG-tuned oscil- lator module.
- Page 111 If no error message is displayed, the problem is cleared. If any of the error messages, listed above, are displayed, contact your local Anritsu service center for assistance. Table 5-12a. YIG Module Assembly Bias Voltages Test Point YIG Module Power Supply Bias Voltages...
- Page 112 Troubleshooting Tables Troubleshooting Table 5-13 Error Message 128 (1 of 3) Output Power Level Related Problems (0.01 to 20 GHz) Error 128 .01-2 GHz Unleveled or Down Converter Unleveled (Option 4) Description: Error 128 indicates a failure of the down converter leveling circuitry.
- Page 113 Troubleshooting Troubleshooting Tables Error Message 128 (2 of 3) Unleveled with no/low output power: Step 1. Set up the MG369XA as follows: a. Frequency: Step Sweep b. F1: 0.010 GHz c. F2: 2.000 GHz (2.2 GHz with Option 4) d. More: Number of Steps: 400 e.
- Page 114 Step 9. Run self-test again. If no error message is displayed, the problem is cleared. If any of the error messages, listed above, are displayed, contact your local Anritsu service center for assistance. 5-30 MG369XA MM...
- Page 115 Troubleshooting Troubleshooting Tables Table 5-14 Error Message 129 (1 of 3) Error 129 Switched Filter or Level Detector Failed Description: Error 129 indicates a failure of either the switched filter or level detector circuitry. The MG369XA may or may not produce an RF output in the 2 to 20 GHz frequency range.
- Page 116 Troubleshooting Tables Troubleshooting Error Message 129 (2 of 3) Unleveled with no/low output power: Step 1. Set up the MG369XA as follows: a. Frequency: Step Sweep c. F1: 2.000 GHz (2.21 GHz with Option 4) d. F2: 20.000 GHz e. More: Number of Steps: 400 Previous: L1: +1.00 dBm Level: ALC Mode: Leveling g.
- Page 117 Troubleshooting Troubleshooting Tables Error Message 129 (3 of 3) Step 5. Set up the 56100A Scalar Network Analyzer as follows: a. Press SYSTEM MENU key. b. From System Menu display, select RESET. c. Press CHANNEL 2 DISPLAY: OFF d. Press CHANNEL 1 DISPLAY: ON e.
- Page 118 Troubleshooting Tables Troubleshooting Table 5-15 Error Messages 130, 131, 132, 133 and 134 Error 130 2-3.3 GHz Switched Filter Error 131 3.3-5.5 GHz Switched Filter Error 132 5.5-8.4 GHz Switched Filter Error 133 8.4-13.25 GHz Switched Filter Error 134 13.25-20 GHz Switched Filter Description: Each of these error messages indicates a failure in a switched filter path within the switched filter assembly.
- Page 119 If error 135 is still displayed, go to step 2. Step 2. Replace the switched filter assembly and run self-test again. If error 135 is not displayed, the problem is cleared. If error 135 is still displayed, contact your local Anritsu service center for assistance. MG369XA MM 5-35...
- Page 120 Table 5-4 to determine if the power supply or regulator needs to be replaced. Step 5. Run self-test. If error 138 is not displayed, the problem is cleared. If error 138 is still displayed, contact your local Anritsu service center for assistance. 5-36 MG369XA MM...
- Page 121 Troubleshooting Troubleshooting Tables Table 5-18 Error Messages 139, 140 and 141 Error 139 32-40 GHz SDM Section Failed Error 140 25-32 GHz SDM Section Failed Error 141 20-25 GHz SDM Section Failed Description: Each of these error messages indicates a failure in a Switched Doubler filter path within the SDM.
- Page 122 RF Output was selected OFF on the front panel. Step 1. Press the OUTPUT key on the front panel to turn the RF Output Step 2. Run self-test again. If error 144 is still displayed, contact your local Anritsu service center for assistance. 5-38 MG369XA MM...
- Page 123 Chapter 6 Removal and Replacement Procedures Table of Contents Introduction ..... . 6-3 Exchange Assembly Program ... . . 6-3 Chassis Covers.
- Page 124 12 Volt Power Supply PCB ... 6-17 Power Supply Regulator PCB ..6-17 6-10 Anritsu Customer Service Centers ..6-19...
-
Page 125: Introduction
Program in one of these subassemblies, the defective unit can be exchanged. Upon receiving your request, Anritsu will ship the exchange subas- sembly or RF component to you, typically within 24 hours. You then have 45 days in which to return the defective item. All exchange sub-... -
Page 126: Exchange Assembly Program
For more information about the program, contact your local sales rep- resentative or call your local Anritsu service center. Refer to Table 6-2, on page 6-19, for a list of current Anritsu service centers. - Page 127 R&R Procedures Exchange Assembly Program Table 6-1. Replaceable RF Components (2 of 2) ASSEMBLY ANRITSU PART SUBASSEMBLY OR PART NAME NUMBER NUMBER RF Components YIG Module ND56503 Standard Switched Filter Assembly D45194 Pulsed Switched Filter Assembly D45196 Hi Power Switched Filter Assembly...
-
Page 128: Chassis Covers
Chassis Covers R&R Procedures Chassis Covers Troubleshooting procedures require removal of the top and bottom cov- ers. Replacement of some MG369XA assemblies and parts require re- moval of all covers. The following procedure describes this process. Tool Required # 1 Phillips Screwdriver Preliminary Disconnect the power cord from the unit. - Page 129 R&R Procedures Chassis Covers Step 5. Turn the instrument over so that the bot- tom cover is on top. Step 6. Remove the screw that fastens the bottom cover to the chassis. See Figure 6-2. Step 7. Slide the bottom cover out along the grooves in the chassis and set it aside.
-
Page 130: Preliminary
Front Panel Assembly R&R Procedures Front Panel This paragraph provides instructions for removing and replacing the front panel assembly of the MG369XA. The front panel assembly con- Assembly tains the A1 Front Panel PCB. Refer to Figures 6-3 and Figure 6-4 during this procedure. -
Page 131: Preliminary
R&R Procedures A2 Microprocessor PCB Board A2 Microprocessor This paragraph provides instructions for removing and replacing the A2 Microprocessor PCB which is located immediately behind the front PCB Board panel in a shielded card cage. See Figure 6-5. Figure 6-5. A2 Microprocessor PCB Removal Remove the front panel assembly as described in Preliminary Section 6-4. -
Page 132: Preliminary
A3 Reference/Fine Loop PCB R&R Procedures A3 Reference/Fine This paragraph provides instructions for removing and replacing the A3 Reference/Fine Loop PCB, which is located in a shielded enclosure Loop PCB immediately behind the Microprocessor board card cage. Preliminary Remove the front handles, rear feet, and top cover as described in Section 6-3. -
Page 133: Preliminary
R&R Procedures A4 Coarse Loop PCB A4 Coarse Loop PCB This paragraph provides instructions for removing and replacing the A4 Coarse Loop PCB assembly, which is located immediately behind the A3 Reference/Fine Loop PCB assembly. Preliminary Remove the front handles, rear feet, and top cover as described in Section 6-3. - Page 134 A4 Coarse Loop PCB R&R Procedures Remove and replace the A4 PCB/shield assembly as follows: (Instruments with option 3) Step 1. Carefully disconnect the coaxial cables from the top connectors of the A4 PCB assembly. Step 2. Turn the chassis upside down and locate the four retaining screws for the A4 board assembly.
-
Page 135: Preliminary
R&R Procedures A5 – A9 PCB Removal A5 – A9 PCB For access to the A5, A6, A7, A8, and A9 PCB assemblies the card cage cover must be removed first, as follows: Removal Preliminary Remove the front handles, rear feet, and top cover as described in Section 6-3. -
Page 136: A5 Auxiliary Pcb
A5 – A9 PCB Removal R&R Procedures COUPLER ATTENUATOR SWITCHED FILTER MODULE A9J1 A7J5 A6J3 A5J1 POWER SUPPLY ASSEMBLY VIEW OF A4 WITH OPTION 3 Figure 6-10. Locations of A5, A6, A7, A8, and A9 PCB Assemblies A5 Auxiliary To remove the A5 Auxiliary PCB, proceed as follows: Step 1. -
Page 137: A7 Yig Lock Pcb
R&R Procedures A5 – A9 PCB Removal Step 3. To install the A6 ALC PCB, reverse the removal process. A7 YIG Lock To remove the A7 YIG Lock PCB, proceed as follows: Step 1. Disconnect the miniature coax cable con- nectors from the top edge of the A7 PCB. -
Page 138: Power Supply Assembly
Power Supply Assembly R&R Procedures Power Supply This section provides instructions for removing and replacing the power supply assembly, which is located in a shielded enclosure at the Assembly left rear of the unit. Preliminary It is necessary to first remove the card cage cover and instrument side cover, as described in Section 6-8. -
Page 139: Volt Power Supply Pcb
R&R Procedures Power Supply Assembly Step 3. Gently pull the rear panel away from the chassis to gain access to the top rear power supply cover screws. Step 4. Use a Phillips screw driver to remove the four screws that secure the top subassem- bly (cover and PDU power supply unit) of the power supply assembly. - Page 140 Power Supply Assembly R&R Procedures Step 1. If not done previously, remove the upper power supply top assembly and 12 volt power supply PCB (previous procedures). Step 2. Disconnect the 2-wire cable from the fan assembly at the JP2 connector of the power regulator PCB.
- Page 141 R&R Procedures Anritsu Customer Service Centers 6-10 Anritsu Customer Table 6-2, below, lists the contact information for Anritsu service cen- ters around the world. Service Centers Table 6-2. Anritsu Service Centers UNITED STATES FRANCE JAPAN ANRITSU COMPANY ANRITSU S.A ANRITSU CUSTOMER SERVICE LTD.
- Page 142 Appendix A Test Records Introduction This appendix provides test records for recording the results of the Performance Verification tests (Chapter 3) and the Calibration proce- dures (Chapter 4). They jointly provide the means for maintaining an accurate and complete record of instrument performance. Test records are provided for all models of the Series MG369XA Synthesized CW/Signal Generators.
- Page 143 Appendix A Test Records Anritsu Model MG369_A Date: __________________________ Serial Number __________________ Tested By: __________________________ 3-6 Internal Time Base Aging Rate Test Test Procedure Measured Value Upper Limit Record frequency error value ....
- Page 144 Test Records Appendix A 3-7 Frequency Synthesis Tests Coarse Loop/YIG Loop Test Procedure Fine Loop Test Procedure Test Frequency (in GHz) Measured Value * Test Frequency (in GHz) Measured Value ** 2.000 000 000 _____________________ 2.000 000 100 _____________________ 3.000 000 000 _____________________ 2.000 000 200 _____________________...
- Page 145 Appendix A Test Records 3-8 Spurious Signals Test: RF Output Signals <2 GHz (Units w/Option 5) Test Procedure Measured Value Upper Limit Set F1 to 10 MHz Record the presence of the worst case harmonic .._______________dBc –30 dBc Record the presence of the worst case non-harmonic .
- Page 146 Test Records Appendix A 3-8 Spurious Signals Test: RF Output Signals £2.2 GHz (Units w/Option 4) Test Procedure Measured Value Upper Limit Set F1 to 10 MHz Record the level of all harmonics of the 10 MHz carrier 20 MHz (2nd harmonic) ..... . _______________dBc –40 dBc 30 MHz (3rd harmonic) .
- Page 147 Appendix A Test Records 3-9 Harmonics Test: RF Output Signals From 2 to 20 GHz Test Procedure Measure Value Upper Limit Set F1 to 2.4 GHz Record the level of all harmonics of the 2.4 GHz carrier: 4.8 GHz (2nd harmonic) ..... _______________dBc –60 dBc* 7.2 GHz (3rd harmonic) .
- Page 148 Test Records Appendix A 3-9 Harmonic Test: RF Output Signals From 2 to 20 GHz (Continued) Test Procedure Measure Value Upper Limit Set F1 to 12.4 GHz Record the level of all harmonics of the 12.4 GHz carrier: 24.8 GHz (2nd harmonic) ..... _______________dBc –60 dBc* 37.2 GHz (3rd harmonic) .
- Page 149 Appendix A Test Records 3-10 Single Sideband Phase Noise Test Upper Limit Test Procedure Upper Limit Measured Value W/Opt 3 Set F1 to 6.0 GHz Record the phase noise levels at these offsets: 10 Hz ......_______________dBc –54 dBc 100 Hz .
- Page 150 Test Records Appendix A 3-11 Power Level Accuracy and Flatness Tests (Model MG3692A w/o Option 2A/2F Step Attenuator) Power Level Accuracy Test Procedure Set F1 to 1.0 GHz Set F1 to 5.0 GHz Units w/Option 4 or 5 Only All Models Set L1 to: Measured Power * Set L1 to:...
- Page 151 Appendix A Test Records 3-11 Power Level Accuracy and Flatness Tests (Continued) (Model MG3692A w/Option 2A Step Attenuator) Power Level Accuracy Test Procedure Set F1 to 1.0 GHz Set F1 to 5.0 GHz Units w/Option 4 or 5 Only All Models Set L1 to: Measured Power * Set L1 to:...
- Page 152 Test Records Appendix A 3-11 Power Level Accuracy and Flatness Tests (Continued) (Model MG3692A w/Option 2F Step Attenuator) Power Level Accuracy Test Procedure Set F1 to 1.0 GHz Set F1 to 5.0 GHz Units w/Option 4 or 5 Only All Models Set L1 to: Measured Power * Set L1 to:...
- Page 153 Appendix A Test Records 3-11 Power Level Accuracy and Flatness Tests (Continued) (Model MG3692A w/Option 15 High Power & w/o Option 2A/2F Step Attenuator) Power Level Accuracy Test Procedure Set F1 to 1.0 GHz Set F1 to 5.0 GHz Set F1 to 10.0 GHz Units w/Option 4 or 5 Only All Models All Models...
- Page 154 Test Records Appendix A 3-11 Power Level Accuracy and Flatness Tests (Continued) (Model MG3692A w/Option 15 & Option 2A Step Attenuator) Power Level Accuracy Test Procedure Set F1 to 1.0 GHz Set F1 to 5.0 GHz Set F1 to 10.0 GHz Units w/Option 4 or 5 Only All Models All Models...
- Page 155 Appendix A Test Records 3-11 Power Level Accuracy and Flatness Tests (Continued) (Model MG3692A w/Option 15 High Power & Option 2F Step Attenuator) Power Level Accuracy Test Procedure Set F1 to 1.0 GHz Set F1 to 5.0 GHz Set F1 to 10.0 GHz Units w/Option 4 or 5 Only All Models All Models...
- Page 156 Test Records Appendix A 3-11 Power Level Accuracy and Flatness Tests (Continued) (Model MG3693A/MG3694A w/o Option 2B Step Attenuator) Power Level Accuracy Test Procedure Set F1 to 1.0 GHz Set F1 to 5.0 GHz Set F1 to 25.0 GHz Units w/Option 4 or 5 Only All Models All Models Set L1 to:...
- Page 157 Appendix A Test Records 3-11 Power Level Accuracy and Flatness Tests (Continued) (Model MG3693A/MG3694A w/Option 2B Step Attenuator) Power Level Accuracy Test Procedure Set F1 to 1.0 GHz Set F1 to 5.0 GHz Set F1 to 25.0 GHz Units w/Option 4 or 5 Only All Models All Models Set L1 to:...
- Page 158 Test Records Appendix A 3-11 Power Level Accuracy and Flatness Tests (Continued) (Model MG3693A/MG3694A w/Option 15 High Power & w/o Option 2B Step Attenuator) Power Level Accuracy Test Procedure Set F1 to 1.0 GHz Set F1 to 5.0 GHz Set F1 to 25.0 GHz Units w/Option 4 or 5 Only All Models All Models...
- Page 159 Appendix A Test Records 3-11 Power Level Accuracy and Flatness Tests (Continued) (Model MG3693A/MG3694A w/Option 15 High Power & w/Option 2B Step Attenuator) Power Level Accuracy Test Procedure Set F1 to 1.0 GHz Set F1 to 5.0 GHz Set F1 to 25.0 GHz Units w/ Option 4 or 5 Only All Models All Models...
- Page 160 Test Records Appendix A Anritsu Model MG369_A Date: __________________________ Serial Number __________________ Tested By: __________________________ 4-7 Preliminary Calibration Procedure Step Step Completion 1. Internal DVM Calibration (calterm119) ......
- Page 161 3. Store the Calibration Data ....... . . ______________ 4-9 RF Level Calibration This calibration is performed using an automatic test system. Contact Anritsu Customer Service for further information. 4-10 ALC Bandwidth Calibration Procedure Step Step Completion 1.
- Page 162 Appendix B Performance Specifications MG369XA Product Data Sheet MG369XA MM B-1/2...
- Page 163 MG3690A Microwave CW Generators 0.1 Hz to 40 GHz The Ideal Local Oscillator...
- Page 164 Anritsu’s MG3690A series of synthesizers deliver the highest performance and the highest value available today. THE MG3690A SYNTHESIZED CW GENERATOR These basic signal sources provide accurate outputs over a wide frequency and power range for Local Oscillator duty and other CW applications.
- Page 165 Easy to Read backlit 1/4 VGA LCD display presents instrument status and measurement setup menus. Softkey Menus lead you step-by-step to the desired instrument setup. Intuitive menu flow virtually eliminates opening the operating manual! (Open it anyway, there’s other good information in it.) MG3690A F AMILY...
- Page 166 Conveniently Enter Function Keys At 13.3 cm High and Edit Parameters group instrument functions for simple coupled with 45 cm depth, you get with the numeric keypad, operation. Configure GPIB interface and maximum performance in the cursor/increment-decrement key, input/output connectors. Initiate security minimum A.T.E.
- Page 167 INSTRUMENTS STANDARD with five Anritsu Synthesizers The IVI standard defines a standard instrument driver model Anritsu Corporation leads the way with IVI technology, having that enables instrument interchangeability and interoperability released the first COM-based IVI driver supporting the Signal without software changes. Anritsu’s IVI-driver supported...
- Page 168 MG3690A eclipses the competition. MORE ACCURATE MEASUREMENTS Anritsu provides this high level of performance so that our customers can develop their own state-of-the-art products. With communications systems and modulation techniques becoming more complex, the low noise aspect of the MG3690A series becomes more important.
- Page 169 Even with all the new technology in the MG3690A series of synthesizers, these new sources still provide all of the reliability you’ve come to expect from Anritsu. Complex ATE Setups Lengthy Cable Runs...
- Page 170 SPECIFICATIONS CW Mode List Sweep Mode Output: Twenty independent, presettable CW frequencies Under GPIB control or via the front panel, up to 4 tables with 2000 (F0 – F9 and M0 – M9). non-sequential frequency/power sets can be stored and then addressed as a phase-locked step sweep.
- Page 171 Any pending GPIB I/O is aborted. Selectable from Emulations: T he instrument responds to the published GPIB the system menu. commands and responses of the Anritsu Models 6600, 6700, and Master/Slave Operation: Allows two output signals to be swept 6XX00-series signal sources. When emulating another signal source, with a user-selected frequency offset.
- Page 172 SPECTRAL PURITY All specifications apply at the lesser of +10 dBm output or maximum specified leveled output power, unless otherwise noted. Spurious Signals Harmonic and Harmonic Related: Power Line and Fan Rotation Spurious Emissions (dBc): Frequency Range Standard Offset From Carrier Frequency Range <300 Hz 300 Hz to 1 kHz...
- Page 173 Single-Sideband Phase Noise Single-Sideband Phase Noise (dBc/Hz): Offset From Carrier 10 kHz 100 kHz Frequency Range 100 Hz 1 kHz ≥0.1 Hz to <10 MHz (Option 22) –90 –120 –130 –130 ≥10 MHz to <500 MHz (Option 4) –94 –106 –104 –120 ≥500 MHz to <2200 MHz (Option 4)
- Page 174 RF OUTPUT Power level specifications apply at 25 ±10˚C. Maximum Leveled Output Power: Output Power Output Power Model Frequency Output Configuration With Step Attenuator With Electronic Number Range (GHz) Power (dBm) (dBm) Step Attenuator (dBm) ≤2.2 GHz w/opt 4 +17.0 +15.0 +13.0 ≤2 GHz...
- Page 175 Accuracy and Flatness CW Power Sweep Accuracy specifies the total worst case accuracy. Flatness is Range: Sweeps between any two power levels at a single included within the accuracy specification. CW frequency. Accuracy = ±1.0 dB Resolution: 0.01 dB/step (Log) or 0.001 mV (Linear) Flatness = ±0.8 dB Accuracy: Same as CW power accuracy.
- Page 176 DIGITAL DOWN CONVERTER (OPTION 4) MG3690A synthesizers with Option 4 DDC produce output Power Line and Fan-Related Spurious (dBc) frequencies from 10 MHz to 2.2 GHz by dividing the YTO Offset from Carrier Frequency Range frequency by 2 . The divisor ranges from 2 at 2.2 GHz to ≥300 Hz <300 Hz 256 at 10-15.625 MHz.
- Page 177 Supports master-slave operation with another synthesizer or allows connector to the rear panel. for a single-cable interface with the Model 56100A Scalar Network Analyzer and other Anritsu instruments. 10 MHz REF IN: Accepts an external 10 MHz ±100 Hz, 0 to +10 dBm time-base signal. Automatically disconnects...
- Page 178 Econonical upgrades are available to upgrade any model to any MG3690A/17 Delete Front Panel – Deletes the front panel for higher performing model. Consult Anritsu for details. use in remote control applications where a front panel display and keyboard control are not needed.
- Page 179 All trademarks are registered trademarks of their respective companies. Sales Centers: Sales Centers: (800) ANRITSU Europe 44 (0) 1582-433433 Canada (800) ANRITSU Japan 81 (03) 3446-1111 South America 55 (21) 286-9141 Asia-Pacific 65-2822400 Microwave Measurements Division 490 Jarvis Drive Morgan Hill, CA 95037-2809 http://www.us.anritsu.com...
- Page 180 Subject Index Operation Related, 3-7 Self-Test, 3-3 to 3-6 ESD (Electrostatic Discharge) Functional Description, 6-15 to 6-16 Precautions, 1-7 ALC and Modulation Subsystem Exchange Assembly Program Block Diagram, 6-11 to 6-12 Program Description, 2-2 Calibration, 5-21 to 5-22 External Reference Troubleshooting, 3-25 Troubleshooting, Lock Failure, 3-17 Attenuator, 6-20...
- Page 181 Switched Filter Parts and Subassemblies, Replaceable, 2-2 to 2-4 Calibration, 5-16 to 5-19 Parts Ordering Information, 2-2 Troubleshooting, 3-31, 3-34 Anritsu Service Centers, 2-2 PC Setup, 5-7 Performance Specifications, B-1 Performance Verification Tests, 4-3 Test Equipment, Recommended, 1-10 to 1-11...
- Page 182 Subject Index U - Z Test Record Connector/Test Points Locator Diagram, 3-10 to Power Level Accuracy and Flatness, A-10 TO 3-11 A-16 Diagnostics, 1-6, 3-3 Single Sideband Phase Noise, A-9 Down Converter, 3-23 Test Records DVM, 3-15 ALC Bandwidth Calibration, A-21 Fine Loop, 3-17 Frequency Synthesis, A-4 Level Detector, 3-31, 3-34...
Need help?
Do you have a question about the MG3692A Series and is the answer not in the manual?
Questions and answers