Table of Contents
Advertisement
Quick Links
Advertisement
Table of Contents
Troubleshooting

Related Manuals for Ventec Life Systems V-Home


Summary of Contents for Ventec Life Systems V-Home
- Page 1 Clinical and Technical Manual V Home, Software Version 5.02...
- Page 2 Copyright: © 2023, Ventec Life Systems 22002 26th Ave SE Bothell, WA 98021 USA Part Number: LBL-00354-000, Rev B CAUTION: Federal law restricts this device to sale and use by or on the order of a physician. VentecLife.com...
-
Page 3: Table Of Contents
Table of Contents Table of Contents Introduction Therapy Overview Leak+ Performance Ventilation Portability Indications for Use V*Home Training Suggested Environments of Use Home Environments Hospital Environments Institutional Environments Transport Environments Getting Started Package Contents Contraindications System Overview Setup V*Home Placement Power Setup The Power Supply The Optional 24 Volt Wheelchair Power Cable... - Page 4 Table of Contents Connecting a Passive Ventec One-Circuit with HME Connecting a Humidifier and Heated Wire Ventec One-Circuit Connecting Ventec One-Circuit Components Connecting an HME (Heat-Moisture Exchanger) Connecting an External Nebulizer Cup to the Patient Circuit Setting up Ventilation Therapy with a Speaking Valve Mouthpiece Patient Circuit Setup Oxygen Therapy Setup Setting Up External Oxygen Sources...
- Page 5 Table of Contents Locking the Touchscreen Quick View The Status Bar The Home Screen Night Mode and Day Mode The Therapy Screen The Monitors Screen The Customization Button The Waveforms Button The Menu Screen The Pre-Use Test Button The Settings & Alarms Button The Device Settings Button The Logs Button The Clinician Access Button...
- Page 6 Table of Contents The Alarm Log The Mark Event Button The Event Log Clearing an Alarm Remote Alarms and Nurse Call Systems (Optional) Monitors Ventilation Monitors Waveform Monitors Monitor Screen Customization Oxygen Therapy Monitors FiO2 Monitor Nebulizer Compensation Monitor System Monitors Multi-View Exporting Multi-View Data to a USB Drive Generating Multi-View Reports...
- Page 7 Table of Contents Powering On V*Home Starting V*Home Therapies Starting Ventilation Therapy Changing Between Configured Ventilation Presets Starting Oxygen Therapy Starting Nebulizer Compensation Responding to Alarms Powering Off V*Home Cleaning and Maintenance Cleaning V*Home Cleaning V*Home Exterior Cleaning the Air and Fan Filters Replacing Components Replacing the Power Supply Replacing the Ventec One-Circuit...
- Page 8 Classifications Standards Applied Ventec One-Circuit Compliance Pressure During Inop Biocompatibility Accessories Available from Ventec Life Systems Available from Other Manufacturers EMC Information Electromagnetic Emissions Electromagnetic Immunity Recommended Separation Distance Between Portable and Mobile RF Communications Equipment and V*Home Technical Description...
-
Page 9: Input Flow 100% Oxygen, Flow Trigger Set To
Table of Contents System Fault Detection Criteria and Recommended Action Low-Pressure Oxygen Blending Input Flow 100% Oxygen, Flow Trigger Set to 1-3 Input Flow 100% Oxygen, Flow Trigger Set to 9 Input Flow 93% Oxygen, Flow Trigger Set to 1-3 Input Flow 93% Oxygen, Flow Trigger Set to 9 Input Flow 100% Oxygen, High Flow Therapy Input Flow 93% Oxygen, High Flow Therapy... -
Page 10: Introduction
Introduction Introduction Therapy Overview Using the Ventec One-Circuit ® , clinicians, home caregivers, and patients can use V*Home to ventilate the patient. NOTE: This manual describes the features included with software version 5.02 for the V*Home Configuration only. For instructions for use of other model VOCSN configurations and software versions, see the links to Clinical and Technical Manuals available at Venteclife.com/resources. -
Page 11: Leak+ Performance
Using the power supply, V*Home can be connected to a wall outlet or other AC power source. Ventec Life Systems also offers an optional 24 Volt Wheelchair Power Cable, which can be used to power V*Home from wheelchair outlets. -
Page 12: Indications For Use
Introduction Indications for Use V*Home Unified Respiratory System is intended to provide continuous or intermittent ventilatory support for the care of individuals who require mechanical ventilation. It may be used in invasive and non-invasive applications. V*Home is intended for pediatric through adult patients weighing at least 5 kg. It is intended for use in home, hospital, institutional, and transport settings, including portable applications. -
Page 13: Suggested Environments Of Use
Introduction Suggested Environments of Use V*Home is suitable for use in the following environments: Home Environments • Home care • Home-based transport Hospital Environments • Emergency departments • Step-down units • Military hospitals WARNING: Do not use V*Home within magnetic resonance (MR) environments. Using V*Home within MR environments may affect... -
Page 14: Getting Started
• One Ventec One-Circuit • Bacterial filters • One Quick Start Guide NOTE: Contact Ventec Life Systems at 1-844-MY-VOCSN for assistance with setup, maintenance, or to report unexpected device operation. “Accessories” on page 162 for a list of V*Home components and accessories available from Ventec Life Systems. -
Page 15: System Overview
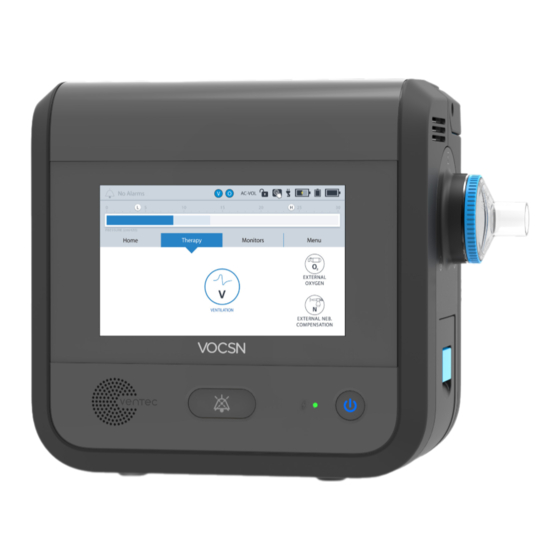
Introduction System Overview Description Description Touchscreen Handle (back view) Speaker T-Slot mount Alarm Silence button Cooling air outlet External Power / Charge Status indicator light Low-pressure O2 Inlet On/Off button and indicator light Remote alarm port Removable, rechargeable battery (right side) USB port for use by trained personnel only. -
Page 16: Setup
WARNING: Only use carrying cases approved by Ventec Life Systems. Use of unauthorized carrying cases may result in damage to V*Home, impaired device performance, and risk to the patient. -
Page 17: Home Placement
Setup V*Home Placement Place V*Home in a well-ventilated area, ensuring air flows freely around its inlets and vents. WARNING: Incorrect placement of V*Home may affect device performance. Do not cover V*Home, place it in an area in which the vents may become obstructed (such as on its back or on top of compliant bedding), or use it in hazardous environments (such as atmospheres containing pollutants). -
Page 18: Power Setup
Use the internal (non-removable) battery in case of power failure or power transition only. NOTE: Use only the power supply approved by Ventec Life Systems to connect V*Home to external sources of power. Ensure the external source of power is rated for use with V*Home. See “External Power Requirements”... -
Page 19: The Power Supply
Setup The Power Supply The power supply included with V*Home is part of the ventilation system, and powers the device from AC wall outlets. Before and during use, periodically inspect the power supply for damage or frays, and to ensure the power supply cords are firmly connected. Do not use damaged power supplies. -
Page 20: The Optional 24 Volt Wheelchair Power Cable
Setup The Optional 24 Volt Wheelchair Power Cable An optional 24 Volt Wheelchair Power Cable is available from Ventec Life Systems. The 24 Volt Wheelchair Power Cable can be used to connect V*Home to external sources of DC power, such as wheelchair power outlets. -
Page 21: Ventec One-Circuit Setup
Ventec Life Systems offers single-patient use adult and pediatric Ventec One-Circuits for use with V*Home, which incorporate an optional passive exhalation valve, and an optional heated wire (for connection to a humidifier). See “Accessories”... -
Page 22: Using A Trach, Et Tube, Or Non-Vented Mask
Setup Using a Trach, ET Tube, or Non-Vented Mask V*Home may be connected to a non-vented mask, trach or ET tube to provide Ventilation therapy using a Passive Ventec One-Circuit. This circuit type includes an exhalation valve designed to expel exhaled gases. See the following pages for detailed setup instructions Using a Vented Mask V*Home may be connected to a vented mask to provide Ventilation therapy using a Valveless Ventec One-Circuit. -
Page 23: Connecting A Passive Or Valveless Ventec One-Circuit
Setup Connecting a Passive or Valveless Ventec One-Circuit The Ventec One-Circuit comes with an optional passive exhalation valve, and an optional heated wire (for connection to a humidifier). The setup procedure will depend on the type of Ventec One-Circuit and the accessories used. To connect a Ventec One-Circuit to V*Home: Connect a bacterial filter. -
Page 24: Ventec One-Circuit Component Connection Order
Setup Ventec One-Circuit Component Connection Order PATIENT BACTERIAL INTERFACE PATIENT FILTER CIRCUIT (optional heated wire) HUMIDIFIER (choose one) V*HOME Item Name Required? Additional Information VOCSN Bacterial Required “Connecting an External Bacterial Filter” on page 25 for instructions. Filter Humidifier Optional May include a form of humidification (either an HME or humidifier). -
Page 25: Connecting An External Bacterial Filter
Setup Connecting an External Bacterial Filter Connect an external bacterial filter to reduce the risk of cross-contamination. Attach a bacterial filter to the Ventec One- Circuit connection port before connecting a Ventec One-Circuit. Fit the bacterial filter against V*Home, aligning the icons on the filter and V*Home, then twist the filter to lock it into place. V*Home contains a secondary, internal bacterial filter to help protect against cross-contamination in case of external bacterial filter failure. -
Page 26: Connecting A Humidifier And Heated Wire Ventec One-Circuit
NOTE: Using humidifiers or other accessories not specified for use with this system may impair V*Home performance. Ventec Life Systems recommends use of the Fisher & Paykel HC550, the Fisher & Paykel MR850, or equivalent. Humidifiers connected to the Ventec One‑Circuit should comply with ISO 8185. -
Page 27: Connecting Ventec One-Circuit Components
“Connecting an HME (Heat-Moisture Exchanger)” on page 27 • “Connecting an External Nebulizer Cup to the Patient Circuit” on page 28 NOTE: Ventec Life Systems recommends including a humidifier or heat‑moisture exchanger (HME) as part of passive and valveless Ventec One‑Circuit configurations. Connecting an HME (Heat-Moisture Exchanger) If you’re not using a humidifier, you may connect an HME to the Ventec One-Circuit between the exhalation valve and... -
Page 28: Connecting An External Nebulizer Cup To The Patient Circuit
NOTE: If a passive Ventec One‑Circuit is used, Ventec Life Systems recommends connecting a filter between the distal end of the circuit and the nebulizer tee to ensure nebulized material does not collect in the passive valve and obstruct airflow. -
Page 29: Setting Up Ventilation Therapy With A Speaking Valve
Setup Setting up Ventilation Therapy with a Speaking Valve V*Home may be used with a passive Ventec One-Circuit and/or a pressure ventilation mode and a connected speaking valve. Because gas delivered from V*Home exits the mouth rather than the Ventec One-Circuit, volume delivery may be affected when a passive Ventec One-Circuit is used. -
Page 30: Mouthpiece Patient Circuit Setup
Setup Mouthpiece Patient Circuit Setup Mouthpiece patient circuits are recommended for use with patients who can place their mouths on the circuit to initiate breaths on their own. WARNING: Using a mouthpiece for Ventilation is not recommended for patients <5 years of age, due to the requirements for physiological and neurological development, as well as neuromuscular coordination necessary for the application of effective therapy. -
Page 31: Oxygen Therapy Setup
Setup Oxygen Therapy Setup Oxygen therapy can be delivered to the patient using a connected external source of low-pressure oxygen to flow oxygen up to 25 L/min through V*Home and into the Ventec One-Circuit, via the low-pressure oxygen port. NOTE: Do not bypass the oxygen ports in the back of V*Home to bleed oxygen directly into the Ventec One‑Circuit from an external oxygen source. -
Page 32: Connecting External Low-Pressure Oxygen
To connect an external low-pressure oxygen source (e.g., oxygen concentrator or liquid oxygen): Connect an O2 Low Pressure Inlet Adapter (available from Ventec Life Systems) to the low-pressure O2 port on the back of V*Home. Connect the oxygen source to the adapter. -
Page 33: Connecting A Nurse Call System Or Remote Alarm
1/4” phono jack. Only use the remote alarm port with Ventec Nurse Call cables or other cables approved by Ventec Life Systems. Follow all setup instructions provided by the remote alarm or nurse call system manufacturer. -
Page 34: Running The Pre-Use Test
Setup Running the Pre-Use Test The V*Home Pre-Use Test calculates the resistance and leak of the Ventec One-Circuit. Based on these calculations, V*Home verifies the integrity of the Ventec One-Circuit, and also improves the accuracy of therapy delivered during ventilation. To ensure therapy is delivered accurately, you must perform a Pre-Use Test whenever prompted, the patient circuit is changed, or the device is powered on. -
Page 35: Connecting A React Datalink
Setup Connecting a React DataLink™ The optional React DataLink enables wireless access to V*Home data. The data can be accessed on the Multi-View Connect™ portal at multiviewconnect.venteclife.com. Consult the React DataLink and Multi-View Connect IFU for detailed instructions on device function and connection. Note: Velcro strips must not obscure the label on the back of V*Home. -
Page 36: Breath Types And Therapy Modes
Breath Types and Therapy Modes Breath Types and Therapy Modes Breath Types Breaths can be initiated (started) and cycled (ended) by either V*Home or the patient. Depending on the Ventilation Mode and breath control settings chosen, V*Home may provide the patient with mandatory, assist, or spontaneous breaths. -
Page 37: Pressure Breaths
Breath Types and Therapy Modes Pressure Breaths Mandatory and assist breaths are delivered as pressure breaths in pressure ventilation modes. V*Home delivers pressure breaths by elevating the pressure of the Ventec One-Circuit to the set Pressure Control limit for the set Inspiratory Time. NOTE: The maximum pressure delivered is limited to the High Pressure alarm setting minus 3 cmH2O. -
Page 38: Volume Breaths
Breath Types and Therapy Modes Volume Breaths Mandatory and assist breaths are delivered as volume breaths in volume ventilation modes. Volume breaths deliver the set Tidal Volume over the set Inspiratory Time. Airway pressure is a function of patient lung resistance and compliance. NOTE: Delivery of volume breaths to patients with extremely high airway resistance (e.g., 200 cmH2O/L/s) and lung compliance requires high circuit pressure, which may cause the High Pressure alarm to activate before the target tidal volume is reached. -
Page 39: Home Ventilation Modes
Breath Types and Therapy Modes V*Home Ventilation Modes V*Home offers nine configurable Ventilation Mode settings: Bi-Level, Spontaneous, Assist/Control-Pressure, Assist/ Control-Volume, SIMV-Pressure, SIMV-Volume, Vol. Targeted-PS, Vol. Targeted-PC, and Vol. Targeted-SIMV. A breath period is the window of time used by V*Home to determine when mandatory breaths will be delivered to the patient. -
Page 40: Assist/Control-Pressure With A Passive, Or Valveless Ventec One-Circuit
Breath Types and Therapy Modes Assist/Control-Pressure Mode Assist/Control-Pressure works one way with passive and valveless circuits, and differently when V*Home is connected to and configured to use a mouthpiece Ventec One-Circuit. Assist/Control-Pressure with a Passive, or Valveless Ventec One-Circuit When used with a passive, or valveless Ventec One-Circuit, Assist/Control-Pressure mode provides mandatory and assist pressure breaths, depending on the timing of detected patient effort. -
Page 41: Simv-Pressure Mode
Breath Types and Therapy Modes SIMV-Pressure Mode SIMV-Pressure mode delivers pressure and spontaneous breaths through a passive, or valveless circuit. When patient effort is detected during a breath period, one assist breath will be delivered. Subsequent patient triggers within a breath period will result in spontaneous breaths. -
Page 42: Assist/Control-Volume Mode
Breath Types and Therapy Modes Assist/Control-Volume Mode Assist/Control-Volume works one way with passive and valveless circuits, and differently when V*Home is connected to and configured to use a mouthpiece Ventec One-Circuit. Assist/Control-Volume with a Passive, or Valveless Ventec One-Circuit When used with a passive, or valveless Ventec One-Circuit, Assist/Control-Volume mode provides mandatory and/or assist volume breaths. -
Page 43: Simv-Volume Mode
Breath Types and Therapy Modes SIMV-Volume Mode SIMV-Volume mode delivers volume and spontaneous breaths through a passive or valveless Ventec One-Circuit. When patient effort is detected during a breath period, one assist breath will be delivered. Subsequent patient triggers within a breath period will result in spontaneous breaths. -
Page 44: Volume Targeted Ventilation Overview
NOTE: In some cases, the High Pressure limit may prevent V*Home from delivering the entirety of the set Tidal Volume to the patient. Ventec Life Systems recommends using the Low Minute Volume alarm as a way to detect this condition. -
Page 45: Vol. Targeted-Ps Mode
Breath Types and Therapy Modes Vol. Targeted-PS Mode Vol. Targeted-PS is a Volume Targeted mode of ventilation. The patient may initiate a spontaneous breath at any time. It provides the patient with two configurable levels of pressure: the set PEEP, and the pressure required to maintain the set Tidal Volume target. -
Page 46: Vol. Targeted-Pc Mode
Breath Types and Therapy Modes Vol. Targeted-PC Mode Vol. Targeted-PC with a Passive or Valveless Ventec One-Circuit When used with a passive or valveless Ventec One-Circuit, Vol. Targeted-PC mode provides mandatory and assist pressure breaths, depending on the timing of detected patient effort. Patient effort will trigger an assist pressure breath. If no patient effort is detected within a breath period, V*Home will provide a mandatory pressure breath. -
Page 47: Vol. Targeted-Simv Mode
Breath Types and Therapy Modes Vol. Targeted-SIMV Mode Vol. Targeted-SIMV mode delivers volume targeted breaths through a passive or valveless circuit. When patient effort is detected during a breath period, one assist breath will be delivered. Subsequent patient triggers within a breath period will result in spontaneous breaths. -
Page 48: Comparable Volume Ventilation Modes
Breath Types and Therapy Modes Comparable Ventilation Modes The V*Home critical care ventilator provides a comprehensive set of ventilation modes to meet patient needs during invasive, non-invasive and mouthpiece ventilation. The reference list below illustrates how to set your preferred ventilation mode. -
Page 49: Comparable Pressure Ventilation Modes (Including Volume-Targeted Ventilation)
Breath Types and Therapy Modes Comparable Pressure Ventilation Modes (Including Volume- Targeted Ventilation) Ventilation Mode or Feature Equivalent V*Home Mode Settings Additional V*Home Controls AC-Pressure • Set Mode to AC-Pressure • Inspiratory Time (Assist/Control) • Set Breath Rate • PEEP •... -
Page 50: Comparable Non-Invasive Ventilation Modes
Breath Types and Therapy Modes Comparable Non-Invasive Ventilation Modes Ventilation Mode or Feature Equivalent V*Home Mode Settings Additional V*Home Controls • Set Mode to Bi-Level • Inspiratory Time (Spontaneous/Timed) • Set Breath Rate • EPAP • Set Flow Trigger • IPAP (measured from a baseline of 0 cmH2O) •... -
Page 51: The Touchscreen
The Touchscreen The Touchscreen Use the V*Home touchscreen to configure and operate the device, as well as monitor the patient. This chapter provides an overview of the information and controls available on each of the four main tabbed navigation screens. NOTE: If V*Home controls become difficult to select, use the Calibrate Touchscreen control to recalibrate the touchscreen sensor. -
Page 52: The Status Bar
The Touchscreen The Status Bar No Alarms SIMV-VOL PRESSURE (cmH20) The status bar remains at the top of the screen during V*Home use. The status bar includes the following indicators: Description Alarm indicator. If an alarm condition occurs, the name of the alarm will display, along with a visual (color) indicator of V*Home alarm severity. -
Page 53: The Home Screen
The Touchscreen The Home Screen The Home screen displays three configurable monitors (for example, Breath Rate, Tidal Volume, and the active Ventilation therapy Preset). The three monitors configured to display on the top row of the Monitors tab will appear on the Home screen. Night Mode and Day Mode Use the Home screen to change between Night Mode and Day Mode. -
Page 54: The Therapy Screen
The Touchscreen The Therapy Screen No Alarms AC-VOL Use the Therapy screen to configure and start Ventilation, or to configure V*Home for use with PRESSURE (cmH20) external Oxygen and Nebulizer therapies. Home Therapy Monitors Menu EXTERNAL OXYGEN VENTILATION EXTERNAL NEB. COMPENSATION The Monitors Screen The Monitors screen displays measured or calculated information about delivered Ventilation and Oxygen therapy. -
Page 55: The Customization Button
The Touchscreen The Customization Button The monitors and controls displayed on this screen are configurable. Press the CUSTOMIZATION button on each page to configure the layout and content of the Monitors screen. The three monitors configured to display on the top row of the Monitors tab will appear on the Home screen. -
Page 56: The Menu Screen
The Touchscreen The Menu Screen The Menu screen provides access to additional system settings and features. This section includes a description of the information and controls accessible through each button on the Menu screen. No Alarms SIMV-VOL PRESSURE (cmH20) Home Therapy Monitors Menu... -
Page 57: The Settings & Alarms Button
The Touchscreen The Settings & Alarms Button Press the SETTINGS & ALARMS button to modify Ventilation control settings and alarms for any of the three configured Ventilation therapy Presets. This button will open the Ventilation Presets configuration screen. SETTINGS & ALARMS “Changing Ventilation Therapy Settings”... -
Page 58: The Enable Prescribed Therapies Button
The Touchscreen The Enable Prescribed Therapies Button Press the ENABLE PRESCRIBED THERAPIES button to enable or disable the FiO2 Monitor. “Enabling and Disabling Prescribed Therapies” on page 72 for more information. COUGH NEBULIZE NOTE: The Enable Prescribed Therapies menu button is only available when V*Home is in ENABLE PRESCRIBED Clinician Access mode. -
Page 59: Controls And Settings
Controls and Settings Controls and Settings V*Home controls are used to configure how the device behaves and delivers therapy. This chapter describes each of the V*Home controls, lists the available settings, and provides configuration instructions. After configuring a control, press ACCEPT to confirm and activate your selection. -
Page 60: Ventilation Therapy Controls
Controls and Settings Ventilation Therapy Controls V*Home stores up to three VT-PS No Alarms pre-configured Ventilation therapy Presets. These Presets can be enabled and configured using the SETTINGS & PRESSURE (cmH20) Press here Prepare patient circuit for ventilation, ALARMS button on the Ventilation screen if you need select preset, and press START to begin. -
Page 61: Available Ventilation Therapy Settings
Controls and Settings Available Ventilation Therapy Settings The following table lists the configurable Ventilation therapy controls available on V*Home. These controls are available separately for each of the three configurable Ventilation therapy Presets. NOTE: Controls that cannot be edited will appear in gray. Controls may be locked because of the Permissions and Clinician Unlock feature. - Page 62 Controls and Settings Ventilator Settings Description Control Circuit Type Passive, Set the Circuit Type control to correspond with the type of patient circuit used Mouthpiece, during Ventilation therapy. Valveless NOTE: The Circuit Type control cannot be modified for the running Ventilation therapy Preset.
- Page 63 Controls and Settings Ventilator Settings Description Control Flow Cycle 10 to 90% Spontaneous breaths will cycle at the set Flow Cycle percentage of peak inspiratory flow. Setting the Flow Cycle control to 90% will result in a shorter inspiratory time; setting the Flow Cycle control to 10% will result in a longer one. When PC Flow Termination is set to On, mandatory and assist pressure breaths will cycle at the set Inspiratory Time or the set Flow Cycle percentage of the peak inspiratory flow, whichever comes first.
- Page 64 Controls and Settings Ventilator Settings Description Control Humidifica- Humidifier, HME Set the Humidification control to correspond to the type of humidification used tion during Ventilation therapy. NOTE: Based on the set Patient Type and Humidification Type, VOCSN automatically adjusts delivered therapy to compensate for differences in the compliance and volume of the Ventec One‑Circuit.
- Page 65 “Volume Targeted Ventilation Overview” on page NOTE: The Pres. Minimum setting may cause VOCSN to deliver more volume than intended by the Tidal Volume setting. Ventec Life Systems recommends using the High Minute Volume alarm to detect this condition. Pressure...
- Page 66 Controls and Settings Ventilator Settings Description Control Pressure 0 to [40-PEEP] cmH2O The set Pressure Support will determine the pressure above PEEP delivered during Support above PEEP the inspiratory phase of spontaneous breaths during SIMV ventilation modes. 10 cmH2O above PEEP Rise Time 1 to 6 The Rise Time setting adjusts the speed of pressure elevation for pressure breaths.
-
Page 67: Control Limiting
Controls and Settings Control Limiting V*Home restricts the availability of some control settings when the set value of another interdependent control creates a limit. For example, available PEEP and Pressure Control settings are interdependent and control limited. If the PEEP control is set to 25 cmH2O, the available Pressure Control settings are automatically limited to 25 cmH2O or less to prevent VOCSN from delivering a total maximum pressure exceeding 50 cmH2O. -
Page 68: Controls Available In Each Ventilation Mode
Controls and Settings Controls Available in Each Ventilation Mode The table below lists the controls available for configuration depending on the set Ventilation Mode. Unavailable controls will not be visible when setting Ventilation therapy controls. NOTE: Controls available regardless of the set Ventilation Mode are not listed in the following table. Assist/ Assist/ Control-... - Page 69 Controls and Settings Assist/ Assist/ Control- SIMV- Control- SIMV- Vol, Targeted- Vol-Targeted- Vol. Targeted- Control Bi-Level Spontaneous Pressure Pressure Volume Volume SIMV High Flow Yes, if device Yes,if device Yes, if device Yes, if device has Leak+ High has Leak+ has Leak+ has Leak+ hardware, or...
- Page 70 Controls and Settings Assist/ Assist/ Control- SIMV- Control- SIMV- Vol, Targeted- Vol-Targeted- Vol. Targeted- Control Bi-Level Spontaneous Pressure Pressure Volume Volume SIMV High Flow Pressure Support Rise Time Sigh Tidal Volume Time Cycle VentecLife.com...
-
Page 71: Setting V*Home Controls For Mouthpiece Ventilation
Controls and Settings Setting V*Home Controls for Mouthpiece Ventilation Mouthpiece patient circuits are intended for use with patients at least 5 years of age, who can place their mouths on the circuit to initiate breaths on their own. NOTE: Because of the circuit size, set the Patient Type control to Pediatric during mouthpiece ventilation, even when VOCSN is used with an adult patient. -
Page 72: Enabling And Disabling Prescribed Therapies
Controls and Settings Enabling and Disabling Prescribed Therapies To use the FiO2 Monitor, ensure the relevant system control to Enabled. This features cannot be configured or activated until they are enabled. To enable or disable an available V*Home therapy: Press the Menu tab. -
Page 73: Oxygen Controls
Controls and Settings Oxygen Controls Oxygen may be provided using the V*Home low-pressure oxygen port. See “Oxygen Therapy Setup” on page 31 oxygen source setup instructions. NOTE: The flow of oxygen from a low‑pressure source is controlled by the source, not by the V*Home oxygen controls. Oxygen from a low‑pressure oxygen source is additive, and can be used in conjunction with oxygen from an external source. - Page 74 Controls and Settings Oxygen Control Settings Description Preset Disabled, Enabled The Preset [1, 2, or 3] Enable control enables or disables the configuration [1, 2, 3] Enable and use of any of or all of the three configurable Oxygen therapy Presets. Preset [up to 10 alphanumeric Use the Preset [1, 2, or 3] Label control to rename any of the three...
-
Page 75: Changing Nebulizer Compensation Settings
Controls and Settings Changing Nebulizer Compensation Settings Nebulizer therapy can configured to compensate for the flow added to No Alarms SIMV-VOL the patient circuit from an external nebulizer. The Nebulizer Duration control may be set for a period of PRESSURE (cmH20) NEBULIZER DURATION Press here to time between 5 and 60 minutes. -
Page 76: Clinician Access Mode
Controls and Settings Clinician Access Mode When the Unlock Required? device setting is set to Yes, pressing the CLINICIAN ACCESS button locks and unlocks V*Home. Using the Permissions feature, V*Home can be configured to restrict which controls are configurable by all users, and which control settings can only be changed by first entering a Clinician Access Passcode to unlock V*Home. -
Page 77: Configuring Permissions
Controls and Settings Configuring Permissions The Permissions feature allows clinicians to configure which V*Home controls are locked (cannot be changed) until the device is unlocked using the Clinician Access Passcode. Control permissions set to User and Clinician are configurable at all times; they can be changed by anyone interacting with V*Home. -
Page 78: Device Settings
Controls and Settings Device Settings V*Home device settings are modifiable, and include controls such as Alarm Volume, whether Clinician Access mode is enabled on the device, and the displayed date and time. Changing Device Settings To change a device setting: Press the Menu tab. -
Page 79: Available Device Settings
Controls and Settings Available Device Settings The following table lists the configurable device settings available on V*Home. NOTE: If the internal battery depletes fully, V*Home Date and Time settings will reset to their default values. To ensure the Alarm and Event logs record information accurately, verify the V*Home Date and Time settings before use, and set them to the correct values if necessary. -
Page 80: Alarms
Low Minute Ventilation 10/23/2013 6:02 AM distance away from V*Home the caregiver may travel. Ventec Life Systems recommends ensuring the Alarm Volume control is set appropriately by simulating these conditions and verifying the alarm can be heard. See “Device Settings”... -
Page 81: Alarm Silence Button
Alarms Alarm Silence Button V*Home will emit an audible series of tones whenever a high- or medium-priority alarm activates. Press the Alarm Silence button on the front of V*Home to silence the active alarm tones for 60 seconds. Press the Alarm Silence button again (or wait 60 seconds) to reactivate the alarm tones. -
Page 82: Alarm Conditions And Settings
Alarms Alarm Conditions and Settings Possible alarm conditions and recommended actions are listed below. The following table also includes a description of each alarm and the range of alarm settings available. All possible alarm conditions are listed in alphabetical order. NOTE: Bold black text indicates the default setting. - Page 83 Alarms Alarm Settings Priority Description Recommended Action Check Patient High The Check Patient Circuit alarm activates when Check the passive Circuit V*Home detects an inadequate leak in a passive or exhalation valve is valveless circuit (see the chart below). unobstructed (for passive circuits).
- Page 84 Press the On/Off button a software or hardware failure renders V*Home again to restart V*Home. unable to safely deliver therapy and/or monitor the If the device remains patient. inoperative, contact your local Ventec Life Systems representative for service. VentecLife.com...
- Page 85 Alarms Alarm Settings Priority Description Recommended Action Internal High The Internal Battery Critically low alarm activates Immediately connect Battery when the internal battery is disconnected, faulty, V*Home to a continuous Critically Low or when the battery is critically low (charged to less source of external power than 33% its capacity).
- Page 86 Low Inspiratory Pressure alarm limit. disconnection. 10 cmH2O Monitor the patient closely NOTE: Ventec Life Systems recommends using to ensure adequate the Low Inspiratory Pressure and Low Minute ventilation therapy is delivered. Volume alarms to detect hypoventilation.
- Page 87 10 to 50 L Minute Volume alarm limit. ventilation therapy is delivered. 2.5 L NOTE: Ventec Life Systems recommends Check the Ventec One- using the Low Minute Volume and Low Circuit for leaks or disconnection. Inspiratory Pressure alarms to detect patient During pressure-control hypoventilation.
- Page 88 Alarms Alarm Settings Priority Description Recommended Action Low PEEP Medium The Low PEEP alarm activates when the monitored Check the Ventec One- Low EPAP PEEP falls 5 cmH2O below the set PEEP control for Circuit for leaks. 3 consecutive breaths. Bi-Level Mode) Monitor the patient closely.
- Page 89 Alarms Alarm Settings Priority Description Recommended Action The graphic to the left shows how the SENSITIVITY setting interacts with leaks at various Mean Airway Pressures (MAPs): NOTE: The Patient Circuit Disconnect alarm may not activate with every disconnect condition. Ventec Life Systems recommends using the Low Minute Volume, Low Inspiratory Pressure, and Apnea alarms in addition...
- Page 90 Alarms Alarm Settings Priority Description Recommended Action System Fault High The System Fault alarm activates if V*Home detects Use the Event Log to any one of multiple system fault conditions. determine the System (all conditions) Fault number, and then see “System Fault Detection Criteria and Recommended Action”...
-
Page 91: The Alarm Log
Alarms The Alarm Log The V*Home Alarm Log lists all active alarms, and all other alarms activated since the last time the log was cleared. To view the V*Home Alarm Log at any time, press the alarm banner in the status bar, or: Press the Menu tab. -
Page 92: The Event Log
Alarms The Event Log The Event Log stores the date and time of unit power on and off, alarm activation, the alarm name, and information about user interactions with the V*Home alarm system and controls. The most recent 7,300 events, including alarms and changes to control settings will be accessible through the Event Log. -
Page 93: Clearing An Alarm
Alarms Clearing an Alarm Visual indicators of an alarm condition remain on the screen as a count in the status bar and a list in the Alarm Log until the alarm condition is resolved and the list is cleared. To clear an activated alarm: Press the Alarm Silence button on the front of V*Home to silence the alarm tones, if desired. -
Page 94: Monitors
Monitors Monitors V*Home monitors multiple parameters. View monitored V*Home Ventilation therapy data by pressing the Monitors tab. Oxygen and Nebulizer therapy monitors are available by navigating to the relevant therapy screen. NOTE: Monitored data depends on the set Circuit Type, Mode, and the number of breaths delivered. Monitors will display “‑‑”... -
Page 95: Ventilation Monitors
Monitors Ventilation Monitors Monitored Ventilation therapy parameters and active control settings can be viewed using the Monitors tab on the V*Home touchscreen. The displayed monitors and controls are customizable. To change which monitors and control settings display on the Monitors tab, see “Monitor Screen Customization”... - Page 96 The patient effort icon appears on the left side of the airway pressure manometer in the V*Home status bar when delivers a patient-triggered breath. NOTE: Ventec Life Systems recommends periodically verifying that the Patient Effort indicator in the status bar appears in synchrony with actual patient effort to breathe. Patient Triggered 0 to 100% The Patient Triggered monitor displays the percentage of the last 100 breaths that were initiated by the patient.
-
Page 97: Waveform Monitors
Monitors Monitor Range Description Pressure 0 to 80 Airway Pressure is monitored using a manometer in the status bar. The dark blue bar cmH2O represents the pressure of the current breath. The light blue bar represents the peak (during Ventilation pressure delivered during the previous breath. -
Page 98: Monitor Screen Customization
Monitors Monitor Screen Customization Press the CUSTOMIZATION button from the Monitors tab to choose which monitors and control settings display on each page of the V*Home Monitor screen. The first page shows a customizable set of nine monitors. The second page shows a customizable set of nine control, alarm, and oxygen settings. -
Page 99: Oxygen Therapy Monitors
Monitors Oxygen Therapy Monitors Use the FiO2 monitors to provide No Alarms SIMV-VOL information about the percentage of oxygen inhaled by the patient. PRESSURE (cmH20) FiO2 Monitor CALCULATED FiO2 MONITOR % Fraction of inspired oxygen. The FiO2 EXT LOW P monitor measures the percentage of oxygen delivered in the inspiratory phase O2 Bleed In... -
Page 100: Nebulizer Compensation Monitor
Monitors Nebulizer Compensation Monitor Once Nebulizer compensation is initiated, the Nebulizer screen will display a Nebulizer Minutes Remaining monitor. This monitor begins at the configured Nebulizer Duration and counts down until Nebulizer therapy is complete. NOTE: The range of the Nebulizer Minutes Remaining monitor is 0 to 60 minutes. No Alarms SIMV-VOL PRESSURE (cmH20) -
Page 101: System Monitors
A negative number indicates how many hours the maintenance is past due. Resetting this monitor requires service-level access to the system. Contact your local Ventec Life Systems representative for service. System Usage 0 to 99,999 The System Usage monitor displays the total duration of V*Home operation over its life. -
Page 102: Multi-View
Multi-View Multi-View VOCSN Multi-View is the first comprehensive reporting solution for ventilator-dependent patients. It is the first and only system to provide complete patient trending and monitoring for ventilator-dependent patients across multiple respiratory therapies. Multi-View is designed to summarize patient data and create trend reports to facilitate the delivery of seamless care across providers from hospital to home. -
Page 103: Exporting Multi-View Data To A Usb Drive
Multi-View Exporting Multi-View Data to a USB Drive Using software versions 4.06 and later, V*Home data can be exported to USB, then uploaded to the cloud to create Multi-View trending reports, which provide insight into the use of all 5 therapies over time including the frequency of alarms, settings changes, and monitored parameter trends. -
Page 104: Generating Multi-View Reports
Multi-View Generating Multi-View Reports To generate Multi-View usage reports, have your VOCSN Multi-View exports at the ready on a USB or folder on your computer, and then: Use the “Click to open Multi-View.html” link or use a web browser to navigate to VentecLife.com/Multi-View. -
Page 105: Reading Multi-View Reports
Multi-View Reading Multi-View Reports This section provides detailed information on using and reading VOCSN Multi-View reports. Each section of the report provides insight into aspects of V*Home therapy use and monitored trends. Report Information The first page of VOCSN Multi-View reports contain information about the V*Home device, as well as the report itself. -
Page 106: Trend Summary
Multi-View Trend Summary The Multi-View Trend Summary section provides information on all available therapies, including daily usage information, monitor averages, and trends. Each box shows a different monitored parameter. The displayed average is calculated over the selected report duration. 7-day reports will include a 7-day average, 60-day reports will include a 60-day average, and so on. At the bottom of each box (as applicable), a trend percentage is shown, with an up or down arrow. -
Page 107: Therapy Use
Multi-View Therapy Use Graphed therapy use provides instant insight into multi-therapy use and trends over time. These charts also show the time and duration of alarm activations during the reported period. Therapy use charts appear at the tops of pages to provide insight into settings changes and monitor values in the context of the frequency of all therapy uses over the reported period. -
Page 108: Monitor Details
Multi-View Monitor Details Use the Monitor Details section to view detailed information about changes in delivered therapies over time. The boxes on the right-hand side of the page identify the monitor (including which therapy it’s applicable to: Ventilation, or Oxygen). It also provides the average monitor value over the report range. Below, the report shows much the monitor increased or decreased during the trend window compared to the rest of the report range. -
Page 109: Logs
Multi-View Logs At the end of the report, you may choose to include detailed logs that include information about every user interaction with the V*Home device over the report period. Multi-View provides four different optional Logs selections when generating a report: •... -
Page 110: Checkout Procedure
Checkout Procedure Checkout Procedure Ventec Life Systems recommends a series of checks and tests to ensure V*Home is ready to use safely. Perform these tests before using VOCSN for the first time, and periodically during use. See “Recommended Maintenance Schedule” on page 131 for the maintenance schedule recommended by Ventec Life Systems. -
Page 111: Power Testing Procedures
NOTE: V*Home battery icons on the touchscreen show the charge status of the batteries relative to when they were new. As the batteries age, their capacity will diminish. Ventec Life Systems recommends replacing batteries when they will no longer charge above 50%. -
Page 112: Ventilation Testing Procedures
Checkout Procedure Ventilation Testing Procedures Connect a passive Ventec One-Circuit, flex tube, and a 1L (one liter) test lung to V*Home to test Ventilation therapy. “Setup” on page 16 for configuration instructions. To test V*Home Ventilation therapy, first change the V*Home control settings to those listed in the table below. -
Page 113: Ventilation Tests
Checkout Procedure Ventilation Tests After configuring Ventilation therapy using the settings described in “Ventilation Testing Procedures” on page 112, verify the complete the following steps while Ventilation therapy (and Oxygen therapy, if prescribed) is running: NOTE: For mouthpiece patient circuit setups, these verification steps are not applicable. NOTE: These ranges represent the combined tolerances of the delivered therapy and their independent monitor. -
Page 114: Ventilation Alarm Verification
Checkout Procedure Ventilation Alarm Verification To ensure alarms are functioning correctly, maintain the control settings configured as part of “Ventilation Testing Procedures” on page 112. NOTE: When performed as a maintenance step during patient use, the V*Home alarm system may be performed using existing V*Home control settings. -
Page 115: Decannulation Alarm Verification
Checkout Procedure Decannulation Alarm Verification If using a Ventec One-Circuit with a tracheostomy tube, you may choose to verify that alarms activate with decannulation before use or periodically during use. Other patient circuit interfaces may also benefit from decannulation alarm verification. -
Page 116: Checkout Worksheet
Checkout Procedure Checkout Worksheet The checkout procedures listed in the following worksheet should be performed before using V*Home on a patient, and periodically during use. Print and complete a copy of this worksheet to verify V*Home checkout procedures were completed. NOTE: If V*Home is in long‑term use with a patient, these testing procedures may be performed using the existing V*Home configuration. -
Page 117: Operating Instructions
Operating Instructions Operating Instructions This chapter describes how to start and use V*Home therapies. See for therapy “Controls and Settings” on page 59 configuration instructions WARNING: When in use for a prolonged period at its maximum environmental operating temperature, V*Home reach a temperature at the patient connection port of 43°C. -
Page 118: Powering On V*Home
Operating Instructions Powering On V*Home V*Home will run on external power (such as a wall outlet), or on its internal and removable batteries. Ventec Life Systems recommends powering V*Home with an external, continuous source of power whenever possible. See “Power Setup” on page 18 for instructions on connecting V*Home to external power. -
Page 119: Starting V*Home Therapies
NOTE: If V*Home performs unexpectedly, prepare an alternate means of ventilation, monitor the patient, and contact your local Ventec Life Systems representative for service. VentecLife.com... -
Page 120: Starting Ventilation Therapy
Operating Instructions Starting Ventilation Therapy To begin Ventilation therapy using V*Home, No Alarms VT-PS first ensure the Ventec One-Circuit is correctly configured, and all Ventilation therapy controls and alarms are set PRESSURE (cmH20) Press here Prepare patient circuit for ventilation, appropriately for the patient condition. -
Page 121: Changing Between Configured Ventilation Presets
Operating Instructions Changing Between Configured Ventilation Presets V*Home can be configured with up to three different Ventilation therapy Presets. To begin Ventilation therapy using a different Preset: Press the Therapy tab, and then press the Ventilation therapy icon. Press the name of the Preset you want to activate. Press START on the bottom of the screen to begin Ventilation therapy using the selected Preset control and... -
Page 122: Starting Oxygen Therapy
Operating Instructions Starting Oxygen Therapy V*Home can provide oxygen therapy using a low pressure oxygen source. To configure Oxygen therapy presets, select a preset and then press the SETTINGS & ALARMS button. Use the blue START button to activate an oxygen preset. NOTE: Oxygen therapy can be hazardous to patients with certain medical conditions. -
Page 123: Starting Nebulizer Compensation
Operating Instructions Starting Nebulizer Compensation V*Home can be configured to compensate for the flow added to the patient circuit from an external 6 L/min nebulizer. No Alarms SIMV-VOL NOTE: Variations in the characteristics of nebulizer cups can affect the accuracy of delivered Tidal Volumes PRESSURE (cmH20) NEBULIZER DURATION during ventilation, particularly for... -
Page 124: Responding To Alarms
Operating Instructions Responding to Alarms The V*Home operator must be capable of responding to alarm conditions and promptly performing the necessary corrective actions. See “Alarm Silence Button” on page 81 for information on each alarm condition. In case of V*Home malfunction, the operator must be able to promptly provide an alternative means of ventilation. -
Page 125: Cleaning And Maintenance
Cleaning and Maintenance Cleaning and Maintenance The organization responsible for the use and maintenance of V*Home should perform all adjustments, cleaning, and disinfection of V*Home. Follow all instructions provided in this Clinical and Technical manual to prevent damage to V*Home during cleaning and maintenance procedures. NOTE: All V*Home single‑patient use components and Ventec One‑Circuits are not intended for cleaning, sterilization, or re‑use. -
Page 126: Cleaning V*Home Exterior
Cleaning and Maintenance Cleaning V*Home Exterior Clean the exterior of V*Home every three months during use, between patient uses, or as needed if exposed to contaminants. Unplug V*Home from any connected external power sources. Ozone, abrasive cleaners and materials may damage the casing or display. -
Page 127: Cleaning The Air And Fan Filters
Inspect the filters for signs of damage or contamination. Replace the filters if they appear damaged. Repeat the cleaning steps described above until the filters pass a visual inspection for cleanliness. NOTE: Replacement air filters are available from Ventec Life Systems. Reinstall the air and fan filters. Reinstall cover plate with slats on cover facing down. -
Page 128: Replacing Components
Replacing the Power Supply For a replacement power supply, contact Ventec Life Systems service representative. To replace the V*Home AC adapter, unplug the AC adapter from the outlet and the V*Home, and dispose of it in accordance with local regulations. -
Page 129: Replacing Ventec One-Circuit Components
HME, nebulizer, external bacterial filter, and any other accessories for signs of damage. Discontinue use and replace any damaged Ventec One-Circuit accessories immediately. NOTE: Ventec Life Systems recommends running a Pre‑Use Test each time the Ventec One‑Circuit configuration is modified. See “Running the Pre-Use Test”... -
Page 130: Replacing The Internal Bacterial Filter
Cleaning and Maintenance Replacing the Internal Bacterial Filter Replace the V*Home internal bacterial filter whenever it may have become contaminated or the external bacterial filter is compromised. NOTE: It may be necessary to replace the internal bacterial filter more often in some environments, such as those with cigarette smoke. -
Page 131: Recommended Maintenance Schedule
Contact your V*Home representative when the Maintenance Due alarm activates. NOTE: A service manual containing detailed technical information required by authorized service technicians to repair and replace serviceable parts of V*Home is available from Ventec Life Systems on request. Only authorized service technicians should repair V*Home. -
Page 132: Battery Care, Maintenance, And Replacement
Charge status on the My VOCSN screen shows 50% or less. This means the battery has half (or less) of the charge capacity it did when new. Removable battery replacements are available from Ventec Life Systems. The internal battery must be replaced by Ventec Life Systems service personnel. -
Page 133: Battery Storage Mode
Cleaning and Maintenance Battery Storage Mode V*Home is shipped in Battery Storage Mode to preserve the charge of its three batteries. With software versions 4.11R and later, users can select the Activate Battery Storage Mode control in the Device Settings and place the fully charged internal battery and both removable, rechargeable batteries back into this power-saving storage mode. -
Page 134: Software Updates
Ventec Life Systems periodically releases V*Home software updates, which may include new features and extended functionality. Software updates occur in the field as needed, or when V*Home is serviced. Contact Ventec Life Systems for additional information about software releases and upgrades. -
Page 135: Locating The V*Home Software Version
Shipping Considerations To ensure the device is not damaged during shipment, and that the shipment meets all applicable regulations, always use packaging approved by Ventec Life Systems when shipping V*Home. Contact Ventec Life Systems with questions, and to obtain packaging materials. -
Page 136: Glossary
Glossary Glossary Glossary of Symbols The following symbols appear on the exterior of V*Home. Symbol Description Title and Reference Consult accompanying product instructions Refer to Instruction Manual/Booklet ISO 7010 Symbol M002 Do not operate near open flame No Open Flame ISO 7010 Symbol P003 Do not smoke near equipment No Smoking... - Page 137 Glossary Symbol Description Title and Reference Indicates the device serial number Serial Number ISO 7000 Symbol 2498 Device identifier Catalogue Number ISO 7000 Symbol 2493 Authorized European Representative Authorized European Representative ISO15223-1 Clause 5.1.2 Environmental requirements for storage and shipping Temperature Limitation ISO 7000 Symbol 0632 Dispose of equipment in accordance with requirements...
- Page 138 Glossary Symbol Description Title and Reference Remote alarm port Bell IEC 60417 Symbol 5013 Date of manufacture Date of Manufacture ISO 7000 Symbol 2497 YYYY-MM-DD Date of Expiry (Expiration). Do not use device after this Use by Date date. ISO 7000 Symbol 2607 Name and address of device manufacturer Manufacturer ISO 7000 Symbol 3082...
-
Page 139: Glossary Of Indicators
Glossary Symbol Description Title and Reference The IP32 rating indicates that the V*Home enclosure Degree of Ingress Protection Provided protects it against ingress from wires and tools >2.5mm, by Enclosure and dripping water IEC 60601-1, Table D.3, Symbol 2 Federal law restricts this device to sale by or on the order Prescription Only of a physician 21 CFR 801.15(c)(1)(i)F... - Page 140 Glossary Indicator Description Indicator Description Internal battery is fully Internal battery is half charged depleted Internal battery is charging Internal battery is low Internal battery is critically low Internal battery is not installed or its status is unknown. This icon appears when Toggle.
-
Page 141: Glossary Of Terms
Glossary Indicator Description Indicator Description UNLOCKED LOCKED UNLOCKED LOCKED Touchscreen is unlocked. Press Touchscreen is locked. Press and hold icon for 3 seconds to and hold icon for 3 seconds lock the V*Home touchscreen. to unlock the V*Home touchscreen. The Ventilation icon with a The Ventilation icon with a blue background appears in white background appears in... - Page 142 Glossary EPAP Expiratory Positive Airway Pressure. I:E Ratio The ratio of inspiratory time to expiratory time. IPAP Inspiratory Positive Airway Pressure. L/min Liters per minute. Mandatory breath A breath that is initiated and cycled by V*Home. Mean Airway Pressure. The MAP is the average patient airway pressure as measured over one full breath cycle.
-
Page 143: Troubleshooting
Some issues with V*Home can be resolved quickly by following the steps described in this chapter. Others may require service from an authorized Ventec Life Systems service technician. In case of V*Home malfunction, the clinician or caregiver must be able to provide an alternative means of ventilation promptly when necessary. - Page 144 Troubleshooting Alarm Recommended Troubleshooting Actions When using battery power, battery alarms are normal. • Monitor battery charge status, and connect an external source of power when available. • To clear the Battery Use alarm while using removable, rechargeable battery Battery Use activates whenever power, navigate to the Alarm Log and select “Clear List”...
- Page 145 Troubleshooting Alarm Recommended Troubleshooting Actions Device Expired - Maximum Hours activates when the 5 yrs. PM Due In monitor is at or below 0, • Dispose of the V*Home in accordance with local regulations. indicating that V*Home has reached the end of its useful life. This alarm can be reset for up to 8 hours by clearing the alarm.
- Page 146 Press the On/Off button again to restart V*Home. only available source of power, or when a software or hardware failure • If the device remains inoperative, contact your local Ventec Life Systems renders V*Home unable to safely representative for service. deliver therapy and/or monitor the patient.
- Page 147 Sys. PM Due In monitor falls • When convenient, contact your local Ventec Life Systems representative to below 0, indicating that V*Home schedule service. (Note that this alarm will activate every 32 hours until service is due for maintenance. This alarm is completed.)
-
Page 148: Device Troubleshooting
V*Home requires service Contact Ventec Life Systems for service V*Home will not power off Touchscreen is not responsive Press and hold the power button for more than 10 seconds... -
Page 149: Ventilation And Troubleshooting
V*Home is too close to a heat source away from any other sources of heat V*Home requires service Contact Ventec Life Systems for service. Patient tubing and flow sensor lines Use of a humidifier requires water Use a Ventec One-Circuit with heated wire... -
Page 150: Oxygen Troubleshooting
Troubleshooting Oxygen Troubleshooting Problem Cause Solution Patient desaturation O2 monitoring equipment is not Ensure the O2 monitoring equipment is connected. connected to the patient. Multi-View Troubleshooting Problem Cause Solution Export stalls while writing to USB drive USB drive is corrupt Use a new USB 2.0 drive formatted to FAT32. -
Page 151: Recalibrating Batteries
Troubleshooting Recalibrating Batteries Over time, the batteries (the removable, rechargeable batteries and/or the internal battery) may require V*Home recalibration to report their charge status correctly in the status bar. V*Home If the three relative state of charge icons in the status bar do not report that the batteries are fully charged even V*Home after... -
Page 152: Technical Specifications
Technical Specifications Technical Specifications This chapter provides V*Home technical specifications, including environmental requirements and the accuracy specifications of all controls and monitors. NOTE: V*Home will continue to meet its stated performance specifications when operating on battery power. Physical Physical Category Specification V*Home Dimensions: 10.25”... -
Page 153: Environmental
Technical Specifications Environmental NOTE: Unless otherwise specified, the following environmental specifications apply to all V*Home components, controls, alarms, and monitors. Environmental Category Specification Temperature and Operating: +5 °C to +40 °C; 15% to 90% relative humidity, non-condensing Relative Humidity Storage and transport: -25 °C at any humidity to +70 °C at up to 90% relative humidity, non-condensing Atmospheric Pressure Operating: 700 to 1060 hPa Storage: 500 to 1100 hPa... -
Page 154: Removable, Rechargeable Batteries
Technical Specifications Sine AC mains waveform AC power Rated Voltage: 100 to 240 VAC, 50 to 60 Hz Power for V+O+C+S+N(+Pro) configurations: ≤288 VA average, 420 VA peak Power for V+C(+Pro) configurations: ≤180 VA average, 240 VA peak DC power 20.0 to 30.3 VDC, as measured at the connection to the device, through 0 to 350 W instantaneous loads Power for V+O+C+S+N(+Pro) configurations: ≤200 W average, 350 W peak... -
Page 155: Expected Service Life And Intervals
Technical Specifications Expected Service Life and Intervals Category Expected service life V*Home 2 years or 10,000 hours of use (whichever is less) Removable, 2 years or 500 complete charge/discharge cycles (whichever is less) rechargeable batteries Audible Volume Category Volume Ventilator ≤48 dBA at 1 meter Inop alarm 65 to 90 dBA at 1 meter... -
Page 156: Control Accuracy
Technical Specifications Control Accuracy NOTE: Negative (subatmospheric) pressure is not available during the expiratory phase of ventilation therapy breaths delivered by V*Home. NOTE: When used with active, passive, or valveless Ventec One‑Circuits, V*Home was designed for use with a humidifier or HME. - Page 157 Technical Specifications Control Accuracy Tidal Volume Measured at the patient connection port Accuracy: ±(10% of setting + 5 mL) for active and mouthpiece circuits; ±(15% of setting + 7.5 mL) for passive and valveless circuits Stability: ±(10% of setting + 5 mL) Time Cycle ±(10% of setting + 0.1 seconds) VentecLife.com...
-
Page 158: Monitor Resolution And Accuracy
NOTE: Monitors incorporating pressure measurements are calculated using a pressure sensor inside V*Home, which calculates the pressure at the Ventec One-Circuit connection port. NOTE: Unless otherwise stated, monitor accuracy specifications are met when V*Home is used as recommended by Ventec Life Systems. Monitor Resolution... - Page 159 Technical Specifications Monitor Resolution Accuracy Removable Battery 1 Capacity Removable Battery 2 Capacity System Usage 1 hour Sys. PM Due In 1 hour Time 1 minute Vte / Est. Vte 1 mL ±(4.0 mL [Vtes >50 mL] or 15 mL [Vtes ≤50 mL] + 15% of actual) VentecLife.com...
-
Page 160: Classifications
Technical Specifications Classifications Category Classification Electrical Safety Class II Continuous Portable Internally Powered Transit Operable Type BF Applied Parts Applied Parts Ventec One-Circuit Standards Applied Category Standard Critical care ventilators ISO 80601-2-12 Home care ventilators ASTM F1246 Breathing sets and connectors ISO 5367 Respiratory gas monitors ISO 80601-2-55... -
Page 161: Ventec One-Circuit Compliance
Technical Specifications Ventec One-Circuit Compliance NOTE: Based on the set Patient Type and Humidification Type, V*Home automatically adjusts delivered therapy to compensate for differences in the compliance and volume of the Ventec One‑Circuit. NOTE: The maximum working pressure of Ventec One‑Circuits is 70 cmH2O. Ventec One-Circuit Compliance Adult Ventec One-Circuits... -
Page 162: Accessories
Accessories Accessories Available from Ventec Life Systems The following parts and accessories are available for use with V*Home. Contact your local Ventec Life Systems representative for more information about available components and accessories, or to place an order: Photo Item name... - Page 163 Accessories Photo Item name Description External Bacterial The Ventec Bacterial Filter helps to protect both the patient and V*Home from Filter contamination from airborne microorganisms. The bacterial and viral filtration efficiency (BFE and VFE) is >99.99%. Fan Filter The washable and reusable foam fan filter cleans air entering the cooling fan intake.
- Page 164 Accessories Photo Item name Description O2 Low-Pressure The O2 Low-Pressure Inlet Adapter inserts into the low-pressure oxygen port Inlet Adapter on the back of VOCSN to connect to a low-pressure oxygen source. Patient Air Intake This washable and reusable foam filter cleans air entering the patient air Filter intake.
- Page 165 Accessories Photo Item name Description Roll Stand The Ventec Roll Stand is a mobile, wheeled mount for VOCSN, and includes a mounting bracket, utility bracket, straps, and a cable hook for cord management. Ventec One- Passive Ventec One-Circuits are single-limb circuits with a fixed-leak passive Circuit, Passive: exhalation port.
-
Page 166: Available From Other Manufacturers
Heat-Moisture Exchanger (HME) Compliant with ISO 9360-1 or ISO 9360-2. Humidifier Compliant with ISO 8185. Ventec Life Systems recommends use of the Fisher & Paykel HC550, the Fisher & Paykel MR850, or equivalent. Mouthpiece Circuit Kit, The Mouthpiece Circuit Kit is a third-party accessory available through Ventec Life Systems. It... -
Page 167: Emc Information
EMC Information EMC Information The EMC information provided in this chapter applies to V*Home and its accessories, including the AC Adapter, 24 Volt Wheelchair Power Cable, and Nurse Call Cable. WARNING: To protect against EMI (electromagnetic interference) affecting device performance: •... -
Page 168: Electromagnetic Emissions
EMC Information Electromagnetic Emissions V*Home is intended for use in the electromagnetic environment specified below. The user of this device should make sure it is used in such an environment. Emissions Test Compliance Guidance: Electromagnetic Environment RF emissions Group 1 V*Home uses RF energy only for its internal function. -
Page 169: Electromagnetic Immunity
EMC Information Electromagnetic Immunity V*Home is intended for use in the electromagnetic environment specified below. The user of this device should make sure it is used in such an environment. Immunity Test IEC 60601 Test Level Compliance Level Guidance: Electromagnetic Environment Electrostatic ±6 kV contact ±8 kV contact... - Page 170 EMC Information IEC 60601 Test Immunity Test Level Compliance Level Guidance: Electromagnetic Environment Portable and mobile RF communications equipment should be used no closer to any part of the device, including cables, than the recommended separation distance calculated from the equation applicable to the frequency of the transmitter.
- Page 171 EMC Information Recommended Separation Distance Between Portable and Mobile RF Communications Equipment and V*Home V*Home is intended for use in an electromagnetic environment in which radiated RF disturbances are controlled. The customer or the user of this device can help prevent electromagnetic interference by maintaining a minimum distance between portable and mobile RF communications equipment (transmitters) and this device as recommended below, according to the maximum output power of the communications equipment.
-
Page 172: Technical Description
Technical Description Technical Description Theory of Operation The sections that follow detail the theory of operation of each of the five V*Home therapies. A pneumatic schematic of each therapy is also provided. Ventilation Therapy Gas is drawn from the air intake, filtered for dust and particles, and flows into the accumulator. The air is mixed with oxygen if V*Home is configured to deliver a set FiO2. -
Page 173: Leak Compensation
Technical Description Leak Compensation With Leak+ hardware configurations, the powerful V*Home leak compensation algorithm can compensate for leaks up to 175 L/min at 20 cmH2O. Leak compensation works differently depending on the type of patient circuit and the ventilation mode used. The following table illustrates when V*Home leak compensation is active. The sections that follow include a detailed description of how leak compensation works with each circuit type. -
Page 174: Nebulization
FiO2. If a precise FiO2 is required during External Neb. Compensation, Ventec Life Systems recommends using an ultrasonic nebulizer instead. If the patient is oxygen dependent, Ventec Life Systems recommends use of patient oxygen monitoring (e.g., an SpO2 monitor), especially during nebulization. -
Page 175: Home Measurements
PEEP. In addition, Ventec Life Systems recommends the use of appropriate alarms to ensure the accuracy of delivered breath pressure. For example, the High Pressure and Low Inspiratory Pressure alarms, as well as the Low Minute Volume alarm can be set to ensure breaths are accurately delivered during pressure-control ventilation. -
Page 176: Alarm Detection Criteria
Technical Description Alarm Detection Criteria Alarm Detection Criteria Patient Circuit Disconnect When High Flow is Off and the Circuit Type control is set to Passive or Valveless: • If Sensitivity is set to “0-75,” the alarm activates when the measured leak persists at more than 15.4 L/min/(cmH2O^0.59) •... -
Page 177: System Fault Detection Criteria And Recommended Action
Provide the patient with backup does not turn. Ventilation (and other therapies if necessary). Restart V*Home. If the problem persists, contact Ventec Life Systems for service. System Fault 10 When the redundant transducers Ventilation and Oxygen will Provide the patient with backup... -
Page 178: Low-Pressure Oxygen Blending
Technical Description Low-Pressure Oxygen Blending When using the a low-pressure oxygen source to bleed oxygen into a passive or valveless Ventec One-Circuit, oxygen delivered to the patient may fluctuate based on the following settings and conditions: • Oxygen flow rate •... -
Page 179: Input Flow 100% Oxygen, Flow Trigger Set To
Technical Description Input Flow 100% Oxygen, Flow Trigger Set to 1-3 Input Flow 100% Oxygen, Flow Trigger Set to 9 VentecLife.com... -
Page 180: Input Flow 93% Oxygen, Flow Trigger Set To
Technical Description Input Flow 93% Oxygen, Flow Trigger Set to 1-3 Input Flow 93% Oxygen, Flow Trigger Set to 9 VentecLife.com... -
Page 181: Input Flow 100% Oxygen, High Flow Therapy
Technical Description Input Flow 100% Oxygen, High Flow Therapy Input Flow 93% Oxygen, High Flow Therapy VentecLife.com... - Page 182 About Ventec Life Systems Ventec Life Systems is defining integrated respiratory care to improve patient outcomes and reduce caregiver challenges in the hospital and home. Ventec’s leading product, VOCSN, seamlessly integrates five separate devices including a ventilator, oxygen concentrator, cough assist, suction, and nebulizer into one unified respiratory system. The team’s history of patient-centric design brings care changing innovations to life for patients, medical professionals, and caregivers.
Need help?
Do you have a question about the V-Home and is the answer not in the manual?
Questions and answers
Patient is going from the Spontaneous mode of the Trilogy to Spontaneous mode of the VHome , is there anything I should be tuned into or know about settings that Vhome has that the Trilogy does not... to make this transition on a very anxious patien go smoothly
When transitioning a patient from the Spontaneous mode of the Trilogy to the Spontaneous mode of the Ventec Life Systems V-Home, consider the following settings:
1. IPAP (Inspiratory Positive Airway Pressure) – Ensure that the set IPAP level (above ambient) in V-Home matches the patient’s needs.
2. EPAP (Expiratory Positive Airway Pressure) – In V-Home's Spontaneous mode, the pressure drops to ambient (zero) when a breath cycles.
3. Patient Effort Detection – V-Home delivers IPAP when it detects patient effort through the mouthpiece circuit.
4. Circuit Compatibility – V-Home’s Spontaneous mode is used only with mouthpiece patient circuits.
5. Minimum Breath Rate – If a minimum breath rate was set on Trilogy, ensure that V-Home's settings meet the patient’s respiratory requirements.
6. Ventilation Therapy Presets – Configure and verify the correct preset before beginning therapy.
These settings ensure a smooth transition while maintaining effective patient ventilation support.
This answer is automatically generated
How is giving a inline neb treatment not using your ciruit,anything I need to look out for.
To give an inline nebulizer treatment with the Ventec Life Systems V-Home without using the circuit, follow these steps:
1. Use an External 6 L/min Nebulizer: Ensure the nebulizer cup provides exactly 6 L/min of flow.
2. Follow Manufacturer Instructions: Connect the nebulizer cup to the patient circuit according to the manufacturer’s guidelines.
3. Enable Nebulizer Compensation: Adjust V-Home settings to compensate for the additional 6 L/min flow, as described in the manual (see “Starting Nebulizer Compensation” on page 123).
4. Disconnect Between Uses: Remove the nebulizer when not in use to prevent unintended effects on ventilation.
### What to Look Out For:
- Accuracy of Ventilation: If the nebulizer flow is not exactly 6 L/min, the delivered ventilation may be temporarily affected.
- Device Compliance: Ensure all nebulizer parts comply with ISO 27427 standards.
- Prohibited Gases: Do not use helium, nitric oxide, or operate in a hyperbaric chamber.
- Unexpected Performance: If the device does not function as expected, prepare an alternate ventilation method and contact Ventec Life Systems support.
Always monitor the patient and follow all safety instructions.
This answer is automatically generated