
Related Manuals for Calphalon TSCLTV-PZDADAFSS


Summary of Contents for Calphalon TSCLTV-PZDADAFSS
- Page 1 PERFORMANCE DUAL OVEN WITH AIR FRY INSTRUCTION MANUAL PN NWL0001419763 MODEL: TSCLTV-PZDADAFSS TSCLTV-PZDADAFSS_22EM1 (US).indd 1 TSCLTV-PZDADAFSS_22EM1 (US).indd 1 2022/6/27 上午10:26 2022/6/27 上午10:26...
-
Page 2: Table Of Contents
TABLE OF CONTENTS IMPORTANT SAFEGUARDS POLARIZED PLUG POWER CORD INSTRUCTIONS PRODUCT DIAGRAM ACCESSORIES CONTROL PANEL PREPARING YOUR COUNTERTOP OVEN HOW TO USE YOUR COUNTERTOP OVEN POSITIONING RACK AND ACCESSORIES OVEN FUNCTIONS OVERVIEW UPPER CHAMBER FUNCTIONS UPPER CHAMBER COOKING CHART LOWER CHAMBER FUNCTIONS LOWER CHAMBER COOKING CHART CLEANING &... -
Page 3: Important Safeguards
IMPORTANT SAFEGUARDS When using electrical appliances, basic safety precautions should always be followed to reduce the risk of fire, electric shock, and/or injury to persons including the following: 1. Read all instructions before using this product. This appliance generates heat during use. Do not touch hot surfaces. Use handles or knobs. Always protect your hands with non-slip oven mitts or similar. -
Page 4: Polarized Plug
19. Do not cover crumb tray or any part of the oven with metal foil. This will cause overheating of the oven. 20. Empty the crumb tray after each use. 21. The glass door is made of tempered glass. Always inspect the glass door for chips, cracks or any other damage. -
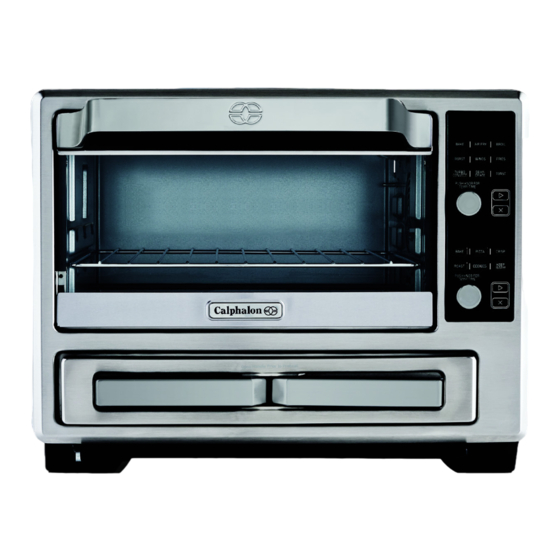
Page 5: Product Diagram
6. Lower Chamber 12. *Wire Rack 7. Lower Chamber Door Handle & Lower Chamber Tray *These parts can be replaced on Calphalon.com or 8. Lower Chamber Control Panel at 1-800-809-7267 10 11 * Due to continuing product development, product and accessories may look slightly different. -
Page 6: Preparing Your Countertop Oven
• Your oven contains two separate cooking chambers that can be used simultaneously. • Once the Calphalon® Performance Dual Oven with Air Fry is plugged in, an audible alert will sound indicating that the oven is on. The screen will illuminate with BAKE mode set as the default function and the START ( ) button with LED lights will flash for both upper and lower chambers. -
Page 7: Positioning Rack And Accessories
CAUTION: Never place food or accessories directly on the heating elements. • The countertop oven does not preheat for TOAST, BROIL, DEHYDRATE, and KEEP WARM. For these functions, place food inside the oven directly on the Wire Rack, or an accessory of choice before pressing the START ( ) button. -
Page 8: Oven Functions Overview
• Before removing the pan allow the unit to cool. Always use oven mitts or potholders. NOTE: The Baking Pan cannot be inserted into the guide rails. OVEN FUNCTIONS OVERVIEW Upper Chamber Function Chart Function Rack Position Preheat Range BAKE Upper/Lower 150°F - 450°F Up to 2 hours AIR FRY... - Page 9 4. Once the preheating cycle is complete, an audible alert will sound, and the START ( ) button will flash. 5. Carefully, place food in the desired accessory and center it on the Wire Rack. Close the countertop oven door and press the START ( ) button to begin the cooking cycle. The interior countertop oven light will illuminate upon pressing the START ( ) button.
- Page 10 • When using the BROIL function, insert the Wire Rack in the upper rack position. Place food in the desired accessory and place the accessory on the center of the Wire Rack. The broiling temperature and time can be adjusted before, or during the cooking cycle. •...
-
Page 11: Upper Chamber Cooking Chart
UPPER CHAMBER COOKING CHART FOOD Weight Rack Accessory Function Temperature Time (Min) Oil? Position Meat/Poultry/Fish Chicken Wings 1 lb. Upper Air Fry WINGS 25-30 Min Rack Basket Chicken Breast 1 lb. Upper Baking Pan TURBO 30 Min/ 3 Min Rack CONVECT/ BROIL Chicken... -
Page 12: Lower Chamber Functions
Snacks Chicken 1 lb. Upper Air Fry AIR FRY 15 Min Nuggets Rack Basket Frozen Garlic 3 Pieces Lower Wire Rack BAKE 4-5 Min Bread Rack *Cooking times are estimates and may vary based on food type, preparation, and external temperatures. When operating both chambers simultaneously, cooking time may take a bit longer. -
Page 13: Lower Chamber Cooking Chart
automatically, indicating that the cooking cycle has begun. NOTE: The timer will not begin until the START ( ) button is pressed. 8. When the cooking cycle is complete, an audible alert will sound. 9. Pull the Lower Chamber Tray out of the lower chamber and tilt it to slide the food onto the desired plate. -
Page 14: Cleaning & Maintenance
• Clean the countertop oven and accessories after each use. • Before cleaning your Calphalon® Performance Dual Oven with Air Fry, press the CANCEL (X) button to turn OFF the countertop oven. Unplug the cord and allow the oven to cool before cleaning. -
Page 15: Troubleshooting
TROUBLESHOOTING Possible Problem Easy Solution Oven does not turn ON • Plug the Countertop into the electrical outlet. • Check that the power plug is securely inserted into the outlet. • Insert the power plug into a different outlet. • Press the START ( ) button. Smoke odor •... -
Page 16: Warranty
WARRANTY 3 YEAR LIMITED WARRANTY Sunbeam Products, Inc. (“Calphalon”) warrants that for a period of three years from the date of purchase, this product will be free from defects in material and workmanship. Calphalon, at its option, will repair or replace this product or any component of the product found to be defective during the guarantee period.
Need help?
Do you have a question about the TSCLTV-PZDADAFSS and is the answer not in the manual?
Questions and answers