
Summary of Contents for Bresser MicroCam MINI Full HD HDMI
- Page 1 MICROCAM MINI FULL HD HDMI Art. No. 5914170 BEDIENUNGSANLEITUNG INSTRUCTION MANUAL...
- Page 2 Desidera ricevere informazioni esaustive su questo prodotto in una lingua specifica? Venga a visitare il nostro sito Web al seguente link (codice QR Code) per conoscere le versioni disponibili. www.bresser.de/P5914170 GARANTIE · WARRANTY · GARANTÍA · GARANZIA www.bresser.de/warranty_terms RECYCLAGE (TRIMAN/FRANCE) BEDIENUNGSANLEITUNG ..
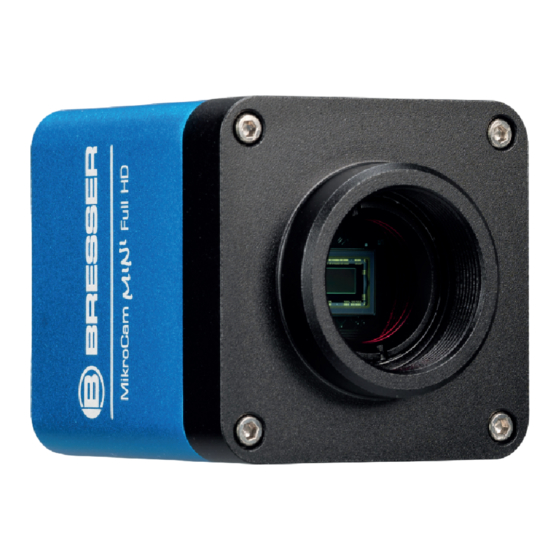
- Page 3 Wir wünschen Ihnen viel Erfolg bei der Arbeit mit Ihrer neuen BRESSER MikroCam Mini Full HD HDMI. Besonderheiten der BRESSER MikroCam Mini Full HD HDMI: • Sony IMX307(C) Sensor für hervorra- gende Bildqualität • 1920x1080 Pixel (Full HD), Sensor 1/2,8“...
- Page 4 Fähigkeiten oder migung des Herstellers oder des Vertreibers, mangels Erfahrung und/oder mangels Bresser GmbH, ist nicht gestattet. Es ist eben- Wissen benutzt zu werden, es sei denn, falls untersagt, diese Unterlagen mit elektro- sie werden durch eine für ihre Sicherheit nischen Systemen (z.
- Page 5 Temperaturschwankungen aus. kann. Die Netzsteckdose sollte sich immer in der Nähe ihrer Kamera befinden • Benutzen Sie nur das von BRESSER mit- und gut zugänglich sein, da der Stecker gelieferte Netzteil. Die Kamera nicht kurz- des Netzteils als Trennvorrichtung zum schließen oder ins Feuer werfen!
-
Page 6: Reinigung Und Wartung
Ersatzteile die den technischen • Vermeiden Sie Fingerabdrücke und ähn- Angaben entsprechen. liche Verunreinigungen auf der optischen • Verwenden Sie immer das von BRESSER Oberfläche. mitgelieferte Netzkabel. Bei Verwendung • Schalten Sie das Gerät nach jedem Ge- eines... - Page 7 2. Lieferumfang MikroCam MINI Full Der Lieferumfang der MikroCam MINI Full Bestellcode HD HDMI HD HDMI ist exemplarisch aufgeführt und Sensor: kann variieren. Sony IMX307(C) Sensor/ Sensorgröße (mm): Sensorgröße 1/2,8“ (5.57x3.13) Pixel (μm) 2,9x2,9 G Empfindlichkeit Dunkelsignal 1300mV mit 1/30s 60@1920*1080 FPS/Auflösung (HDMI-kompatibel)
- Page 8 Anschlüsse und Funktionsbeschreibung Schnittstelle/ Funktionsbeschreibung Anzeige HDMI Gemäß dem HDMI 1.4-Stan- dard mit einer Videoausgabe im 1080P-Format für Standard- FHD-Monitor LED-Statusanzeige, leuchtet HDMI USB Mouse auf, wenn die Kamera in Be- trieb ist USB-Maus Anschlussbuchse für eine USB-Maus; somit wird die Be- dienung des Bildschirmmenüs DC12V ermöglicht...
- Page 9 Weitere Funktionen Funktionsbeschreibung ISP-Funktion Belichtung (automatische/manuelle Belichtung) (Image Signal Processor) Verstärkung Weißabgleich (manuell/automatisch/ROI-Modus) Schärfen 3D Denoise (Rauschunterdrückung) Sättigungsanpassung Kontrastanpassung Helligkeitsanpassung Anpassung des Gammawertes (Anpassung des Kontrastumfangs der Mitteltöne des Bildes) Farbbild zu Graustufenbild (Color to Gray) 50Hz/60Hz Anti-Flimmer-Funktion Bildbearbeitung Vergrößern/Verkleinern Spiegeln/Flip Einfrieren Querlinie...
-
Page 10: Inbetriebnahme Der Kamera
4. Inbetriebnahme der Kamera Für die Inbetriebnahme der Kamera benö- tigen Sie neben dem Mikroskop nur einen HDMI-Monitor, die mitgelieferte USB-Maus und die in der Kamera integrierte Software. HDMI USB Mouse DC12V Abb. 3: Anschluss der MikroCam MINI Full HD HDMI an einen HDMI-Monitor. - 10 -... - Page 11 Wird keine SD-Karte eingelegt, wird BRESSER Science Mikroskope. nur das Livebild angezeigt, eine Aufnahme von Bildern und Videos ist • BRESSER Foto-Adapter 23.2 mm / C-Mount nicht möglich. (Art.-Nr. 5942070) - Dieser Adapter wird für den Anschluss einer MikroCam oder C-Mount-Kamera benötigt, wenn am Mik-...
- Page 12 Abb. 4: Benutzeroberfl äche der MikroCam Mini Full HD HDMI. 5.1 Bedienfeld der Kamera • Das Bedienfeld der Kamera steuert die • Ist ein Regler blau hinterlegt, kann dieser Kamera, um die beste Bild- oder Video- mit der Maus bewegt werden. Zum Be- qualität je nach Anwendung zu erreichen.
- Page 13 Aufbau Bedienfeld der Kamera Funktion Beschreibung der Funktion Einzelbild Bild aufnehmen und auf der SD-Karte spei- chern (Hinweis: Eine SD-Karte muss einge- legt sein). Aufnehmen Video aufnehmen und auf der SD-Karte speichern. Automatische Ist die automatische Belichtung aktiviert, Belichtung werden Belichtungszeit und Empfindlich- keit automatisch eingestellt.
- Page 14 Aufbau Bedienfeld der Kamera Funktion Beschreibung der Funktion Schärfe Anpassen der Bildschärfe (0-100): (Hinweis: ein hoher Wert führt nicht automatisch zu einem besseren Ergebnis.) Entrauschen Anpassen der Rauschunterdrückung (0- 50): Bei schwachem Licht kann dieser Wert erhöht werden, um das Bildrauschen zu verringern.
- Page 15 Im Folgenden werden die verschiedenen Funktionen des oberen Menübalkens vorgestellt: Vier Punkte Winkel (Messfunk- Symbol Bezeichnung/Fuktion tion) Stecknadel (automatisch ausblenden) Punkt (Messfunktion) Anheften/Ausblenden des oberen Menübalkens An- Beliebige Strecke (Messfunk- heften dient zur perma- tion) nenten Darstellung (HINWEIS: andere Menü- Drei Punkte Strecke (Messfunk- balken sind blockiert) tion)
- Page 16 Beenden Funktion Symbol Beenden/Ausblenden des Ring Messmodus (aus zwei Kreisen und drei Punkten) (Messfunktion) Steuerleiste für Objektposition und -eigenschaften Zwei Kreise (und ihr Mittelabstand) Öffnet sich NACH BEENDIGUNG (Messfunktion) DER MESSUNG Drei Punkte Zwei Kreise Klicken Sie mit der linken Maus- (Zwei Kreise taste auf ein einzelnes Mess- mit je drei Punkten und ihr Mittelabstand)
- Page 17 Symbol Funktion Einfrieren (Video Freeze) Einfrieren des Bildes Browser Durchsuchen der Bilder und Vi- deos auf der SD-Karte Info Versionsinfo Schaltfläche Einstellung (Settings) Die Unterpunkte der Schaltfläche Einstellung sind komplexer als die anderen Funktionen. Im Folgenden mehr Details zu den Unterpunkten: 5.4.1 Einstellung ˃...
- Page 18 5.4.2 Einstellung ˃ Vergrößerung Der Name der Vergrößerung, in der Regel die Vergrößerung des Objektivs des Mikroskops, wird bei der Kalibrierung als Vergröße- rungsname verwendet, z. B. 4x, 10x, Name 100x, usw. Außerdem können dem Vergrößerungsnamen auch andere benutzerdefinierte Informationen hinzugefügt werden, z.
- Page 19 H264: Das Kodierungsformat der Videodateien ist das H264-Format. H265: Das Kodierungsformat der Videodateien ist das H265-Format Videokodierung (Hardwareunterstützung erforder- lich). Prüfen Sie vorher, ob ihr Wiedergabegerät diesen Standard unterstützt. Abb. 8b: Videoeinstellungen: Videokodierung. 5.4.5 Einstellung ˃ Lager SD-Karte: Speichergerät Die SD-Karte wird ausschließlich als Speichergerät unterstützt Auflistung des Dateisystem- formats des aktuellen Speicher-...
- Page 20 5.4.6 Einstellung ˃ Dateien Automatisch: Die Bilddateien werden automa- tisch mit dem angegebenen Präfix Name der Bild- gespeichert. datei Handbuch: Der Benutzer muss den Datei- namen VOR dem Speichern des Bildes angeben. Automatisch: Die Videodatei wird automatisch mit dem angegebenen Präfix ge- Name der speichert.
- Page 21 5.4.8 Einstellung ˃ Sonstiges Legen Sie fest, ob das Lineal auf dem Bildschirm angezeigt werden Lineal soll oder nicht. Wird die Messung kalibriert, ändert sich das Lineal entsprechend der Pixelzahl. Die maximale Belichtungszeit während der automatischen Be- lichtung kann festgelegt werden Automatische (1-100).
-
Page 22: Ce-Konformitätserklärung
7. CE-Konformitätserklärung Eine „CE-Konformitätserklärung“ in Übereinstimmung mit den an- wendbaren Richtlinien und ent- sprechenden Normen ist von der Bresser GmbH erstellt worden. Der vollständige Text der CE-Konformitätserklärung ist unter der folgenden Internetadresse verfügbar: www.bresser.de/download/5201000/ CE/5201000_CE.pdf 8. Entsorgung Entsorgen Sie die Verpackungsmate- rialien sortenrein. -
Page 23: Important Notes
We wish you every success with your new BRESSER MicroCam Mini Full HD HDMI. Special features of the BRESSER MicroCam Mini Full HD HDMI: • Sony IMX307(C) sensor for crystal-clear images • 1920x1080 pixels (Full HD), 1/2.8" sensor (5.57x3.13) • Image output via HDMI... -
Page 24: Safety Instructions
This device is not intended to be used without the prior written permission of the by persons (including children) with manufacturer or the distributor, Bresser reduced physical, sensory or mental GmbH, Is not permitted. It is also prohibited capabilities, or lack of experience... -
Page 25: Explosion Hazard
• Only use the power pack supplied by • Do not subject the camera to physical BRESSER. Do not short-circuit the camera shock! or throw it into a fire! • Only use accessories and spare parts for •... -
Page 26: Product Information
• Clean the outside of the camera housing with a dry cloth. Fig. 1: Package contents of the MicroCam MINI Full HD HDMI. • Blow loose dust off the sensor surface. A: MicroCam MINI Full HD HDMI • Use high quality lens cleaning towels... - Page 27 DC12V Slot for an SD card for storing images and videos; conforms to the SDIO3.0 standard Fig. 2: Available connections on the back of the DV12V DC connection socket (12V,1A) MicroCam MINI Full HD HDMI - 27 -...
-
Page 28: Video Output Interface
Video output interface Description HDMI compatible interface Complies with HDMI-compatible 1.4 standard; 60fps@1080P Other functions Description Save video Video format: 2M (1920*1080) H264-encoded MP4 fi le Video storage frame rate: 50~60fps (depends on SD card performance) Image capture 2M (1920*1080) JPEG image on SD card Save measurements Measurement information is stored in different layers with image content. -
Page 29: Operating Conditions
Operating conditions Operating temperature -10°C ~ 50°C Storage temperature -20°C ~ 60°C Operating humidity 30~80%RH (Relative Humidity) Storage humidity 10~60%RH (Relative Humidity) 4. Commissioning the camera Easy setup - in addition to the microscope, all you require is an HDMI monitor, the supplied USB mouse and the built-in camera software. - Page 30 If the mouse is not connected, the Attach the camera to the microscope camera is only operated in automatic The MicroCam MINI Full HD HDMI mode. In this case, it is not possible to features a C-Mount thread for connecting record images.
-
Page 31: Camera Control Panel
Fig. 4: User interface of the MikroCam Mini Full HD HDMI. 5.1 Camera control panel • The camera control panel allows you to • Sliders which appear blue can be moved confi gure the camera settings so that you with the mouse. To move a slider, left can obtain the best image or video quality click the corresponding slider. - Page 32 Camera control panel Function Description Single image Capture image and save to SD card (note: an SD card must be inserted). Record Record video and save to SD card. Automatic If automatic exposure is enabled, the exposure exposure time and sensitivity will be set automatically.
- Page 33 Camera control panel Function Description Sharpness Adjust the sharpness (0-100): (Note: a high value does not automatically lead to a better result.) Noise reduction Adjust the noise reduction setting (0-50): In low light, this value can be increased to reduce image noise. Saturation Adjust the saturation: use this option to increase or decrease the colour of the...
- Page 34 The following section shows the various functions of the top menu bar: Any distance (measurement Icon Name/function function) Pin (auto hide) Three-point distance Pin/hide the top menu (measurement function) bar (NOTE: other menu bars are greyed out) Horizontal distance (measurement function) Display/hide the Visible measurement functions...
-
Page 35: Bottom Toolbar
Control bar for object position Icon Name/function and properties Opens AFTER THE MEASUREMENT Three points, two circles (Two circles, IS COMPLETED each with three points and their centre distance) Left-click on a measurement (measurement function) object to display the control bar for the object position Circular arc (measurement and properties. - Page 36 Settings button Icon Function The sub-menus in Settings are more complex than the other functions. The Browser following section provides an overview of Browse the images and videos each sub-menu: on the SD card Info Version info 5.4.1 Settings > Measurement Save calculation results to specified Accuracy...
- Page 37 5.4.2 Settings > Magnification The magnification name, typically the magnification of the microscope objective, is used as the magnification name during Name calibration (e.g. 4x, 10x, 100x, etc). Other custom information can also be added to the magnification name, e.g. the microscope model, the name of the user, etc.
- Page 38 H264: The encoding format of the video files is H264 format. H265: The encoding format of Video encoding the video files is the H265 format (requires hardware support). Check beforehand whether your playback device supports this standard. Fig. 8b: Video settings: Video encoding. 5.4.5 Settings >...
- Page 39 5.4.6 Settings > Files Automatically: The image files are automatically saved with the specified prefix. Image file name Manual: The user must specify the filename BEFORE saving the image. Automatically: The video file is automatically saved with the specified prefix. Video file name Manual: The user must specify the name...
- Page 40 5.4.8 Settings > Miscellaneous Choose whether to display the ruler on the screen. When the Ruler measurement is calibrated, the ruler changes according to the number of pixels. The maximum exposure time during auto exposure can be set Automatic (1-100). Setting this option to a exposure lower value can ensure a faster frame rate during auto exposure.
-
Page 41: Ec Declaration Of Conformity
. b re s s e r . d e / d ow n l o a d / 5 9 1 4 1 7 0 / www.bresser.de/download/5201000/ UKCA/5914170_UKCA.pdf CE/5201000_CE.pdf BRESSER UK Ltd. • Suite 3G, Eden House 8. Disposal Enterprise Way, Edenbridge, Kent TN8 6HF, GB Dispose of the packaging materials properly, according to their type, such as paper or cardboard. - Page 42 (de preferencia por e-mail). E-Mail: service@bresseruk.com E-Mail: servicio.iberia@bresser-iberia.es Telephone*: +44 1342 837 098 Teléfono*: +34 91 67972 69 BRESSER UK Ltd. BRESSER Iberia SLU Suite 3G, Eden House c/Valdemorillo,1 Nave B Enterprise Way P.I. Ventorro del Cano Edenbridge, Kent TN8 6HF 28925 Alcorcón Madrid...
- Page 43 Anmerkungen / Notes...
- Page 44 Anmerkungen / Notes...
- Page 45 Bresser GmbH Bresser UK Ltd. Gutenbergstraße 2 Suite 3G, Eden House 46414 Rhede · Germany Enterprise Way Edenbridge, Kent TN8 6HF www.bresser.de Great Britain @BresserEurope ...
Need help?
Do you have a question about the MicroCam MINI Full HD HDMI and is the answer not in the manual?
Questions and answers