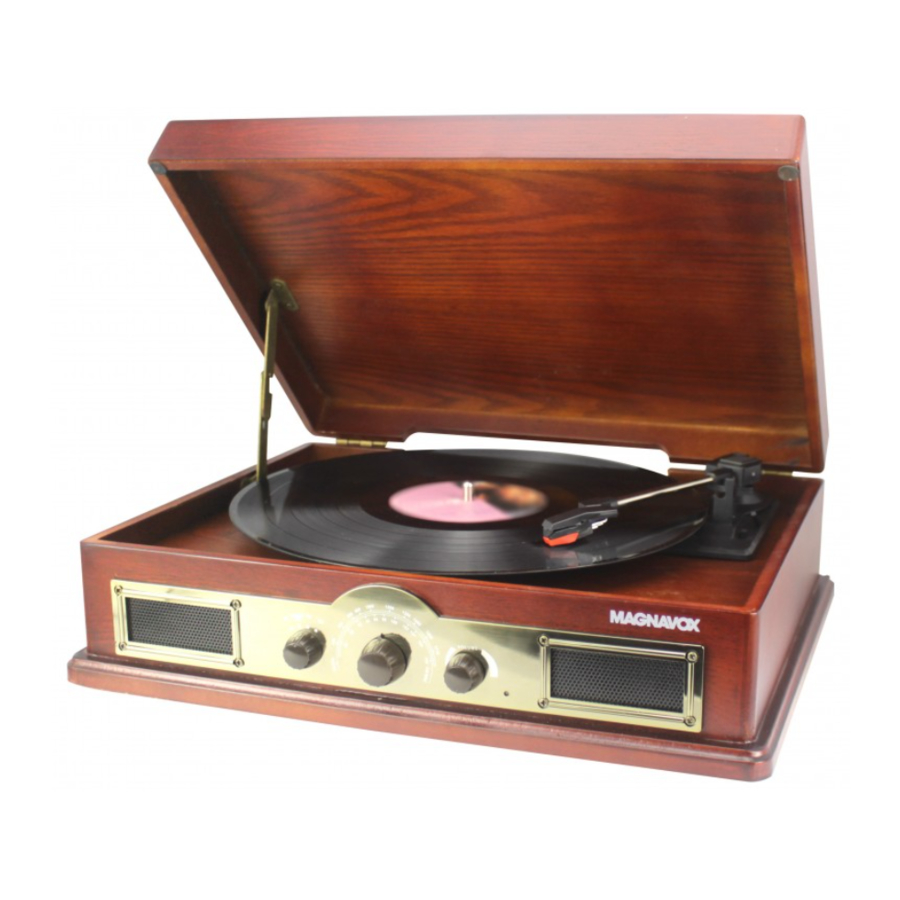
Magnavox MD695 - 4-In-1 Turntable System with Bluetooth Wireless Technology Manual
- Owner's manual (16 pages)
Advertisement
- 1 Location of Controls
- 2 Power Source
- 3 Operation
- 4 Listening through Bluetooth
- 5 Listening to a Record
- 6 Listening to the Radio
- 7 Other Connections
- 8 Records Handling
- 9 Replace the stylus
- 10 Troubleshooting Guide
- 11 General Specifications
- 12 Accessories
- 13 IMPORTANT SAFETY INSTRUCTIONS
- 14 Documents / Resources
Location of Controls
Turntable

- Turntable spindle
- Tray for 45 RPM adapter storage
- Lever
- Tone arm holder
- Speed selector
- Tone arm
- Stylus cartridge
- Turntable platter
Front View

- Speakers
- Function selector
- Radio tuning knob
- Power ON-OFF/ Volume control knob
- Indicator
Rear View

- FM wire antenna
- AUX (in) jack
- LINE OUT jacks
- DC IN jack
Power Source
- Connect the small plug from the supplied AC/DC Adaptor to the DC IN jack on the rear of unit.
- Connect the AC/DC Adapter into a conveniently located AC outlet having AC 100-240V~, 50/60Hz.


Notes:
- This AC/DC Adaptor is intended to be correctly orientated in a vertical or floor mount position.
- For saving energy, if long period of time will not use the unit. Unplug the AC/DC Adaptor from wall outlet.
Operation
General Operation:

- Connected the unit to AC power as instructed earlier.
- Open the top cover and lock the metallic holder as the illustrated below.
- Turn the Power ON-OFF/Volume control knob clockwise to power on the unit and set the volume to the desired level.
The red power on indicator on the front of the unit will illuminate. - Turn the Function selector to the desired position.
- When finished listening, turn the Power ON-OFF/Volume control knob counterclockwise until "Click" is heard to shut off the unit. The indicators will not light.
- Release the metallic holder as the illustrated below then close top cover.
Listening through Bluetooth
(BT) Bluetooth Pairing:
For first time use or re-pairing to a new BT Device, pairing it as below:
- Power on the unit and turn the Function selector to BT position as the instructed earlier. The color of the indicator on the front of the unit will turn to Blue and blink.
- Power on the external BT Device and enter to BT searching mode. Start pairing as the on screen instructions on the external BT Device. After paired, the Blue indicator will stop blinking.
(For details pairing procedures, please refer to the user's manual of your BT Device.). - If pairing is complete you may now play music with your external BT Device.
- During playback, using the controls on the paired BT Device to skip the tracks; pause; play... etc.
Notes:
- When the external BT player searched the unit, our model number " MD695 " will appear on the display of external BT Device.
- If while pairing you are asked for a code please try "0000" or "1234".
Normal operation after paired:
- Power on the external BT Device and enter to BT playback mode.
- Power on the unit and turn the Function selector to the BT position as the instructed earlier. The color of the indicator on the front of the unit will turn to Blue and blink.
- Wait a few seconds until the unit automatically paired to the external BT Device. (The Blue indicator will stop blinking.)
- If pairing is complete you may now play music with your external BT Device.
- During playback, using the control buttons on the paired device to skip the tracks; pause; play...etc.
Listening to a Record
- In first time use, take off the protective cover from the stylus as the illustrated below:
![]()
- Place the Record on the center spindle.
Note: If you are playing a 45 RPM Single (small size record), place the supplied 45 RPM adapter to the center spindle then place the record on it. If you don't use the adaptor, place it to the tray as the illustrated below:
![]()
- Slide the Speed selector to 33; 45 or 78 to match the play speed of the record.
- Unlock the Tone Arm from the holder as the illustrated below:
![]()
- Power on the unit and turn the Function selector to the PHONO/AUX position as the instructed earlier.
- Raise the Lever to raising the Tone arm then move it to the top of the desired location of the record. Release the Lever to put the Tone arm onto the record. Plays will auto start.
- When finished playback, the unit will auto stop turning (or you wants to stop immediately); raise the Lever to rising the Tone arm then put it back to the Holder. Release the Lever then lock the Tone arm on the Holder.


NOTE:
Before record playback, make sure the audio connection cable has not plugged in the AUX (in) jack on rear of the unit. Otherwise, the turntable will not be functioning.
Listening to the Radio
- Power on the unit and turn the Function selector to the AM or FM position as the instructed earlier as desired.
- Turn the Radio tuning knob to received the desired radio station.
Note: When the unit received a stereo FM station in FM mode, it will play it in stereo mode automatically.
Antenna:
AM - This unit has a built-in ferrite rod antenna, which provides adequate reception in most areas. If reception is weak, reassemble the other direction/location to improve reception.
FM - The FM Antenna wire is for FM reception. If reception is weak, unwind and extend the wire or reassemble the wire antenna to other direction/location to improve reception.
Other Connections
AUX IN:
Listen music from the external audio player as follows:
- Connect one end of the supplied audio connection cable to the Phones jack; Line out jack or AUX out jack on the external audio player.
- Connect the other end to the AUX (in) jack on the rearof unit as the illustrated below:

- Power on the unit and turn the Function selector to the PHONO/AUX position as the instructed earlier.
- Plays the music on the connected external audio player as usual.

Notes:
- Make sure the volume level of the external audio player was set to high. Otherwise, sound from this unit may weak.
- When inserted the audio connection cable into the AUX (in) jack, the unit will automatically turn to AUX (in) mode. Unplug it from the AUX (in) jack before using Turntable.
LINE OUT:
To listening from external audio amplifier:
- Connect one end of the RCA audio connection cable (not supplied) to the Line IN jacks or AUX IN jacks on the external audio amplifier.
- Connect the other end of the cable to the LINE OUT jacks on the rear of unit as the illustrated below:

- Power on the unit and plays music as usual as the instructed earlier.
- Power on the external audio amplifier and set it toLINE IN mode to plays the music from this unit.

Records Handling
- Do not touch the record's grooves. Only handle records, by the edges or the label. Make sure your hands are clean. Skin oils from even clean hands can leave a residue on the record surface that will gradually deteriorate the quality of your record.

- Keep your hands away from dust. Keep them in a cool, dry place.
- To avoid dust and scratches, keep records in their sleeves and jackets when not in use.
- Store records upright on their edges. Records stored horizontally will eventually bend and ward.
- Do not expose records to direct sunlight or high humidity and temperature. Long exposure to high temperatures will warp the record.
- Do not store your records in the trunk of your car. The temperature in a closed trunk can ruin your collection.
- Store records in an area with a stable temperature and low humidity.
- Should the record become dirty, gently wipe the surface in a circular motion, using a soft anti-static cloth.
![]()


Replace the stylus
If the stylus was abrased after long time use, replace it by the supplied extra style as follows:
- Use a screwdriver (not included) to push the stylus off then pull it out as the illustrated below:
![]()

- Install the new stylus as illustrated below:
![]()

Troubleshooting Guide
| Symptom | Possible Cause | Solution |
| Power | ||
No power | AC/DC Adaptor had not connected to unit or wall outlet | Connected the AC/DC Adaptor to the unit and wall outlet |
| Power ON-OFF/Volume control knob is on power off position | Turn the Power ON-OFF/ Volume control knob clockwise to power on the unit and set the volume to the desired level | |
| Turntable | ||
Noise or sound distorted | Speed selector wrong setting | Set the Speed selector to the correct position 33; 45 or 78 as the play speed of record |
| The stylus may abrasion after long time used | Replace it by the supplied extra stylus | |
| BT | ||
BT not functioning | The BT Device had not paired to the unit | Paired the BT Device to the unit |
Sound weak or distortion | The BT Device too far from the unit | Place the BT Device close to the unit |
| Radio | ||
Noise or sound distorted | Station not tuned properly. | Retune the radio station. |
| The location not good for radio reception. | Reassemble the unit (or wire antenna) to the other direction/location to improve reception | |
General Specifications
| Power Source: | DC  9V, 1500mA, 9V, 1500mA,  |
| Audio Power: | 1 5. W (RMS) x 2 |
| Impendence of Speakers: | 4 Ohm; 3W x 2 |
| BT Version: | 4.1 |
| BT Effective Range: | ≤ 32 feet in open area |
| Radio Frequency: | AM 530-1710kHz FM 87.5-108MHz |
| Turntable: | |
| Speed: | 33; 45; 78 rpm selectable |
| Type of Stylus: | CSC-015 |
Accessories
1 x Owner's Manual
1 x AC/DC Adaptor (Input: AC 100-240V~; 50/60 Hz; 0.5A; Output: DC ![]() 9V, 1500mA,
9V, 1500mA, ![]() )
)
2 x Stylus (one pre-mounted)
1 x 45 RPM Adaptor
1 x Audio connect cable with 3.5 mm stereo plugs
SPECIFICATIONS AND ACCESSORIES ARE SUBJECT TO CHANGE WITHOUT NOTICE
IMPORTANT SAFETY INSTRUCTIONS

RISK OF ELECTRIC SHOCK DO NOT OPEN
TO REDUCE THE RISK OF ELECTRIC SHOCK, DO NOT R EMOVE COVER (OR BACK). NO USER-SERVICEABLE PARTS INSIDE. REFER SERVICING TO QUALIFIED SERVICE PERSONNEL.
 The lightning flash with arrowhead symbol within an equilateral triangle is intended to alert the user to the presence of uninsulated dangerous voltage within the product's enclosure that may be of sufficient magnitude to constitute a risk of electric shock to persons.
 The exclamation point within an equilateral triangle is intended to alert the user to the presence of important operating and maintenance(servicing) instructions in the literature accompanying the appliance.

TO REDUCE THE RISK OF FIRE OR ELECTRIC SHOCK, DO NOT EXPOSE THIS PRODUCT TO RAIN OR MOISTURE.
TO REDUCE THE RISK OF FIRE OR ELECTRIC SHOCK, AND ANNOYING INTERFERENCE, USE THE RECOMMENDED ACCESSORIES ONLY.
Before using the unit, be sure to read all operating instructions carefully. Please note that these are general precautions and may not pertain to your unit. For example, this unit may not have the capability to be connected to an outdoor antenna.
- Read these instructions. All the safety and operating instructions should be read before the product is operated.
- Keep these instructions. The safety and operating instructions should be retained for future reference.
- Heed all warnings. All warnings on the product and in the operating instructions should be adhered to.
- Follow all instructions. All operating and use instructions should be followed.
- Do not use this apparatus near water. Do not use this product near water and moisture, for example: near a bathtub, washbowl, kitchen sink or laundry tub; in a wet basement; or near a swimming pool.
- Clean only with dry cloth. Unplug this product from the wall outlet before cleaning. Do not use liquid cleaners or aerosol cleaners. Use a dry cloth for cleaning.
- Do not block any ventilation openings. Install in accordance with the manufacturer's instructions. Slots and openings in the cabinet and in the back or bottom are provided for ventilation, to ensure reliable operation of the product and to protect it from overheating. These openings must not be blocked or covered. The openings should never be blocked by placing the product on a bed, sofa, rug or other similar surface. This product should never be placed near or over a radiator or heat source. This product should not be placed in a built-in installation such as a bookcase or rack unless proper ventilation is provided or the manufacturer's instructions have been adhered to.
- Do not install near any heat sources such as radiators, heat registers, stoves, or other apparatus(including amplifiers) that produce heat.
- Do not defeat the safety purpose of the polarized or grounding-type plug. A polarized plug has two blades with one wider than the other. A grounding type plug has two blades and a third grounding prong. The wide blade or the third prong are provided for your safety. If the provided plug does not fit into your outlet, consult an electrician for replacement of the obsolete outlet.
- Protect the power cord from being walked on or pinched particularly at plugs, convenience receptacles, and the point where they exit from the apparatus.
- Only use attachments/accessories specified by the manufacturer.
- Use only with the cart, stand, tripod, bracket, or table specified by the manufacturer, or sold with the apparatus. When a cart is used, use caution when moving the cart/apparatus combination to avoid injury from tip-over. An appliance and cart combination should be moved with care. Quick stop, excessive force and uneven surfaces may cause the appliance and cart combination to overturn.
![]()
- Unplug this apparatus during lightning storms or when unused for long periods of time. To protect your product from a lightning storm, or when it is left unattended and unused for long periods of time, unplug it from the wall outlet and disconnect the antenna or cable system. This will prevent damage to the product due to lightning and power-line surges.
- Refer all servicing to qualified service personnel. Servicing is required when the apparatus has been damaged in any way, such as power-supply cord or plug is damaged, liquid has been spilled or objects have fallen into the apparatus, the apparatus has been exposed to rain or moisture does not operate normally, or has been dropped.
- Power source
This product should be operated only from the type of power source indicated on the marking label. If you are not sure of the type of power supply to your home, consult your appliance dealer or local power company. For products intended to operate from battery power, or other source, refer to the operation instructions. - Power lines
An outside antenna system should not be located in the vicinity of overhead power lines or other electric light or power circuits, or where it can fall into such power lines or circuits. When installing an outside antenna system, extreme care should be taken to keep from touching such power lines or circuits as contact with them might be fatal.

- Overloading
Do not overload wall outlets and extension cords as this can result in a risk of fire or electric shock. - Object and liquid entry
Never push objects of any kind into the product through openings as they may touch dangerous voltage points or short out parts that could result in fire or electric shock. Never spill or spray any type of liquid on the product. - Outdoor antenna grounding
If an outside antenna is connected to the product, be sure the antenna system is grounded so as to Provide some protection against voltage surges and built up static charges. Section 810 of the National Electric Code ANSI/NFPA 70 provides information with respect to proper grounding of the mast and supporting structure, grounding of the lead-in wire to an antenna discharge product, size of grounding conductors, location of antenna-discharge product, connection to grounding electrodes and requirements for the grounding electrodes.
![]()
- Service
Do not attempt to service this product yourself as opening or removing covers may expose you to dangerous voltage or other hazards. Refer all servicing to qualified service personnel. - Replacement parts
When replacement parts are required, be sure the service technician uses replacement parts specified by the manufacturer or those that have the same characteristics as the original parts. Unauthorized substitutions may result in fire or electric shock or other hazards. - Safety check
Upon completion of any service or repairs to this product, ask the service technician to perform safety checks to determine that the product is in proper operating condition. - Damage requiring service
Unplug this product from the wall outlet and refer service to qualified service personnel under the following conditions.

- When the power-supply cord or plug is damaged.
- If liquid has been spilled or objects have fallen into the product.
- If the product has been exposed to rain or water.
- If the product does not operate normally by following the operating instructions. Adjust only those controls that are covered by the operating instructions, as an adjustment of other controls may result in damage and will require extensive work by a qualified technician to restore the product to its normal operation.
- If the product has been dropped or the cabinet has been damaged.
- When the product exhibits a distinct change in performance-this indicates a need for service.
- Note to CATV system installer
This reminder is provided to call the CATV system installer's attention to Article 820-40 of the NEC that provides guidelines for proper grounding and, in particular, specifies that the cable ground shall be connected to the grounding system of the building, as close to the point of cable entry as practical.
NOTE: Refer all servicing to qualified service personnel. Servicing is required when the unit has been damage i n any way such as the following: the power-supply cord or plug has been damaged, liquid has bee s pilled into unit, the unit has been exposed to rain or moisture, the unit has been droppe n ot operate normally.

Documents / ResourcesDownload manual
Here you can download full pdf version of manual, it may contain additional safety instructions, warranty information, FCC rules, etc.
Download Magnavox MD695 - 4-In-1 Turntable System with Bluetooth Wireless Technology Manual
Advertisement


Need help?
Do you have a question about the MD695 and is the answer not in the manual?
Questions and answers