Advertisement
NEXSAN
UNITY
Quick Start Guide
This document provides installation steps for racking, cabling, and setting up the Nexsan UNITY
Storage System, and cabling all Nexsan storage components for power and data/host connectivity. For additional
documentation please visit
Taking delivery
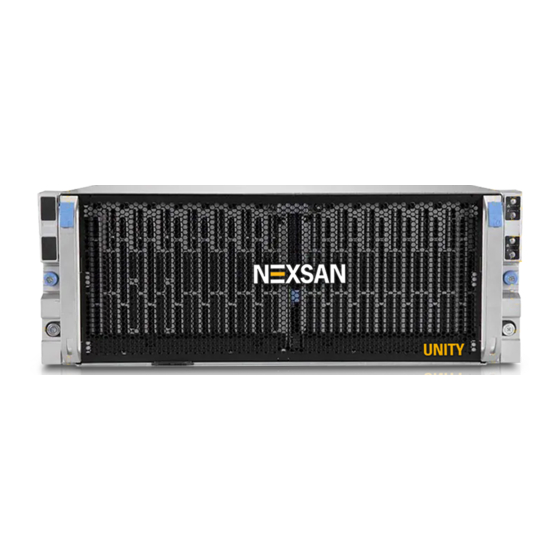
Your UNITY™ shipment includes the UNITY™
NV6000. Check to ensure no damage has been
sustained to the packaging in transit. If anything
appears to be damaged, you should file a damage
claim with your reseller.
Item
Name
A
Drawer latch
B
Drawer lock
C
Rack lock
D
Power button
E
Status LEDs
F
UID Button/LED
1
Power supply module
2
1x PCI-E 3.0 x16 HHHL
3
Fan
4
Serial port
5
VGA Port
6
1x PCI-E 3.0 x16 HHHL
NV6000 Storage System
™
http://helper.nexsansupport.com/unt_support.html
Description
Top left and right. To slide HDD drawer out of storage enclosure.
Middle left and right. Locks the drawer into the chassis.
Bottom left and right. Locks the system into a rack.
Main power to add or remove power supply to the server.
Network activity, heat, HDD, fan, and power conditions.
To help locate the server in racks and server banks.
2,600W redundant power supply with C19 plug.
Slot3, from CPU2. HHHL = half height, half length.
6x Hot-swap counter-rotate fans.
COM port for serial communication support.
For VGA display or monitor.
Slot2, from CPU1.
1 — UNITY
NV6000 Quick Start Guide
™
Hardware overview
The main components of the UNITY™ NV6000 are
shown in these front and rear view diagrams:
Front view
Rear view
Firmware Version 7
NV6000
™
Advertisement
Table of Contents

Summary of Contents for Nexsan UNITY NV6000
- Page 1 Firmware Version 7 This document provides installation steps for racking, cabling, and setting up the Nexsan UNITY NV6000 ™ Storage System, and cabling all Nexsan storage components for power and data/host connectivity. For additional documentation please visit http://helper.nexsansupport.com/unt_support.html Taking delivery Hardware overview Your UNITY™...
-
Page 2: Prepare For Installation
Item Name Description 1x PCI-E 3.0 x8 HHHL Slot1, from CPU1. IPMI LAN port For remote access, monitoring, and management. USB 3.0 ports (2) Can support USB-enabled devices such as keyboard, mouse, USB/SATA DVD drive, or flash drive. Dual RJ45 10GbE LAN Ports Top port, LAN2: Management Interface (nx99). - Page 3 Secure the length of the extended rail by tightening the screws into the holes closer to the Step 2: Installing the chassis into the rack inner rail. Align the sides of the chassis with the front of the rails. Slide the chassis into the rails, keeping the pressure even on both sides.
- Page 4 HDDs and their carriers can be loaded into the chassis, or removed from the chassis by pressing Logical drive locations: their release buttons to eject their handles and HDDs are numbered from left to right when then pulling the drives out by the handles. Close ...
-
Page 5: Power On Unity™ Components
connections diagram Step 5: Connect to hosts the owning controller are optimized and all the paths on the other controller are non-optimized. Under the required LUN (Logical Unit Number) mask File systems can be accessed from the virtual configuration, when connecting the UNITY™ network interface, bound to the owning controller NV6000 to a Fibre Channel switch, each host has at dynamically. -
Page 6: Monitor The Unity™ Storage System
Universal Information This section describes the front panel LEDs that help Continuously on and red Indicates: you to monitor the Nexsan UNITY™ Storage System. - an overheat condition has occurred. Control panel LEDs - an HDD(s) status has changed. - Page 7 Configure the Management Interface The UNITY™ System Configuration wizard opens. (nx99) using the nxadmin CLI Step 1: Configure UNITY™ System properties Connect to the UNITY™ NV6000 using input devices, see Step 2: Connect peripherals & Enter the UNITY™ System information. on page 4.
-
Page 8: Safety Notices
Help, Nexsan Unity™ nxadmin CLI Reference Guide. By Web: http://helper.nexsansupport.com/unt_support.html Copyright © 2010-2023 Nexsan Technologies, Inc. All Rights Reserved. Nexsan®, UNITY™ NV6000, and the Nexsan logo are trademarks or registered trademarks of Nexsan. All other trademarks and registered trademarks are the property of their respective owners.


Need help?
Do you have a question about the UNITY NV6000 and is the answer not in the manual?
Questions and answers