
Related Manuals for ProLights SIGMAPIX 26B1X1BF


Summary of Contents for ProLights SIGMAPIX 26B1X1BF
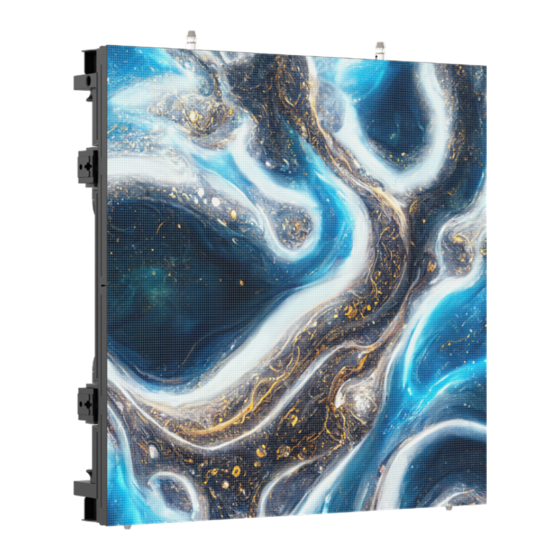
- Page 1 SIGMAPIX 26B1X1BF Indoor LED module, SMD1515 BF, p.2,6mm, 50x50cm, 192x192pix, 1000nit, 8kg USER MANUAL English version REV.01-07/23...
- Page 2 PROLIGHTS product are trademarks OWNED or licensed by Music & Lights S.r.l., its affiliates, and subsidiaries. PROLIGHTS is a registered trademark by Music & Lights S.r.l. All right reserved. Music & Lights – Via A. Olivetti, snc - 04026 - Minturno (LT) ITALY.
-
Page 3: Table Of Contents
MAINTENANCE AND CLEANING THE PRODUCT............29 MAINTENANCE ON INDOOR PRODUCT ..............29 MAINTENANCE ON OUTDOOR PRODUCT ..............30 CORRECT STARTUP/SHUTDOWN SEQUENCE ............. 30 TRANSPORTATION AND STORAGE ................30 GENERAL INDICATIONS FOR USE ................31 TROUBLESHOOTING ..................... 32 PROLIGHTS - SIGMAPIX X26B1X1BF... -
Page 4: Safety Information
• Do not reapply power until repairs have been completed. • Refer any service operation not described in this manual to PROLIGHTS Service team or an authorized PROLIGHTS service center. Installation •... - Page 5 • Warning! Disconnect the fixture from AC mains power and allow to cool for at least 10 minutes before handling. • Only technicians who are authorized by PROLIGHTS or Authorised service partners are permitted to open the fixture. • Users may carry out external cleaning, following the warnings and instructions pro- vided, but any service operation not described in this manual must be referred to a qualified service technician.
-
Page 6: Optional Accessories
• FMTOOL Front maintenance tool for OMEGAX-DELTAX series LED screens (INDOOR) • MRTOOL Mask Replacement TOOL for OMEGAX26B and OMEGAX26BE 2 - TECHNICAL DRAWING 500 mm 88 mm [19.7 in] [3.5 in] Fig. 01 Weight: 8 kg - 17,64 lbs PROLIGHTS - SIGMAPIX X26B1X1BF... -
Page 7: Product Overview
11. POWER IN CONNECTOR: for connection to the Mains 100-240V~/50-60Hz. 12. POWER OUT CONNECTOR: power output for connection of multiple units in series 13. ANGLE MECHANICS: allow both concave and convex precise installation of +10° / -10° Fig 02 PROLIGHTS - SIGMAPIX X26B1X1BF... -
Page 8: Installation
If you use the KSXHGB02 accessory, remove highlighted pins for grounding applications. Align the KSXHGB fly/ground bar accessories, then adjust the height of the feet toward the ground to keep the ground beam perfectly horizontal. Fig 03 PROLIGHTS - SIGMAPIX X26B1X1BF... - Page 9 Hook the cabinet to the ground bar, taking care to align the holes in the screen with the pins in the bar. Hook the panels sideways and lock them by push and turning the locking lever. Fig 04 PROLIGHTS - SIGMAPIX X26B1X1BF...
- Page 10 Hook down the cabinet of the next row and lock them by push and turning the locking lever, and continue horizontally forward. Hook the panels sideways and lock them by turning the locking lever. Fig 05 PROLIGHTS - SIGMAPIX X26B1X1BF...
- Page 11 Install SIGMAX series LED wall back plates, KSXBSC accessory, for ground fixing. Finally, to stiffen the structure, install the KSXGHR accessory between the two rear supports, and if the installation is complex help with the use of the SXXJ or OXXJ accessory. Fig 06 PROLIGHTS - SIGMAPIX X26B1X1BF...
-
Page 12: Fly Bar Hanging System
FLY BAR HANGING SYSTEM Remove the noted feet and center pin on the KSXHGB01 accessory, then install the eye hook. If you use the KSXHGB02 accessory, remove highlighted feet and center pins, then install the eye hook. Fig 07 PROLIGHTS - SIGMAPIX X26B1X1BF... - Page 13 Hook the cabinet to the KSXHGB01/KSXHGB02 fly/ground bar accessories, taking care to align the holes in the screen with the pins in the bar. Hook down the panels of the next row and lock them by push and turning the locking lever, and continue horizontally forward. Fig 08 PROLIGHTS - SIGMAPIX X26B1X1BF...
- Page 14 Finally, when finished assembling the first row in the same way proceed with the others, and if the installation is complex help with the use of the SXXJ or OXXJ accessory. Fig 09 PROLIGHTS - SIGMAPIX X26B1X1BF...
-
Page 15: Installation Of Special Cabinet Accessories
Press the handles to unlock the screen and give it the desired curve, visualizing on the indicator above the locking knob the degrees of the angle. Turn the knobs highlighted in the image counterclockwise to lock the screen. Fig 10 PROLIGHTS - SIGMAPIX X26B1X1BF... -
Page 16: Indoor Led 45° Module (Optional Sigmax26Bc1X1Bf)
Remove the side mechanical locking components highlighted in the image from the cabinet. Assemble the SIGMAXCFM accessories as shown in the pictures. On another cabinet remove the side mechanical locking components highlighted in the image from the cabinet. Fig 11 PROLIGHTS - SIGMAPIX X26B1X1BF... - Page 17 Assemble the SIGMAXCMM accessories as shown in the pictures. Hook the panels sideways and lock them by push and turning the locking lever. Fig 12 PROLIGHTS - SIGMAPIX X26B1X1BF...
- Page 18 Assemble the SIGMAXCFM and SIGMAXCMM accessories as shown in the pictures. Prepare 4 panels that will form the base of the cube with No.4 SIGMAXCMM and No.4 SIGMAXCFM. Assemble No.8 SIGMAXCFM on cabinet that will close the cube. Fig 13 PROLIGHTS - SIGMAPIX X26B1X1BF...
- Page 19 Hook the panels sideways and lock them by push and turning the locking lever. Put the upper cabinet without tiles on the base, engage the locking levers Fig 14 PROLIGHTS - SIGMAPIX X26B1X1BF...
- Page 20 Finally reassemble the tiles on the cabinet. Fig 15 PROLIGHTS - SIGMAPIX X26B1X1BF...
-
Page 21: Connection To The Mains Supply
• Connect the power connector into the Mains input socket (100-240 VAC-50/60 Hz). • The product is then ready for its operations and can be controlled through the available input sig- nals on board. • To disconnect power from the product, disconnect the Mains from the socket. PROLIGHTS - SIGMAPIX X26B1X1BF... -
Page 22: Data Connection
MAIN AND BACKUP DATA LINE For all Prolights led screen cabinet it’s possible to install a MAIN data line and a BACKUP data line. This allows to see image on led screen in case of MAIN failure. MAIN and BACKUP need to be assigned from the PC software to the outputs of the processor. - Page 23 NOTE: it’s always suggested to use different processor for MAIN line and BACKUP line Last cabinet First cabinet of the chain of the chain DATA MAIN DATA BACKUP Fig. 18 PROLIGHTS - SIGMAPIX X26B1X1BF...
-
Page 24: Led Display Control Setting
• Windows PC • USB cable • Nova LCT software NOTE: PRO user can utilize the software SMARTLCT to configure more complex led screen. It’s pos- sible to see user manual on Novastar web site download page https://www.novastar.tech/downloads/ PROLIGHTS - SIGMAPIX X26B1X1BF... -
Page 25: Resolution Management
Led screen resolution 1.843.200 pixels Video Resolution HD 1920x1080 (2.073.600 pixels) Pc output resolution NOTE: HD resolution can be used in this case because is very similar to Sending card resolution the native one Pixel rate 1:1,125 (2.073.600/1.843.200) PROLIGHTS - SIGMAPIX X26B1X1BF... -
Page 26: Led Screen Configuration With Novalct
Go in Screen Configuration and Next sword. Go in Screen Connection tab Set the quantity of screen and Configure Set the cabinet resolution and apply to en- Set the number of columns and rows tire row and column Fig. 22 PROLIGHTS - SIGMAPIX X26B1X1BF... - Page 27 Send to HW and Save Set the Backup and press Add Press Send to apply settings and Save # of MAIN PROCESSOR # of BACKUP PROCESSOR # of BACKUP PORT # of MAIN PORT Fig. 23 PROLIGHTS - SIGMAPIX X26B1X1BF...
-
Page 28: Application Example
Power line distribution: 16A LINE 1 16A LINE 2 16A LINE 3 Column 1 Column 4 Column 7 Column 2 Column 5 Column 8 Column 3 Column 6 Column 9 15 cabinets 15 cabinets 15 cabinets PROLIGHTS - SIGMAPIX X26B1X1BF... - Page 29 BACKUP PROCESSOR MAIN PROCESSOR VIDEO SPLITTER VIDEO HDMI OUT HDMI IN HDMI OUT SOURCE Fig. 24 Power line schematics: 16A LINE 1 16A LINE 1 16A LINE 1 Fig. 25 NOTE: screen is seen from behind PROLIGHTS - SIGMAPIX X26B1X1BF...
- Page 30 Configure Data line 1 Configure Data line 2 Configure Data line 3 Backup settings for port 1, 2 and 3 Fig. 26 PROLIGHTS - SIGMAPIX X26B1X1BF...
-
Page 31: Maintenance
• Electrical and functional checks; eventual repairs. WARNING: the use of alcohol or any other detergent or liquid could damage the product. • All other service operations on the product must be carried out by PROLIGHTS, its approved service agents or trained and qualified personnel. -
Page 32: Maintenance On Outdoor Product
LED displays, the ambient temperature and relative humidity for storage shall be ranging from -30°C to +60°C and 10% to 95% RH. Do not store the cabinets in an environment with chemicals that are volatile, corrosive, or flammable. PROLIGHTS - SIGMAPIX X26B1X1BF... -
Page 33: General Indications For Use
• Make sure when assembling the cabinets, to secure the screen and all accessories properly and prevent collapse that may cause damage or danger to people and property, and to use only acces- sories approved by PROLIGHTS. • Switch off the power immediately and contact the professional personnel when the LED display has any abnormal conditions such as peculiar smell, smoke, electric leakage, and abnormal tempera- ture. -
Page 34: Troubleshooting
Check whether the hub card contacts properly with the receiving card • Signal output of the • Check output signals of the receiving card of the previous cabinet previous cabinet, or replace the signal cable faulty PROLIGHTS - SIGMAPIX X26B1X1BF... - Page 35 • Dirty led surface • Clean the fixture regularly. Contact an authorized service center in case of technical problems or not reported in the table can not be resolved by the procedure given in the table. PROLIGHTS - SIGMAPIX X26B1X1BF...
- Page 36 Note...
- Page 37 Note...
- Page 38 Note...
- Page 40 PROLIGHTS is a trademark of prolights.it Via A.Olivetti snc MUSIC & LIGHTS S.r.l. support@prolights.it 04026 - Minturno (LT) ITALY musiclights.it Tel: +39 0771 72190...
Need help?
Do you have a question about the SIGMAPIX 26B1X1BF and is the answer not in the manual?
Questions and answers