Advertisement
Available languages
Available languages
Quick Links
Heimsport-Trainingsgera t
Crosstrainer-Ergometer
Montage- und Bedienungsanleitung
u r Bestell-Nr. 1621
Notice de montage et d'utilisation du
No. de commande 1621
Инструкция по монтажу и эксплуатации
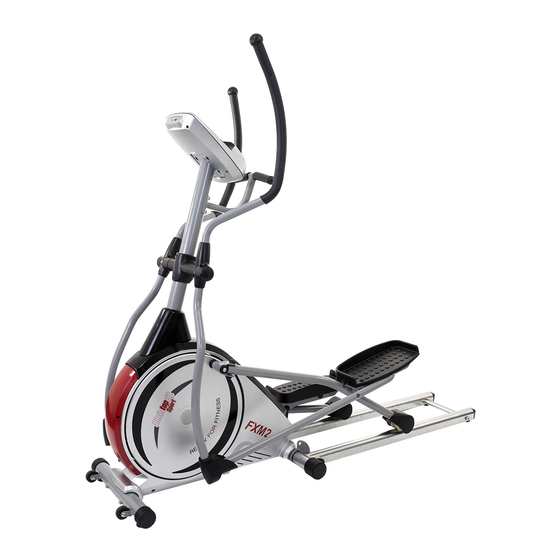
FXM 2
D
GB
Assembly and exercise instructions
or Order No. 1621
F
NL
Montage- en bedieningshandleiding voor
Bestellnummer 1621
RU
№ заказа 1621
1
Advertisement

Related Manuals for Christopeit Sport FXM 2


Summary of Contents for Christopeit Sport FXM 2
- Page 1 Heimsport-Trainingsgera t Crosstrainer-Ergometer FXM 2 Montage- und Bedienungsanleitung Assembly and exercise instructions u r Bestell-Nr. 1621 or Order No. 1621 Notice de montage et d’utilisation du Montage- en bedieningshandleiding voor No. de commande 1621 Bestellnummer 1621 Инструкция по монтажу и эксплуатации...
- Page 2 Inhaltsu bersicht Contents Page 1. Wichtige Empehlungen und Sicherheitshinweise Seite 2. Einzelteileu bersicht Seite 3. Stu ckliste-Ersatzteilliste-Techn. Daten Seite 4. Montageanleitung mit Explosionsdarstellungen Seite - 11 Benutzung des Gera tes, Leistungstabelle Sommaire Page 5. Computeranleitung-Sto rungsbeseitigung Seite 13 - 15 Reinigung, Wartung und Lagerung...
- Page 3 Montageu bersicht: Assembly overview: Aperçu de l‘Assemble e: Montage overzicht: Обзор Ассамблея:...
- Page 5 Nach O nen der Verpackung bitte kontrollieren, ob alle Teile ent- Stückliste - Ersatzteilliste sprechend der nacholgenden Montageanleitung vorhanden sind. FXM 2 Best.-Nr. 1621 Ist dies der Fall, ko nnen Sie mit dem Zusammenbau beginnen. Technische Daten: Stand: 01. 09. 2016 Wenn ein Bauteil nicht in Ordnung ist oder ehlt, oder wenn Sie in...
- Page 6 Abbildungs- Bezeichnung Abmessung Menge Montiert an ET-Nummer Stu ck Gummiring 36-1621-28-BT Wellscheibe 17//22 36-9918-22-BT Unterlegscheibe 10//20 18+20 39-9989-VC Unterlegscheibe 8//32 39-10166 Unterlegscheibe 8//20 39-10018 Unterlegscheibe 8//16 15+22 39-9962-CR Unterlegscheibe gebogen 8//25 13+17 39-9966-CR Unterlegscheibe gebogen 8//20 39-10232-CR Wellscheibe 21//25 2,84+86 36-9925523-BT Selbstsichernde Mutter...
- Page 7 Abbildungs- Bezeichnung Abmessung Menge Montiert an ET-Nummer Stu ck Pedalarm 33-1621-17-SI Schraube M6x15 86,87+98 39-10120 Tretachse 87+90 33-1621-18-SI Tretkurbelscheibe 36-1621-21-BT Federring u r M6 39-9865-CR Selbstsichernde Mutter 85+113 39-9861-VC Kugellager 6004Z 36-1621-40-BT Stellmotor 72+92 36-1621-41-BT Seilzug 91+100 36-1621-42-BT Feder 1+100 36-1621-43-BT...
- Page 8 Montageanleitung Entnehmen Sie alle Einzelteile der Verpackung, legen diese Schritt 1: au den Bodenund kontrollieren die Vollza hligkeit anhand der Montage des vorderen Fußrohres (10) und der Lauschienen (3) Montageschritte. am Grundrahmen (1). Das Gera t wurde gro ßtmo glich vormontiert, sodass der Zu- 1.
- Page 9 Schritt 3: Montage der Fußhebel (9) und den Verbindungsrohren (5). 1. Den Fußhebel links (9L) an das Verbindungsrohr links (5L) stecken 6. Legen Sie die Stu tzrollen (66) au den Lauschienen (3) au und bewegen Sie vorsichtig den Antrieb 3-4 Umdrehungen von Hand. und die Bohrungen in den Rohren so ausrichten, dass sie u ...
- Page 10 Schritt 5: Montage des Computers (76) am Stu tzrohr (2). 1. Nehmen Sie den Computer (76) und stecken Sie das Verbin- dungskabel (72) in die Ru ckseite des Computers (76) ein. 2. Stecken Sie die Pulskabel (59) in die entsprechende Buchsen am Computer (76) ein und legen Sie den Computer (76) au...
- Page 11 und setzen Sie den Fuß darau, sodass sie einen sicheren Stand au der Fußschale haben. Schwingen Sie nun das andere Bein zur gegenu berliegenden Fußschalen- seite und stellen Sie ihn au die Fußschale au. Dabei mit den Ha nden am Haltegri...
- Page 12 U/min und Wattleistung von Stue 1 bis Stue 24 u r FXM 2 Art.-Nr. 1621 20RPM 30RPM 40RPM 50RPM 60RPM 70RPM 80RPM 90RPM 100RPM Anmerkung: 1. Die Leistungsanzeige in Watt wurde anhand der Umdrehungszahl der Tretachse pro Minute (UPM) und des Bremsmomentes (Nm) kalibriert.
- Page 13 Trainingscomputer FUNKTIONSBESCHREIBUNG Inbetriebnahme: Training ohne Eingabe von Daten: 1. Einschalten durch Einstecken des Netzgera tes. Es erolgt ein kurzes Startbild: Starten des Trainings durch Dru cken der START/STOP-Taste. Mit der +/- -Drehtaste kann der Widerstand beliebig eingestellt werden. Alle ak- tuellen Trainingsdaten werden angezeigt.
- Page 14 Beginner / Advance / Sporty: eingegebenen perso nlichen Daten wie Geschlecht (SEX – Male = Ma nn- Es gibt 12 verschiedene Trainingsprogramme u r ein abwechslungsreiches lich / Female = Weiblich) / Gro ße (HEIGHT) und Gewicht (WEIGHT) Ihre Training mit unterschiedlichen Trainings-prolen.
- Page 15 Sto rungsbeseitigung: Reinigung, Wartung und Lagerung des Ergometers: Wenn Sie die Funktionssto rung nicht anhand der augeu hrten Inormationen beheben ko nnen, so kontaktieren Sie Ihren Ha ndler 1. Reinigung oder den Hersteller. Benutzen Sie nur ein leicht angeeuchtetes Tuch zur Reinigung. Achtung: Benutzen Sie niemals Benzin, Verdu ...
- Page 16 Trainingsanleitung Weitere Inormationen zum Thema Auwa rmu bungen, Dehnungsu bungen oder allgemeine Gymnastiku bungen fnden Sie in unserem Downloadbereich unter www.christopeit-sport.com Um spu rbare ko rperliche und gesundheitliche Verbesserungen zu erreichen, mu ssen u r die Bestimmung des erorderlichen Trainingsauwandes die 4. Motivation olgenden Faktoren beachtet werden: Der Schlu ssel u r ein erolgreiches Programm ist ein regelma ßiges Training. Sie sollten sich einen esten Zeitpunkt und Platz pro Trainingstag einrichten 1. Intensita t: und sich auch geistig au das Training vorbereiten. Trainieren Sie nur gut Die Stue der ko ...
- Page 17 Contents 1. Summary o Parts Page 3 - 4 2. Important Recommendations and Saety Inormation Page 17 3. Parts List-List o spare parts-tec. Data Page 18 - 20 4. Assembly Instructions With Exploded Diagrams Page 21 - 24 Mount, use and dismount 5.
- Page 18 Please check ater opening the packing that all the parts shown in Parts list – List of spare parts the ollowing assembly steps are there. Once you are sure that this FXM 2 order No. 1621 is the case, you can start assembly. Technical data: Issue: 01.
- Page 19 Illustration Designation Dimensions Quantity Attached to ET number illustration No. Rubber ring 36-1621-28-BT Washer 17//22 36-9918-22-BT Washer 10//20 18+20 39-9989-VC Washer 8//32 39-10166 Washer 8//20 39-10018 Washer 8//16 15+22 39-9962-CR Curved washer 8//25 13+17 39-9966-CR Curved washer 8//20 39-10232-CR Wave washer 21//25 2,84+86 36-9925523-BT...
- Page 20 Illustration Designation Dimensions Quantity Attached to ET number illustration No. Crank 33-1621-17-SI Bolt M6x15 86,87+98 39-10120 Pedal axle 87+90 33-1621-18-SI Belt wheel 36-1621-21-BT Spring washer or M6 39-9865-CR Nylon nut 85+113 39-9861-VC Ball bearing 6004Z 36-1621-40-BT Motor 72+92 36-1621-41-BT Tension Cable 91+100 36-1621-42-BT Spring...
- Page 21 Assembly Instructions Step 1: Remove all the separate parts rom the packaging, lay them Attach the ront stabilizer (10) and the slideway at main rame (1). on the oor and check that all are there on the basis o the assembling steps.
- Page 22 Step 3: Assembly o the pedal tubes (9) and connection tubes (5). 5. Install the right pedal tube (9R) incl. all additionally required parts 1. Put the let pedal tube (9L) at the let connection tube (5L) and on the right hand side o the machine as described in 1.– 4. adjust the holes in the tubes so that they are aligned.
- Page 23 Step 5: Attach the computer (76) at support (2). 1. Place the computer (76) to support (2) and put the plug o connection cable (72) into the plug rom computers (76) backside. 2. Insert the plugs o pulse cables (59) into the jack o the computer (76) and attach the computer (76) to top monitor bracket o...
- Page 24 Put your oot onto the ootrest, try to put whole body weight on your oot and simultaneously cross over with your another oot on the other side ootrest and place there on the ootrest too. Now you are in the position to start your training. Use: Keep your hands in desired position on the xed handlebar.
- Page 25 RPM and Power in Watt o Level 1 - Level 24 or FXM 2 Art.-Nr. 1621 20RPM 30RPM 40RPM 50RPM 60RPM 70RPM 80RPM 90RPM 100RPM Remarks: 1. The power consumptions (Watt) are calibrated by measuring the driving speed (min-1) o axle and the braking torque (Nm).
- Page 26 Trainingscomputer Start exercising directly through pressing START/STOP-key. With UP/ DOWN (+/-) -turnkey you can adjust the resistance level. All exercise data will show on display. You are in manual program. Exercising with enter data: 1. Plug in power supply, LCD display show program choice. You can select 1 o...
- Page 27 Body Fat: SYMBOL FAT% - Low/Medium Medium Medium/high Gender Male <13% 13%-25.9% 26%-30% >30% Female <23% 23%-35.9% 36%-40% >40% Test-Recovery: 1. When pulse value display on the computer (hold handgrip), press RE- COVERY (Test) -key. Cardio mode: 2. TIME shows „0:60“ (seconds) and start counting down to “00:00”. 1.
- Page 28 Cleaning, Checks and Storage o the Ergometer Troubleshooting bike: I you cannot solve the problem with the ollowing inormation, please contact the authorized service center. 1. Cleaning Use only a less wet cloth or cleaning. Caution: Never use benzene, thinner or other aggressive cleaning agents or surace cleaning as Problem Possible Cause Solution...
- Page 29 Training instructions You must consider the ollowing actors in determining the amount o training 4. Motivation eort required in order to attain tangible physical and health benefts: The key to a successul program is regular training. You should set a fxed time and place or each day o training and prepare yoursel mentally or the 1. Intensity: training. Only train when you are in the mood or it and always have your goal The level o physical exertion in training must exceed the level o normal in view. With continuous training you will be able to see how you are progres- exertion without reaching the point o breathlessness and / or exhaustion. sing day by day and are approaching your personal training goal bit by bit. A suitable guideline or eective training can be taken rom the pulse rate. During training this should rise to the region o between 70% to 85% o the maximum pulse rate (see the table and ormular or determination and calculation o this). During the frst weeks, the pulse rate should remain at the lower end o this region, at around 70% o the maximum pulse rate. In the course o the ollo- wing weeks and months, the pulse rate should be slowly raised to the upper limit o 85% o the maximum pulse rate. The better the physical condition o the person doing the exercise, the more the level o training should be encreased to remain in the region o between 70% to 85% o the maximum pulse rate. This should be done by lengthening the time or the training and / or encreasing the level o difculty. I the pulse rate is not shown on the computer display or i or saety reasons you wish to check your pulse rate, which could have been displayed wrongly due to error in use, etc., you can do the ollowing:...
- Page 30 Sommaire 1. Aperçu des pie ces Page Che re cliente, cher client, 2. Recommandations importantes et re gles de se ´ curite ´ Page Nous vous e ´ licitons pour l’achat de ce cycle d’entra nement inte ´ rieur et 3.
- Page 31 Apre s avoir ouvert l’emballage, veuillez contro ler s’il y a toutes les pie ces conorme ´ ment a la montage. Si c’est le cas, vous pouvez FXM 2 N° de commande 1621 commencer l’assemblage. Version du : 01/ 09/ 2016 Caractéristiques techniques :...
- Page 32 Sche ma De signation Dimensions Quantite Monte sur Nume ro ET n° en mm Unite s sche ma n° Anneau en caoutchouc 36-1621-28-BT Rondelle intercalaire 17//22 36-9918-22-BT Rondelle 10//20 18+20 39-9989-VC Rondelle 8//32 39-10166 Rondelle 8//20...
- Page 33 Sche ma De signation Dimensions Quantite Monte sur Nume ro ET n° en mm Unite s sche ma n° Reve tement rondelle 36-1621-04-BT Ecrou d’axe M10x1,25 86+113 39-9820-SW Manivelle du pe dalier 33-1621-17-SI M6x15 86,87+98...
- Page 34 Instructions de montage Etape n° 1: Sortez toutes les pie ces de l’emballage, posez-les sur le sol et Montage du tube de pied avant (10) et arrie re (3) sur le cadre contro lez si rien ne manque en vous basant sur la montage de base (1).
- Page 35 Etape n° 3: Montage des logements du sabot (9) sur les tubes de connexion (5). 1. Placer le logement du sabot gauche (9 L) sur le tube de connexion 6. Inse ´ rer les roulettes (66) sur les tubes de pieds arrie re (3). Tourner (5 L) en veillant a ...
- Page 36 Etape n° 5 : Montage de l’ordinateur (76) sur le tube de support (2). 1. Branchez le ca ble de connexion (72) et les ca bles de mesure de pouls (59) du calculateur qui de ´ passe du tube de support (2) dans la prise qui se trouve au dos du calculateur (76).
- Page 37 c. Vous e tes maintenant dans la correcte position pour commencer votre entra nement. Utiliser : a. Tenez vos mains dans la position de ´ sire ´ e sur la poigne ´ e xe. b. Pe ´ dalez sur la machine en marchant sur les repose-pieds, alternant votre poids corporel sur les deux repose-pieds.
- Page 38 RPM and Power in Watt o Level 1 - Level 24 or FXM 2 Art.-Nr. 1621 20RPM 30RPM 40RPM 50RPM 60RPM 70RPM 80RPM 90RPM 100RPM Remarques : 1. La puissance consomme ´ e (en Watt) est calibre ´ e mesurant la vitesse (min-1) d’essieu et de couple (en Nm).
- Page 39 Trainingscomputer Appuyant sur la touche START/STOP. La re ´ sistance peut e tre ajuste ´ e a la touche souhaite ´ e - Tournez la touche de tours +/-. Toutes les donne ´ es de ormations actuelles sont ache ´ es. Vous e tes dans le programme manuel : Formation a ...
- Page 40 Beginner 1-4 / Advance 1-4 / Sporty 1-4 Ko rperett : Body programme de graisse 12 programmes de ormation die ´ rents pour divers ormation avec les Ici, l‘ordinateur calcule apre s avoir entre le sexe (Male = ma le / Female prols de ormation die ´...
- Page 41 re ´ cepteur de montre-bracelet existent . L’ordinateur sur vos ergome tres est un re ´ cepteur (sans e ´ metteur) pour existants cardio pouls monitor e ´ qui- pe ´ . Si vous posse ´ dez e tre d‘un tel dispositi, an que votre e ´ metteur (sangle de poitrine) peut impulsions e ´...
- Page 42 Recommandations pour l’entra nement Les acteurs ci-apre s doivent e tre pris en compte pour la de ´ termination de Un entra nement re ´ gulier est la cle de la re ´ ussite de votre programme. l’entra...
- Page 43 Inhoudsopgave 1. Overzicht van de losse delen pagina 3 - 4 Geachte klant 2. Belangrijke aanbevelingen en veiligheidsinstructies pagina 43 Wij willen u van harte gelukwensen met de aanscha van uw hometrainer en 3. Stuklijst-reserveonderdelenlijst, pagina 44 - 46 hopen dat u hier veel plezier aan zult beleven. Neem a.u.b. de instructies en aanwijzingen uit deze montage- en bedieningshandleiding in acht en Technische specicatie volg deze op.
- Page 44 Stuklijst - reserveonderdelenlijst Controleer na het openen van de verpakking a.u.b. aan de hand van de montage o alle onderdelen aanwezig zijn. Wanneer dit het FXM 2 best.nr. 1621 geval is, kunt u met de montage beginnen. Technische specifcatie: Stand: 01. 09. 2016 Wanneer een bepaald onderdeel niet in orde is o...
- Page 45 Abeeldings- Beschrijving Ametingen Aantal Gemonteerd aan ET-nummer stuks abeeldingsnr. Rubberen ring 36-1621-28-BT Schij gegolt 17//22 36-9918-22-BT Onderlegplatje 10//20 18+20 39-9989-VC Onderlegplatje 8//32 39-10166 Onderlegplatje 8//20 39-10018 Onderlegplatje 8//16 15+22 39-9962-CR Onderlegplatje gebogen 8//25 13+17 39-9966-CR Onderlegplatje gebogen 8//20 39-10232-CR Schij gegolt 21//25 2,84+86 36-9925523-BT...
- Page 46 Abeeldings- Beschrijving Ametingen Aantal Gemonteerd aan ET-nummer stuks abeeldingsnr. Ronde bekleiding 36-1621-04-BT As moer M10x1,25 86+113 39-9820-SW Krukarm 33-1621-17-SI Schroe M6x15 86,87+98 39-10120 Krukarm as 87+90 33-1621-18-SI Aandrijschij 36-1621-21-BT Veering voor M6 39-9865-CR Zelborgende moer 85+113 39-9861-VC Kogellager 6004Z 36-1621-40-BT Stelmotor 72+92 36-1621-41-BT...
- Page 47 Montagehandleiding Neem alle losse onderdelen uit de verpakking, leg deze op Stap 1: de grond en controleer aan de hand van de montage staps Montage van de voorste en achterste voet (3+10) aan het uit de montageen bedieningshandleiding o alle onderdelen basisrame (1).
- Page 48 Stap 3: Montage van de voetvats (9) en de verbindingsbuis (5). 1. Stopt u het eind van de linkse voetsteun (9L) op de verbindings- 5. De rechter voetvat (9R) incl alle toebehorende delen aan de buis (5L). De openingen in de delen zo uitlijnen dat ze precies rechter zijde van het apparaat, precies zoals in 1-4 beschreven, boven elkaar liggen.
- Page 49 Stap 5: Montage van de computer (76) aan de steunbuis (2). 1. Steek de stekker van de verbindingskabel (72), en polska- bels (59) die aan de bovenzijde uit de stuurbuis (2) steekt, in de bus aan de achterzijde van de computer (76). 2.
- Page 50 te brengen en zwaai tegelijkertijd het andere been over het apparaat heen en plaats uw voet ook daar op de voetsteun. c. U bevindt zich nu in de juiste houding om de training te beginnen. Gebruik: a. Houdt uw handen op de gewenste positie op het vaste stuur. b.
- Page 51 RPM and Power in Watt o Level 1 - Level 24 or FXM 2 Art.-Nr. 1621 20RPM 30RPM 40RPM 50RPM 60RPM 70RPM 80RPM 90RPM 100RPM Opmerkingen: 1. De energieconsumptie (Watt) wordt gemeten door de trapsnelheid te meten (min-1) van de as en de torsie (Nm).
- Page 52 Trainingscomputer Start de training door op de START/STOP-toets zonder gebruiker selectie. De weerstand kan worden aangepast naar wens draai aan de +/- -draai- toets. Alle huidige trainingsgegevens worden weergegeven. Je bent in de handmatige programma: Trainen met specifcatie van gegevens: 1.
- Page 53 Lichaamsvet: Icoon VET% - Laag Laag/Middelen Middelen Middelen/hoog Gender Male <13% 13%-25.9% 26%-30% >30% Female <23% 23%-35.9% 36%-40% >40% FITNESS TEST: Na de training met hartslagmeting, drukt u op de Test -toets. Voor het pro- gramma goed te laten werken, plaats beide handen op de polssensoren Cardio polsslag programma‘s: tijdens de tijd telt een minuut en vervolgens een Fitness score van F1 tot Er zijn 4 polsslag programma‘s voor verschillende trainingsbelasting.
- Page 54 Reiniging, onderhoud en opslag van de Ergometer: Fixes: Als u niet kunt oplossen met behulp van de genoemde storing 1. Reiniging inormatie, kunt u contact opnemen met uw dealer o Fabrikant. Gebruik alleen een vochtige doek voor het reinigen. Probleem Mogelijke oor- Oplossing Let op: Gebruik nooit benzeen, thinner o...
- Page 55 Trainingshandleiding o algemene gymnastische oeenen in onze downloadarea onder www. christopeit-sport.com De onderstaande actoren moeten in acht worden genomen bij het bepalen van de benodigde training voor het bereiken van een merkbare verbetering 4. Motivatie van uw guur en gezondheid: De sleutel tot een succesvol programma is een regelmatige training.
- Page 56 Обзор содержания Уважаемые покупательницы и покупатели! 1. Важные рекомендации и указания Поздравляем Вас с покупкой тренировочного снаряда для домашних по безопасности ctp. занятий спортом и желаем Вам самых приятных впечатлений. 2. Обзор отдельных деталей стр. Следуйте, пожалуйста, указаниям и инструкциям нашего руководства 3.
- Page 57 Сняв упаковку, проверьте по списку, все ли детали на месте. Если все в порядке, то можно начинать сборку. Если какой-нибудь FXM 2 № заказа 1621 агрегат не в порядке или отсутствует, обращайтесь к нам: Технические характеристики По состоянию на 01. 09. 2016 Эргометр...
- Page 58 № картинки Наименование Размер, мм К-во Монтируется на № ET-№ штук Резиновое кольцо 36-1621-28-BT Гнутая подкладная шайба 17//22 36-9918-22-BT Шайба 10//20 18+20 39-9989-VC Шайба 8//32 39-10166 Шайба 8//20 39-10018 Шайба 8//16 15+22 39-9962-CR Изогнутая шайба 8//25 13+17 39-9966-CR Изогнутая шайба 8//20 39-10232-CR Гнутая...
- Page 59 № картинки Наименование Размер, мм К-во Монтируется на № ET-№ штук Обшивка круглая 36-1621-04-BT Ось Гайка M10x1,25 86+113 39-9820-SW Крепление педали 33-1621-17-SI Винт M6x15 86,87+98 39-10120 Ось кривошипа 87+90 33-1621-18-SI Шайба кривошипа 36-1621-21-BT Шайба пружинная для M6 39-9865-CR Гайка самострахующаяся 85+113 39-9861-VC Подшипник...
- Page 60 Руководство по монтажу Пожалуйста, выньте все отдельные части из коробки и Шаг 1: проверьте их на комплектность в соответствии со спец- Монтаж эадняя ножек (3) и передняя ножка (10) на основную ификацией. Примите во внимание, что некоторые части раму (1). предварительно...
- Page 61 Шаг 3: Монтаж рычаг ноги (9) на соеденительная труба (5). 1. Приставьте правый фиксатор стопы (9R) на правый ножной 5. Смонтируйте левый фиксатор стопы (9L) на левый ножной рычаг (5R) таким образом, чтобы отверстия располагались рычаг (5L), как описано выше в пунктах 1-4. друг...
- Page 62 Шаг 5: Монтаж компьютера (76) на опорную трубу (2). 1. Вставьте штекер компьютерного кабеля (72), и кабель пульса (59) выходящий из опорной трубы руля (2), в находящееся на обратной стороне компьютера (76) гнездо. 2. Вставьте компьютер (76) в соответствующее крепление на опорной...
- Page 63 Садиться и спускаться с тренажера: Садиться на тренажер: Встаньте рядом с тренажером и возьмитесь за поручни. Установите ближайшую педаль в нижнюю позицию и поставьте на нее ступню так, чтобы она находилась в надежном положении на педали. Перекиньте другую ногу на противоположную сторону и ноставьте ступню на педаль. Крепко...
- Page 64 Обороты/минута и показатель в ваттах отступени 1 до ступени 24 для FXM 2 № заказа 1621 20RPM 30RPM 40RPM 50RPM 60RPM 70RPM 80RPM 90RPM 100RPM Замечание: 1. Показатель мощьности в ваттах расчитывается из количества оборотов оси кривошипа в минуту (UPM) и тормозного момента (Nm).
- Page 65 КОМПЬЮТЕР Посредством нажатия на клавишу START/STOP / СТАРТ/СТОП начни- те тренировку. С помощью клавиш +/- возможно изменение степени нагрузки. Производится индикация всех актуальных показателей. Вы находитесь в программе ручной тренировки. Тренировка с вводом показателей: 1. Вставьте штекер блока питания в розетку. После ввода персональ- ных...
- Page 66 Beginner 1-4 / Advance 1-4 / Sporty 1-4: ния пульса. Результат (символ, BMI и процент жира ) после расчета по- Вы можете выбрать одну из 12 встроенных программ с различными казателя - - - (прибл. 8 секунд) выводится на дисплей. При индикации профилями...
- Page 67 Чистка, техническое обслуживание и хранение Исправление неполадок: Если проблема не может быть решена с помощью нижестоя- тренажера: щих указаний, пожалуйста, обратитесь в центр, где вы купили тренажер. 1. Чистка Для чистки используйте чистую влажную салфетку. Внимание: Никогда не используйте для чистки бензин, разбавитель или Проблема...
- Page 68 ИНСТРУКЦИЯ ПО ТРЕНИРОВКЕ Мотивация Вы должны учитывать следующие факторы, чтобы определить Ключевым моментом успеха программы являются регулярные верные параметры тренировок для достижения ощутимых физических тренировки. Вам следует установить конкретное время и место на результатов и пользы для здоровья. каждый день для тренировок и внутренне подготовить себя к ним. Тренируйтесь...
Need help?
Do you have a question about the FXM 2 and is the answer not in the manual?
Questions and answers