Table of Contents
Advertisement
Available languages
Available languages
Quick Links
Heimsport-Trainingsgera t
Montage- und Bedienungsanleitung u r
Montage- en bedieningshandleiding voor
Bestellnummer 1960
Инструкция по монтажу и эксплуатации
Rudergera t
RW 500
D
GB
Notice de montage et d'utilisation du
Bestell-Nr. 1960
No. de commande 1960
NL
Notice de montage et d'utilisation du
No. de commande 1960
RU
№ заказа 1960
1
F
Advertisement
Chapters
Table of Contents

Related Manuals for Christopeit Sport RW 500


Summary of Contents for Christopeit Sport RW 500
- Page 1 Heimsport-Trainingsgera t Rudergera t RW 500 Montage- und Bedienungsanleitung u r Notice de montage et d’utilisation du Bestell-Nr. 1960 No. de commande 1960 Montage- en bedieningshandleiding voor Notice de montage et d’utilisation du Bestellnummer 1960 No. de commande 1960 Инструкция...
-
Page 2: Table Of Contents
Inhaltsu bersicht Contents Page 1. Wichtige Empehlungen und Sicherheitshinweise Seite 2 4. Montageanleitung mit Explosionsdarstellungen Seite 3 - 4 6. Computeranleitung Seite 5 5. Bedienungs- und U bungsanleitung Sommaire Page Seite 5 7. Reinigung, Lagerung, Wartung, Sto rungsbeseitigung, Garantiebestimmungen Seite 8. Trainingsanleitung, Auwa rmu bungen (Warm Up) Seite 7 Inhoudsopgave Pagina 26... -
Page 3: Montageanleitung Mit Explosionsdarstellungen
Montageanleitung Entnehmen Sie alle Einzelteile der Verpackung, legen diese au den Boden und kontrollieren die Vollza hligkeit grob an- hand der Montageschritte dieser Montage- und Bedienungs- anleitung. Zu beachten ist dabei, dass einige Teile direkt mit dem Grundgestell verbunden sind und vormontiert wurden. Des Weiteren sind auch einige andere Einzelteile schon zu Einheiten Zusammengeu ... - Page 4 Schritt 4: Montage des Sitzrahmens (3) am Grundrahmen (1). 1. Fu hren Sie den Sitzrahmen (3) zur entsprechenden Aunahme am Grundrahmen (1) und verbinden sie das Sensorkabel (41) mit dem Verbindungskabel (42). 2. Legen Sie den Sitzrahmen (3) in die Aunahme am Grundrah- men (1) ein, sodass die Bohrungen des Sitzrahmens (3) und des Grundrahmens (1) fuchten und schrauben Sie den Sitzrahmen (3) mittels der Schraube M10x105 (11), Unterlegscheiben (22)
-
Page 5: Computeranleitung
Computeranleitung 6. „SCAN“-Funktion: Wird diese Funktion ausgewa hlt, werden im ortlauenden Wechsel von ca. 5 Sekunden die aktuellen Werte aller Funktionen nacheinander angezeigt. Der mitgelieerte Computer bietet den gro ßten Trainingskomort. Jeder trainingsrelevante Wert wird in einem entsprechenden Sichtenster ange- 1. -
Page 6: Sto Rungsbeseitigung, Garantiebestimmungen
Trainingsfa che in mm Freifa che in mm (u r Gera t und Benutzer) (Trainingsfa che und Sicherheitsfa che (umlauend 60cm)) Reinigung, Wartung und Lagerung des Heimtrainers: Sto rungsbeseitigung: Wenn Sie die Funktionssto rung nicht anhand der augeu hrten 1. -
Page 7: Trainingsanleitung, AuWa Rmu Bungen (Warm Up)
Trainingsanleitung Um spu rbare ko rperliche und gesundheitliche Verbesserungen zu erreichen, Weitere Inormationen zum Thema Auwa rmu bungen, Dehnungsu bungen mu ssen u r die Bestimmung des erorderlichen Trainingsauwandes die oder allgemeine Gymnastiku bungen fnden Sie in unserem Downloadbereich olgenden Faktoren beachtet werden: unter www.christopeit-sport.net 4. Motivation 1. Intensita t: Die Stue der ko rperlichen Belastung beim Training muß den Punkt der Der Schlu ... - Page 8 RW 500 Art.-Nr.1960 Internet Service- und Ersatzteilportal: Technische Daten: Stand: 01.10.2019 www.christopeit-service.de RW 500 ist ein Rudergera t u r Ganzko rpertraining. Adresse: Top-Sports Gilles GmbH Eektives Training von Oberko rper, Schultern, Ru cken, Friedrichstr. 55...
- Page 9 Abb- Bezeichnung Abmessung Menge Montiert an ET-Nummer Stu ck Abb-Nr. Fußschale 36-1260-10-BT Kabelschutz 36-1660-15-BT Magnet 36-1960-14-BT Endstopen 36-1260-21-BT Sensor 36-1960-15-BT Verbindungskabel 36-1960-16-BT Schraubenkappe 36-9988108-BT Pulsanzeige 44.b+45 36-1860-03-BT Pulsanzeigengeha use 44.a+45 36-1860-04-BT Pulssensor mit Kabel 36-1860-08-BT Schraube 3.5x20 44a+44b 36-1860-07-BT Mutter M10x1...
-
Page 10: Important Recommendations And SaEty InOrmation
Dear customer, Contents We congratulate you on your purchase o this home training sports unit and hope that we will have a great deal o pleasure with it. Please take heed o the enclosed notes and instructions and ollow them closely concerning 1. Important Recommendations and Saety Inormation Page 10 assembly and use. 2. Assembly Instructions With Exploded Diagrams Page 11 - 12 Please do not hesitate to contact us at any time i you should have any questions. 3. Computer instructions Page 13 4. Operating and exercising instructions Page 13 Top-Sports Gilles GmbH 5. -
Page 11: Assembly Instructions With Exploded Diagrams
Assembly Instructions Remove all the separate parts rom the packaging, lay them on the oor and check that all are there on the basis o the packing list in these instructions or assembly and use. Please note that a number o parts have been connected directly to the main rame and preassembled.In addition, there are seve- ral other individual parts that have been attached to separate units. - Page 12 Step 4: Attach the seat rame (3) at main rame (1). 1. Place the seat rame (3) against the main rame (1) and connect the sensor cable (41) with connection cable (42). 2. Place the seat rame (3) into the holder o main rame (1), so that the holes pattern and screw the seat rame (3) at main rame (1) loosely by using screw M10x105 (11), washer (22) and nut (18).
-
Page 13: Computer Instructions
Computer instructions 1. Key: Pressing this key once briefy makes it possible to change rom one unction to another. The currently selected unction is indicated by an icon in the The supplied computer allows the most convenient training. Every value respective window. -
Page 14: Cleaning, Storage, Checks, Troubleshooting
Training area in mm Free area in mm (or home trainer and user) (Training area and security area (rotating 60cm)) Cleaning, Checks and Storage o the home bike: Troubleshooting I you cannot solve the problem with the ollowing inormation, 1. Cleaning please contact the authorized service center. -
Page 15: Training Instructions, Warm Up Exercises (Warm Up)
Training instructions You fnd urther inormation on the subject warm-up exercises, stretch exer- cises or general gymnastics exercises in our download area under www. christopeit-sport.net You must consider the ollowing actors in determining the amount o training eort required in order to attain tangible physical and health benefts: 4. Motivation The key to a successul program is regular training. You should set a fxed 1. Intensity: time and place or each day o training and prepare yoursel mentally or the The level o physical exertion in training must exceed the level o normal training. Only train when you are in the mood or it and always have your goal exertion without reaching the point o breathlessness and / or exhaustion. in view. With continuous training you will be able to see how you are progres- A suitable guideline or eective training can be taken rom the pulse rate. sing day by day and are approaching your personal training goal bit by bit. During training this should rise to the region o between 70% to 85% o the maximum pulse rate (see the table and ormular or determination and calculation o this). During the frst weeks, the pulse rate should remain at the lower end o this region, at around 70% o the maximum pulse rate. In the course o the ollo- wing weeks and months, the pulse rate should be slowly raised to the upper limit o 85% o the maximum pulse rate. The better the physical condition o the person doing the exercise, the more the level o training should be encreased to remain in the region o between 70% to 85% o the maximum pulse rate. This should be done by lengthening the time or the training and / or encreasing the level o difculty. -
Page 16: Parts List
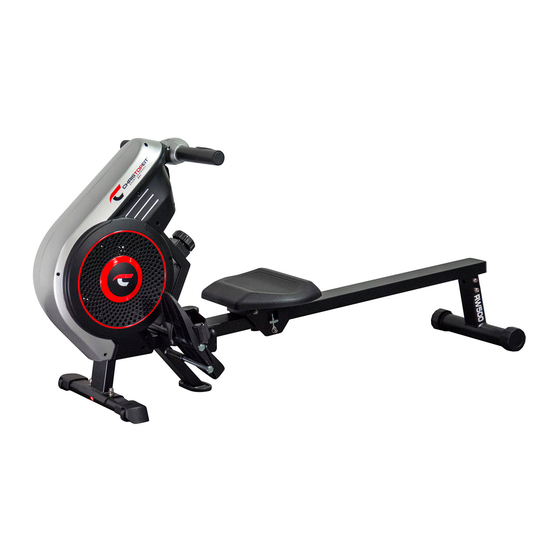
RW 500 Order No. 1960 Internet service- and spare parts data base: www.christopeit-service.de Technical data: Issue: 01.10.2019 Top-Sports Gilles GmbH RW 500 is ull body workout rowing machine. Friedrichstr. 55 Eective training o upper body, shoulders, back, 42551 Velbert arms and legs. Teleon: +49 (0) 20 51 - 6 06 70 Great eect with little eort... - Page 17 Pedal 36-1260-10-BT Cable save 36-1660-15-BT Round magnet with bracket 36-1960-14-BT End cap 36-1260-21-BT Sensor wire 36-1960-15-BT Extension wire 36-1960-16-BT Ball cap 36-9988108-BT Pulse display 44.b+45 36-1860-03-BT Pulse display housing 44.a+45 36-1860-04-BT Pulse sensor 36-1860-08-BT Cross head screws 3.5x20 44a+44b 36-1860-07-BT M10x1 39-9820 Flywheel axle...
- Page 18 Sommaire Che ` re cliente, cher client, Nous vous e licitons pour l’achat de ce cycle d’entra nement inte rieur et nous vous souhaitons beaucoup de plaisir avec. 1. Recommandations importantes et re ` gles Veuillez respecter et suivre les indications et les instructions de montage et d’emploi.
-
Page 19: De Se Curite
Instructions de montage Sortez toutes les pie ` ces de l’emballage, posez-les sur le sol et contro lez si rien ne manque en vous basant sur la montage etape de cette Notice de montage et d’utilisation. Il aut tenir compte du ait que certaines pie ` ces ont e ... - Page 20 E tape n° 4: Montage du cadre de selle (3) sur le cha ssis (1). 1. Inse rez le cadre de selle (3) sur le cha ssis (1) et raccordez le ca ble du palpeur (42) au ca ble de connexion (42). 2.
-
Page 21: Manuel D'utilisation Du Calculateur E Lectronique
Mode d’emploi de l‘ordinateur 6. Fonction „SCAN“: Si l’on se lectionne cette onction, les valeurs actuelles de l’ensemble des onctions sont ache es les unes apre ` s les autres toutes les 5 secondes- L’ordinateur livre vous ore le plus grand conort d‘entra nement. Chaque environ. -
Page 22: Notice De Montage Avec E Corche S
Centre d‘entra nement en mm Surace libre en mm (Pour appareil et l‘utilisateur) (Zone de la ormation et de la zone de se curite (60cm rotation)) Nettoyage, Entretien et stockage de l‘exercice: Corrections: Si vous ne pouvez pas re soudre en utilisant les inormations 1. -
Page 23: Recommandations Pour L'entra Nement
Recommandations pour l’entra nement aux exercices de distension ou les exercices de gymnastique ge ne raux dans notre domaine de te le chargement sous le www.christopeit-sport.net 4. Motivation Les acteurs ci-apre ` s doivent e tre pris en compte pour la de termination de Un entra... -
Page 24: Nomenclature
Service- Internet et les pie ces de rechange base de donne es www.christopeit-service.de RW 500 est un rameur pour l’entra nement de tout le corps. Top-Sports Gilles GmbH Entra nement efcace des muscles du haut du corps, des e ... - Page 25 Sch. n° De signation Dimensions Quantite Monte sur Nume ro ET sche ma n° Pe dalier 36-1260-10-BT Reve tement de ca ble 36-1660-15-BT Aimant 36-1960-14-BT Prise ronde 36-1260-21-BT Capteur 36-1960-15-BT Ca ble de connexion 36-1960-16-BT Capuchon de vis 36-9988108-BT...
-
Page 26: Friedrichstr. 55
Inhoudsopgave Geachte klant Wij willen u van harte gelukwensen met de aanscha van uw hometrainer en hopen dat u hier veel plezier aan zult beleven. Neem a.u.b. de instructies 1. Belangrijke aanbevelingen en veiligheidsinstructies pagina 26 en aanwijzingen uit deze montage- en bedieningshandleiding in acht en volg deze op. - Page 27 Montagehandleiding Neem alle losse onderdelen uit de verpakking, leg deze op de grond en controleer aan de hand van de montage staps uit de montage en bedieningshandleiding o alle onderdelen aanwezig zijn. Hierbij moet er op worden gelet dat een aan- tal onderdelen rechtstreeks met het onderstel zijn verbonden en voorgemonteerd zijn.
- Page 28 Stap 4 : Montage van de zadelrame (3) op het basisrame (1). 1. Plaatz de zadelrame (3) aan de basisrame (1) en verbind de stekkers van den sensorkabel (41) and verbindingskabel (42). 2. Monteer de zadelrame (3) op het basisrame (1). Gebruik daar¬voor een schroe...
- Page 29 Computerhandleiding 6. „SCAN“-unctie: Wanneer deze unctie wordt geselecteerd, worden in een voortdurende wisseling in ca. 5 seconden de actuele waarden van alle uncties na elkaar De bijgeleverde computer zorgt voor een uitstekend trainingscomort. aangegeven. Elke trainingsrelevante waarde wordt in een apart venster weergegeven. Vana...
- Page 30 Oeenterrein in mm Oeenterrein in mm (Voor de apparaat-en (Voor de apparaat-en gebruikers) gebruikers) Reiniging, onderhoud en opslag van de hometrainer: Fixes: Als u niet kunt oplossen met behulp van de genoemde storing 1. Reiniging inormatie, kunt u contact opnemen met uw dealer o Fabrikant. Gebruik alleen een vochtige doek voor het reinigen.
- Page 31 Trainingshandleiding 4. Motivatie De sleutel tot een succesvol programma is een regelmatige training. U kunt het beste een vaste tijd en plaats per trainingsdag vaststellen en u ook De onderstaande actoren moeten in acht worden genomen bij het bepalen geestelijk op de training voorbereiden. Train alleen met een goed humeur van de benodigde training voor het bereiken van een merkbare verbetering en houd uw doel voor ogen.
- Page 32 RW 500 best.nr. 1960 u zich wenden tot: Technische specifcatie: Stand: 01. 10..2019 Internet service- en onderdelen data base: RW 500 is een roeitrainer voor het hele lichaam. www.christopeit-service.de Eectieve training van bovenlichaam, schouders, rug, armen en benen Top-Sports Gilles GmbH Friedrichstr. 55 42551 Velbert •...
- Page 33 Ab- Beschrijving Ametingen Menge Montiert an ET-Nummer Stu ck Abb-Nr. Voetschaal 36-1260-10-BT Kabel dop 36-1660-15-BT Magneet 36-1960-14-BT Einddop 36-1260-21-BT Sensor 36-1960-15-BT Verbindingskabel 36-1960-16-BT Schroe dop 36-9988108-BT Polsslagweergave 44.b+45 36-1860-03-BT Polsslagweergave behuizing 44.a+45 36-1860-04-BT Polssensor met kabel 36-1860-08-BT Schroe 3.5x20 44a+44b 36-1860-07-BT Moer...
- Page 34 Обзор содержания Уважаемые покупательницы и покупатели! Поздравляем Вас с покупкой тренировочного снаряда для домашних Важные рекомендации и указания занятий спортом и желаем Вам самых приятных впечатлений. по безопасности ctp. Следуйте, пожалуйста, указаниям и инструкциям нашего руководства 2. Руководство по монтажу стр.
- Page 35 Руководство по монтажу Удалите все отдельные части упаковки, положите их на пол и проверьте их комплектность примерно в соответствии с шагами по установке, приведенными в настоящей инструкции по монтажу и эксплуатации. Следует отметить, что некоторые детали напрямую соединены с базовой рамой и предварительно собраны. Кроме...
- Page 36 Шаг 4: Монтаж рамы сиденья (3) на раме (1). 1. Положите раму сиденья (3) рядом с основной рамой (1) и подключите кабель датчика (41) к соединительному ка- бе¬лю (42). 2. Вставьте рамку сиденья (3) в держатель на основной рамой (1), так, чтобы отверстия каркаса сиденья (3) и основной рамой...
- Page 37 Описание компьютера для Клавиша: Коротким однократным нажатием клавиши можно переходить от одной функции к другой, то есть выбирать соответствующую функцию. Входящий в комплект оборудования компьютер обеспечит Вам Каждое значение высвечивается в соответствующем окошке. максимальный комфорт во время тренировки. Любой важный для тренировочного...
- Page 38 Область обучения в мм Бесплатный поверхность в мм (Для устройства и пользователя) (Площадь Обучение и зоны безопасности (вращающиеся 60см)) Чистка, техническое обслуживание и хранение Исправление неполадок: Если проблема не может быть решена с помощью нижестоящих тренажера указаний, пожалуйста, обратитесь в центр, где вы купили тре- нажер.
- Page 39 ИНСТРУКЦИЯ ПО ТРЕНИРОВКЕ Вы находите следующие сведения о теме Упражнения на подогреве, упражнениях на растяжение мышц или общие упражнения гимнастики в нашей области загрузки под www.christopeit-sport.net Вы должны учитывать следующие факторы, чтобы определить Мотивация верные параметры тренировок для достижения ощутимых физических Ключевым...
- Page 40 агрегат не в порядке или отсутствует, обращайтесь к нам: Интернет-сервис и запасные части портала: Технические характеристики По состоянию на 01.10.2019 www.christopeit-service.de RW 500 - это гребной тренажер для тренировки всего тела. Эффективная тренировка верхней части тела, плеч, спины, Top-Sports Gilles GmbH рук и ног...
- Page 41 № Наименование Размеры в Кол-во Монтируется ЕТ-№ мм Фиксатор стопы 36-1260-10-BT Кабельная защита 36-1660-15-BT Магнит 36-1960-14-BT Заглушка 36-1260-21-BT Датчик 36-1960-15-BT Соединительный кабель 36-1960-16-BT Колпачок для болта 36-9988108-BT Дисплей 44.b+45 36-1860-03-BT Корпус дисплея 44.a+45 36-1860-04-BT Датчик пульса с кабелем 36-1860-08-BT Болт 3.5x20 44a+44b 36-1860-07-BT...
- Page 44 Service / Hersteller Bei Reklamationen, notwendigen Ersatzteilbestellungen oder Reparaturen wenden Sie sich bitte an unsere Service Abteilung. Internet Service- und Ersatzteilportal: © by Top-Sports Gilles GmbH www.christopeit-service.de D-42551 Velbert (Germany) Service: Top-Sports Gilles GmbH Tel.: +49 (0)2051/6067-0 Friedrichstrasse 55 info@christopeit-sport.com Fax: +49 (0)2051/6067-44 D - 42551 Velbert http://www.christopeit-sport.com...
Need help?
Do you have a question about the RW 500 and is the answer not in the manual?
Questions and answers