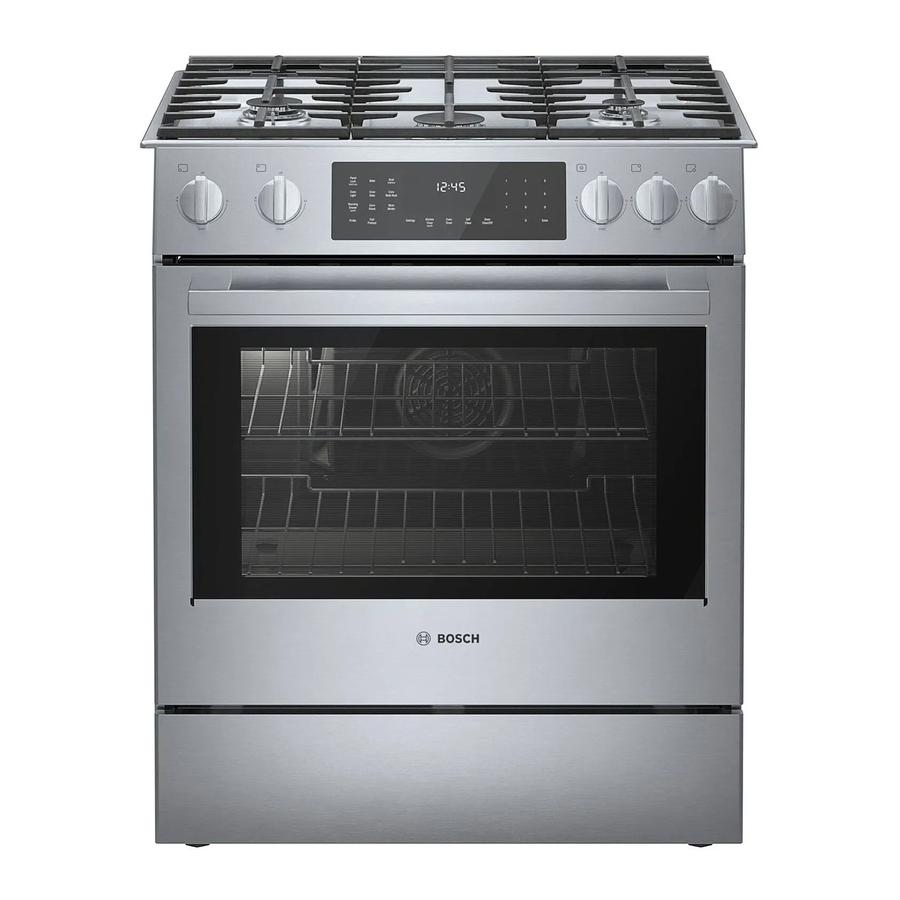
Bosch HDIP056U, HDIP056C, HDI8056U, HDI8056C - Dual Fuel Slide-In Oven 30" Manual
- User manual (84 pages) ,
- Assembly instructions manual (60 pages) ,
- Installation instructions manual (24 pages)
Advertisement
- 1 Familiarizing yourself with your appliance
- 2 Accessories
- 3 Before using for the first time
-
4
Oven operation
- 4.1 Setting the heating mode and temperature
- 4.2 Turning the oven off
- 4.3 Temperature range by heating mode
- 4.4 Heating time limitation
- 4.5 Fast preheat
- 4.6 Meat probe
- 4.7 Turning the panel lock on or off
- 4.8 Kitchen timer
- 4.9 Oven timer
- 4.10 Sabbath mode
- 4.11 Basic settings
-
4.12
General tips for heating modes
- 4.12.1 How to use bake mode
- 4.12.2 How to use convection bake mode
- 4.12.3 How to use convection multi-rack/true convection mode
- 4.12.4 How to use pizza mode
- 4.12.5 How to use roast mode
- 4.12.6 How to use convection roast mode
- 4.12.7 How to use convection broil mode
- 4.12.8 How to use proof mode
- 4.12.9 How to use warm mode
- 4.13 Getting the best results
- 5 Cooktop operation
- 6 Warming drawer operation
- 7 Cleaning and maintenance
- 8 Oven troubleshooting
- 9 Cooktop troubleshooting
- 10 Customer service
-
11
IMPORTANT SAFETY INSTRUCTIONS
- 11.1 Safety definitions
- 11.2 General information
- 11.3 Intended use
- 11.4 Restriction on user group
- 11.5 Safe use
- 11.6 Child safety
- 11.7 Gas safety
- 11.8 Food safety
- 11.9 Cleaning function
- 11.10 Proper installation and maintenance
- 11.11 Conversion to Liquified Petroleum gas
- 11.12 High altitude installation
- 11.13 State of California Proposition 65 Warnings
- 12 Preventing material damage
- 13 Documents / Resources
Familiarizing yourself with your appliance
Appliance
Here you can find an overview of the parts of your appliance.

 | Cooktop control panel |
 | Oven control panel |
 | Oven vent |
 | Socket for meat probe |
 | Oven rails |
 | Oven cavity bottom |
 | Door latch |
 | Broil element |
 | Convection fan |
 | Warming drawer |
Oven cavity
Here you can find information about the features of the oven cavity.

Do not place food directly on the oven cavity bottom.
Convection fan
Convection baking uses a fan to circulate the oven's heat evenly and continuously within the oven.
This improved heat distribution allows for even cooking and excellent results using multiple racks at the same time.
Cooling fan
The cooling fan runs during all cooking modes.
Familiarizing yourself with your appliance
The fan can be heard when it is running, and warm air may be felt as it is released from the oven vent. The fan may also run after the oven is off.
Cooktop burners

| Number | Part | Maximum output of burner |
| Burner grates | Always position burner grates as shown. |
 | Back left burner | 5,000 BTU/hr 1.464 kW |
 | Center burner | 800 Series, wok burner:
Benchmark Series, dual wok burner:
|
 | Back right burner | 5,000 BTU/hr 1.464 kW |
 | Front right burner | 15,000 BTU/hr 4.392 kW |
 | Front left burner | 10,000 BTU/hr 2.928 kW |
Control panels
You can use the control panel to configure all functions of your appliance and to obtain information about the operating status.
Note: This User Manual covers several models. Your model may have some but not all of the features or displays listed.
Oven control panel

| Display | Depending on your oven model the display shows information on the currently active modes and features. In standby mode the display shows the time of day. |
| Touch keys | Touch keys are touch sensitive areas. You only have to press on the keys lightly to operate them. The touch keys will not work if you press several of them at once, such as when cleaning them. |
| Numeric keypad | Used for entering numeric values, such as timer values. |
Basic features
Here you can find information on the basic operating features of your oven.
| Touch key | Function |
| Oven Clear/Off | Clear entered value / turn appliance off |
| Enter | Confirm entered values / Start heating mode |
| Settings | Access the basic settings |
| Panel Lock | Activate or deactivate the panel lock  is displayed. is displayed. |
| Oven Light | While the oven door is closed, press the oven light keypad to turn the light on and off. When the oven door is opened, the oven light will automatically turn on. During self clean the oven light cannot be turned on. |
| Warming Drawer | Activating the warming drawer |
Heating modes and functions
Here you can find a list of heating modes and other features of your appliance.
| Touch key/Display | Display symbol | Heating mode/function | How it works and what it is used for |
| Bake |  | Bake | Cooks with dry, heated air. For a variety of foods, such as cakes, cookies, pastries, quick breads, quiche and casseroles. → "How to use bake mode" |
| Conv Bake |  | Convection bake | Similar to bake, but air is circulated by a fan at the back of the oven. Best for baked goods such as cakes, cornbread, pies, quick breads, tarts, and yeast breads. → "How to use convection bake mode" |
| Conv Multi-Rack |  | Multi-rack convection / true convection | Well suited for cooking individual serving-sized foods such as cookies and biscuits. It is also good for cooking on multiple racks (2 or 3) at the same time. Baking cookies is possible on 6 racks simultaneously. → "How to use convection multi-rack/true convection mode" |
| Broil |   | Broil high intensity Broil low intensity | Use for tender cuts of meat 1'' (2.5 mm) or less thick, poultry, browning bread and casseroles. |
| Conv Broil |  | Convection broil | Combines intense heat from upper element with fan circulation. Use for tender cuts of meat more than 1'' (2.5 mm) thick, poultry and fish. Not for browning. → "How to use convection broil mode" Press More Modes to access this mode. |
| Warm |  | Warm | Maintains a low temperature in order to keep food hot. Best for baked goods such as cakes, cornbread, pies, quick breads, tarts, and yeast breads. → "How to use warm mode" Press More Modes to access this mode. |
| Roast |  | Roast | Best suited for meats, poultry, less tender cuts of meats and roasting vegetables. → "How to use roast mode" Press More Modes to access this mode. |
| Conv Roast |  | Convection roast | Uses intense heat and air circulated by a fan. Use for tender cuts of meat and poultry and roasting vegetables. Meats are more juicy and moist than results with roast mode. → "How to use convection roast mode" |
| Proof |  | Proofing dough | Maintains the warm, non-drafty environment needed for proofing yeast leavened products. → "How to use proof mode" Press More Modes to access this mode. |
| Pizza |  | Pizza | Heat is circulated throughout the oven by the convection fan. Use for fresh or frozen pizza. → "How to use pizza mode" Press More Modes to access this mode. |
| Probe |  | Meat probe | Use to determine the internal temperature of many foods, especially meats and poultry during cooking. → "Meat probe" |
| More Modes | - | More modes | Some models have a more modes button for accessing additional heating modes. Depending on your model these may include:
|
| Fast Preheat |  | Fast preheat | Fast preheat heats the oven quicker than standard preheat. → "Fast preheat" |
| Sabbath | Sabbath | The Sabbath mode enables those of particular faiths to use their ovens on the Sabbath. → "Sabbath mode" | |
| Self Clean |  | Pyrolytic self-cleaning | The oven reaches a high temperature to burn off food soil. → "Self clean function"  The door is locked during self clean. The door is locked during self clean. |
| Oven Timer | Oven timer | The oven timer is a countdown timer which upon reaching 00:00 turns the oven off, stopping the current mode. The oven timer is used to set how long a mode will run. → "Oven timer" | |
| Kitchen Timer | Kitchen timer | The kitchen timer is a countdown timer that has no affect on oven heating. The kitchen timer is used for general kitchen timing needs. → "Kitchen timer" |
Cooktop control panel
The markings around the control knobs show the available power levels.

| Knob position | |
| OFF | Burner turned off |
 | Electronic ignition |
| HI | Highest power level |
| MED | Medium power level |
| MED LO | Lowest power level |
Burner positions
The markings next to each of the control knobs show which burner they control.
 | Front left burner |
 | Front right burner |
 | Center burner |
 | Back left burner |
 | Back right burner |
Accessories
Only use original accessories. These are designed especially for your appliance.
| Accessories | Use | |
| Wire rack |  |
|
| Telescopic rack |  | Use with heavier dishes to make placement into the oven easier. Note: Do not clean using the Self Clean function. |
| Meat probe and plug |  | The meat probe can be used to determine the internal temperature of many foods, especially meats and poultry. Notes
|
| Broiler pan and grid |  | Use for broiling and roasting. Note: Do not clean using the Self Clean function. |
| Wok ring |  |
|
Other accessories
You can purchase other accessories from our customer service, specialist retailers or online.
You will find a comprehensive range of products for your appliance in our brochures and online: www.bosch-home.com
Accessories are appliance-specific. When purchasing them, always give the exact designation (E no.) of your appliance.
You can find out which accessories are available for your appliance in our online shop or from our customer service.
Rack positions
Your oven has six rack positions. The rack positions are counted from bottom to top.
Use rack positions 1 through 6 only. DO NOT attempt to use the top guide to support an oven rack.

| Rack position | Best for |
| 6 | Broiling hamburgers and 1" (2.5 cm) steaks |
| 5 | Broiling 1½" (4 cm) steaks, toasting bread, broiling most meats, melting cheese |
| 4 | Thicker meats |
| 3 | Broiling poultry, most baked goods on a cookie sheet or baking pan using a single rack, includes frozen convenience foods, cakes, casseroles, frozen pizza |
| 2 | Small roasts or poultry, Bundt 1 cakes, pies, breads |
| 1 | Large roasts, turkey, angel food cake |
1 These marks are registered trademarks of their respective owners. All other trademarks are trademarks of BSH Home Appliances Corporation or its affiliated companies.
Safe use of oven racks
For your safety, follow these recommendations on how to use the oven racks correctly.
The oven racks and the oven cavity surfaces become very hot during cooking.
- Place oven racks in the desired positions before turning oven on.
- Always use oven mitts when the oven is warm.
- If a rack must be moved while the oven is hot, do not let oven mitts contact hot heating elements.
- Use caution when removing oven racks from the lowest rack position to avoid contact with the hot oven door.
To avoid possible injury or damage to the appliance, ensure oven rack is installed exactly per installation instructions and not backwards or upside down.
Inserting the wire rack
Requirement: You have read the recommendation on
→ "Safe use of oven racks"
- Grasp the rack firmly on both sides.
- Tilt the rack up to allow the stop into rack guide
![]()
- Bring the rack to a horizontal position and push it in the rest of the way
![]() .
.
The rack should be straight and flat, not crooked.


 .
.
Inserting the telescopic rack
Requirement: You have read the recommendation on
→ "Safe use of oven racks"
- Slide the rack in evenly until the rear of the rack is about 2'' (5 cm) from the back of the oven.
- Tilt the front of the rack up about 3/4'' (2 cm)
![]() and finish pushing the rack all the way back
and finish pushing the rack all the way back ![]()
Note: Avoid striking the oven light cover glass when pushing the rack into position.

- The back of the telescopic rack drops in to place.
- Pull the rack forward to engage the bottom of the rack onto the rear of the rack position guide.
- Lower the front of the rack to finish seating it on the rack guide. The rack should feel stable when properly seated.
- Slide the movable part of the telescopic rack in and out a few times to make sure it is able to move freely and that the non-moving part of the telescopic rack is securely anchored.

Before using for the first time
Carry out these steps before using your appliance.
- The appliance must be properly installed by a qualified service provider before use.
- Read and understand all safety precautions and information in the User Manual prior to operating.
- This User Manual covers several models. Not all features are available on all models.
Cleaning the appliance before using it for the first time
Clean the oven cavity and accessories before using the appliance to prepare food for the first time.
- Remove all packaging materials from the oven cavity. For double ovens, check both oven cavities.
- Before heating the appliance, wipe the smooth surfaces in the oven cavity with a soft, damp cloth.
- Keep the room ventilated while the appliance is heating.
- Set the heating mode and temperature.
| Heating mode | Convection bake |
| Temperature | maximum |
| Duration | 1 hour |
- Switch off the appliance after the specified cooking time.
- Wait until the oven cavity has cooled down.
- Clean the smooth surfaces with soapy water and a dish cloth.
- Clean the accessories using soapy water and a dish cloth or soft brush.
- There may be a slight odor during first uses. This is normal and will disappear.
Setting the clock
Requirement: The oven is in standby mode.
- Press Settings.
- The display shows "SET CLOCK".
- Press enter.
- Use the numeric keypad to enter the desired time.
The numbers fill in from right to left. To enter 10:45, type 1, 0, 4, 5. - Press enter.
Assembling the burner parts
- Ensure that the burner parts are clean and dry.
- Ensure that the individual parts of the burners are fitted in their exact position and are straight; otherwise, this may result in ignition problems or problems during operation.
- Fit the burner head and the burner ring in such a way that the locking catches on the lower section of the burner click into place in the corresponding recesses.


Flame characteristics
The color of the flame tells you if the gas supply is properly adjusted.
Note: Allow the appliance to operate for 4 to 5 minutes before evaluating the flame. Some yellow streaking is normal during the initial startup.
| Flame | Image | Measure |
| Completely or mostly yellow |  | Verify that the regulator is set for the correct fuel. Retest after adjustment. |
| Yellow tips on outer cone |  | Normal for LP gas |
| Soft blue |  | Normal for natural gas |
Oven operation
Here you will find out everything you need to know about operating your oven.
Setting the heating mode and temperature
- Press the button for the desired heating mode.
- The heating mode and the default temperature are displayed.
- The temperature flashes to show it can be edited.
- If desired, enter a temperature using the numeric keypad.
- Press Enter.
- The oven begins to preheat. The "preheating" is displayed and the preheat bar begins to fill up until the set temperature is reached.
Turning the oven off
- Press Oven Clear/Off.
- The oven turns off and the clock is displayed.
Temperature range by heating mode
| Heating mode | Lowest in °F (°C) | Highest in °F (°C) |
| Bake | 100 (38) | 550 (285) |
| Roast | 100 (38) | 550 (285) |
| Broil (low, high) | 450 (230) | 550 (285) |
| Warm | 150 (65) | 225 (105) |
| Proof | 85 (30) | 125 (52) |
| Convection bake | 100 (38) | 550 (285) |
| Convection multi-rack/True convection | 100 (38) | 550 (285) |
| Convection roast | 100 (38) | 550 (285) |
| Pizza | 100 (38) | 550 (285) |
| Convection broil (low, high) | 450 (230) | 550 (285) |
Heating time limitation
The maximum heating time is limited. If you forget to turn off the oven, it turns off automatically after a set period of time.
The maximum time for Sabbath mode is 74 hours. For all other heating modes the maximum allowed time is 24 hours.
| Temperature °F | Temperature °C | Max. time allowed without activity |
| 100 - 200 | 30 - 120 | 24 hours |
| 201 - 550 | 121 - 300 | 12 hours |
Fast preheat
With this function you can shorten the time the oven needs to reach the set temperature.
Fast preheat is available for the following heating modes:
- bake
- true convection / convection multi-rack
- convection bake
- convection roast
- pizza
Fast preheat is not available for the following heating modes: ¡ roast
- broil
- convection broil
- proof
- warm
Setting fast preheat
- Set the desired heating mode.
- Enter the desired temperature using the numeric keypad.
- Press Fast Preheat.
Note: If fast preheat is not allowed for the selected heating mode an error tone sounds. - To turn off fast preheat press Fast Preheat again.
Meat probe
The meat probe measures the internal temperature of the food. You can set a core temperature and the heating mode turns off automatically as soon as the set temperature is reached.
- The meat probe can be used with the heating modes bake, roast, and all convection modes, except convection broil.
- The probe function is not available when an oven timer has been set.
- You can set a temperature between 100°F (40°C) and 200°F (100°C). If you enter a temperature outside this range, an error is displayed.
- The current and target temperature of the probe are displayed in the format "105/180". The current temperature will display "<80" until the food temperature reaches 80°F.
- The probe temperature is updated in increments of 5° during the cooking process.
- Do not store the probe in the oven cavity.
Inserting the meat probe
Requirements
- Food must be completely thawed before inserting the probe into the meat.
- The probe ships with a black plastic safety cap over the pointed metal end of the probe. The cap must be removed prior to use.
- Insert the tip of the probe in the middle and thickest part of the meat or the breast for poultry. Make sure the probe is not touching fat, bone or parts of the oven or the pan.
Always use the handle of the probe for inserting and removing. - Insert the plug of the probe into the socket at the side of the oven cavity.
Setting the meat probe
Requirement:
→ "Inserting the meat probe"
- Set the desired heating mode and temperature.
- Press Probe.
![]() and "SET PROBE TEMP" is displayed.
and "SET PROBE TEMP" is displayed.- A three digit input prompt "- - -" blinks on the display.
 and "SET PROBE TEMP" is displayed.
- Set the desired core temperature with the numeric keypad.
- Press Enter.
- The current and target temperature of the probe are displayed.
- When the set probe temperature is reached, the heating mode turns off. "COOKING COMPLETE" blinks in the display. An alarm tone sounds every 10 seconds for 2 minutes.
- Press Oven Clear/Off or remove the probe to turn off the display.
- Always use the handle of the probe for inserting and removing.
- The probe becomes hot during use. Always use potholders to remove the probe.
- The display goes to standby mode.
Turning the panel lock on or off
With the panel lock you can disable all touch keys on the control panel.
Requirement: The oven is in standby mode.
- Press and hold Panel Lock for 3 seconds.
- Press and hold Panel Lock again for 3 seconds to turn off the panel lock.
- The display returns to standby mode.
Kitchen timer
The kitchen timer is a countdown timer that has no affect on oven heating.
You can set a kitchen timer value up to 99:59 hours.
Setting the kitchen timer
- Press Kitchen Timer. a 0:00 blinks in the display.
- Enter the desired timer value in H/MM format using the numeric keypad.
- Press Enter.
- The timer starts to count down.
- When the kitchen timer has counted down an alarm tone sounds for 2 minutes.
- Press Kitchen Timer to cancel the timer or to turn off the alarm tone.
Editing the kitchen timer
- Press Kitchen Timer.
- The current timer value blinks and can be edited.
- Enter the desired timer value using the numeric keypad.
- Press Enter.
Oven timer
If you set an oven timer, operation of the oven stops automatically once this time has elapsed.
Setting the oven timer
The oven timer automatically ends a heating mode after a set period of time.
Note: The oven timer is not available for the heating modes broil, convection broil, proof, or self clean.
- Set a heating mode and temperature.
- Press Oven Timer.
- Press Enter.
- Enter the desired timer value in H/MM format using the numeric keypad.
- Press Enter.
- The oven timer starts to count down.
- When the oven timer reached 0:00 the cooking mode ends and "OVEN TIMER FINISHED" is displayed.
- The oven timer alarm tone sounds every 10 seconds for 2 minutes.
Sabbath mode
The Sabbath mode enables those of particular faiths to use their ovens on the Sabbath.
- Sabbath mode is only available in bake mode.
- The temperature range may be set between 100°F (38°C) and 450°F (230°C).
- You can set a duration of up to 74 hours.
- Kitchen timer, oven timer or probe feature are not available in Sabbath mode.
- Pressing any of the buttons while the oven is in Sabbath mode will have no effect.
- If the oven light is on when Sabbath Mode is set, the light remains on. If it is off when Sabbath Mode is set, the light remains off.
Setting Sabbath mode
Requirement: No kitchen timer or oven timer is running, otherwise the display indicates that Sabbath mode is not available.
- Set Bake mode and a temperature within the allowed temperature range.
- Press Enter to start the heating mode.
If you want to use Sabbath mode for the warming drawer, set the warming drawer temperature before you continue. - Press and hold Oven Timer for 5 seconds.
- In the Sabbath mode timer the default value 74:00 hours blinks.
- Set the desired time using the numeric keypad. If you want to keep the default value you do not have to enter anything.
- Press Oven Timer.
- Sabbath mode begins. If you do not press Enter within 5 seconds Sabbath mode auto starts.
- "x" is displayed. a "x"is displayed in the temperature display.
- The timer counts down until it reaches: 00, then "x" is displayed. a The heating mode ends, but the oven stays in Sabbath mode. No changes can be made at this point.
Tip: You can change the temperature while Sabbath mode is running. Enter the desired value with the numeric keypad and press Enter. There is no visual or audible response to the input.
Canceling Sabbath mode
- Press Oven Clear/Off.
- Sabbath mode is ended.
Basic settings
You can configure your appliance to meet your needs.
Overview of the basic settings
Here you can find an overview of the basic settings and factory settings. The basic settings depend on the features of your appliance.
| Menu item | Description | Settings |
| 1 | Temperature unit |
|
| 2 | Display brightness |
|
| 3 | Volume |
|
| 4 | Clock mode |
|
| 5 | Auto convection conversion Decreases the set oven temperature by 25°F for convection bake and convection multi-rack/true convection heating modes. |
|
| 6 | Button beep Tone when a button is pressed. |
|
| 7 | Standby clock display |
|
| 8 | Language |
|
| 9 | Temperature offset Sets the temperature offset value for bake, convection bake, roast, convection roast and convection multi-rack/true convection. When an offset value is entered, the actual oven temperature is increased or decreased by this value. This feature is useful if food is either too brown or too light. | Between +/- 35°F (+/- 19°C) in 1° increments 01 |
1Factory setting (may vary according to model)
Changing the basic settings
- Press Settings.
- The display shows "SET CLOCK".
- Press Settings to enter the settings menu.
- Press Settings to cycle through the settings list.
- Press Enter to access the menu for a setting.
- Enter the desired value with the numeric keypad.
- The new value is automatically accepted as the display reverts from edit mode back to standby mode.
- Press Oven Clear/Off to leave the basic settings menu.
Oven temperature offset
The oven is calibrated to provide accurate results. This feature is useful if you prefer your foods lighter or darker.
- When an offset temperature is selected, the actual oven temperature is raised or lowered by this value.
- Do not use residential oven thermometers to evaluate oven temperatures as they will fluctuate throughout cooking.
- You can set a temperature offset from the factory baseline. Each time you enter the temperature offset in the basic settings menu, the factory baseline temperature is restored so you can set a new offset value.
Auto convection conversion
Convection bake and convection multi-rack modes require a 25°F reduction in temperature. Auto convection conversion reduces the temperature you enter automatically.
- Simply enter the package or recipe temperature when setting the mode. The control calculates the correct temperature and it is shown in the display.
General tips for heating modes
How to use bake mode
Use the bake mode to prepare a variety of food items, from pastries to casseroles.
Refer to recipe or package directions for oven temperature and baking time.
Note
- Fully preheat the oven before baking items like cakes, biscuits and breads.
- Use the convection bake function for best results when baking cookies on multiple racks.
- Allow at least 2'' (5 cm) of space between bakeware for proper air circulation.
- Dark or dull bakeware absorbs more heat than shiny bakeware, resulting in dark or over browned foods. It may be necessary to reduce oven temperature or cook time to prevent overbrowning of some foods.
- Shiny pans are recommended for cakes, cookies, and muffins.
- Do not open oven door often. Opening the door will reduce the temperature in the oven and may increase cook time.
How to use convection bake mode
Use the convection bake mode for bar cookies and breads. This mode takes advantage of the bottom heat, yielding a better crust on baked items.
The benefits of convection bake include a slight decrease in cook time and a higher dough volume, for example yeast items rise higher with this mode.
Note
- Conv Bake is the best function to use for baking cakes.
- Reduce recipe temperature by 25°F. Refer to the cooking chart.
- Place food in shallow, uncovered pans, such as cookie sheets without sides.
- If baking more than one pan on a rack, allow at least 1" to 1½'' (2.5 to 4 cm) of air space around the pan.
- Allow at least 2'' (5 cm) of space between bakeware for proper air circulation.
- For cakes use rack positions 2 and 5. Stagger pans so that one is not directly above the other.


How to use convection multi-rack/true convection mode
Use convection multi-rack or true convection for cooking individual serving-sized foods such as cookies and biscuits. It is also good for cooking on multiple racks (2 or 3) at the same time.
The benefits of convection multi-rack include even browning and time savings as a result of using multiple racks at one time.
Note
- Baking cookies is possible on 6 racks simultaneously. In this case, the baking time increases slightly.
- Reduce recipe temperature by 25°F if auto convection conversion is not activated.
- Place food in low-sided, uncovered pans such as cookie sheets without sides.
- If baking more than one pan on a rack, allow at least 1" to 1½" (2.5 to 4 cm) of air space around the pan.
- Stagger pans so that one is not directly above the other.
How to use pizza mode
Note
Follow these recommendations:
- There might be a slight decrease in baking time. Check before minimum package time.
- When baking a frozen pizza: For a crispy crust, place directly on the rack. For a softer crust, use a pizza pan.
- When proofing pizza dough, coat dough with olive oil and cover it in a bowl tightly with plastic wrap to prevent crust formation.
- If par baking handmade pizza dough, prick the dough with a fork before baking.
- If using a pizza pan, choose a dark, perforated pan for a more crisp crust and a non-perforated pan for a softer crust.
- Preheat baking stones following manufacturer's recommendations while the oven is preheating.
- Bake homemade pizzas on rack position 2 in the center of the rack.
- Follow manufacturer's directions for frozen pizza.
- The convection fan cycles on and off when using pizza mode.
How to use roast mode
Use roast mode for large cuts of meat and poultry.
Note
- Preheating the oven is not necessary.
- Use a high-sided broil pan or roasting pan. Cover dish with a lid or foil for less tender cuts of meat.
- For less tender cuts of meat, add liquids, such as water, juice, wine, bouillon or stock for flavor and moisture.
- Roasting bags and using a liquid are suitable for use in this mode.
- When roasting whole chicken or turkey, tuck wings behind back and loosely tie legs with kitchen string.
How to use convection roast mode
Use the convection roast mode for preparing tender cuts of meat and poultry. It is also suitable for roasting vegetables.
The benefits of convection roast mode include as much as 25% faster cooking than non-convection modes and rich, golden browning.
Note
- Preheating the oven is not necessary.
- Use the same temperature as indicated in the recipe.
- Check doneness early, since roasting time may decrease.
- Do not cover meat or use cooking bags.
- Use a broil pan with a rack and grid or a shallow, uncovered pan with a rack for roasting.
- Use a meat thermometer to determine the internal temperature of the meat.
- If the meat is browned to your liking, but is not yet done, foil can be placed over the meat to prevent overbrowning.
- Let meat stand covered with foil 10-15 minutes after removing it from the oven.
How to use convection broil mode
Use the convection broil mode for cooking thick, tender cuts of meat, poultry and fish. Convection broil is not recommended for browning breads, casseroles and other foods.
In addition to the benefits of standard broiling, convection broiling is faster.
Note
- Always use convection broil with the oven door closed.
- Preheat the oven for 3 to 4 minutes. Do not preheat for more than 5 minutes.
- Steaks and chops should be at least 1½" (4 cm) thick.
- Use the broil pan and grid or a deep pan with a metal rack, for broiling.
- Do not cover the broil grid with foil. It is designed to drain fats and oils away from the cooking surface to prevent smoking and spattering.
- Turn meats once during the recommended cook time.
Fish does not need to be turned. - Never use heat-proof glass, such as Pyrex; it cannot tolerate the high temperature.
How to use proof mode
Use the proof mode to raise yeast dough.
Note
- Start with a cool oven when using the proof mode.
- Allow frozen dough to thaw first.
- The ideal temperature for proofing will be maintained until the mode is turned off. Dough has proofed when it has doubled in size.
- Loosely cover the bowl or pan and use any rack that accommodates the size of the container.
- Keep the door closed and use the oven light to check the rising of the dough.
| Size | Time in min. |
| Loaf, 1 lb (4.5 kg) | 60 - 75 |
| Rolls, 0.1 lb (50 g) | 30 - 45 |
How to use warm mode
Use the warm mode to keep hot, cooked foods at serving temperature.
Food may spoil when kept warm for too long.
- Do not use the warm mode to heat cold food.
- Be sure to maintain proper food temperature. The USDA recommends holding hot food at 140°F (60°C) or warmer.
- DO NOT warm food longer than one hour.
Note
- ALWAYS start with hot food. DO NOT use this mode to heat cold food other than for crisping crackers, chips, and dry cereal.
- Serving dishes, plates, and cups may be kept warm with this mode.
- Foods that must be kept moist should be covered with a lid or aluminum foil.
- Aluminum foil may be used to cover food. Use only heat-safe dishes.
- DO NOT open the oven door unnecessarily. Opening the door will reduce the temperature of the oven.
- When keeping cooked food warm, allow time for the oven to preheat before placing the item in the oven.
Getting the best results
- Minimize opening the oven door.
- Use the rack position recommended by the recipe.
- Use the bakeware recommended in the recipe.
- Store pans outside the oven. An extra pan without food affects the browning and cooking.
- The type of pan used affects the browning.
- For tender, golden brown crusts, use light non-stick/ anodized or shiny metal pans.
- For brown crisp crusts, use dark non-stick, anodized or dark, dull metal pans or glass bakeware. These may require lowering the bake temperature 25°F.
Preheating the oven
- Most cooking times in recipes are designed for a preheated oven and require that the oven already be at a certain temperature before cooking starts. Refer to your recipe for preheating recommendations.
- Preheating time depends on the temperature setting and the number of racks in the oven.
Bakeware type
- Metal bakeware with or without a non-stick finish, heatproof glass, glass-ceramic, pottery, or other utensils are suitable for the oven.
- Suitable cookie sheets have a small lip on one side. Heavy sheets or those with more than one side may affect the baking time.
Pan placement
- Allow at least 1'' (2.5 cm) of space between the pans and the oven walls so heat can circulate around each pan.
- Stagger bakeware so that one is not directly above another. Allow 1½'' (4 cm) above and below each pan.
High altitude baking
When cooking at high altitudes, recipes and cooking times will vary. For accurate information, go to www.csuextstore.com, or write to the Extension Service, Colorado State University, Fort Collins, Colorado 80521. There may be a cost for the guides. Specify which high altitude food preparation guide you prefer: general information, cakes, cookies, breads, etc.
Condensation
It is normal for a certain amount of moisture to evaporate from the food during any cooking process. The amount depends on the moisture content of the food. The moisture will condense on any surface cooler than the inside of the oven, such as the control panel.
Cooktop operation
Here you will find out everything you need to know about operating your cooktop.
Cookware
This information will help you save energy and avoid damaging your cookware.
Suitable cookware
Only use cookware of a suitable size. The cookware must not overhang the edge of the cooktop.
| Burner | Minimum diameter of the cookware base | Minimum diameter of the cookware base |
| Large burner | 11¾" (20 cm) | 10¼" (26 cm) |
| Medium burner | 5½" (14 cm) | 8⅔" (22 cm) |
| Small burner | 4¾" (12 cm) | 6¼" (16 cm) |
Cookware recommendations
- Aluminum or copper bottomed pans conduct heat evenly.
- Steel pans, if not combined with other metals, may cook unevenly.
- Cast-iron cookware absorbs heat slowly and cooks more evenly at low to medium settings.
- Flat heavy bottom pans provide even heat and stability.
- DO NOT USE pans that are thin, warped, dented or ridged as they heat unevenly.
Turning on a burner
Your gas cooktop has an automatic quick-ignition function.
- Place suitable cookware on the burner grate.
- Push in the control knob for the selected burner and turn it counter-clockwise to the highest power level. Keep the control knob pushed in.
- a Sparks appear in all burners and the flame ignites.
- Wait a few seconds and release the control knob.
![]()
Risk of explosion! Escaping gas can ignite.- If the burner does not turn on after 15 seconds, turn off the control knob and open the door or window in the room. Wait at least 1 minute before igniting the burner again.
Turn the control knob to the desired position.
- If the burner does not turn on after 15 seconds, turn off the control knob and open the door or window in the room. Wait at least 1 minute before igniting the burner again.
- If the burner does not ignite, turn it off and repeat the steps described above. This time, hold the control knob down longer (up to 10 seconds).
Note
In order to ensure proper operation of the appliance, observe the following instructions:
- The burner parts and burner grates need to be properly positioned.
- Do not interchange the burner caps of the individual burners.
- It is important to keep the appliance clean. Clean the igniters regularly with a small non-metallic brush. Take care to prevent the igniters from suffering any heavy impacts.
- The burner holes and slots must be clean for the flame to be correct. Clean the burners regularly.
Manually igniting a burner
In the event of a power failure, you can ignite the burners manually.
- Hold down the control knob for the selected burner and turn it counterclockwise to the highest power level.
- Hold a lit lighter or a match against the burner.
Flame failure safety system
Your cooktop is equipped with a safety system (thermocouple) that cuts off the gas when the burners accidentally go out during operation, for example through a draft of air. In order to light the burner, the system that allows the passage of gas must be activated.

If the burner flames are accidentally blown out, turn the control knob of the burner to the off position and do not try to relight it for at least 1 minute.
- Light the burner without releasing the control knob.
- Hold the control knob down firmly for 4 seconds after lighting the flame.
Turning off a burner
- Turn the control knob clockwise to off.
Normal behavior during operation
The following behavior during operation is normal.
- A soft whistling noise while the burner is operating.
- Release of odors during first use. These do not pose a risk and will disappear in time.
- An orange-colored flame is normal. It is caused by impurities, such as the presence of dust in the atmosphere or spilled liquids.
Recommended cooking settings
Use the following chart as a guide for heat settings. The cooking times and heat settings may vary depending on the type of food, its weight and quality, on the type of gas used, and on the material from which the cookware is made.
Always use cookware that is the right size and place it in the center of the burner.
Tips
- Recommendations for cooking:
- Place all the ingredients into the cookware at the same time when cooking soups, creams, lentil stews or chickpeas.
- Preheat the oil when frying. Once you have started frying the food, maintain the temperature by adjusting the power if necessary. Maintain the temperature of the oil between different batches and turn the food frequently.
- Recommendations to reduce the cooking time:
- Use a pressure cooker to cook creamy soups and legumes. Follow the manufacturer's instructions of the pressure cooker. Add all the ingredients at the same time at the start.
- Bring the water to a boil before adding pasta, rice or potatoes and then adjust the power level to continue boiling.
- Use a lid to cook rice and potatoes.
| Cooking process | Heat setting |
| Bringing water to a boil | High |
| Pan frying, sauteing, browning meat, deep fat frying | Medium high |
| Most frying, eggs, pancakes, slow boil | Medium |
| Finish cooking covered foods, steaming | Medium low |
| Melting chocolate and butter, simmering tomato sauces, soups, stews | Low |
Warming drawer operation
The warming drawer will keep hot, cooked foods at serving temperature.
Always start with hot food. DO NOT use to heat cold food. It is safe to use the drawer to crisp crackers, chips or dry cereal and to warm plates.
To maintain food safety, follow these guidelines
- DO NOT use a warming drawer to heat cold food. It is safe to use the drawer to crisp crackers, chips or dry cereal and to warm plates.
- Be sure to maintain proper food temperature. The USDA recommends holding hot food at 140°F or warmer.
- DO NOT leave food in the warming drawer for more than one hour before or after cooking.
- Plastic containers, plastic wrap or aluminum foil can melt if in direct contact with the drawer or a hot cooking container. If it melts onto the drawer, it may not be removable.
The warming drawer has a push-to-open (PTO) mechanism. Press on the center of the warming drawer front panel to open it.
Warming drawer levels
You can set 3 different heating levels for the warming drawer.
For best results, preheat the warming drawer when warming food.
| Level | Preheat time in min. |
| LOW | 10 |
| MED | 15 |
| HIGH | 20 |
Turning the warming drawer on
You can operate the warming drawer with the oven control panel.
- Press Warming Drawer.
- The default level med is displayed.
- Press Warming Drawer to cycle the available warming drawer settings.
- Press Enter to confirm.
- The warming drawer icon is displayed below the clock.
Turning the warming drawer off
- Press Warming Drawer.
- The warming drawer symbol turns off.
Using the warming drawer in Sabbath mode
You can use the warming drawer in Sabbath Mode, while the oven is in Sabbath mode. It is not possible to run Sabbath Mode only in the warming drawer.
- Set the desired warming drawer temperature.
- Set Sabbath mode for the oven cavity.
- The warming drawer and oven will operate in Sabbath mode until the oven timer reaches zero.
Warming empty serving bowls and plates
Requirements
- Do not preheat drawer prior to placing dishes.
- Use only heat-safe dishes.
- Place empty plates or dishes in the cold warming drawer.
- Select the warming drawer temperature "LOW".
- Check the dish temperature during the warming period.
Crisping stale items
- Place the food in a low-sided dish or pan.
- Select the warming drawer temperature "LOW".
- Preheat the warming drawer for 10 minutes, then place the food in the warming drawer.
- Set the warming timer.
- Check the crispness after 45 minutes. Continue crisping if needed.
General tips for the warming drawer
- To keep several different foods hot, set the temperature for the food needing the highest setting.
- Place items needing the highest setting toward the side of the drawer and items needing less heat in the center of the drawer.
- You can warm empty serving dishes while the warming drawer is preheating.
- Place cooked, hot food in the warming drawer in its original cooking container or in a heat-safe serving dish.
- You can use aluminum foil to cover the food. DO NOT line the warming drawer with aluminum foil.
- Do not use the warming drawer for storage purposes.
Warming drawer temperature recommendations
| Food | Temperature setting | Cover dish |
| Bacon | HIGH | No |
| Beef, medium and well done | LOW | Yes |
| Beef, medium rare | LOW | Yes |
| Bread, hard rolls | MED | No |
| Bread, soft rolls, coffee cakes | LOW | Yes |
| Biscuits | MED | Yes |
| Casseroles | MED | Yes |
| Eggs | MED | Yes |
| Fish, seafood | MED | Yes |
| Fried foods | HIGH | No |
| Gravy, cream sauces | MED | Yes |
| Ham | MED | Yes |
| Pancakes | LOW | Yes |
| Pies, one crust | MED | Yes |
| Pies, two crusts | MED | No |
| Pizza | HIGH | No |
| Pork | MED | Yes |
| Potatoes, baked | HIGH | Yes |
| Potatoes, mashed | MED | Yes |
| Poultry, roasted | MED | Yes |
| Vegetables | MED | Yes |
| Plates | HIGH | No |
| Plate of food | MED | Yes |
Cleaning and maintenance
To keep your appliance working efficiently for a long time, it is important to clean and maintain it carefully.
Cleaning agents
Only use suitable cleaning agents to avoid damage to the appliance surfaces.
You can purchase suitable cleaners for your appliance online at www.bosch-home.com/us/shop or through our distributors in Canada.
Brand names
- The use of brand names is intended only to indicate a type of cleaner. This does not constitute an endorsement.
- The omission of any brand name cleaner does not imply its adequacy or inadequacy.
- Many products are regional in distribution and can be found in local markets.
- It is imperative that all cleaning products be used in strict accordance with the instructions on its package.
Avoid these cleaners
Do not use commercial oven cleaners such as Easy Off. They may damage the oven finish or parts. Chlorine or chlorine compounds in some cleansers are corrosive to stainless steel. Check ingredients on label. Never use scouring pads or abrasive cleaners.
Be sure the entire appliance (including the light bulb) has cooled and grease has solidified before attempting to clean any part of the appliance.

To avoid risk of electrical shock, DO NOT use a steam cleaner or high pressure cleaners to clean the appliance.
Penetrating moisture may cause electrical shock.
Cooktop cleaning and maintenance
Cleaning the appliance
NOTICE:
Humidity might enter the appliance interior, if you remove the control knobs during cleaning. This may damage the appliance.
- Do not remove the control knobs when cleaning the appliance.
- Let the appliance cool down.
- Clean with a sponge, water and soap.
- Dry with a soft cloth.
Cleaning the burners
Clean the surfaces of the burners after every use to prevent them from becoming encrusted.
NOTICE:
Do not clean the burner parts in the dishwasher. They may be damaged.
- Wait until the appliance has cooled.
- Scrub with a non-metallic brush and soapy water.
- Dry the burners completely. If there are water droplets or damp patches on the cooktop when you start cooking, the enamel may be damaged.
- Reassemble the burner parts. Ensure that the burner caps are correctly positioned on the burner bases.
Cleaning the burner grates
- Wait until the appliance has cooled.
- Carefully lift off the burner grates.
- Scrub with a non-metallic brush and soapy water. Carefully clean around the rubber feet. If the rubber feet come off, the grates may scratch the cooktop surface.
- Dry the burners grates completely. If there are water droplets or damp patches on the cooktop when you start cooking, the enamel may be damaged.
- Place the burner grates in their proper position.
Cleaning recommendations
Follow these cleaning recommendations for the individual parts of your appliance.
| Part / Material | Suitable cleaning method | Important notes |
| Burner base / aluminum alloy |
|
|
| Burner cap / porcelain enamel |
|
|
| Control knobs and grommets | Non-abrasive cleaners: Dish soap and hot water Dry thoroughly after cleaning. |
|
| Exterior finish / stainless steel |
|
|
| Burner grates and grate bridge / porcelain enamel on cast iron |
|
|
| Ingiters / ceramic |
|
|
| Glass surfaces | Non-abrasive cleaner: Dish soap and hot water Rinse and dry immediately. |
|
Removing the control knobs
You can remove the control knobs and grommets for a more thorough cleaning.
To avoid possible electric shock, do not reach through the control opening into rough-in box located under the cooktop.
- Turn the control knob to the OFF position.
- Gently lift the knob up and off.
- Gently pull the grommet from the sides and lift out.
- To replace the control knob and grommet, carefully insert the grommet into the opening. Make sure that the main top is seated in the track around the entire perimeter of the grommet.
- Replace the control knob by placing indicator line at the OFF position. Press down firmly.
Oven cleaning and maintenance
Cleaning recommendations
Clean only those parts of you oven that are listed in this cleaning chart.
| Part | Suitable cleaning method | Recommendations |
| Flat rack |
|
|
| Telescopic rack |
|
|
| Door gasket | None |
|
| Glass |
| Avoid using powder cleaning agents, steel wool pads and oven cleaners. |
| Painted surfaces | Clean with hot soapy water or apply Fantastik to a clean sponge or paper towel and wipe clean. | Avoid using powder cleaning agents, steel wool pads and oven cleaners. |
| Porcelain surfaces |
| Do not use a moistened sponge/cloth on hot porcelain. It is normal for porcelain to show fine lines with age due to exposure to heat and food soil. |
| Heat resistant enamel and polished components in the oven cavity | Use the self clean function for heavy soiling. |
|
| Stainless steel surfaces |
|
|
| Black stainless surfaces/ anti-fingerprint surfaces |
| Never use stainless steel polish. |
| Plastic and controls | When cool, clean with soapy water, rinse and dry. | |
| Probe | Wipe with soapy water. |
|
| Printed areas (words and numbers) | Do not use abrasive cleaners or petroleum based solvents. |
Self clean function
With pyrolytic self cleaning the oven is heated to a very high temperature. Stubborn soil is burnt off and can be wiped out after self clean is finished.
After the completion of a self-clean cycle, the oven will not allow you to start another self-clean cycle for 24 hours. All surface elements are automatically disabled during Self Clean. This is normal. Once the Self Clean cycle is complete and the oven has cooled, the elements become operable once again.
Preparing self clean
During the elimination of soil during self-cleaning, small amounts of carbon monoxide can be created and the fiberglass insulation could give off very small amounts of formaldehyde during the first several cleaning cycles.
- To minimize exposure to these substances, provide good ventilation with an open window, or use a ventilation fan or hood.
During the self clean cycle, parts of the appliance may become potentially harmful to persons who lack adult knowledge of appliances and adult reactions to potentially harmful conditions.
- Children should not be left alone or unattended in an area where appliances are in use.
The oven heats up to a very high temperature during self cleaning. Opening the door can result in injury.
- When self-cleaning, confirm that the door locks and will not open.
- If the door does not lock, do not run Self Clean. Contact Customer Service.
Remove broiler pans, pots, and other utensils and excess spillage before self-cleaning.
Do not leave food or cooking utensils, etc., in the oven during the pyrolytic self-cleaning mode of operation.
The oven vents are important for air circulation. Covering the oven vents will cause the oven to overheat. Refer to the appliance overview for the location of the oven vents.
- Do not obstruct oven vents.
NOTICE:
Do not clean parts or accessories with the self clean function.
- Remove all accessories and racks from the oven.
- Wipe out excessive spillage from the oven cavity.
Starting self clean
Requirements
- All heating modes or timers are canceled.
- You have carried out the steps for preparing the oven for self clean.
→ "Preparing self clean"
- Press Self Clean.
![]() lights up on the display.
lights up on the display.- The default self clean time "4:00" blinks on the timer display.
- You can set a self clean time between 2 and 4 hours with the numeric keypad.
Tip: Use a longer setting for a heavily soiled oven. - Press Enter.
- The oven door locks.
![]() blinks on the display and then remains lit until the oven has cooled down after self clean is finished.
blinks on the display and then remains lit until the oven has cooled down after self clean is finished. - "SELF CLEAN" lights up on the display.
- The timer starts to count down.
- When self clean is finished, the display shows 0:00. The oven remains locked until it has cooled down sufficiently. "COOLING DOWN" is displayed.
- a When the oven has cooled down the door unlocks and "SELF CLEAN FINISHED" is displayed.
- The oven door locks.
- Press Oven Clear/Off.
- Wipe the remaining ash from the oven with a moist cloth.
Canceling self clean
- Press Oven Clear/Off.
- "COOLING DOWN" is displayed.
- The door remains locked.
- When the oven has cooled down the door unlocks and "SELF CLEAN FINISHED" is displayed.
- Press Oven Clear/Off.
- Wipe the remaining ash from the oven with a moist cloth.
Maintenance
Replacing an oven light bulb
When the oven light fails you can replace the light bulbs.
Light socket is live when door is open if main power supply is not turned off.
- Turn off main power supply at the service panel before changing the light bulbs.

Make sure the appliance and lights are cool and power to the appliance has been turned off before replacing the light bulb(s). Failure to do so could result in electrical shock or burns.
- The lenses must be in place when using the appliance.
- The lenses serve to protect the light bulb from breaking.
- The lenses are made of glass. Handle carefully to avoid breaking. Broken glass can cause an injury.
Removing the oven door from bottom hinge conventional ovens
Failure to follow these instructions when removing the oven door may lead to personal injury or product damage.
![burn hazard]()
![shock hazard]()
Make sure oven is cool and power to the oven has been turned off before removing the door. Failure to do so could result in electrical shock or burns.- The oven door is heavy and parts of it are fragile. Use both hands to remove the oven door.
- The door front is glass. Handle it carefully to avoid breakage.
- Grasp only the side of the oven door. Do not grasp the handle. It may swing in your hand and cause damage or injury. Failure to grasp the oven door firmly and properly could result in personal injury or product damage.
- To avoid injury from hinge bracket snapping closed, be sure both levers are securely in place before removing the door.
- Do not force the door open or closed. The hinge could be damaged and cause damage or injury.
- Do not lay the removed door on sharp or pointed objects as this could break the glass. Lay it on a flat, smooth surface, positioned so that the door cannot fall over.
- Open the oven door to its fully open position.
- Flip levers on hinges toward you.
If necessary, use a tool, such as a screwdriver, to gently pry the upper part of the lever away from the housing. Take care to avoid scratching the housing.

- Bring both door hinge levers to their fullest down position. The left and right door hinges differ slightly but operate in the same manner.
![]()
Risk of injury! Follow the instructions below to prevent the latch from slamming shut and pinching or cutting your hand.
Close the oven door until it catches on the hinge stop levers, locking the hinges at the proper angle for door removal.

- The door will be open about 7" (18 cm) at the top.
![]()
Risk of injury! The door is heavy.- Do not grip the door by the handle.
- Use both hands to firmly grip it by the sides.


Maintaining the door angle, lift the door straight up approximately 3/4" (2 cm) to unhook the hinges from the slots and then pull it out towards you until the hinges are clear of the oven housing.

- Place the door in a convenient and stable location.
Do not lay the door on its handle. This could cause dents or scratches.
Reinstalling the oven door
- Hold the door firmly in both hands. Grip it on either side, not by the handle.
- Tilt the door back slightly towards you at an angle that would open the door about 7" (18 cm) at the top.
- Slide the hinges
![]() into the slots
into the slots ![]() as far as they will go
as far as they will go ![]() and lower the door straight down
and lower the door straight down ![]() .
.
The angle of the door may need to be adjusted slightly to allow the hinges to engage properly and the door to be lowered into place. The door should lower about 3/4" (2 cm) and stop. If it does not, the hinges have not engaged properly and the door could fall if it is released.

- Once both hinges are fully engaged, gently open the door until it is fully open.
- Push the levers on both the hinges up and forward until they are locked into the slot and flush with the front of the oven body.

- Close and open the door slowly to be sure it is correctly and securely in place.
 into the slots
  as far as they will go

Cleaning the warming drawer
Note: You can remove the warming drawer for cleaning. Refer to the Installation Instructions for your appliance.

To prevent burns, do not remove the drawer while hot.
- Be sure the drawer is empty before removing.
| Part | Recommendations |
| Drawer interior, polished stainless steel |
|
| Painted surfaces |
|
| Drawer exterior frame, brushed stainless steel |
|
Oven troubleshooting
You can eliminate minor faults on your appliance yourself. Please read the information on eliminating faults before contacting Customer Service. This may avoid unnecessary repair costs.
Improper repairs are dangerous.
- Only authorized service providers should repair the appliance.
- If the appliance has an issue, call Customer Support.
Improper repairs are dangerous.
- Repairs to the appliance should only be performed by authorized service providers.
- Only original spare parts may be used to repair the appliance.
| Fault | Cause and troubleshooting |
| Oven door is locked and will not open, even after cooling | The door lock is engaged
|
| Oven is not heating | There is no power supply to the appliance
|
There is no cooking temperature set
| |
| Baking results are not as expected The rack position in not ideal |
|
| Food takes longer to cook than expected | The oven temperature needs to be recalibrated Note: The oven is carefully calibrated to provide accurate results.
|
| Food is overcooked | The oven temperature needs to be recalibrated Note: The oven is carefully calibrated to provide accurate results. |
| |
| Oven light is not working properly | The oven light bulb is loose or defective
Tip: Touching the bulb with fingers may cause the bulb to burn out. |
| Oven light does not turn off | The oven door does not close properly
|
The oven light is turned on
| |
| Cannot remove lens cover on light There is soil build-up around the lens cover |
|
| Oven is not self-cleaning properly | The oven is too hot to start self clean
|
| Clock and timer are not working properly | There is no power supply to the appliance
|
| "E" and a number appears in display and control beeps | An electronics fault has occured
|
| With a new oven there is a strong odor when oven is turned on | This is normal with a new oven and will disappear after a few uses
|
| Control does not react when a key is touched | The control is wet or soiled
|
The touch keys are not pressed correctly
| |
| Warm air or steam escapes from oven vent | It is normal to see or feel steam or warm air escaping from the oven vent
|
| Cooling fan runs even when the oven is turned off | The cooling fan will continue to run, even after the oven has been turned off, until the oven has cooled sufficiently
|
Cooktop troubleshooting
| Fault | Cause and troubleshooting |
| The general electrical system of the appliance is not working | The fuse is faulty.
|
The circuit breaker has tripped.
| |
The mains plug for the power cord is not plugged in.
| |
There has been a power failure.
| |
The automatic ignition is not working | Food remnants, dirt, or cleaning products are located between the igniters and the burners.
|
Burner parts are wet.
| |
The burner parts are not positioned correctly.
| |
The appliance is not connected properly to the power supply.
| |
The burner flame is not uniform | The burner parts are not positioned correctly.
|
The grooves on the burner are dirty.
| |
| The gas flow is not normal or there is no gas | The gas supply is blocked by intermediate gas valves.
|
The gas cylinder is empty.
| |
There is a smell of gas in the kitchen | A gas valve has been left on.
|
Incorrect coupling of gas cylinder.
| |
The gas pipe to the appliance is leaking.
| |
| The burner switches off immediately after releasing the control knob | The control knob has not been pressed down long enough.
|
The grooves on the burner are dirty.
| |
The display shows F and a number | There is an electronics fault
|
Customer service
If you have any questions on use, are unable to eliminate an issue in the appliance yourself, or the appliance needs to be repaired, please contact our Customer Service. We will work to find an appropriate solution for you thereby avoiding unnecessary visits by a service provider. With any warranty repair, we will make sure your appliance is repaired by a trained authorized service provider using genuine replacement parts. We use only genuine replacement parts for all repairs.
Detailed information on the warranty period and terms of warranty can be found in the Statement of Limited Product Warranty, from your retailer, or on our website. If you contact the Customer Service, you will require the model number (E-Nr.) and the production number (FD) of your appliance.
USA:
1-800-944-2904
www.bosch-home.com/us/owner-support/get-support
www.bosch-home.com/us/shop
CA: 1-800-944-2904
www.bosch-home.ca/en/service/get-support www.bosch-home.ca/en/service/cleaners-and-accessories
Model number (E-Nr.) and production number (FD)
You can find the model number (E-Nr.) and the production number (FD) on the appliance's rating plate.
You can see the rating plate with these numbers when you open the appliance door.
Making a note of your appliance's details and the Customer Service telephone number will enable you to find them again quickly.
IMPORTANT SAFETY INSTRUCTIONS
READ AND SAVE THESE INSTRUCTIONS

Read all instructions carefully before use. These precautions will reduce the risk of electrical shock, fire and injury to persons. When using kitchen appliances, basic safety precautions must be followed including those in the following pages.
If the information in these instructions is not followed exactly, a fire or explosion may result property damage, personal injury or death.
- Do not store or use gasoline or other flammable vapors and liquids in the vicinity of this or any other appliance.
- WHAT TO DO IF YOU SMELL GAS
- Do not try to light any appliance.
- Do not touch any electrical switch.
- Do not use any phone in your building.
- Immediately call your gas supplier from a neightbor's phone. Follow the gas supplier's instructions
- If you cannot reach your gas supplier, call the fire department.
- Installation and service must be performed by a qualified installer, service agency or the gas supplier.
Never Operate the Top Surface Cooking Section of this Appliance Unattended.
![]()
Failure to follow this warning statement could result in fire, explosion, or burn hazard that could cause property damage, personal injury, or death.![burn hazard]() If a fire should occur, keep away from the appliance and immediately call your fire department.
If a fire should occur, keep away from the appliance and immediately call your fire department.
DO NOT ATTEMPT TO EXTINGUISH AN OIL/GREASE FIRE WITH WATER.
Safety definitions
Here you can find explanations of the safety signal words used in this manual.
This indicates that death or serious injuries may occur as a result of non-observance of this warning.
This indicates that minor or moderate injuries may occur as a result of non-observance of this warning.
NOTICE:
This indicates that damage to the appliance or property may occur as a result of non-compliance with this advisory.
Note: This alerts you to important information and/or tips.
General information
- Read this manual carefully.
- Keep the manual and the product information in a safe place for future reference or for the next owner.
- Do not connect the appliance if it has been damaged in transit.
Intended use
Only a qualified professional may connect appliances without plugs. The manufacturer is not responsible for damage caused by incorrect connections. Please see the Statement of Limited Product Warranty.
Only use this appliance:
- To prepare meals and drinks.
- Under supervision. Never leave the appliance unattended when cooking for short periods.
- In private households and in enclosed spaces in a residential environment.
Do not use the appliance:
- On boats or in vehicles.
- as a room heater.
Call Customer Service if you want to convert your appliance to a different type of gas.
Restriction on user group
This appliance is not intended for use by persons (including children) with reduced physical, sensory or mental capabilities, or lack of experience and knowledge, unless they have been given supervision or instruction concerning use of the appliance by a person responsible for their safety.
When children become old enough to use the appliance, it is the responsibility of the parents or legal guardians to ensure that they are instructed in safe practices by qualified persons.
Children should be supervised to ensure that they do not play with the appliance.
Do not let children play with the appliance.
Safe use
When properly cared for, your new appliance has been designed to be safe and reliable.
![burn hazard]()
![shock hazard]()
Read all instructions carefully before use. These precautions will reduce the risk of burns, electric shock, fire, and injury to persons.- When using kitchen appliances, basic safety precautions must be followed, including those in the following pages.
Overheated materials can cause fire or burns.
- Do not allow aluminum foil, plastic, paper or cloth to come in contact with a hot surface element, burner or grate.
- Do not allow pans to boil dry.
Set the burner control so that the flame does not extend beyond the bottom of the pan.
Take care that drafts like those from fans or forced air vents do not push the flames so that they extend beyond the edges of the pan.
During a power failure, only the cooktop burners can be lit manually.
Unattended cooking on a cooktop with fat or oil can be dangerous and may result in a fire.
- Do not leave the cooktop unattended when in use.
Never leave the cooktop unattended when in use.
- Boilovers cause smoking and greasy spillovers may ignite.
If materials inside an oven or warming drawer should ignite, keep door closed.
- Turn off the appliance and disconnect the circuit at the circuit breaker box.
A fire could occur during cooking.
- Always have a working smoke detector near the kitchen.
- Have an appropriate fire extinguisher available, nearby, highly visible and easily accessible near the appliance. NEVER cover any slots, holes or passages in the oven bottom or cover an entire rack with materials such as aluminum foil.
- Doing so blocks air flow through the oven and may cause carbon monoxide poisoning.
![]()
Aluminum foil linings may also trap heat, causing a fire hazard.
If the cooktop is near a window, forced air vent or fan, be certain that flammable materials such as window coverings do not blow over or near the burners or heating elements.
![burn hazard]() They could catch on fire.
They could catch on fire.
Cooking fires can spread if extinguished incorrectly.
- Never use water on cooking fires.
TO REDUCE THE RISK OF A RANGE TOP GREASE FIRE
- Never Leave Surface Units Unattended at High Settings - Boilovers cause smoking and greasy spillovers that may ignite. Heat oils slowly on low or medium settings.
- Always turn hood ON when cooking at high heat or when flambeing food (i.e. Crepes Suzette, Cherries Jubilee, Peppercorn Beef Flambe').
- Clean ventilating fans frequently. Grease should not be allowed to accumulate on fan or filter.
- Use proper pan size. Always use cookware appropriate for the size of the surface element.
Flames can be drawn into the ventilation system.
- Whenever possible, do not operate the ventilation system during a cooktop fire. However, do not reach through fire to turn it off.
Cookware Handles Should be Turned Inward and Not Extend Over Adjacent Surface Units.
![]()
To reduce the risk of burns, ignition of flammable materials, and spillage due to unintentional contact with the cookware, the handle of a cookware should be positioned so that it is turned inward, and does not extend over adjacent surface units.
Wear Proper Apparel. Loose-fitting or hanging garments, such as ties, scarves, jewelry, or dangling sleeves, should never be worn while using the appliance.
- Tie long hair so that it does not hang loose.
- Secure all loose garments, etc. before beginning. Use Proper Pan Size. This appliance is equipped with one or more surface units of different size.
- Select cookware having flat bottoms large enough to cover the surface unit heating element.
- The use of undersized cookware will expose a portion of the heating element or burner to direct contact and may result in ignition of clothing. Proper relationship of cookware to heating element or burner will also improve efficiency.
Do not store items on the cooking surfaces.
In the event that personal clothing or hair catches fire, drop and roll immediately to extinguish flames.
Do Not Use Water on Grease Fires.
- Smother fire or flame or use dry chemical or foam-type extinguisher.
Adjust burner flame size so that it does not extend beyond the edge of the cookware. Proper relationship of cookware to burner flame reduces safety risks.
The cooking process has to be supervised. A short term cooking process has to be supervised continuously. The oven vents are important for air circulation. Covering the oven vents will cause the oven to overheat. Refer to the appliance overview for the location of the oven vents.
- Do not obstruct oven vents.
Use Only Dry Potholders. Moist or damp potholders on hot surfaces may result in burns from steam.
- Do not let potholders touch hot heating elements.
- Do not use a towel or other bulky cloth.
Hot oil is capable of causing extreme burns and injury.
- Use high heat settings on the cooktop only when necessary.
- To avoid bubbling and splattering, heat oil slowly on no more than a low-medium setting.
- Never move a pan of hot oil, especially a deep fat fryer. Wait until it is cool.
Spills of hot food may cause burns.
- Hold the handle of the pan when stirring or turning food. This helps prevent spills and movement of the pan.
DO NOT TOUCH SURFACE UNITS OR AREAS NEAR UNITS. Surface units may be hot even though they are dark in color. Areas near surface units may become hot enough to cause burns.
- During and after use, do not touch, or let clothing, potholders, or other flammable materials contact surface units or areas near units until they have had sufficient time to cool. Among these areas are the cooktop and areas facing the cooktop.
DO NOT TOUCH HEATING ELEMENTS OR INTERIOR SURFACES OF OVEN - Heating elements may be hot even though they are dark in color. Interior surfaces of an oven become hot enough to cause burns.
- During and after use, do not touch, or let clothing, potholders, or other flammable materials contact heating elements or interior surfaces of oven until they have had sufficient time to cool. Other surfaces of the appliance may become hot enough to cause burns. Among these surfaces are oven vent openings, surfaces near these openings and oven doors.
Exercise caution when opening the appliance.
- Standing to the side, open the door (or drawer) slowly and slightly to let hot air and/or steam escape.
- Keep your face clear of the opening and make sure there are no children or pets near the unit.
- After the release of hot air and/or steam, proceed with your cooking.
- Keep doors shut unless necessary for cooking or cleaning purposes.
- Do not leave open doors unattended.
After a spill or boilover, turn off the burner and allow the cooktop to cool.
- Clean around the burner and burner ports.
- After cleaning, check for proper operation.
Inspect your cookware for damage or excessive wear before using it.
Use caution when cooking foods with high alcohol content (e.g. rum, brandy, bourbon) in the oven. Alcohol evaporates at high temperatures. There is a risk of burning as the alcohol vapors may catch fire in the oven.
- Use only small quantities of alcohol in foods, and open the oven door carefully.
The oven racks and the oven cavity surfaces become very hot during cooking.
- Place oven racks in the desired positions before turning oven on.
- Always use oven mitts when the oven is warm.
- If a rack must be moved while the oven is hot, do not let oven mitts contact hot heating elements.
- Use caution when removing oven racks from the lowest rack position to avoid contact with the hot oven door.
Do not touch the interior surfaces of the drawer while it is in use. The interior of the drawer could become hot enough to cause burns.
- Allow drawer and rack (if equipped) to cool before handling.
Avoid reaching or leaning over the appliance.
![]()
Be aware that certain clothing and hair sprays may contain flammable chemicals that could be ignited if brought in to contact with hot surface units or heating elements and may cause severe burns.
Storage in or on Appliance - The use of corrosive chemicals in heating or cleaning will damage the appliance and could result in injury.
- Flammable materials, corrosive chemicals, vapors or non-food products should not be stored or used in an oven or on or near surface units.
- The appliance is specifically designed for use when heating or cooking food.
This appliance is intended for normal family household use only.
- It is not approved for outdoor use.
![burn hazard]() See the Statement of Limited Product Warranty. If you have any questions, contact the manufacturer. Using this appliance other than for its intended use can cause fire or injury to persons.
See the Statement of Limited Product Warranty. If you have any questions, contact the manufacturer. Using this appliance other than for its intended use can cause fire or injury to persons.- Use this appliance only for its intended use as described in this manual.
- NEVER use your appliances as a space heater for warming or heating the room. Doing so may result in overheating the appliance.
- Never use the appliance for storage.
TO REDUCE THE RISK OF INJURY TO PERSONS IN THE EVENT OF A RANGE TOP GREASE FIRE, OBSERVE THE FOLLOWING
![]()
SMOTHER FLAMES with a close-fitting lid, cookie sheet, or metal tray, then turn off the burner. BE CAREFUL TO PREVENT BURNS. If the flames do not go out immediately, EVACUATE AND CALL THE FIRE DEPARTMENT.- NEVER PICK UP A FLAMING PAN – You may be burned.
- DO NOT USE WATER, including wet dishcloths or towels – a violent steam explosion will result.
- Use an extinguisher ONLY if:
- You know you have a Class ABC extinguisher, andyou already know how to operate it. - The fire is small and contained in the area where it started.
- The fire department is being called.
- You can fight the fire with your back to an exit.
Do not heat or warm unopened food containers.
- Build-up of pressure may cause the container to burst and cause injury.
Failure to operate knobs properly may result in personal injury and damage to the appliance.
Glazed Cooking Utensils - Only certain types of glass, glass/ceramic, ceramic, earthenware, or other glazed utensils are suitable for cooktop or range-top service without breaking due to the sudden change in temperature.
Cooking or roasting bags might explode.
- Follow the manufacturer's directions when using cooking or roasting bags.
To avoid possible injury or damage to the appliance, ensure oven rack is installed exactly per installation instructions and not backwards or upside down. Do not place food directly on the oven cavity bottom.
Moisture intrusion may cause an electric shock.
- Do not use any steam cleaners or high-pressure cleaners to clean the appliance.
If the appliance or the power cord is damaged, this is dangerous.
- Never operate a damaged appliance.
- Never operate an appliance with a cracked or broken surface.
- Never pull on the power cord to unplug the appliance.
Always unplug the appliance at the power outlet.
- If the appliance or the power cord is damaged, immediately unplug the power cord or switch off the breaker in the circuit breaker box and turn off the gas supply.
- Call Customer Service.
If the surface is cracked, switch off the appliance to avoid the possibility of electric shock.
Child safety
Do not let children play with the appliance.
Do not store items of interest to children in cabinets above a range or on the backguard of a range. Children climbing on the range to reach items could be seriously injured.
Do Not Leave Children Alone.
- Children should not be left alone or unattended in the area where the appliance is in use.
- They should never be allowed to sit or stand on any part of the appliance.
- Always check inside the oven before turning it on.
Do not allow anyone to climb, stand, lean, sit, or hang on any part of an appliance, especially a door, warming drawer, or storage drawer.
- This can damage the appliance, and the unit may tip over, potentially causing severe injury. Do not allow children to use this appliance unless closely supervised by an adult.
- Children and pets should not be left alone or unattended in the area where the appliance is in use. They should never be allowed to play in its vicinity, whether or not the appliance is in use.
Gas safety
To prevent carbon monoxide build-up, do not block appliance air vents.
Have the installer show you where the gas shut-off valve is located.
If a burner goes out and gas escapes, open windows and doors. Wait until gas dissipates before using the appliance.
If you smell gas, your installer has not done a proper job of checking for leaks. If the connections are not perfectly tight, you can have a small leak and, therefore, a faint smell. If you smell gas, immediately shut off the unit and contact an authorized service provider to diagnose the issue. Read the WARNING about gas smell.
Keep the igniter ports clean for proper lighting performance of the burners. It is necessary to clean these when there is a boilover or when the burner does not light even though the electronic igniters click.
For proper burner performance, keep igniters clean and dry.
All igniters spark when any single burner is turned on.
- Do not touch any of the burners when the cooktop is in use.
To prevent flare-ups all grates must be properly positioned on the cooktop whenever the cooktop is in use. Each of the feet must be placed into the corresponding dimples in the cooktop.
- Do not use a grate if the rubber feet are missing or damaged.
To prevent flare-ups do not use the cooktop without all burner caps and all burner grates properly positioned.
Use this appliance only for its intended use as described in this manual.
- NEVER use this appliance as a space heater to heat or warm the room. Doing so may result in carbon monoxide poisoning and overheating the appliance.
- Never use the appliance for storage.
The burning of gas cooking fuel can create small amounts of carbon monoxide, benzene, formaldehyde and soot. To minimize exposure to these substances the burners should be adjusted by a certified installer or agency to ensure proper combustion.
- Ensure proper ventilation with an open window or use a ventilation fan or hood when cooking with gas.
- Always operate the unit according to the instructions in this manual.

IMPORTANT SAFETY NOTICE: The California Safe Drinking Water and Toxic Enforcement Act requires the Governor of California to publish a list of substances known to the state to cause cancer, birth defects or other reproductive harm, and requires businesses to warn customers of potential exposure to such substances. The burning of gas cooking fuel and the elimination of soil during self-cleaning can generate some by-products which are on the list. To minimize exposure to these substances, always operate this unit according to the instructions contained in this booklet and provide good ventilation.
Food safety
To maintain food safety, follow these guidelines
- DO NOT use a warming drawer to heat cold food. It is safe to use the drawer to crisp crackers, chips or dry cereal and to warm plates.
- Be sure to maintain proper food temperature. The USDA recommends holding hot food at 140°F or warmer.
- DO NOT leave food in the warming drawer for more than one hour before or after cooking.
- Plastic containers, plastic wrap or aluminum foil can melt if in direct contact with the drawer or a hot cooking container. If it melts onto the drawer, it may not be removable.
Cleaning function
Follow these safety instructions when using the cleaning function.
Do not block the oven vent(s) during the self-cleaning cycle.
- Always operate the unit according to the instructions in this manual.
During the elimination of soil during self-cleaning, small amounts of carbon monoxide can be created and the fiberglass insulation could give off very small amounts of formaldehyde during the first several cleaning cycles.
- To minimize exposure to these substances, provide good ventilation with an open window, or use a ventilation fan or hood.
The oven heats up to a very high temperature during self cleaning. Opening the door can result in injury.
- When self-cleaning, confirm that the door locks and will not open.
- If the door does not lock, do not run Self Clean. Contact Customer Service.
Remove broiler pans, pots, and other utensils and excess spillage before self-cleaning.
Birds have very sensitive respiratory systems.
- Keep pet birds out of the kitchen or other rooms where kitchen fumes could reach them.
- During self clean, fumes are released that may be harmful to birds.
- Other kitchen fumes such as overheating margarines and cooking oils may also be harmful.
Proper installation and maintenance
TIP OVER HAZARD! A child or adult can tip the range over and be killed.

- Verify that the anti-tip bracket is securely installed. Ensure the anti-tip bracket is engaged whenever the range is moved to a new location.
![]()
Do not operate the range without the anti-tip bracket in place. Failure to follow the instructions in this manual can result in death or serious burns to children and adults.- Check for proper installation and use of the anti-tip bracket. Carefully tip the range forward pulling from the back to ensure that the anti-tip bracket engages the range leg and prevents tip-over. The range should not move more than 1" (2.5 cm).
- It is the home owner's responsibility to ensure the antitip bracket is installed.
In the event of a malfunction, it might become necessary to turn off the power supply.
- Have the installer show you the circuit breaker or fuse. Mark it for easy reference.

To avoid electrical shock hazard, before servicing the appliance, turn power off at the service panel and lock the panel to prevent the power from being switched on accidentally.
Proper Installation - Improper installation or grounding can cause electric shock.
- This appliance must be properly installed and grounded by a qualified technician.
- Connect only to properly grounded outlet.
- Refer to installation instructions for details.
User Servicing - Do not repair or replace any part of the appliance unless specifically recommended in this manual.
- All other servicing should be referred to an authorized service provider.
Light socket is live when door is open if main power supply is not turned off.
- Turn off main power supply at the service panel before changing the light bulbs.
Make sure the appliance and lights are cool and power to the appliance has been turned off before replacing the light bulb(s). Failure to do so could result in electrical shock or burns.
- The lenses must be in place when using the appliance.
- The lenses serve to protect the light bulb from breaking.
- The lenses are made of glass. Handle carefully to avoid breaking. Broken glass can cause an injury.
Failure to follow these instructions when removing the oven door may lead to personal injury or product damage.
![burn hazard]()
![shock hazard]()
Make sure oven is cool and power to the oven has been turned off before removing the door. Failure to do so could result in electrical shock or burns.- The oven door is heavy and parts of it are fragile. Use both hands to remove the oven door.
- The door front is glass. Handle it carefully to avoid breakage.
- Grasp only the side of the oven door. Do not grasp the handle. It may swing in your hand and cause damage or injury. Failure to grasp the oven door firmly and properly could result in personal injury or product damage.
- To avoid injury from hinge bracket snapping closed, be sure both levers are securely in place before removing the door.
- Do not force the door open or closed. The hinge could be damaged and cause damage or injury.
- Do not lay the removed door on sharp or pointed objects as this could break the glass. Lay it on a flat, smooth surface, positioned so that the door cannot fall over.
Grease and fat can ignite when heated.
- Keep the oven free from grease build up.
In the event of an error the display flashes and beeps continuously.
- Disconnect appliance from the power supply and call an authorized service provider.
Malfunctions can cause injuries.
- Do not operate this appliance if it is not working properly, or if it has been damaged. Contact an authorized service provider.
Conversion to Liquified Petroleum gas
Personal injury or death from electrical shock may occur, if the range is not installed by a qualified installer or electrician. Any additions, changes, or conversions required in order for this appliance to satisfactorily meet the application needs must be made by a qualified technician. Your gas range model is designed to allow for LP conversion by a qualified service technician.
- Before installing the kit, be sure to follow the LP Installation Instructions carefully.
High altitude installation
Contact Customer Service for use at altitudes above 5,000 ft (1524 m) elevation above sea level.
State of California Proposition 65 Warnings
This product may contain a chemical known to the State of California, which can cause cancer or reproductive harm. Therefore, the packaging of your product may bear the following label as required by California:
STATE OF CALIFORNIA PROPOSITION 65 WARNING:
Cancer and Reproductive Harm - www.P65Warnings.ca.gov
IMPORTANT SAFETY NOTICE: The California Safe Drinking and Toxic Enforcement Act requires the Governor of California to publish a list of substance known to the state to cause cancer, birth defect or other reproductive harm, and requires businesses to warn customers of potential exposure to such substances. The burning of gas cooking fuel and the elimination of soil during self-cleaning can generate small amounts of carbon monoxide. The fiberglass insulation in self clean ovens gives off very small amounts of formaldehyde during the first several cleaning cycles. California lists formaldehyde as a potential cause of cancer. Carbon monoxide is a potential cause of reproductive toxicity.
Exposure to these substances can be minimized by:
- Providing good ventilation when cooking with gas.
- Providing good ventilation during and immediately after self-cleaning the oven.
- Operating the unit according to the instructions in this manual.
Preventing material damage
Preventing oven cavity damage
NOTICE:
When the oven cavity is hot, any water inside it will create steam. The change in temperature may cause damage.
- Never pour water into the oven cavity when it is still hot.
- Never place cookware containing water on the oven cavity bottom.
The prolonged presence of moisture in the oven cavity leads to corrosion.
- Allow the oven cavity to dry after use.
- Do not keep moist food in the oven cavity for a long time with the door closed.
- Do not store food in the oven cavity.
Leaving the appliance to cool down with the door open will damage the front of neighboring kitchen units over time.
- Always allow the oven cavity to cool down with the door closed after cooking at high temperatures. Only leave the oven cavity to dry with the door open if a lot of moisture was produced during operation.
- Take care not to trap anything in the appliance door.
Fruit juice dripping from the baking tray leaves stains that cannot be removed.
- When baking very juicy fruit pies, do not pack too much on the baking tray.
Sitting or placing objects on the appliance door may damage it.
- Do not place or hang objects on the appliance door.
- Do not place cookware or accessories on the appliance door.
Carrying the appliance by the door handle could break it. The door handle cannot support the weight of the appliance.
- Do not carry or hold the appliance by the door handle.
Preventing cooktop damage
NOTICE:
OPERATIONAL FAULT.
- Always turn the control knob to the OFF position when the appliance is not being used.
Overheating can damage the cookware.
- Do not heat empty pots or pans.
A build-up of heat may damage the appliance.
- Never cover the cooktop, for example with aluminum foil or oven protectors.
- Do not place roasters, frying pans or grill stones on more than one burner at a time.
- Only use the accessories specified.
Acidic liquids such as lemon juice or vinegar may damage the surface finish of the appliance.
- Remove spilled liquids immediately. Use caution while the burners are still hot.
Heat may cause damage to adjacent appliances or furniture. If the appliance is in operation for an extended period, heat and moisture will be generated. Additional ventilation is required.
- Open the window or switch on an extractor hood that discharges the extracted air and moisture outside the building.
Register your appliance and join the Bosch family of perks:
bosch-home.com/us/mybosch

Documents / Resources
References
![www.bosch-home.com]() Home Appliances Global Website | Bosch
Home Appliances Global Website | Bosch![www.p65warnings.ca.gov]() http://www.p65warnings.ca.gov
http://www.p65warnings.ca.gov![www.bosch-home.com]() Bosch Home Appliances | Bosch Cleaners, Filters, Accessories & Parts Store
Bosch Home Appliances | Bosch Cleaners, Filters, Accessories & Parts Store![www.bosch-home.com]() Customer Service I Bosch
Customer Service I Bosch![www.bosch-home.ca]() Service - Get Support | Bosch Home Appliances
Service - Get Support | Bosch Home Appliances![www.bosch-home.ca]() Cleaners & Accessories | Bosch Home Appliances
Cleaners & Accessories | Bosch Home Appliances![bosch-home.com]() MyBosch - Personal product registration for Bosch Home Appliances
MyBosch - Personal product registration for Bosch Home Appliances

Download manual
Here you can download full pdf version of manual, it may contain additional safety instructions, warranty information, FCC rules, etc.
Download Bosch HDIP056U, HDIP056C, HDI8056U, HDI8056C - Dual Fuel Slide-In Oven 30" Manual
Advertisement


Need help?
Do you have a question about the HDIP056U and is the answer not in the manual?
Questions and answers