DeLonghi TCH Series, TCH8093ER - CERAMIC FAN HEATER Manual
- Instructions for use manual (8 pages)
Advertisement
Electrical connection
UK only
- If your appliance comes fitted with a plug, it will incorporate a 13 Amp fuse. If it does not fit your socket, the plug should be cut off from the mains lead, and an appropriate plug fitted, as below.
![]()
Very carefully dispose of the cut off plug after removing the fuse: do not insert in a 13 Amp socket elsewhere in the house as this could cause a shock hazard.
With alternative plugs not incorporating a fuse, the circuit must be re-fitted when changing the fuse using a 13 Amp Asta approved fuse to BS 1362. In the event of losing the fuse cover, the plug must NOT be used until a replacement fuse cover can be obtained from your nearest electrical dealer. The colour of the correct replacement fuse cover is that as marked on the base of the plug. - If your appliance is not fitted with a plug, please follow the instructions provided below:


The wires in the mains lead are coloured in accordance with the following code:
| Blue: | Neutral |
| Brown: | Live |
As the colours of the wires in the mains lead of this appliance may not correspond with the coloured markings identifying the terminals in your plug, proceed as follows:
The wire which is coloured blue must be connected to the terminal which is marked with the letter N or coloured black.
The wire which is coloured brown must be connected to the terminal which si marked with the letter L or coloured red.
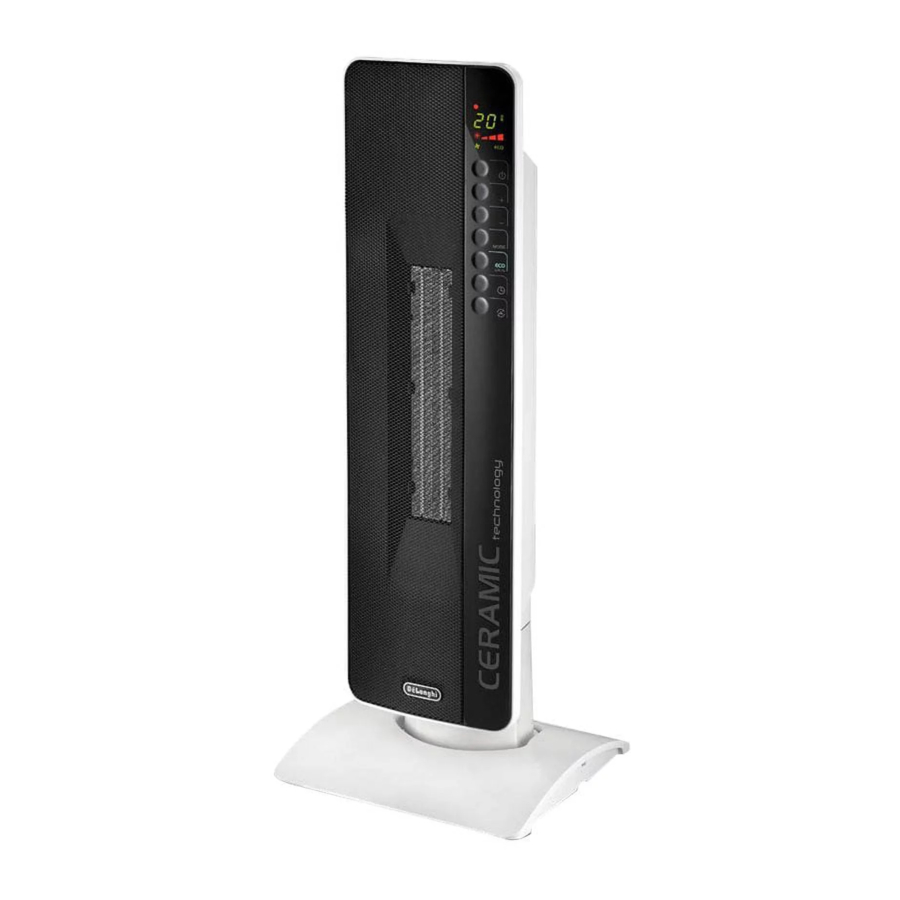
DESCRIPTION

Fig. 1
- ON/STAND-BY button
- +/- adjustment buttons
- MODE button (selects the operating mode)
- "ECO plus" button
- Timer button
- Swing button
- Remote control receiver
- Indicator light
- Air intake grille
- Filter
INSTRUCTIONS FOR USE
Read these instructions carefully before using the appliance.
Failure to comply with these instructions can lead to injury to persons and damage to the machine.
The manufacturer is not liable for damage deriving from the failure to comply with the user instructions.
Symbols used in these instructions
Important warnings are identified by the symbols below.
It is important to respect the warnings.


Failure to respect the warnings could lead to electric shock, serious injury, burns, fire or damage to the appliance.

Failure to observe the warning may result in life threatening injury by electric shock.
Failure to observe the warning could result in injury or damage to the appliance.

Failure to observe the warning could result in burns or scalds.
 Please note:
This symbol indicates recommendations and important information for the user.
Fundamental recommendations regarding safety
Dear Customer – The plug on this appliance will get 'warm' during use, this is perfectly normal. This product is A HIGH POWER HEATING APPLIANCE designed to our usual high standards but please make sure your wall sockets are in good condition and the plug is inserted correctly to avoid any accidental overheating. We suggest that you check the plug AND THE SOCKET regularly if the heater is in prolonged use, if you are in any doubt please consult an electrician.
USE
Installation
- The appliance can be used on any horizontal surface.
Do not overload the electrical circuit. Avoid using the same socket for other appliances.
Electrical connection
- Before plugging the appliance into the mains socket, check that the mains power supply corresponds to the value indicated on the rating plate and that the mains power supply is adequate for the load.
- THIS APPLIANCE COMPLIES WITH DIRECTIVE 2004/108/ EEC ON RADIO INTERFERENCE SUPPRESSION.
Mounting the base
- Fit the two parts of the base together, matching the guide pins on the front with the recesses on the back and snapping the two clips into place.

- Turn the appliance upside down and position the assembled base on the appliance in order to couple the two openings with the two tabs on the appliance, tilting it as shown in figure below, consequently turn the base down till the two frontal teeth snaps into position.

- Assembly time: approx. 5 minutes.
- Optional
- Fasten the tower to the base using the screw provided to achieve extra stability.
- Tools needed and estimated time:
1 Phillips head screwdriver type PH 2 x 100
1 screws (included)
Assembly time: approx. 2 minutes.


Operation and use
- Plug into the mains socket.
- The appliance emits a beep. The indicator light (H) comes on and remains lit while the appliance is powered.
- The appliance switches to stand-by. A dot flashing on the display means the tip over device has been activated. See paragraph: "Safety functions".
- Press ON/STAND-BY (A) to turn the appliance on. It begins heating the room according to the current settings.
- Press the MODE button (C) to select one of the following operating modes:
Fan![]()
Freeze prevention![]()
Heating 1![]()
Heating 2![]()
Heating 3![]()
- Fan
![]()
In this mode, only the fan operates and the appliance does not heat the room. - Freeze prevention
![]()
In this mode, the appliance keeps the room at a temperature of 7°C to avoid freezing. - Heating 1, 2 and Heating 3
![]()
In this mode, the desired temperature can be selected by pressing the adjustment buttons + and – (B):
- Fan


- Heating 1
![]()
The appliance operates at low power, reducing noise levels and energy consumption to a minimum. - Heating 2
![]()
The appliance operates at medium power. - Heating 3
![]()
The appliance operates at high power to heat the room rapidly.


- "ECO plus" function
The "ECO plus" function is available in Heating 1, 2 and 3 modes only. To activate the function, press the "ECO plus" button (D). When this function is active the appliance automatically sets the most appropriate power level to guarantee optimum comfort while reducing energy consumption. While the "ECO plus" function is active, the appliance may switch automatically to a lower heating power than the one displayed. This may happen a number of times during use. - To distribute the air flow over a wider surface, press the swing button (F)
![]() . The appliance starts oscillating to the right and left. To stop the appliance in the desired position, simply press the swing button (F) again.
. The appliance starts oscillating to the right and left. To stop the appliance in the desired position, simply press the swing button (F) again. - To turn the appliance off, press the ON/STAND-BY button (A). The display may visualize a countdown for about 6 seconds.
 . The appliance starts oscillating to the right and left. To stop the appliance in the desired position, simply press the swing button (F) again.
Please note: Room temperature can be displayed in either °C or °F. To change the unit of measurement for the temperature, press and hold the + button for a few seconds, then release.
Digital 24 h timer
This function can be activated from any operating mode.
Auto-start: with the appliance in STAND-BY, press the timer button ![]() (E). The
(E). The ![]() symbol is displayed together with the time remaining before the appliance comes on. To adjust the timer, use the adjustment buttons + and - (B), then wait a few seconds for the setting to be memorised. The stand-by light (H) is displayed together with the
symbol is displayed together with the time remaining before the appliance comes on. To adjust the timer, use the adjustment buttons + and - (B), then wait a few seconds for the setting to be memorised. The stand-by light (H) is displayed together with the ![]() symbol, indicating that the timer has been set. When the programmed time is reached, the appliance comes on with the settings used during the previous period of operation.
symbol, indicating that the timer has been set. When the programmed time is reached, the appliance comes on with the settings used during the previous period of operation.
Auto-off: with the appliance on, press the timer button ![]() (E). The
(E). The ![]() symbol is displayed together with the time remaining before the appliance goes off.
symbol is displayed together with the time remaining before the appliance goes off.
To set the timer, use the adjustment buttons + and - (B), then wait a few seconds for the setting to be memorised.
The current settings are displayed again, together with the ![]() symbol indicating that the timer has been set.
symbol indicating that the timer has been set.
When the programmed time is reached, the appliance goes off automatically. To go back to operation without the timer, press the timer button (E) twice.
The timer symbol ![]() disappears from the display.
disappears from the display.
Using the remote control
The functions on the remote control are the same as those on the appliance control panel. For a description of the functions, see the "Operation and use" section above.
Inserting or replacing the batteries
The remote control is powered by a CR2032 lithium battery. To operate the remote control, pull and remove the plastic strip under the battery cover. To replace the batteries, remove the battery cover by sliding it as shown in the figure.
When replacing the batteries, make sure you respect the polarity. Replace the cover as shown in the figure. Old batteries are harmful to the environment and must be removed and disposed of in compliance with current legislation.

MAINTENANCE
- Always unplug from the mains socket before cleaning.
- During the season when the appliance is in use, clean the air intake and outlet grilles regularly using a vacuum cleaner.
- To clean the filter, remove the rear grille by pulling it outwards (fig. 1). Remove the dust filter which retains impurities in the air drawn in from the room, blow on it lightly then replace in the appliance.
- Never use abrasive powders or solvents to clean the appliance.
TECHNICAL CHARACTERISTICS
| Power supply | See rating plate |
| Absorbed power | " |
| Max Power | 2400W |
TROUBLESHOOTING
| PROBLEM | CAUSE | SOLUTION |
 display and emits a beep display and emits a beep | Temperature sensor is not working properly | The product needs to be serviced Customer Experience |
Product doesn't turn on | Check that the plug is connected to the outlet | Plug in |
| Auto-start is on | Wait till time elapsed or press the button (E) twice to cancel the auto-start and push the button (A) | |
| Room temperature has reached the set temperature | Use the "+" button to increase the set temperature | |
The appliance goes off unexpectedly | Check that the plug is connected to the outlet The set temperature has been reached or the time set on the timer has elapsed | Plug in |
A green dot is flashing and unit is off | The tip-over switch has been activated | Make sure the appliance is standing upright on a flat surface, if the problem persists contact our toll free number to assist you |
SAFETY WARNINGS
- The appliance must not be placed immediately under a fixed power socket.
- Do not use the appliance near showers, bathtubs, sinks, swimming pools, etc.
- If the power cable is damaged, it must be replaced by the manufacturer, an authorised service centre or a qualified electrician in order to eliminate all risk.
- This appliance can be used by children aged from 8 years and above and persons with reduced physical, sensory or mental capabilities or lack of experience and knowledge if they have been given supervision or instruction concerning use of the appliance in a safe way and understand the hazards involved. Children shall not play with the appliance. Cleaning and user maintenance shall not be made by children without supervision.
- Children of less than 3 years should be kept away unless continuously supervised.
- Children aged from 3 years and less than 8 years shall only switch on/ off the appliance provided that it has been placed or installed in its intended normal operating position and they have been given supervision or instruction concerning use of the appliance in a safe way and understand the hazards involved. Children aged from 3 years and less than 8 years shall not plug in, regulate and clean the appliance or perform user maintenance.
![]()
Some parts of this product can become very hot and cause burns. Particular attention has to be given where children and vulnerable people are present. - ATTENTION: To avoid the safety system resetting accidentally, this appliance must not be powered through an external on/off device such as a timer, or connected to a circuit which is turned off and on regularly by the energy supplier.
- Do not use the appliance in small rooms when they are occupied by persons that are not capable of leaving the room, unless constant supervision is provided.
![]()
To avoid overheating, never under any circumstances cover the appliance during operation as this would lead to a dangerous rise in temperature.
![]()


Please note:
- Always use the appliance in an upright position.
- The use of extension leads is not recommended.
However if they cannot be avoided, follow the instructions accompanying the extension lead and never exceed the power limit marked on the extension. - The heater must be positioned at least 50 cm from furniture or other objects.
- Do not use the appliance in rooms with a floor area of less than 4m2.
- Before putting the appliance away, make sure it is completely off and unplugged from the mains socket.
Wrap the cable around the base.
Do not store in dusty atmospheres. - Do not rest anything on the appliance.
- Do not use the appliance to dry laundry. Do not obstruct the air intake and outlet grilles (danger of overheating).
- Do not use the appliance near walls, furniture, curtains, etc.
Safety functions
- Safety device: the appliance is fitted with a safety device which switches it off in the event of accidental overheating (e.g. obstruction of air intake and outlet grilles, motor turning slowly or not at all).
To reset, unplug the appliance from the mains socket for a few minutes, remove the cause of overheating then plug in again. - Tip over safety device: a tip over safety device turns the appliance off if it falls over or is positioned inappropriately in such a way as to jeopardise safety.
The appliance emits a beep and a dot flashes on the display. The appliance resumes operation a few seconds after being placed in an upright position again.
Use in compliance with intended use
Use this heater only as described in this manual. All other use is considered improper. This appliance is not suitable for commercial use. The manufacturer is not liable for damage deriving from improper use of the appliance. This is a household appliance only. It is not intended to be used in:
- staff kitchen areas in shops, offices and other working environments;
- farm houses;
- by clients in hotels, motels and other residential type environments;
- bed and breakfast type environments.
Use in this manner will invalidate the manufacturers warranty.
De'Longhi Appliances via Seitz, 47 31100 Treviso Italia www.delonghi.com

Documents / Resources
References
Download manual
Here you can download full pdf version of manual, it may contain additional safety instructions, warranty information, FCC rules, etc.
Download DeLonghi TCH Series, TCH8093ER - CERAMIC FAN HEATER Manual
Advertisement


Need help?
Do you have a question about the TCH Series and is the answer not in the manual?
Questions and answers