
Related Manuals for HOMCOM B3-0059


Summary of Contents for HOMCOM B3-0059
- Page 1 INadb002V01_ES B3-0059 MANUAL DE USUARIO Advertencia: No somos responsables de ninguna lesión causada por usar el trampolín.
- Page 11 2. Monte el riel superior (C) y únalo firmemente como lo que se muestra en la imagen.
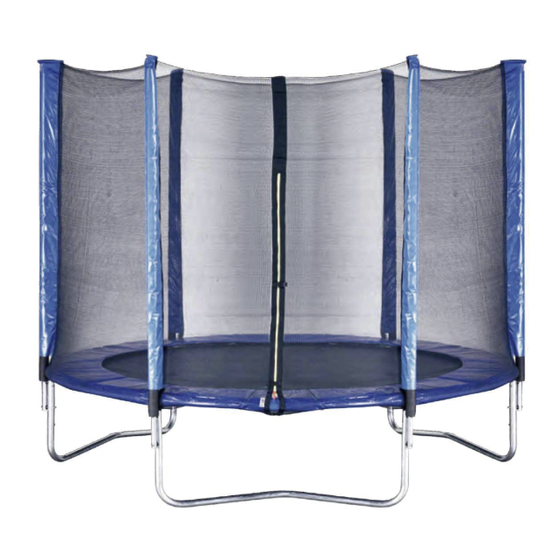
- Page 13 MONTAJE DE RED DE CERRAMIENTO PASO 1: CONECTE DOS SECCIONES DE POSTES SUPERIORES JUNTOS COMO LO QUE SE MUESTRA EN LA FIGURA 1. Luego instale la cubierta del poste. Como lo que se muestra en la Figura 2 PASO2 : REPITA EL PASO 1 HASTA QUE SE INSTALENTODOS LOS POSTES. A1:Monte los postes superiores en la extensión A2: Fijeel perno con la llave.
- Page 14 PASO3:Extienda la Red de cerramiento (P) sobre la estera del trampolín. Localice el panel con la puerta y alinee la red en el lugar donde le gustaría entrar y salir del trampolín. Instale la correa superior con la tapa comolo que se muestra en la siguite Figura. La cremallera debe estar en el medio de los dos tubos inferi- ores.
- Page 29 ENCLOSURE NET ASSEMBLY STEP 1 : CONNECT TWO SECTIONS OF UPPER POLES TOGETHER AS SHOWN IN FIGURE Then set up the pole cover. AS SHOWN IN FIGURE 2 STEP 2 : REPEAT STEP 1 UNTIL ALL THE POLES ARE SET UP. A1:Mount the upper poles onto the vertical A2: Firm the bolt using the wrench leg extension using parts of spacer, washer,screw, and nut.
- Page 30 STEP 3: Spread Enclosure net (P) out on the trampoline mat. Locate the panel with the doorway and align the net as to where you would like to get in and out of the trampo- line. Install the top belt with the cap as below pictures. The zipper must be in the middle of the two bottom tubes...
Need help?
Do you have a question about the B3-0059 and is the answer not in the manual?
Questions and answers