Table of Contents
Advertisement
Quick Links
Advertisement
Table of Contents

Related Manuals for MANDAI DESIGN Addison

Summary of Contents for MANDAI DESIGN Addison
- Page 1 Addison Assembly Instruction...
- Page 2 Assembly video View our instructional video for assembly. You can scan the QR code below or visit our YouTube channel: https://youtube.com/@mandaidesign Use your smartphone camera to scan the QR code or visit our website directly at: www.mandai-design.com/pages/assembly-instructions AD.NOV.2023.01.EN...
-
Page 3: Modular Assembly
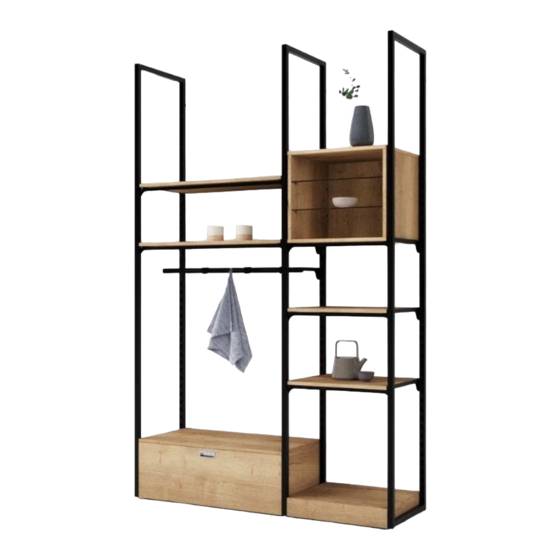
Modular assembly Addison is a versatile modular shelving system that offers our customers unlimited design possibilities. These assembly instructions cover the fundamental steps to assemble the frame, along with all available components. Please note that the configuration you ordered may not include all the components explained here. -
Page 4: Safety Tips
Make sure the shelf is assembled on a level surface. To use Addison as a freestanding shelf, you must use the diagonal connectors to interconnect the upright frames for stability. The assembly with diagonal connectors can be found on page 15. -
Page 5: Plan Ahead
Plan ahead Unpack all items and organize them to get a clear overview. Verify your measurements on-site and mark the position of the shelf using tape. Place an underlay beneath the shelf for protection. When planning the placement of your shelving system, consider nearby doorways and walk- ways. -
Page 6: Load Capacity
Load capacity In general, we recommend the use of shelf support profiles. These ensure a consistent appearance, even when the shelves carry varying loads. Shelf support profiles should always be used for each shelf when the load is between 15 kg and up to a maximum of 30 kg. - Page 7 Accessories For your added convenience, we include additional screws with each order. You will find these indicated in the drawings with the corresponding number. The wall mounting anchor is suitable for both solid and drywall. Note: The leveling adjustable foot is pre-assembled and attached to the upright frame. The AW20 screw bit is used both for wall mounting, display/chalk board and wooden elements.
-
Page 8: Frame Alignment
Frame alignment 1. Before starting, mark the beginning and the end of the shelf on the wall. 2. Set up the frame against the wall. 3. Align the frame with a spirit level. If necessary, adjust the feet using the supplied wrench. Note: Pay particular attention to the back of the shelf frame, there are six holes on the backside. - Page 9 Wall mounting frame 1. Mark the drill holes with a pen through the hole in the mounting frame, or measure the distance. 2. Drill holes for the anchors and insert them. 3. Select the spacer sleeve so that the mounting frame is level. 4.
-
Page 10: Frame Extension
Frame extension 1. Screw the connector securely to the wall fixed frame at the bottom. 2. Attach the next mounting frame to the other end of the connector. 3. Align this mounting frame with the level and mark the drill holes on the wall. 4. - Page 11 Presentation box 1. Hang the support profile at the desired height into the mounting frame. 2. Hang the two brackets at the same height. 3. Carefully slide the presentation box on the brackets. The presentation box must be flush with the front edge and secured from below with a total of four screws. 4.
- Page 12 Shelf board, Display board + Chalk board Shelf board: Screw the brackets to the underside of the shelves. The bracket must be flush with the front edge of the shelf. flush Shelf board Display board/Chalk board: Screw the adapters to the back of the board according to the dimensions specified below Display board/Chalk board AD.NOV.2023.01.EN...
- Page 13 Shelf board, Display board, Chalk board + Display fittings 1. Hang the shelves in position and use support profiles as needed, depending on the purpose. A support profile is required for the presentation box and the angled shelf board. 2. Hang the display/chalk board in the mounting frame. 3.
- Page 14 Storage box + Pedestal 1. Place the storage box on the connector. 2. Adjust the feet under the storage box by turning them by hand until the desired position is reached. Ideally, the lower edge of the storage box should align with the height of the mounting frame. The same steps apply to the pedestal.
- Page 15 Free-standing shelf assembly 1. Set up the mounting frame. 1. Securely attach the connector to the 2. Align the frame using a level. mounting frame. 3. If necessary, adjust the leveling 2. Align the next mounting frame with a feet with a wrench. level and fasten it at the bottom using the connector.
- Page 16 Contact Mandai GmbH Straße der Deutschen Einheit 4b 04643 Geithain +49 (0) 34341 40 70 950 info@mandai-design.com www.mandai-design.com Social Media: www.facebook.com/mandaidesignde www.instagram.com/mandai_design_de www.pinterest.de/mandaidesign www.youtube.com/@mandaidesign © Mandai GmbH 11/2023...
Need help?
Do you have a question about the Addison and is the answer not in the manual?
Questions and answers