Table of Contents
Advertisement
Quick Links
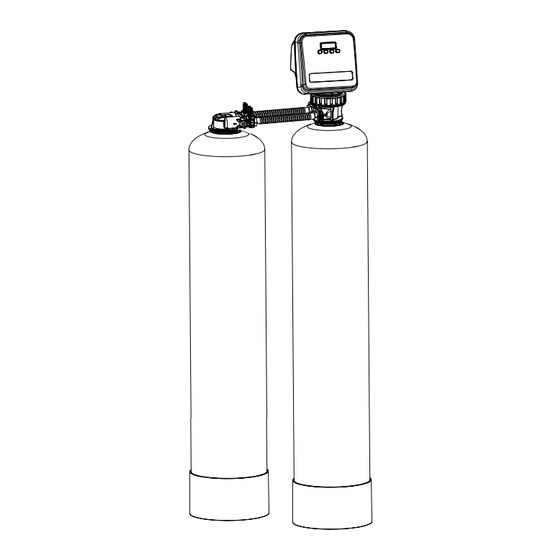
465 BIF/565 BAF
Water Filter Manual
1. This manual contains important safety and operating instructions. Read all instructions and follow
them when using this product. Failure to consider this information and follow these instructions,
including those concerning maintenance, may result in property damage, injury and or death.
Page 23 of this manual contains important maintenance procedures for the continued proper
operation of your unit. These MUST be performed regularly for your warranty to remain valid.
2. We recommend installation only be completed by a competent installer or plumbing professional to insure this
product is installed in accordance with local plumbing codes.
3. Read this manual in full and follow all instructions carefully before operation.
4. Avoid pinched O-rings during installation by applying NSF certified lubricant to all seals (provided with install kit).
5. This system is not intended for treating water that is microbiologically unsafe or of unknown quality without
adequate disinfection before or after the system.
6. Discard small parts remaining after the installation.
7. Failure to install the system correctly voids the warranty.
8. Handle all components of the system with care. Do not drop, drag or turn components upside down.
9. Save these instructions and keep track of your product's serial number.
NOTICE: THIS MANUAL CONTAINS A LIMITED WARRANTY. BY INSTALLING AND OR USING THIS PRODUCT, YOU WAIVE
CERTAIN LEGAL RIGHTS INCLUDING THE RIGHT TO SUE OR CLAIM COMPENSATION IN THE EVENT OF PROPERTY
DAMAGE, INJURY, AND OR DEATH.
Canature WaterGroup Canada Inc.
855 Park St., Unit 1
Regina, SK, S4N 6M1
Toll Free: (877) 288-9888
Canature WaterGroup U.S.A. Inc.
6353 Commerce Drive
Whitestown, IN, 46075
Toll Free: (877) 288-9888
IAPMO R & T Certified
Against NSF/ANSI 42
Advertisement
Table of Contents

Subscribe to Our Youtube Channel
Related Manuals for Canature WaterGroup 465 BIF


Summary of Contents for Canature WaterGroup 465 BIF
- Page 1 465 BIF/565 BAF Water Filter Manual IAPMO R & T Certified Against NSF/ANSI 42 1. This manual contains important safety and operating instructions. Read all instructions and follow them when using this product. Failure to consider this information and follow these instructions, including those concerning maintenance, may result in property damage, injury and or death.
-
Page 2: Table Of Contents
SAFETY FIND AND RECORD VALVE TYPE & SERIAL NUMBERS RECORDS & CONTACTS KNOW THIS BEFORE STARTING YOUR INSTALLATION HOW YOUR WATER FILTER WORKS FEATURES & TERMINOLOGY FLOW RATE INFORMATION CHECK YOUR WATER PRESSURE AND PUMPING RATE FEED WATER PARAMETERS BACKWASHING INSTRUCTIONS UNPACKING/INSPECTION BEFORE INSTALLATION PREPARATIONS... -
Page 3: Safety
Used to depict a specific behavior that MUST be followed to avoid the present hazard (problem). Canature WaterGroup U.S.A. Inc. / Canature WaterGroup Canada Inc. (“Canature”) has disclosed all known risks associated with the product within this manual but cannot disclose risks that are beyond its knowledge. -
Page 4: Find And Record Valve Type & Serial Numbers
FIND AND RECORD VALVE TYPE & SERIAL NUMBERS There are two labels located on your Unit: 1) Control valve label and 2) System number label. Find and record your product model number, serial number, and valve serial number in the Records & Contacts section as they will be important if you need to troubleshoot. Item # Model # Control Valve Serial #... -
Page 5: Know This Before Starting Your Installation
KNOW THIS BEFORE STARTING YOUR INSTALLATION Read this manual thoroughly to become familiar with Do not use this filter on hot water supply lines. the filter and its capabilities before installing or Avoid pinched O-rings during installation by applying the operating. - Page 6 KNOW THIS BEFORE STARTING YOUR INSTALLATION (CONTINUED) The BIF, BIFMN, BAF and BIFHS all have individual design parameters that must be followed. Please review and verify correct sizing for your application utilizing the chart supplied below and by using the following formula: (Iron mg/l ________ X 1) + (manganese mg/l ________ X 2) + (Hydrogen Sulphide mg/l _______X 3) = Total Iron mg/l ________ BIF, BIFMN, BAF, and BIFCC Sizing and Application Guide Chart size is as follows:...
-
Page 7: How Your Water Filter Works
HOW YOUR WATER FILTER WORKS The BIF/BAF systems work by adding oxygen to the incoming water by passing it through a bubble of compressed air. The water is then passed through a special filter bed. The special media not only increases the pH of the water to enhance iron removal but also acts as a physical barrier to trap iron precipitate. As more water passes through this iron filter, the oxygen in the unit is used up, and the media gets loaded with iron. -
Page 8: Feed Water Parameters
CHECK YOUR WATER PRESSURE AND PUMPING RATE (CONTINUED) BACKWASH FLOW RATES The most important criteria in sizing a filter is the capacity of the pump. The water must pass through the filter media at a service flow rate that allows it to operate properly. The filter must also be backwashed at a flow rate sufficient to dislodge and remove captured particulates. Failure to provide sufficient water will cause a build-up of particulates in the filter media, impairing its filtration ability. -
Page 9: Backwashing Instructions
Groundwater systems are the most common drinking water source for sulfide contamination because of the anaerobic environment in which groundwater exists. Chlorination has been considered the most practical method for POE systems, but is often difficult to implement because continuous chemical addition and ongoing maintenance is required. The formation of THMs is also a concern. Sulfide problems in surface water sources are much less frequent because of the natural aeration that occurs in most flowing surface water sources. -
Page 10: Unpacking/Inspection
UNPACKING/INSPECTION Be sure to check the entire unit for any shipping damage or parts loss. Also note damage to the shipping cartons. Contact the transportation company for all damage and loss claims. The manufacturer is not responsible for damages in transit. Small parts, needed to install the filter, are in a parts box. -
Page 11: Before Installation
BEFORE INSTALLATION Make sure you have a copy of your most recent water test results. If your water has not been tested previously, your professional installer can obtain a water sample bottle to be sent to one of our facilities for a free analysis. It is important that this product not be installed until you have this information. -
Page 12: Preparations
PREPARATIONS 3. Fill the gravel support bed first. MEDIA INSTALLATION A large funnel makes filling the tank much easier. Order part #99003 Follow the steps below for proper media loading. separately for your own funnel. Slowly add the gravel. Depending on the type of system, add the resin, or 2. - Page 13 PREPARATIONS (CONTINUED) BIFMM Models Anthrafilt/ Anthracite Fine Sand Fine Garnet Coarse Garnet Support Bed (when supplied) Gravel 4. Apply the supplied lubricant (part #92360) to the internal O-ring at the bottom of the control valve. Apply lubricant to the larger O-ring on the bottom of the valve that seals with the tank threads.
-
Page 14: Planning Your Installation
PLANNING YOUR INSTALLATION WATER FILTER INSTALLATION LAYOUT Select the location for your filter tank with care. Various conditions that contribute to proper location include: 1. All installation procedures must conform to local or regional plumbing codes. Canature is not liable for any non-compliance with local requirements 2. - Page 15 PLANNING YOUR INSTALLATION (CONTINUED) WATER FILTER INSTALLATION NOTE Check valve needs to be installed on the inlet side of the system. Check Valve Inlet 5/8” Drain Line Outlet Clips Bypass Floor drain NOTE Waste connections or drain outlet shall be designed and constructed to provide for connection to the sanitary waste system through an air-gap of 2 pipe diameters or 1 inch (22 mm) whichever is larger.
-
Page 16: Installation Steps
INSTALLATION STEPS TO BEGIN YOUR INSTALLATION: 1. Make sure the bypass is attached securely to the control valve. 2. Apply thread tape to threaded connections straight or elbow plumbing adaptors 3. Apply the supplied lubricant (#92360) to the O-rings of the fittings. 4. - Page 17 INSTALLATION STEPS (CONTINUED) Using the included Allen key, place the unit in the bypass position. a. Slowly turn the main water supply ON. b. At the nearest cold treated water tap, remove the tap screen, OPEN the tap and let water run a few minutes or until the system is free of any air or foreign material resulting from the plumbing work.
-
Page 18: Understand The Screen & Keypad Configuration
UNDERSTAND THE SCREEN & KEYPAD CONFIGURATION The control valve is controlled with simple, user-friendly electronics, displayed on an LCD screen CONNECT THE TRANSFORMER Connect the transformer to the unit by plugging the 12 volt transformer into a 120 VAC 60 Hz outlet WARNING If your power supply is subject to surges or frequent outages, surge protection is recommended... -
Page 19: Start-Up Instructions
START-UP INSTRUCTIONS STEP 1. PURGE AIR FROM THE UNIT PRESS SETTINGS KEY AUG/30/2022 REGENERATION 3 SEC TO UNLOCK 12:15AM IMMEDIATELY 1. Press any button to start. The display may read PRESS 3. Press and hold button two (2) to start 4. - Page 20 START-UP INSTRUCTIONS (CONTINUED) STEP 2. PROGRAM HOUSEHOLD SETTINGS This unit is factory set for the correct size based on average applications. You are only required to set the date and the time of day. PRESS SETTINGS KEY AUG/30/2023 TIME OF DAY 3 SEC TO UNLOCK 12:15AM 12:15AM...
- Page 21 START-UP INSTRUCTIONS (CONTINUED) STEP 2. PROGRAM HOUSEHOLD SETTINGS (CONTINUED) REGEN. DAYS REGEN. DAYS DAYS DAYS 14. Now press button three (3) or 16. Now press button three (3) or four (4) to 15. Press button one (1) once to four (4) to change the DAY value change REGEN.
-
Page 22: Plumbing System Clean Up
PLUMBING SYSTEM CLEAN UP The following procedures are guidelines only but have proven successful in most instances. Under no circumstances should any procedure outlined below be followed if contrary to any other household appliances manufacturer’s instruction(s). Should there be any questions concerning the advisability of performing a procedure, it is strongly recommended that the dealer be consulted prior to performing the procedure. -
Page 23: System Maintenance
SYSTEM MAINTENANCE Maintenance of your new water filter requires very little time or effort but is essential. Regular maintenance will ensure many years of efficient and trouble-free operation. Check with your local dealer about setting up a regular maintenance plan.Failure to follow maintenance instructions and schedule will result in the unit failing to operate properly and void your warranty. - Page 24 SERVICING YOUR CONTROL VALVE (CONTINUED) INSPECTION & REPLACEMENT OF PISTON ASSEMBLY AND SEAL & SPACER KIT Seal and Remove all Piston Spacer Screws Assembly Plate Brine Valve Assembly 1. Follow steps 1 to 3 of Powerhead Removal 3. Remove the plate from the valve body and 5.
- Page 25 SERVICING YOUR CONTROL VALVE (CONTINUED) CLEAN INJECTOR ASSEMBLY Sediment, salt, and silt will restrict or clog the injector. A clean water supply and pure salt will prevent this from happening. The injector assembly is located on the right side of the control valve when facing your softener. The assembly is easy to clean, start by: 1.
-
Page 26: Troubleshooting Guide
TROUBLESHOOTING GUIDE NOTE Before attempting any troubleshooting, be sure to test the water. The tests should include; 1. Raw water 2. Hot treated water 3. Cold treated water. PROBLEM DELIVERS UNTREATED WATER The bypass is closed, sending raw water past the unit. Return the bypass valve to the open position to service the home. -
Page 27: Common Spare Parts
COMMON SPARE PARTS Part Number Description 60090003 QC Valve connector one (1) inch straight with O-ring 60090006 QC Valve connector three-quarters (3/4) inch straight with O-ring 60090010 QC Valve connector three-quarters (3/4) inch elbow with O-ring 60010025 Locking clip large 60010069 Locking clip small 60010006... -
Page 28: Warranty
Warranty on Control Valve and Parts: Canature WaterGroup™ will replace or repair any part (except for Wear and Tear Items – Media, Piston, Seals and Brine Valve) which fails within seven (7) years from date of manufacture, as indicated by the serial number, provided the failure is due to a defect in material or workmanship. The only exception from the date of manufacture shall be proof of purchase or installation is provided and then the warranty period shall be from the date thereof.
Need help?
Do you have a question about the 465 BIF and is the answer not in the manual?
Questions and answers