Table of Contents
Advertisement
Quick Links
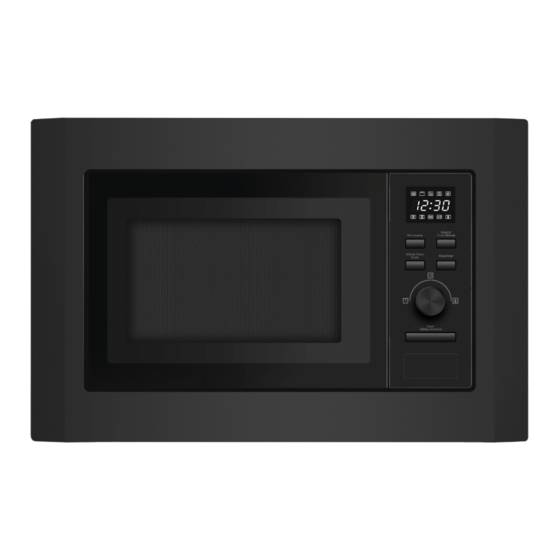
Microwave Oven
LAM7200
LAM7202
l Please read this User & Installation Manual to ensure safe fitting and use of the appliance.
l The appliance should be fitted by a suitably competent and qualified person.
l Please keep these instructions in a safe place for future reference.
l Danger of suffocation, keep packaging material away from children.
User Instructions and Installation
ISSUE v1.4 270723
www.howdens.com/appliance-registration
Advertisement
Table of Contents

Subscribe to Our Youtube Channel
Related Manuals for Lamona LAM7202


Summary of Contents for Lamona LAM7202
- Page 1 Microwave Oven LAM7200 LAM7202 l Please read this User & Installation Manual to ensure safe fitting and use of the appliance. l The appliance should be fitted by a suitably competent and qualified person. l Please keep these instructions in a safe place for future reference.
- Page 2 Microwave Oven LAM7200 / LAM7202 www.howdens.com...
- Page 3 Instructions Welcome Dear Customer, Congratulations on your choice of microwave oven. This user and installation manual will help you use your product quickly and safely. • Please read this manual before installing and using the microwave. • Always follow the safety instructions. •...
-
Page 4: Table Of Contents
Microwave Oven LAM7200 / LAM7202 Contents 1. Warnings & safety information 5 Enquire function Child lock Intended application General safety 7. Trouble shooting Safety with children Observations that are normal Electrical safety Problem, cause and remedy Safety in use 8. Care & maintenance... -
Page 5: Warnings & Safety Information
Instructions 1. Warnings & safety information • Please read these instructions. The microwave may be used by The manufacturer is not p e o p l e w i t h re d uc e d p hysi c al , responsible if an incorrect installation sensory or mental capabilities, or and / or improper use causes injury and... - Page 6 Microwave Oven LAM7200 / LAM7202 Microwave heating beverages can Do not use the appliance when it result in delayed eruptive boiling. is empty. Metal parts inside the Care must be taken when handling cooking compartment can create the liquids’ container.
-
Page 7: Safety With Children
Instructions Safety with children Keep children and pets away from the appliance when it operates or This appliance can be used by when it cools down. Accessible parts may be hot. children aged from 8 years and above and persons with reduced Electrical safety physical, sensory or mental capabilities or lack of experience... -
Page 8: Safety In Use
Microwave Oven LAM7200 / LAM7202 • Open the door carefully. Use of If it is necessary to use an extension ingredients containing alcohol cord, use only a 3-wire extension cord. can come into contact with hot • A short power-supply cord is provided surfaces or mix with air and ignite. -
Page 9: Precautions To Avoid Possible Exposure To Excessive Microwave Energy
Instructions • 2.Microwave cooking, Do not keep moist dishes and food in the appliance after you have a general guide finished cooking. Precautions to avoid Remove aluminium foil packaging possible exposure to from metal containers, etc. before excessive microwave you prepare the food for heating. energy •... -
Page 10: Defrosting Meat, Poultry And Fish
Microwave Oven LAM7200 / LAM7202 • Dishes containing sauce must be Defrosting butter & portions of stirred from time to time. gateau: • • Turn larger pieces of food over after Do not fully defrost in the appliance, half the cooking time. -
Page 11: Cookware You Can Use
Instructions Cookware you can use in the microwave Utensils Remarks Browning dish Follow manufacturer’s instructions. The bottom of a browning dish must be at least 3/16 inch (5mm) above the turntable. Incorrect usage may cause the turntable to break. Dinnerware Microwave-safe only. Follow the manufacturer’s instructions. Do not use cracked or chipped dishes. -
Page 12: Microwave And Accessories
Microwave Oven LAM7200 / LAM7202 3.Microwave and accessories Cooking Compartment Door Assembly Safety Interlock System Control Observation Panel Window Glass Tray Turntable Installation Glass Tray (underside) Turntable Ring Turntable Shaft • Never place the glass tray upside down. Its movement must not be restricted. -
Page 13: Control Panel
Instructions 4.Control Panel Digital Display Allows defrosting by time or weight Provides access to multi-section cooking Sets the microwave functions. power level (%). Pressing while cooking shows the current power setting. Stops cooking or clears the current Provides access to the input. -
Page 14: Microwave Cooking
Microwave Oven LAM7200 / LAM7202 Setting the clock The clock displays time in 24 hour format. It will not work if it is has not been set at power on. When the microwave is switched on, it will beep and display 1. -
Page 15: Select The Power Setting
Instructions (A) Select the power setting 1. Press ..to access power setting The display flashes 2. Press repeatedly or rotate to cycle through the settings 3. Press to confirm the selected power setting. The display stops flashing. (B) Set the cooking time 4. -
Page 16: Quick Start
Microwave Oven LAM7200 / LAM7202 Quick start • Quick start allows rapid selection of cooking time at 100% power. • This function can only be used when the microwave is in a non-cooking state. Method A 1. Press ..to start cooking (100% power) 2. -
Page 17: Defrost By Time
Instructions 3. Press to start defrosting. Defrost by time 1. Press twice.......... T he display shows 2. Rotate ..to set the defrost time (up to 95 minutes) Example 3. Press to start defrosting. NOTE: The defrost power is P30 and cannot be changed. Kitchen timer 1. -
Page 18: Auto Menu
Microwave Oven LAM7200 / LAM7202 Auto menu 1. Rotate right to select a menu* ..2. Press to confirm. Turn to choose the weight** 3. Press to start cooking. *Menu **Weight Display 200g Pizza 400g 250g Meat 350g 450g 200g... -
Page 19: Stage Cooking
Instructions 2 Stage cooking This function allows a two stage cooking process. Defrost (1), then cook (2). 1. Press twice............the display shows 2. Turn to set the defrost time 3. Press , the display shows 4. Press again / repeatedly or rotate to set power Example 5. -
Page 20: Enquire Function
Microwave Oven LAM7200 / LAM7202 Enquire function While cooking, to show the current power setting: Press ... T he current power setting is displayed for 3 seconds Example While cooking, to show the clock: Press ..T he current time (if set) is displayed for 3 seconds... -
Page 21: Trouble Shooting
Instructions 7. Trouble Shooting During normal operation the following observations are normal When cooking, the If the microwave is close to a radio or TV, reception microwave interferes may be impaired , this is normal. with TV reception. If cooking using a low power setting, the light may The oven light is dim. -
Page 22: Care & Maintenance
Microwave Oven LAM7200 / LAM7202 8. Care & Maintenance Door contact surfaces and neighbouring parts The microwave must be unplugged from the power supply Clean the door frame, contact socket before cleaning. surfaces and neighbouring parts with a damp cloth. -
Page 23: Cleaning The Accessories
Installation Cleaning the accessories authorised Lamona service engineer as this may involve removal of a cover giving Remove the the glass tray and protection against exposure to turntable ring. Clean with soapy microwave energy. water. 9. Installation Utensil Test Please read this manual carefully See page 11, for before installation. -
Page 24: Electrical Connections
Microwave Oven LAM7200 / LAM7202 Adapters, multi-way strips and Do not install or use the extension leads must not be used. appliance if it appears to Overloading can result in a risk be damaged. of fire. Electrical Connections • Electrical connection must be made by a suitably qualified person. -
Page 25: Minimum Installation Height
Installation Mounting the microwave Minimum installation height is 850mm. Supplied Components Depending upon the installation and any other appliances fitted (e.g. an oven), the microwave may need to be raised on the shelf slightly to avoid fascia clash. Do not cover ventilation slots and air intakes points. -
Page 26: Exhaust Venting And Service Void
Microwave Oven LAM7200 / LAM7202 Exhaust venting and service void 3.Ensure the microwave is centred. 15mm 1. Place a spacer on the bottom shelf for best appearance. 4. Install fixing screws at the four corners of the outer frame. 3-6mm Spacer 2. -
Page 27: Technical Specifications
Installation (Top left side) fixing screw (Bottom left side) fixing screw 10. Technical Specifications Model LAM7200 / LAM7202 Rated Voltage 230V ~ 50Hz Rated Input Power 1050W (microwave) Rated Output Power 700W (microwave) Oven Capacity Turntable Diameter Ø 245mm External Dimensions... -
Page 28: Environmental Care
Microwave Oven LAM7200 / LAM7202 11. Environmental Care This appliance is marked according to the European directive 2012/19/EU on Waste The environmentally friendly, Electrical and Electronic recyclable packaging is designed Equipment (WEEE). to protect the appliance from damage during transportation. -
Page 29: Your Guarantee
• Your full contact details. Call the Depot number on your Proof of Purchase Document supplied with the product/kitchen. Call the LAMONA Service Line on: Within the UK: 0344 460 0006 Within Republic of Ireland: 01525 5703 • Product installed within a domestic kitchen or a non-domestic kitchen where 8 or fewer people are using the appliance. - Page 30 Notes LAM7200 / LAM7202 www.howdens.com...
- Page 31 Notes...
- Page 32 Product serial number (Place sticker here) REPRISE À DÉPOSER À DÉPOSER À LA LIVRAISON EN MAGASIN EN DÉCHÈTERIE Cet appareil se recycle Howden Joinery Ltd, Thorpe Road, Howden, East Yorkshire, DN14 7PA Imported in EU by: Houdan Cuisines SAS, Z.A. du Bois Rigault Nord, 1Rue Calmette, 62880 Vendin-le-Vieil, Cedex, France.
Need help?
Do you have a question about the LAM7202 and is the answer not in the manual?
Questions and answers
Does the Colin constantly flash after setting time on clock