
Related Manuals for Lamona LAM7151


Summary of Contents for Lamona LAM7151
- Page 1 Microwave Oven LAM7151 Instructions and Installation www.howdens.com/appliances-registration ISSUE v3.1 130522...
- Page 2 Free 3 year guarantee YEARS Call now 0333 010 0009 Alternatively, visit www.howdens.com/appliance-registration 3 year guarantee available. Register your appliance within 90 days By registering your appliance and creating an account, we will keep you up to date with the latest product information and notify you immediately of any important product updates Lines are open Monday to Friday 9am to 5pm.
-
Page 3: Table Of Contents
Contents Safety information Children safety General safety Safety in use Microwave mode Materials you can use Contents description Control panel Operation instructions Clock setting Quick start Microwave cooking Grill or combi cooking Auto menu Kitchen timer Defrost by weight Defrost by time Multi-stage cooking Child lock Cleaning... - Page 4 Dear Customer, Congratulations on your choice of microwave/grill. This user manual will help you use your product quickly and safely. • Please read this user manual before installing and using the mircowave/grill. • Always follow the safety instructions. • Keep this user manual within easy reach for future reference. •...
-
Page 5: Safety Information
Safety information Before the installation and use of the appliance, carefully read the supplied instructions. The manufacturer is not responsible for any injuries or damages that are the result of incorrect installation or usage. Always keep the instructions in a safe and accessible location for future reference. - Page 6 Before carrying out any maintenance, disconnect the • appliance from the power supply. Ensure that the appliance is switched off before replacing • the lamp to avoid the possibility of electric shock. Do not use a steam cleaner to clean the appliance. •...
- Page 7 Microwave heating of beverages can result in delayed • eruptive boiling. Care must be taken when handling the liquid’s container. The contents of feeding bottles and baby food jars shall be • stirred or shaken and the temperature checked before consumption, in order to avoid burns.
-
Page 8: Safety In Use
Safety in use WARNING! Risk of injury, burns and electrical shock or explosion. • This appliance is for household use only. • Do not change the specification of this appliance. • Make sure that the ventilation openings are not blocked. •... -
Page 9: Microwave Mode
• Discoloration of the enamel or stainless steel has no effect on the performance of the appliance. • Use a deep pan for moist cakes. Fruit juices cause stains that can be permanent. Microwave mode CAUTION! Do not let the appliance operate when there is no food in it. - Page 10 • Turn larger pieces of food over after half the cooking time. • If possible, cut vegetables into similar-sized pieces. • Use flat, wide dishes. • Do not use cookware made of porcelain, ceramic or earthenware with unglazed bottoms, or small holes, e.g. on handles.
-
Page 11: Materials You Can Use
Materials you can use in a microwave oven Utensils Remarks Browning dish Follow manufacturer’s instructions. The bottom of browning dish must be at least 3/16 inch (5mm) above the turntable. Incorrect usage may cause the turntable to break. Dinnerware Microwave-safe only. Follow manufacturer's instructions. Do not use cracked or chipped dishes. -
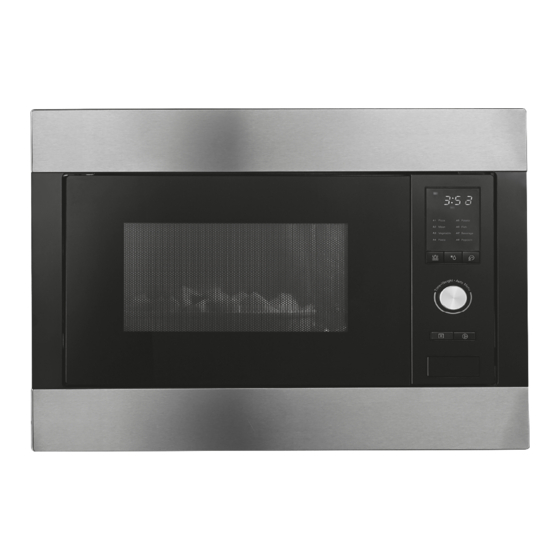
Page 12: Contents Description
Contents description A) Control panel B) Turntable shaft C) Turntable ring assembly D) Glass tray Grill Rack (Can not be used E) Observation window in microwave only function F) Door assembly and must be placed on the G) Safety interlock system glass tray) A. -
Page 13: Control Panel
Control panel Microwave/ Grill/ Combi Weight/Time Defrost Kitchen Timer/ Clock Stop/Clear Start/ +30Sec./Confirm... -
Page 14: Operation Instructions
Operation instructions 1. Clock Setting When the microwave oven is powered on, the screen will display "0:00", buzzer will sound once. 1) Press " Kitchen Timer/Clock " twice to select clock function, the hour will flash. 2) Turn " " to adjust the hour, the input time should be within 0--23. 3) Press "... -
Page 15: Microwave Cooking
3. Microwave Cooking Press " Microwave/Grill/Combi. " once, the screen will display "P100". Press Microwave/Grill/Combi. " " repeatedly or turn " " to choose the power y ou want, ,"P 10" ,"G" ,"C-1" or "C-2" will display for each " P 100", "P 80", "P 50", "P 30 "... -
Page 16: Grill Or Combi Cooking
4. Grill or Combi. Cooking Press " " once, the screen will display "P100". Press Microwave/Grill/Combi. " Microwave/Grill/Combi. " repeatedly or turn " " to choose the power y ou want, and ,"P 10" ,"G" ,"C-1" or "C-2" will display for each "P 100", "P 80", "P 50", "P 30 "... -
Page 17: Kitchen Timer
The menu chart: Menu Display Weight 200 g Pizza 400 g 250 g 350 g Meat 450 g 200 g 300 g Vegetable 400 g 50g(with 450 ml cold water) Pasta 100g(with 800 ml cold water) 200 g 400 g Potato 600 g 250 g... -
Page 18: Defrost By Weight
7. Defrost By Weight 1) Press " " once, and the oven will display "dEF1". Weight/Time Defrost 2) Turn " " to select the weight of food from 100 to 2000g. 3) Press " Start/+30Sec./Confirm " to start defrosting. 8. Defrost By Time 1) Press "... -
Page 19: Multi-Stage Cooking
9. Multi-stage cooking Two stages can be set for cooking. In multi-stage cooking, if one stage is defrosting, then defrosting should be the 1st stage. Example: If you want to defrost food for 5 minutes and then cook with 80% microwave power for 7 minutes, operate it as the following: Weight/Time Defrost 1) Press "... -
Page 20: Cleaning
Cleaning Be sure to disconnect / unplug the appliance from the power supply beforehand. 1. Clean the cavity of the oven after use with a slightly damp cloth. 2. Clean the accessories in the usual way in soapy water. 3. The door frame seal and neighbouring parts must be cleaned carefully with a damp cloth when they are dirty. -
Page 21: Installation Safety Instructions
Installation safety instructions Installation WARNING! Only a suitably competent / qualified person must install this appliance. • Remove all the packaging. • Do not install or use a damaged appliance. • Follow the installation instruction supplied. • Always take care when moving the appliance as it is heavy. •... - Page 22 • Make sure not to cause damage to the mains plug and to the mains cable. Should the mains cable need to be replaced, this must be carried out by our Authorised Service Centre or suitably qualified person. • The shock protection outer cabinet of live and insulated parts must never be removed.
-
Page 23: Installation Instructions
Installation instructions The cabinet must have the rear panel removed behind the microwave and the service void must be maintained for ventilation. Specific sized gap could be referenced by the diagrams: Minimum installation height: 850mm DO NOT COVER VENTILATION SLOTS. NOTE: DO NOT TRAP OR BEND THE POWER CABLE. -
Page 24: Built-In Furniture
A - Built-in furniture * Depending upon the installation and any other appliance (e.g oven) fitted the microwave may need to be raised on the shelf slightly to avoid fascia clash. This can be achieved by attaching the supplied feet and rubber which will lift the microwave by 6mm, see page 24. -
Page 25: Retaining Bracket Fitting
B - Retaining bracket fitting 1. Fit the 6mm rubber spacer to the anti-tilt bracket if additional height is required. 2. Mark the shelf of cabinet according to drawing below for the position of the rear retaining bracket. 350mm 350mm Centre line 3. -
Page 26: Install The Oven
3. Assemble the fixation bracket and four adjust feet on the base of the microwave. Push and twist 90°clockwise to locate feet. Push and click the fixation bracket. Push and click Push and click C. Install the oven 4. Insert the oven into the cabinet - Make sure the back of the oven is engaged by mounting plate. - Page 27 5. Open the door, fix the oven to the cabinet with screw B, via the installation hole. Then fix the trim kit plastic cover to the installation hole. Take care to insert screw vertically to avoid piercing front shelf edge. Screw B Installation Hole NOTE: Any existing screws in this area should be removed and screw B should...
-
Page 28: Specification
Specification Model: LAM715 Rated Voltage: 230V~50Hz Total Input Power 1450W Fuse: 900W Rated Output Power (Microwave): Rated Input Power(Grill): 1000W Oven Capacity: 315mm Turntable Diameter: External Dimensions: 595x400x460mm Net Weight: Approx. 19kg... -
Page 29: Troubleshooting
Troubleshooting WARNING! Refer to Safety chapters. What to do if... Problem Possible cause Remedy The oven does not heat up. The oven is deactivated. Activate the oven. The oven does not heat up. The clock is not set. Set the clock. The oven does not heat up. -
Page 30: Guarantee Details
Call the Depot number on your Proof of Purchase Document supplied with the product/kitchen. Document supplied with the product / kitchen. Call the LAMONA Service Line on 0344 460 0006 Call the LAMONA Service Line on: Within the UK: 0344 460 0006... - Page 32 Product serial number (Place sticker here) REPRISE À DÉPOSER À DÉPOSER À LA LIVRAISON EN MAGASIN EN DÉCHÈTERIE Cet appareil se recycle Product serial number Howden Joinery Ltd, Thorpe Road, Howden, East Yorkshire, DN14 7PA (Place sticker here) Imported in EU by: Houdan Cuisines SAS, Z.A. du Bois Rigault Nord, 1Rue Calmette, 62880 Vendin-le-Vieil, Cedex, France.
Need help?
Do you have a question about the LAM7151 and is the answer not in the manual?
Questions and answers