Advertisement
Quick Links
ASSEMBLY INSTRUCTIONS
Please Inspect all items carefully before assembling. If for any reason you need to return
this item, you must return it in its original packaging. Assembled items cannot be returned.
Please open the zip on the back of the headboard.
You may find the footboard and some of the components inside
Minimum No.of people recommended to assemble this product: Two (2)
Approx. Assembly time: 90 mins
1) Owing to the size and weight of the bed, we recommend that it is assembled by two adults,
on a flat surface in a room that it is intended for.
2) Please Do Not use any tools other than those provided or recommended in these instructions.
3) Please Do Not discard any packaging until you have checked that you have all the parts and fittings.
Keep all fittings out of reach of children.
4) Assemble all parts loosely until advised to tighten. Depending on use, it maybe necessary to tighten
the fittings from time to time, So please save your Allen key and Spanner that has beed provided.
5) Do Not throw away any of the packaging or the instructions booklet until you have checked all
the components and fittings and the furniture is fully assembled.
PHB-FRA-GREY-60
IMPORTANT
HELPFUL ADVICE PRIOR TO ASSEMBLING THE BED
Page 1 of 5
Advertisement

Related Manuals for NOVO Madelin PHB-FRA-GREY-60


Summary of Contents for NOVO Madelin PHB-FRA-GREY-60
- Page 1 ASSEMBLY INSTRUCTIONS PHB-FRA-GREY-60 IMPORTANT Please Inspect all items carefully before assembling. If for any reason you need to return this item, you must return it in its original packaging. Assembled items cannot be returned. Please open the zip on the back of the headboard. You may find the footboard and some of the components inside Minimum No.of people recommended to assemble this product: Two (2) Approx.
- Page 2 Parts list Hardware list Label Picture Description Qty Label Picture Description Bolt M8x65mm Single Plastic Cap Double Plastic Cap Bolt M6x20mm Metal Frame"U" Screw 3.5x15mm Screw 4x25mm Bolt M8x20mm Bolt M8x25mm Connection Plate Left Connection Plate Right Tool list Label Picture Description Screw driver(not provided)
- Page 3 Step 1 2pcs 2pcs Connection Connection Plate Right Plate Left 8pcs Bolt M8x25mm Step 1a 8pcs Bolt M8x20mm Step 1b Step 2 16pcs Screw 4x25mm...
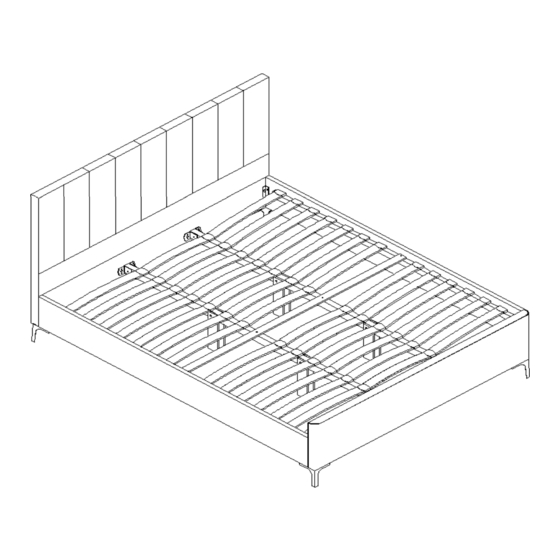
- Page 4 Step 3 4pcs C 2pcs 4pcs 4pcs Screw 3.5X15mm Metal Frame"U" Bolt M6x20mm 4pcs Bolt M8x65mm Step 3c Step 3a Step 3b Step 4 14pcs 14pcs Make sure all slats arched like this when assembled...
- Page 5 Step 5 14pcs 14pcs 4pcs Single Double Screw 4x25mm Plastic Cap Plastic Cap Step 5b Step 5a Step 5c Step 5d Make sure all slats arched like this when assembled Page 5 of 5...
Need help?
Do you have a question about the Madelin PHB-FRA-GREY-60 and is the answer not in the manual?
Questions and answers