Table of Contents

Related Manuals for Kenmore 405.84126


Summary of Contents for Kenmore 405.84126
- Page 1 Use & Care Guide Manual de Uso y Cuidado Kenmore ® Portable Air Conditioner Aire Acondicionado Portatil Model/Modelo: 405.84126 Sears Brands Management Corporation Hoffman Estates, IL 60179 U.S.A. www.kenmore.com w.sears.com www.kmart.com...
-
Page 2: Table Of Contents
Master Protection Agreement....................28 BEFORE USING YOUR NEW AIR CONDITIONER Read this guide. It will help you operate your new Kenmore Air Conditioner in the safest and most effective way. Keep this book and your sales check (receipt) in a safe place for future reference. -
Page 3: Important Safety Instructions
IMPORTANT SAFETY INSTRUCTIONS Read all instructions in this guide before using your Air Conditioner. This product is intended for indoor residential use only, not for industrial or other commercial applications. Use only with electrical wiring that is in good working order and that meets applicable codes and ordinances. - Page 4 15. The Air Conditioner should be connected to a 115 V, 60 Hz, 15- or 20-amp fused 3 prong grounded outlet. 16. Always insert the filters securely. Clean them every two weeks. Operation without filters may cause failures. OPERATING CONDITION •...
- Page 5 WARNING: SHOCK HAZARD Never place Air Conditioner where it may fall into a bathtub, sink, flooded area, or any receptacle or pool of water. WARNING: FIRE HAZARD Air Conditioners have arcing or sparking parts inside. Do not use near combustible materials or flammable gases or sources of heat.
-
Page 6: Electrical Requirements
ELECTRICAL REQUIREMENTS 15A or 20A 3-prong grounded LCDI plug If an extension cord must be used, the cord must be a minimum14AWG and rated not less than 1875 watts. PRODUCT SPECIFICATIONS MODEL 84126 Voltage 115V~60Hz Amperage: 11.8 Amps Cooling Power Consumption: 1355 Watts Cooling Cooling Capacity... -
Page 7: Parts And Features
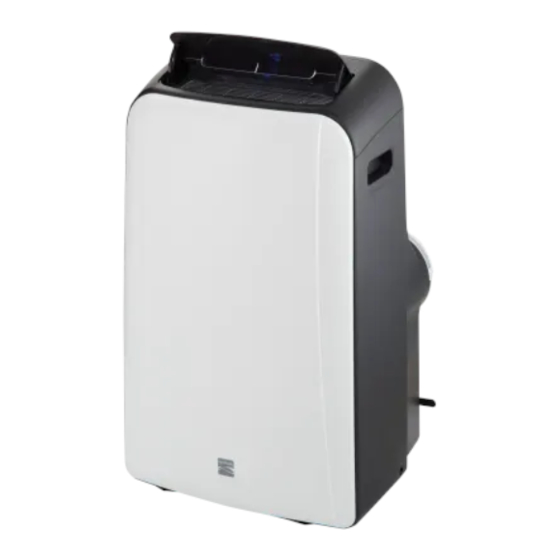
PARTS AND FEATURES FRONT Control Panel Horizontal louver (Swings out automatically) Carrying handle (both sides) Casters REAR Upper air filter (Behind the grille) Upper air intake Drain outlet Air outlet Lower air intake Lower air filter Power cord outlet (Behind the grille) Power Cord Strap (Used only when Power plug socket (Use... -
Page 8: Installation Instructions
INSTALLATION INSTRUCTIONS LOCATION The Air Conditioner should be placed on a firm foundation to minimize noise and vibration. For safe and secure positioning, place the unit on a smooth, level floor strong enough to support the unit. The unit has casters to aid placement, but it should only be rolled on smooth, flat surfaces. - Page 9 Installation in a double-hung sash window Cut a length of adhesive foam seal the width of the window and attach it to the Adhesive Foam Seal window stool (see Fig. 8). 2. Place the window slider onto the adhesive foam seal (see Fig. 9). Adjust window slider width according to the instructions on page 8.
- Page 10 Installation in a sliding sash window Cut a length of adhesive foam seal the height of the window and attach it to the window frame (see Fig. 12). Adhesive Foam Seal Place the window slider onto the adhesive foam seal (see Fig. 13). Adjust window slider height according to the instructions on page 8.
- Page 11 Exhaust hose installation The exhaust hose and adaptor must be adaptor B adaptor I installed or not installed in accordance with the usage mode. Fig.16a COOL or AUTO mode Install FAN or DEHUMIDIFY mode Do not install Air Outlet Screw adaptor B and adaptor I onto Adaptor B the exhaust hose as shown in Fig.
- Page 12 Water drainage For dehumidifying mode, pull the drain Continuous plug from the upper drain hole fitting. Drain Hose Push the open end of the supplied drain hose securely over the fitting. Place the adaptor end of the hose directly over a floor drain so that the water will flow into the drain (See Fig.19).
-
Page 13: Operation
OPERATION TROL PANEL off SWING TIMER MODE SLEEP POWER button with OPERATION MODE button indicator Press this button to select the Power switch on/off. operating mode in a sequence that advances from AUTO to SLEEP button COOL to DRY to FAN. An indicator Used to initiate the SLEEP light will illuminate for each mode operation. - Page 14 TEMP SENSOR feature NOTE: This feature can be activated from the remote control ONLY. The remote control serves as a remote thermostat allowing for precise temperature control at its location. To a ctivate the TEMP SENSOR feature, point the remote control towards the unit and press the TEMP SENSOR button.
- Page 15 AUTO operation When Air Conditioner is in AUTO mode, it will automatically choose cooling or fan-only operation based on the set temperature point. In AUTO mode you cannot manually set the fan speed. FAN operation Press the "MODE" button until the "FAN " indicator light comes on. Press the "FAN "...
- Page 16 OTHER FEATURES Auto-Restart If there is a power failure, the unit will return to the same operating condition when the power is restored. Wait 3 minutes before resuming operation 3 minute compressor delay - Any time the compressor stops running for any reason, such as when the humidity set point has been reached, it will not restart again for a minimum of 3 minutes.
-
Page 17: Using The Remote Control
USING THE REMOTE CONTROL Location of the remote control. Infrared Receiver Use the remote control within a distance of 26 ft (8m) Window (Hidden) from the appliance, pointing it towards the receiver. 26ft/8m Reception is confirmed by a beep. CAUTION: •... - Page 18 1 ON/OFF Button ( Turns the main unit on and off 2 MODE Button Each time the button is pressed, the operating mode changes AUTO COOL in this sequence: ON/OFF 3 SLEEP Button TEMP Enables/Disables the SLEEP function. NOTE: If the unit is in SLEEP mode, it will be cancelled if the MODE, FAN SPEED or MODE TOUCH...
- Page 19 • If this button is pressed for more than 2 seconds, the system will automatically store the current operation settings including operating mode, setting temperature, fan speed level and sleep feature (if activated). Then the next time the button is pressed, the remote will transmit these stored setting to the unit.
- Page 20 INDICATORS ON LCD Transmission Indicator This transmission indicator lights when remote controller transmits signals to the indoor unit. Mode display Displays the current operation mode. Including auto( ), cool( ), dry( ), fan( )and back to auto( Temp./Timer display Displays the temperature setting 62 F~88 F (17 C~ 30 C).
- Page 21 HOW TO USE THE BUTTONS AUTO OPERATION ON/OFF TEMP MODE TOUCH NOTE SLEEP SPEED TIMER TURBO TIMER SWING CANCEL TEMP TIMER SENSOR RESET LOCK COOLING/FAN OPERATION NOTE DEHUMIDIFYING OPERATION NOTE...
- Page 22 SWING OPERATION TIMER OPERATION TO SET THE AUTO-ON TIME: TO SET THE AUTO-OFF TIME TO CANCEL AUTO TIME...
- Page 23 EXAMPLE OF TIMER SETTING TIMER ON (Auto-on Operation) TIMER ON TIMER ON START START 6 HOURS LATER 6 HOURS LATER TIMER OFF (Auto-off Operation) TIMER OFF TIMER OFF STOP STOP 10 HOURS LATER 10 HOURS LATER...
- Page 24 COMBINED TIMER (Setting both ON and OFF timers simultaneously) TIMER OFF TIMER ON TIMER ON OFF Stop Start operation) START STOP 2 HOURS LATER 10 HOURS LATER AFTER SETTING AFTER SETTING TIMER OFF TIMER ON Stop Stop operation) TIMER ON OFF START STOP 2 HOURS LATER...
- Page 25 SLEEP OPERATION Press the SLEEP button for the selected temperature setting to increase to 2° F (1° C) warmer after 30 minutes, and another 2° F (1° C) warmer after another 30 minutes. The warmer temperature will be maintained for 7 hours at which time the unit will return to the originally selected temperature.
-
Page 26: Care And Maintenance
CARE AND MAINTENANCE IMPORTANT: 1. Be sure to unplug the unit before cleaning or Upper filter servicing. (take out) 2. Do not use gasoline, thinner or other chemicals to clean the unit. Remove the 3. Tap or hose washing may result in an electrical screw, then hazard when resuming operation of the unit. -
Page 27: Troubleshooting
TROUBLESHOOTING Before calling for service, review the chart below first yourself. PROBLEM CAUSE SOLUTION 1. Unit does not P1 appears in the Drain the water in the Start when display window bottom tray. Pressing on/off Button When in COOL mode, room Reset the temperature. -
Page 28: Master Protection Agreement
MASTER PROTECTION AGREEMENTS Congratulations on making a smart purchase. Your new Kenmore product is designed ® and manufactured for years of dependable operation. But like all products, it may require preventive maintenance or repair from time to time. That’s when having a Master Protection Agreement can save you money and aggravation. - Page 29 Get it fixed, at your home or ours! Your Home For troubleshooting, product manuals and expert advice: www.managemylife.com For repair – in your home – of all major brand appliances, lawn and garden equipment, or heating and cooling systems, no matter who made it, no matter who sold it! For the replacement parts, accessories and owner’s manuals that you need to do-it-yourself.
Need help?
Do you have a question about the 405.84126 and is the answer not in the manual?
Questions and answers