Table of Contents
Advertisement
Quick Links
450mm
Imported by Amart Furniture Pty Ltd,Qld, Brisbane Australia
For any assistance with assembly or for missing parts, please phone
Amart Furniture, Customer Service Freecall 1800 351 084.
ASSEMBLY INSTRUCTION
TORELLI CORNER TV STAND
ITEM CODE - 48830
Imported by Amart Furniture Pty Ltd,Qld, Brisbane Australia
For any assistance with assembly or for missing parts, please phone
Amart Furniture, Customer Service Freecall 1800 351 084.
1100mm
1-8
500mm
Item Code: 48830
Advertisement
Table of Contents

Subscribe to Our Youtube Channel
Related Manuals for Amart Furniture TORELLI 48830


Summary of Contents for Amart Furniture TORELLI 48830
- Page 1 ASSEMBLY INSTRUCTION TORELLI CORNER TV STAND ITEM CODE - 48830 Imported by Amart Furniture Pty Ltd,Qld, Brisbane Australia For any assistance with assembly or for missing parts, please phone Amart Furniture, Customer Service Freecall 1800 351 084. 450mm 1100mm 500mm...
- Page 2 PRE-ASSEMBLY PREPARATION BEFORE YOU START 1. Choose a clean, level, spacious assembly area. Avoid hard surfaces that may damage the product. 2. Take care when lifting. Product should be assembled as near as possible to the point of use. 3. Ensure that you have all required contents for complete assembly. 4.
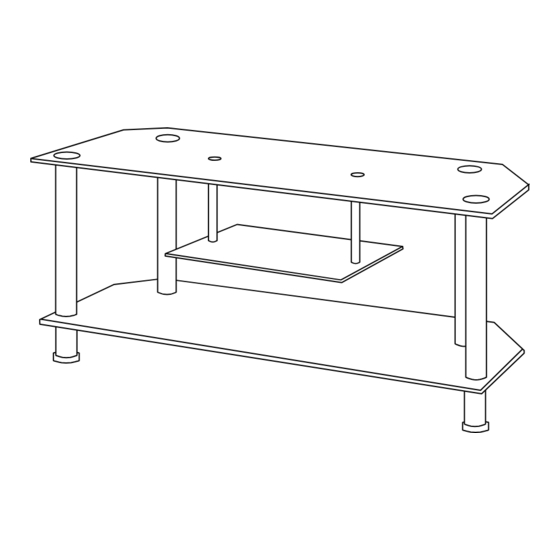
- Page 3 EXPLODED EXAMPLE Item Code: 48830...
- Page 4 CHECKLIST Rods 210mm x 2 Plate x 8 Rods 485mm x 4 Washer x 6 Spacer x 2 Plastic Washer x 2 Hex Nut x 6 Nut Tightener x 1 PART NUMBER DIMENSION 1100mm x 450mm x 5mm 500mm x 300mm x 5mm 1100mm x 450mm x 5mm 50mm x 420mm 50mm x 55mm...
- Page 5 REQUIRED FOR STEP 1 Rods 485mm x 4 Rods 210mm x 2 Attach the Rods to the aluminium plate on glass as shown. REQUIRED FOR STEP 2 Spacer x 2 Plate x 4 Insert the Tube over the Rods and follow by the hardware stated. Item Code: 48830...
- Page 6 REQUIRED FOR STEP 3 Washer x 2 Plastic Washer x 2 Hex Nut x 2 Place the glass over the tube and followed by the hardware stated. REQUIRED FOR STEP 4 Plate x 4 Washer x 4 Hex Nut x 4 Nut Tightener x 1 Place the glass over the tube and followed by the hardware stated.
- Page 7 ASSEMBLY IS COMPLETE CARE AND MAINTENANCE If the glass is chipped or broken, stop using the product and consult the place of purchase. Do not drop, drag or strike glass. Do not sit or stand upon the glass surfaces. Do not place very hot or cold items on the glass unless adequately thick table mats are used to prevent such items coming in contact with the glass.
- Page 8 SAFETY BRACKETS INSTRUCTIONS 1. Attach the plastic brackets to the wall where the assembled product going to be placed with the screws provided. 2. Move the furniture into its final position, thread a strap through the bracket and furniture as shown in diagram. Tighten strap until snug, Do NOT over tighten. 3.
Need help?
Do you have a question about the TORELLI 48830 and is the answer not in the manual?
Questions and answers