Table of Contents
Advertisement
Available languages
Available languages
Quick Links
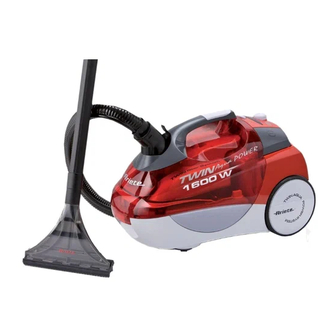
MOD. 2486 / 2488
Aspirapolvere & aspiraliquidi con
immissione di detergente / shampoo
Wet & Dry Vacuum Cleaner
with detergent / shampoo injection
Пылесос для сухой и влажной
уборки с применением моющих
средств /шампуней
De' Longhi Appliances Srl
Divisione Commerciale Ariete
Via L. Seitz, 47
31100 Treviso (TV) - Italy
E-Mail: info@ariete.net
Internet: www.ariete.net
825440
Advertisement
Table of Contents

Related Manuals for ARIETE Twin Aqua Power


Summary of Contents for ARIETE Twin Aqua Power
- Page 1 Wet & Dry Vacuum Cleaner with detergent / shampoo injection Пылесос для сухой и влажной уборки с применением моющих средств /шампуней De’ Longhi Appliances Srl Divisione Commerciale Ariete Via L. Seitz, 47 31100 Treviso (TV) - Italy E-Mail: info@ariete.net Internet: www.ariete.net 825440...
- Page 2 Aspirazione / Dry vacuuming / Уборка пыли Fig. 12 Fig. 13 Fig. 14 Fig. 1 Fig. 2 Fig. 3 CLICK Fig. 5 Fig. 6 Fig. 7 Fig. 16 Fig. 17 Fig. 15 Fig. 8 Fig. 9 Fig. 10 Lavaggio / Wash cleaning / Мойка...
-
Page 3: Инструкция По Эксплуатации
ISTRUZIONI PER L’USO PAG. 3 INSTRUCTIONS FOR USE PAGE 13 СТР. 23 ИНСТРУКЦИЯ ПО ЭКСПЛУАТАЦИИ... - Page 4 - 2 -...
-
Page 5: Avvertenze Importanti
Power è amico dell’ambiente, ma nemico delle polveri, dei pollini, degli acari e dei loro allergeni. Twin Aqua Power è adatto non solo per pulire a secco, bensì anche per aspirare l’acqua o i materiali che contengono acqua ed anche per la pulizia di tappetini, tappeti, tappezzerie, pavimenti duri, interni di auto, ecc.. - Page 6 • Non usare l’apparecchio se risulta danneggiato. Tutte le riparazioni, compresa la sostituzione del cavo di alimentazione, devono essere eseguite solamente dal Centro Assistenza Ariete o da tecnici autorizzati Ariete, in modo da prevenire ogni rischio. • Nel caso si dovessero impiegare prolunghe elettriche, le medesime devono essere adeguate al carico onde evitare pericoli per l’operatore o per la sicurezza dell’ambiente ove si opera.
-
Page 7: Descrizione Dell'apparecchio
• Allorchè si decida di smaltire come rifiuto questo apparecchio, si raccomanda di renderlo inope- rante tagliandone il cavo di alimentazione. Si raccomanda inoltre di rendere innocue quelle parti dell’apparecchio suscettibili di costituire un pericolo, specialmente per i bambini che potrebbero servirsi dell’apparecchio per i propri giochi. • Gli elementi dell’imballaggio non devono essere lasciati alla portata dei bambini in quanto po- tenziali fonti di pericolo. CONSERVATE QUESTE ISTRUZIONI DESCRIZIONE DELL’APPARECCHIO 1 Filtro ad acqua / Coperchio serbatoio... - Page 8 ACCESSORI Nebulizzatore (B) Tubo flessibile d’aspirazione (A) con aggancio accesso- ri (A1), valvola regolazione aspirazione (A2), pulsante erogazione detergente (A3), tasto di blocco (A4) Misurino (C) Bocchetta per fessure (D) Spazzola pavimenti (E) Accessorio parquet (F) per spazzola pavimenti (E) Bocchetta per pulizia tes- Accessorio setolato (H) suti (G) per bocchetta per pulizia tessuti (G) Kit per pulizia vetri e fine- Tubi rigidi d’aspirazione stre (I) con speciale sistema per...
-
Page 9: Utilizzo Dell'apparecchio
TABELLA APPLICAZIONI Metodo di pulizia Applicazione Accessori Impianto di filtrag- Aspirazione polvere Tappeti e superfici dure, Spazzola “Magic 300 cc di acqua nel mobilia e tappezzeria Brush” (M), bocchetta serbatoio auto, fessure, angoli, tessuti (G), bocchetta pulizia auto, punti in ge- fessure (D), spazzola nere non accessibili pavimenti (E), acces-... - Page 10 germente verso il basso fino al completo scatto della relativa linguetta superiore (Fig. 5). Analogamente per rimuovere il tubo (A) sarà necessario premere la linguetta e contemporanea- mente estrarlo verso l’alto. ATTENZIONE: Utilizzare esclusivamente l’impugnatura (10) per sollevare o trasportare l’apparec- chio. Mentre lo si trasporta, l’apparecchio deve essere spento. - Montare sull’impugnatura del tubo flessibile di aspirazione (A) l’accessorio desiderato a seconda del tipo di pulizia da effettuare e della superficie da trattare (Fig. 6), inserendolo e bloccandolo ruotando l’apposita linguetta di fissaggio (Fig. 7). ATTENZIONE: Prima di procedere con l’utilizzo dell’apparecchio, assicurarsi che tutti i filtri siano correttamente nelle loro posizioni (vedere “Pulizia e Manutenzione”). - Estrarre il cavo di alimentazione ed inserire la spina nella presa di corrente. - Premere l’interruttore di accensione (18) con il piede per accendere l’apparecchio (Fig. 8). L’apparecchio inizierà ad aspirare; è possibile regolare la potenza di aspirazione agendo sull’ap- posita manopola (22) posta sulla parte superiore dell’apparecchio (Fig. 9), oppure aprendo la valvola (A2) posta sull’impugnatura del tubo flessibile di aspirazione (Fig. 10).
- Page 11 Scollegare la spina dalla presa di corrente e riavvolgere automaticamente il cavo elettrico all’in- terno dell’apparecchio premendo con il piede l’apposito pulsante (16) (Fig. 13). - Riporre l’apparecchio, con la possibilità di fermare i tubi (L) con l’accessorio utilizzato sul retro dell’aspirapolvere (Fig. 14). UTILIZZO DEGLI ACCESSORI TUBI RIGIDI DI ASPIRAZIONE (L) Particolarmente utili per raggiungere punti alti o nascosti (sotto i mobili, divani, letti). Si applicano direttamente sull’impugnatura (A). SPAZZOLA PAVIMENTI (E) E ACCESSORIO PARQUET (F) Indicata per la pulizia di superfici dure come pavimenti e pareti. Grazie allo snodo, che consente una rotazione di 360°, questo accessorio permette di pulire tutte le zone difficili da raggiungere. Si applica o sull’impugnatura (A) o sul tubo (L) (Fig. 15).
-
Page 12: Pulizia E Manutenzione
KIT PER PULIZIA VETRI E FINESTRE (I) Indicato per ampie vetrate, grandi specchi, superfici liscie in genere. Si applica o sull’impugnatura (A) o sul tubo (L). Per il corretto impiego del lavavetri procedere nel seguente modo: - erogare uniformemente il detergente sulla superficie da pulire in modo da sciogliere lo sporco. - Premere il tergivetro in gomma alla superficie da pulire, muovendo verticalmente dall’alto verso il basso con inserita la funzione aspirazione. - Page 13 coperchio (1), come descritto in precedenza, mediante l’apposito manico pieghevole (4). Rimuovere il filtro aria motore (19) con la relativa guarnizione (Fig. 23) ed eventualmente pulirlo con acqua corrente; farlo asciugare perfettamente e reinserirlo nell’apparecchio. Filtro “Magic Filter” (2) Aprire il coperchio (11) dell’apparecchio come descritto in precedenza, ed estrarre il filtro ad acqua (1) mediante l’apposita impugnatura (Fig. 24). Rimuovere il coperchio filtro (3) tirandolo leggermen- te verso il basso (Fig. 25) ed estrarre il filtro di protezione (2) (Fig. 26). Pulirlo accuratamente sotto l’acqua corrente, farlo asciugare perfettamente, e rimontarlo insieme agli altri componenti seguendo in senso inverso le operazioni descritte in precedenza. ATTENZIONE: Si consiglia di pulire il filtro (2) dopo ogni utilizzo e di cambiarlo quando risulta degra- dato utilizzando il filtro di ricambio incluso nella confezione.
- Page 14 Aspirazione con lavaggio • La potenza di aspirazione dimi- - Il serbatoio dell’acqua sporca è pieno (il galleggiante fun- nuisce improvvisamente ziona?) Svuotare e pulire il serbatoio- • Sviluppo consistente e ano- - Avete usato dello shampoo originale Ariete? Sostitui- malo di schiuma nel serbatoio telo. dell’acqua sporca - Nel serbatoio della sostanza da spruzzare il liquido è suf- • Non esce alcun detergente ben- ficiente? Riempitelo.
-
Page 15: Important Safeguards
Dear Customer, Thank you for choosing to buy a product from Ariete. By choosing this appliance, you are taking care of your family’s health because Twin Aqua Power is gentle on the environment but hard on dust, pollen, mites and allergens. Twin Aqua Power is suitable not only for dry vacuum cleaning, but can also be used to clean up wa- ter or materials containing water and, furthermore, for the wet cleaning of rugs, carpets, upholstery, hard floors, car interiors, etc. Thanks to its special water filter, Twin Aqua Power traps dust and dirt in water, which can be poured away easily with no fear of dispersion. Its 6-level filtering system with “Magic Filter” also guarantees that the air leaving the appliance is perfectly clean. As well as meaning no more dusty bags and all of the problems that they entail, the water filter is the revolutionary “green” heart of the appliance because its efficiency is based on the natural cleansing properties of water. Water flows and gurgles through the special filter, trapping dirt to prevent any annoying contact with dust or any damaging dust dispersion in the environment. Twin Aqua Power also has a special, powerful and washable “Magic Filter” that is already used in other professional environments where the maximum hygiene is needed. This filter is able to trap the finest dust, pollen, mites and micro organisms and it is easily rinsed clean when necessary. A full range of attachments mean that you can deal with cleaning problems, solving them quickly and without wasting any time or effort. IMPORTANT SAFEGUARDS BEFORE USING THE APPLIANCE, READ THESE INSTRUCTIONS CAREFULLY. - Page 16 • Only use the non-foaming cleaning agent supplied. • The special cleaning agent designed for the device should be stored away from children and the label directions on the product being used should always be followed. This cleaning agent may slightly dry the skin on your hands and therefore, it is advisable to wear gloves before handling. • Prevent the cleaning agent ejected from the vacuum cleaner from getting in touch with electrical outlets and/or appliances and their power cords. • Do not use the appliance if it is damaged in any way. To prevent any risks, all repairs, including the replacement of the power cord, must be performed by an Ariete Assistance Centre or Ariete authorised technicians only. • Should you use extension leads, make sure that these are suitable for the electric load in use to avoid dangers for the operator or for the overall safety of the room where the appliance is used. Unsuitable extension leads can result in malfunctioning of the appliance. • In case of appliance failure or malfunction, contact your dealer or an authorised Ariete service engineer. Do not attempt to disassemble the appliance. • Any servicing of the supply cable must exclusively be carried out by personnel from the Ariete after-sales service. • Never touch the appliance when your hands or feet are wet if it is plugged in. • Never place the appliance in water or other liquids. • Never leave the appliance unattended when it is connected to the power mains; unplug it after each use. • Only use original spare parts and attachments approved by the manufacturer so as not to com- promise the safety of the appliance. • This appliance is for home use only, as indicated in the manual. The manufacturer refuses to accept any liability for damages caused through improper or incorrect use of the appliance. • Always switch off the appliance using the main switch and unplug it before performing any maintenance or cleaning operations on the appliance itself.
-
Page 17: Description Of The Appliance
DO NOT THROW AWAY THESE INSTRUCTIONS DESCRIPTION OF THE APPLIANCE 1 Water filter / Container lid “Magic Filter” (1 fitted + 1 spare) Filter cover Folding handle Container cap 6 Dirty water container Cleaning agent container 8 Drainage valve 9 Cover lock/release lever 10 Hand grip 11 Appliance cover 12 Suction inlet 13 Cleaning agent pump valve 14 Rubber wheels 15 Triple filter for exhaust air 16 Cord rewinder button... - Page 18 ATTACHMENTS Spray (B) Suction hose (A) with cou- pling for tool attachments (A1), suction adjustment valve (A2), cleaning agent dispensing button (A3), lock button (A4) Measure (C) Crevice nozzle (D) Floor brush (E) Parquet floor attachment (F) for floor brush (E) Fabric cleaning nozzle (G) Bristled attachment (H) for fabric cleaning nozzle Kit for cleaning glass and Rigid suction tubes with windows (I) special detergent dispen-...
-
Page 19: Application Table
APPLICATION TABLE Cleaning method Attachments Filtering system Dry vacuuming Rugs and hard surfa- “Magic Brush” (M), fa- 300 cc water in the ces, furnishings and bric nozzle (G), crevice container car upholstery, crevices, nozzle (D), floor brush corners, cars, areas that (E), parquet floor at- are difficult to access in tachment (F) general Washing Deep-down cleaning... - Page 20 In the same way, to remove the hose (A), it is necessary to press the tab, pulling the hose up- wards at the same time. WARNING: Only use the hand grip (10) to lift or carry the appliance. The appliance must always be switched off before it can be carried. - Fit the required attachment onto the grip of the suction hose (A) according to the type of cleaning required and the surface to be cleaned (Fig. 6). Insert the attachment and lock it into place by turning the relevant tab (Fig. 7). WARNING: Before using the appliance, make sure that all filters have been fitted into the correct position (see “Cleaning and Maintenance”). - Pull out the power cord and plug the appliance into the power mains socket. - Press the on/off switch (18) with your foot to switch on the appliance (Fig. 8). Appliance suction will start. It is possible to adjust suction power using the special dial (22) on the top of the appliance (Fig. 9), or by opening the valve (A2) on the hand grip of the suction hose (Fig. 10). - If you want to use the suction function while washing with water and cleaning agent, it is neces- sary to start the pump to fill the system by pressing the relevant on/off switch (20) on the top of the appliance. The relevant power on indicator (21) will switch on and stay lit for the whole time that the pump is operating. WARNING: Before washing and dispensing cleaning agent, it is advisable to test a small concealed area of the surface to be cleaned, according to its type. - Dose the cleaning agent dispensing amounts by pressing the dispensing button (A3) on the hand grip of the hose (A), and slowly move the hose over the surface to be cleaned; this is to ensure that the cleaning agent is evenly applied. Make sure that the pump indicator light (21) is on (Fig. 12) For continued dispensing over large surfaces, it is possible to lock the button (A3) into a preset...
-
Page 21: Using The Attachments
appliance by pressing the relevant button with your foot (16) (Fig. 13). - Put away the appliance; it is possible to lock the tubes (L) into place with the special attachment on the back of the vacuum cleaner (Fig. 14). USING THE ATTACHMENTS RIGID SUCTION TUBES (L) Especially useful for reaching high or hidden areas (below furniture units, sofas, beds, etc.). These tubes can be fitted directly to the hand grip (A). FLOOR BRUSH (E) AND PARQUET FLOOR ATTACHMENT (F) Ideal for cleaning hard surfaces such as floors or walls. A joint allows the brush to rotate through 360° to clean in all areas that are difficult to reach. It can be fitted directly to the hand grip (A) or tube (L) (Fig. 15). The parquet floor attachment (F) fits to the brush (E) and is used for thorough parquet cleaning. “Magic Brush” (M) LIQUID VACUUM BRUSH AND RUBBER SCRAPER (N) Ideal for cleaning up liquids on hard surfaces such as floors as well as on rugs and carpets. It guar- antees perfect suction of liquids to leave surfaces perfectly dry and it can be used for dry vacuum cleaning with excellent results. -
Page 22: Cleaning And Maintenance
FABRIC CLEANING NOZZLE (G) AND BRISTLED ATTACHMENT (H) This is particularly suited for cleaning surfaces such as armchairs, rugs, and smaller-sized hard surfaces, and also for fabrics and curtains. It can be fitted to the hand grip (A) or tube (L) (Fig. 18). The bristled attachment (H) can be fitted to the nozzle (G) and it is recommended for cleaning small- sized fabric surfaces. KIT FOR CLEANING GLASS AND WINDOWS (I) Ideal for large glass surfaces, large mirrors, and smooth surfaces in general. It can be fitted to the hand grip (A) or tube (L). To use the glass washer correctly, proceed as follows: - evenly dispense the cleaning agent over the surface to be cleaned so as to dissolve the dirt. - Page 23 must be re-fitted in the following order: the green/white filter first (with green side facing the grille); the second (carbon) filter needs to be fitted on the white side of the first filter. Fit the grille back in place, pressing gently until it clicks into position. Motor air filter (19) Open the cover (11) of the appliance and remove the dirty water container (6) complete with lid (1), as described previously, using the special folding handle (4). Remove the motor air filter (19) and relevant gasket (Fig. 23) and clean under running water, if necessary; leave to dry thoroughly and re-fit in the appliance. “Magic Filter” (2) Open the cover (11) of the appliance as described previously and remove the water filter (1) using the special hand grip (Fig. 24). Remove the filter cover (3) by gently pulling it downwards (Fig. 25) and take out the protective filter (2) (Fig. 26). Carefully rinse the filter under running water, leave it to dry perfectly and re-fit it together with the other parts, following the above steps in reverse order. WARNING: The filter (2) should be cleaned after every use and if it appears to be worn, it should be replaced with the spare filter provided. WHAT TO DO IF... General (all functions) - Are the mains connection cable, plug and plugbox in • The appliance cannot be star- order? Before checking disconnect the main power...
- Page 24 - Is the mechanical suction power controller on the hand grip open? Close the slider on the hand grip. Washing cleaning - Is the dirty water tank full (float has responded)? Em- • The suction power decreases pty and clean the tank. suddenly - Have you used original Ariete cleaning shampoo? Re- • Unusual heavy development of place. foam in the dirty water tank - Is there any cleaning liquid in the spraying agent tank? • No cleaning liquid is provided Refill.
- Page 25 пылесос Twin Aqua Power заботится о защите окружающей среды и избавляет от пыли, частичек пыльцы, клещей и различных аллергенов. Пылесос Twin Aqua Power предназначен не только для сухой уборки, но и для всасы- вания воды и различных веществ, содержащих жидкость, а также для чистки ковров, ковриков, ковровых...
- Page 26 работе пылесоса. • Необходимо всегда обращаться к продавцу или в фирменный центр послепродаж- ного обслуживания компании Ariete в случае выхода из строя или поломки пылесо- са. Запрещается самостоятельно разбирать пылесос. • Любые виды ремонта сетевого шнура должны осуществляться персоналом фир- менного...
- Page 27 • Пылесос предназначен исключительно для бытовых нужд, перечисленных в ин- струкции по эксплуатации. Производитель не несет никакой ответственности за повреждения, произошедшие вследствие некорректного использования пылесоса либо его эксплуатации не по прямому назначению. • Всегда выключайте пылесос посредством кнопки выключения и вынимайте вилку из розетки...
- Page 28 ОПИСАНИЕ ПЫЛЕСОСА Водный фильтр / Крышка резервуара для сбора жидкости Фильтр Magic Filter (№1 в комплекте + №1 сменный) Крышка фильтра Ручка сгибаемая Отверстие резервуара Резервуар для сбора грязной жидкости Резервуар для моющих средств Дренажное отверстие Устройство блокирования крышки 10 Ручка 11 Крышка...
- Page 29 НАСАДКИ Гибкий всасывающий Распылитель (B) шланг (A) с приспо- соблением для кре- пления насадок (A1), задвижка для регу- лирования мощности всасывания (A2), кноп- ка подачи моющего средства (A3), кнопка блокировки (A4) Мерная емкость (C) Плоская насадка для сбора пыли между ча- стями...
- Page 30 СПИСОК ВЫПОЛНЯЕМЫХ ФУНКЦИЙ Вид уборки Описание функ- Используемые А к в а ф и л ь т р , ции насадки резервуар для воды и моющих средств Всасывание пыли Используется для у н и в е р с а л ь н а я 300 мл...
- Page 31 В воду будут поступать все виды загрязнений, содержащихся в окружающем воз- духе. - В случае, если пылесос используется для влажной уборки с применением моющего средства, максимальный объем смеси жидкости и моющего средства в резервуаре (7) должен составлять 2,7 л (10/15 мл моющего средства на каждый литр воды). Предварительно...
- Page 32 распыляющее устройство (3) путем нажатия кнопки блокирования (А4) (Рис. 11). - После того, как вы распределили необходимое количество моющего средства по очищаемой поверхности, отключите насос распыляющего устройства, нажав кнопку (20), подождите нескольку минут пока моющее средство впитается и приступайте к устранению...
-
Page 33: Уход И Очистка
ковровых покрытий, для того, чтобы моющее средство равномерно распределялось по поверхности. Насадка закрепляется на рукоятке (А) или на трубке (L) ВНИМАНИЕ: Перед тем, как приступить к распылению моющего средства на поверх- ность ковров и ковровых покрытий, необходимо собрать основную грязь. Используйте рекомендуемое... - Page 34 Опорожнение и очистка резервуара для сбора грязной воды (6) Откройте крышку (11) пылесоса, как описано выше (Рис. 1-2). Возьмитесь за гибкую ручку (4) резервуара для сбора грязной жидкости (6) и выньте его из корпуса пылесоса (Рис. 19). ВНИМАНИЕ: Не снимайте крышку резервуара (1) до тех пор, пока вы не дойдете до того...
- Page 35 ЧТО ДЕЛАТЬ В СЛУЧАЕ, ЕСЛИ ... Общая поломка (каса- тельно всех функций) - Связаны ли эти вопросы с повреждением шнура • Пылесос не может исполь- питания, с вилкой или электрической розеткой? зоваться Перед проверкой необходимо отключить при- бор от сети, и решение о необходимости ремонта может...
- Page 36 - Возможно электронный регулятор мощности вса- сывания установлен на минимальное значение MIN? Установите регулятор мощности на мак- симальное значение MAX (загорится оранжевая сигнальная лампочка). - Возможно механический регулятор мощности всасывания на ручке манипулятора открыт? Закройте задвижку на ручке манипулятора. Влажная...
Need help?
Do you have a question about the Twin Aqua Power and is the answer not in the manual?
Questions and answers