Table of Contents
Advertisement
Quick Links
LS7 series
Projector
User Guide
IMPORTANT: Please read this User Guide to obtain important information on installing and using your product in
a safe manner, as well as registering your product for future service. Warranty information contained in this User
Guide will describe your limited coverage from ViewSonic® Corporation, which is also found on our web site at
http://www.viewsonic.com in English, or in specific languages using the Regional selection box on our website.
Model No. VS19701
Advertisement
Table of Contents

Related Manuals for ViewSonic LS7 Series


Summary of Contents for ViewSonic LS7 Series
- Page 1 Warranty information contained in this User Guide will describe your limited coverage from ViewSonic® Corporation, which is also found on our web site at http://www.viewsonic.com in English, or in specific languages using the Regional selection box on our website.
- Page 2 At ViewSonic®, we believe that our products have the potential to make a positive impact in the world, and we are confident that the ViewSonic® product you have chosen will serve you well.
-
Page 3: Safety Precautions
Safety Precautions following Safety Precautions before you start using the projector. Please read the • Keep this user guide in a safe place for later reference. • Read all warnings and follow all instructions. • Allow at least 20“ (50 cm) clearance around the projector to ensure proper ventilation. - Page 4 (UPS). • If smoke, an abnormal noise, or a strange odor is present, immediately switch the projector off and call your dealer or ViewSonic®. It is dangerous to continue using the projector. • Use only attachments/accessories specified by the manufacturer.
- Page 5 Safety Precautions - Ceiling Mounting Please read the following Safety Precautions before you start using the projector. If you intend to mount the projector on the ceiling, it is strongly recommended that you use a proper fitting projector ceiling mount kit and that you ensure it is securely and safely installed.
-
Page 6: Table Of Contents
Contents Safety Precautions ............3 Introduction ..............9 Package Contents ....................9 Product Overview ....................10 Projector ........................ 10 Keypad ........................11 Indicator Lights ...................... 11 I/O Ports ........................ 12 Remote Control ..................... 13 Initial Setup ............... 17 Choosing a Location - Projection Orientation ............17 Projection Dimensions ..................18 Mounting the Projector ..................20 Using the Security Bar ..................20... - Page 7 Operating the Projector ..........31 On-Screen Display (OSD) Menu ................31 Menu Navigation ....................32 On-Screen Display (OSD) Menu Tree ..............33 Menu Operation ....................39 Display Menu......................39 Audio Menu ......................45 Setup Menu ......................46 Information Menu ....................49 Appendix ..............50 Specifications ......................50 Projector Dimensions ...................51 Timing Chart ......................52...
- Page 8 Regulatory and Service Information ......58 Compliance Information ..................58 FCC Compliance Statement ................... 58 Industry Canada Statement ................... 58 CE Conformity for European Countries ..............59 Declaration of RoHS2 Compliance................. 60 Indian Restriction of Hazardous Substances ............61 Product Disposal at End of Product Life ..............61 Copyright Information ..................62 Customer Service ....................
-
Page 9: Introduction
クイックスタートガイド Enter Menu Exit http://vsweb.us Download Link HDMI 1 HDMI 2 http://vsweb.us/q/dn.php ViewSonic Projector Number Description Projector Remote Control Batteries Quick Start Guide Power Cord Power Adapter NOTE: The power cord and remote control included in your package may vary depending on your country. -
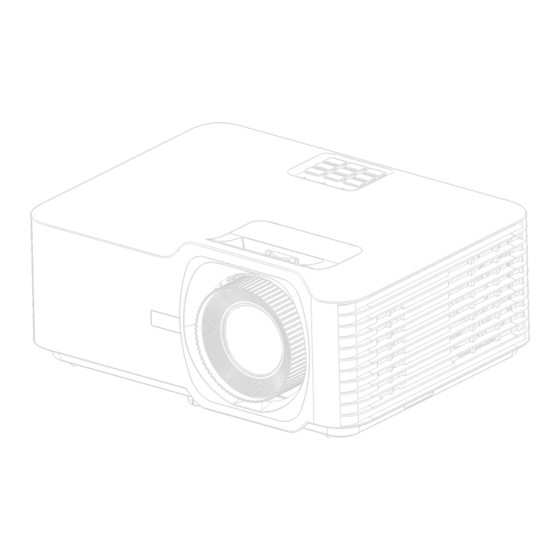
Page 10: Product Overview
Product Overview Projector Number Description Keypad Focus Ring Zoom Ring Front IR Top IR DC In Lens I/O Ports Vent (inlet) Vent (outlet) Lens Shift NOTE: Do not block projector intake and exhaust vents. -
Page 11: Keypad
Keypad SOURCE ENTER AUTO MENU EXIT Description OURCE ENTER AUTO Toggles the projector between standby mode and Power Power On. MENU Manually corrects distorted images resulting from an Keystone EXIT angled projection. SOURCE ENTER AUTO Selects the desired menu items and makes SOURCE ENTER AUTO... -
Page 12: I/O Ports
I/O Ports 12V TRIGGER HDMI 1 HDMI 2 HDCP 2.2 HDCP 2.2 RS232 AUDIO OUT DC 19.5V eARC USB 5V/1.5A (SERVICE) Port Description HDMI 1 HDMI port. HDMI 2 HDMI port2. RS-232 RS-232 control port. USB (5V/1.5A Out) USB Type A port for power and service. (Service) 12V Trigger 12V DC output terminal (500mA Out). -
Page 13: Remote Control
Remote Control AV Mute Contrast Display Brightness Mode Aspect Freeze Auto Source Sync Enter Menu Exit HDMI 1 HDMI 2 Button Description Power ON Turns the projector ON AV Mute Power OFF Turns the projector OFF AV Mute Contrast Display Brightness Mode AV Mute... - Page 14 Contrast Display Mode AV Mute Contrast Display Brightness Aspect Mode Display AV Mute Mode AV Mute Button Contrast Description AV Mute Display Brightness Aspect Mode AV Mute AV Mute Contrast Freeze Display Brightness Mode AV Mute Contrast Brightness Display Mode Aspect Contrast Displays the brightness mode selection bar.
- Page 15 Remote Control - Receiver Range To ensure proper function of the remote control follow the steps below: 1. The remote control must be held at an angle within 30° perpendicular to the projector’s IR remote control sensor(s). 2. The distance between the remote control and the sensor(s) should not exceed 8 m (26 ft.) NOTE: ...
- Page 16 Remote Control - Replacing the Batteries 1. Remove the battery cover from the bottom of the remote control by pressing the finger grip and sliding it across. 2. Remove any existing batteries (if necessary) and install two AAA batteries. NOTE: Observe the battery’s polarities as indicated. 3.
-
Page 17: Initial Setup
Initial Setup This section provides detailed instructions for the initial set up your projector. Choosing a Location - Projection Orientation Personal preference and room layout will decide the installation location. Consider the following: • Size and position of your screen. •... -
Page 18: Projection Dimensions
Projection Dimensions • 16:9 Image on a 16:9 Screen NOTE: • (e) = Screen (f) = Center of Lens (b) Projection Distance (d) Vertical Offset (a) Screen (c) Image Size Height Minimum Maximum Minimum Maximum 27.72 37.91 14.71 2.74 1016 36.95 50.55 1284... - Page 19 • 16:9 Image on a 4:3 Screen NOTE: • (e) = Screen (f) = Center of Lens (b) Projection Distance (d) Vertical Offset (a) Screen (c) Image Size Height Minimum Maximum Minimum Maximum 25.44 34.80 13.50 2.51 1016 33.92 46.40 1179 18.00 3.35...
-
Page 20: Mounting The Projector
NOTE: If you buy a third party mount, please use the correct screw size. Screw size can vary depending on the thickness of the mounting plate. 1. To ensure the most secure installation, please use a ViewSonic® wall or ceiling mount. -
Page 21: Making Connections
Making Connections Connecting to Power 1. Connect the power cord to the power adapter. 2. Connect the power adapter to the DC IN jack at the rear of the projector. 3. Plug the power cord into a power outlet. NOTE: When installing the projector, incorporate a readily accessible disconnect device in the fixed wiring, or connect the power plug to an easily accessible outlet near the unit. -
Page 22: Connecting To External Devices
Connecting to External Devices HDMI Connection Connect one end of an HDMI cable to the HDMI port of your video device. Then connect the other end of the cable to the HDMI 1/2 port (each support HDMI 2.0/ HDCP 2.2) of your projector. NOTE: ... -
Page 23: Audio Connection
Audio Connection You can connect to various external sound delivery devices via the AUDIO OUT and HDMI 2 ports. NOTE: The HDMI 2 port supports eARC. It can deliver sound to external devices when connected. -
Page 24: Usb Connection
USB Connection USB Type A Connection The USB port is for supplying power (e.g., dongles) and service needs. NOTE: The USB port does not supply power when the projector is in standby mode. -
Page 25: Rs-232 Connection
RS-232 Connection When you use a RS-232 serial port cable to connect the projector to an external computer certain functions can be controlled remotely by the PC, including Power On/Off, Volume adjustment, Input select, Brightness, and more. -
Page 26: Using The Projector
Using the Projector Starting Up the Projector 1. Ensure the projector’s power cord is properly connected to a power outlet. 2. Press the Power button on the projector or remote control to turn on the projector. NOTE: • The Power Indicator Light will be flashing blue during startup. •... -
Page 27: Selecting An Input Source
Selecting an Input Source The projector can be connected to multiple devices at the same time. However, it can only display one full screen at a time. When Auto Source is On, the projector will automatically search for input sources. If multiple sources are connected, press the Source button on the projector or remote control to select the desired input. -
Page 28: Adjusting The Projected Image
Adjusting the Projected Image Adjusting the Projector’s Height and Projection Angle The projector is equipped with three (3) adjustment feet. Adjusting the feet will change the projector’s height and the vertical projection angle. Adjustment Feet Tilt-Adjustment Ring... -
Page 29: Adjusting The Focus, Keystone, Lens Shift, And Zoom
Adjusting the Focus, Keystone, Lens Shift, and Zoom You can improve and adjust the clarity and position of the image by adjusting the Focus Ring, Keystone Keys, Lens Shift dial or Zoom Ring. -
Page 30: Shutting Down The Projector
Shutting Down the Projector 1. Press the Power button on the projector or remote control and a “power off message” will appear. 2. Press the Power button again to confirm and shut down the projector. 3. The Power Indicator Light will turn solid red and enter standby mode. -
Page 31: Operating The Projector
Operating the Projector On-Screen Display (OSD) Menu The projector has multilingual on-screen display menus that allow you to make image adjustments and change a variety of settings. Display Image Settings Inactive Ultra Fast Input Aspect Ratio Auto Keystone Zoom Select Exit Enter Menu... -
Page 32: Menu Navigation
Menu Navigation The projector has multilingual on-screen display menus that allow for image and settings adjustment. 1. To open the On-Screen Display (OSD) Menu, press the Menu/Exit button on the projector or the remote control. 2. When the OSD is displayed, use the Navigation buttons ( ) to select any item in the main menu. -
Page 33: On-Screen Display (Osd) Menu Tree
On-Screen Display (OSD) Menu Tree Main Menu Sub-menu Menu Option Standard Bright Display Mode Cinema Gaming sRGB User Brightness (-/+, -50~50) Contrast (-/+, -50~50) Sharpness (-/+, 1~15) Color (-/+, -50~50) Tint (-/+, -50~50) Film Display Image Settings Video Gamma Graphics Standard (2.2) BrilliantColor™... - Page 34 Main Menu Sub-menu Menu Option Hue / R (*) (-/+, -50~50) Saturation / (-/+, -50~50) G (*) Color Gain / B (*) (-/+, -50~50) Matching Reset Color Settings Exit Auto Image Settings RGB (0~255) Color Space RGB (16~235) Dynamic Black Brightness Mode Power...
- Page 35 Main Menu Sub-menu Menu Option Top-Left Top-Right Four Corners Bottom-Left Bottom-Right Keystone Display H. Keystone (-/+, -30~30) V. Keystone (-/+, -30~30) 3x3 Warp Reset Zoom (-/+, -5~25) Volume (-/+, 0~10) Mute Audio Bitstream Audio Mode...
- Page 36 Main Menu Sub-menu Menu Option Desk Front Desk Rear Projection Ceiling Front Ceiling Rear Direct Power Signal Power Power Settings Auto Power (-/+, 0~180) minutes Security Security Setup Change Password HDMI Link HDMI CEC XBOX Mode Green Grid Magenta Grid Test Pattern Test Pattern White Grid...
- Page 37 Main Menu Sub-menu Menu Option English Deutsch Français Italiano Español Português Polski Nederlands Svenska Norsk Suomi ελληνικά Language 繁體中文 簡体中文 日本語 한국어 Options Русский Setup Čeština يبرع ไทย Türkçe Tiếng Việt Bahasa Indonesia High Altitude Auto Source Keypad Lock Default Logo Neutral Reset to...
- Page 38 Main Menu Sub-menu Menu Option Serial Number Source Resolution Refresh Rate Light Source Information Hours Display Mode Brightness Mode System Firmware Version...
-
Page 39: Menu Operation
Menu Operation Display Menu Display Image Settings Inactive Ultra Fast Input Aspect Ratio Auto Keystone Zoom Select Exit Enter Menu Description Display Mode There are several predefined display modes that you can choose from to suit your viewing preference. Mode Description Designed for normal circumstances in a Standard... - Page 40 Menu Description Brightness The higher the value, the brighter the image. Lower values will result in a darker image. Contrast Use this to set the peak white level after you have previously adjusted the Brightness setting to suit your selected input and viewing environment.
- Page 41 Menu Description Color Settings Setting Description A color-processing algorithm and enhancements to enable higher BrilliantColor™ brightness while providing true, more vibrant colors in picture. Select from Warm, Standard, Cool, Color Temperature or Cold. Only in permanent installations with controlled lighting levels such as: boardrooms, lecture halls, or home theaters should Color Matching be considered.
- Page 42 Menu Description This function is favorable to frame rate reducing. Quick response time in native timing can be achieved. When enabled, the following settings (if applicable) will return to factory preset values and disabled: Warping, Keystone, Four corners., Aspect Ratio, Zoom. Ultra Fast Input NOTE: This function is only available when a 4K@60Hz, 1440P@60/120Hz and 1080P@60/120/240Hz...
- Page 43 Menu Description Select the aspect ratio of the projected image. Aspect Ratio Description Scales an image so that it is displayed in the center of the screen with a 4:3 aspect ratio. This is most suitable for 4:3 images like computer monitors, standard definition TV, and 4:3 aspect DVD movies, as it displays them without aspect alteration.
- Page 44 Menu Description Option Description Adjust each corner to make a square image when the projection surface is not level. NOTE: While adjusting the Four Corners, the Aspect Four Corners Ratio, and Zoom menus will be disabled. To enable them, reset the Keystone settings to Keystone default.
-
Page 45: Audio Menu
Audio Menu Audio Volume Mute Audio Mode Select Exit Enter Menu Description Volume Adjust the volume level. Mute Temporarily turn off the sound. Select the preferred audio mode. Option Description Audio Mode Play sound via the projector’s Bitstream speakers. Switch to ARC/eARC. -
Page 46: Setup Menu
Setup Menu Setup Projection Power Settings Security HDMI CEC Test Pattern Options Reset Select Exit Enter Menu Description Select the preferred projection location: Desk Front, Desk Projection Rear, Ceiling Front, or Ceiling Rear. Direct Power On Automatically power on the projector when DC power is supplied, without pressing the Power button on the projector or the remote control. - Page 47 Menu Description HDMI Link When you connect HDMI CEC-compatible devices to the projector with HDMI cables, you can control them on the same power on or power off status using the HDMI CEC control feature in the projector’s OSD. This lets one device or multiple devices in a group power on or power off via HDMI CEC in a typical configuration.
- Page 48 Menu Description Language Select the On-Screen Display (OSD) Menu language. High Altitude When On, the fans will spin faster for better cooling and performance. This is useful for high altitude environments where the air is thin. Auto Source Automatically find an available input source. Option Description Only search the current input...
-
Page 49: Information Menu
Information Menu View Serial Number, Source, Resolution, Refresh Rate, Display Mode, Light Source Hours, Brightness Mode, and Firmware Version information. Information 0000123456789 Serial Number HDMI Source 1920 x 1080 Resolution 60Hz Refresh Rate Gaming Display Mode 99999 hr Light Source Hours Eco. -
Page 50: Appendix
Appendix Specifications Item Category Specifications Type Laser Display Size 30”~300” 1.06~1.45 Throw Ratio Projector (100”@2.34 m) Lens F=2.51~2.93, f=15.985~21.423 mm Display 1-CHIP DMD System Input Signal HDMI (v. 2.0) : 15~255 kHz, f :24~240 Hz, Pixel rate: 600 MHz Resolution Native 3840 x 2160 Power... -
Page 51: Projector Dimensions
Projector Dimensions 286 mm (W) x 129 mm (H) x 216 mm (D) -
Page 52: Timing Chart
Timing Chart HDMI Video Timing Timing Resolution Refresh Rate (Hz) SDTV(480i) 720 x 480 SDTV(480p) 720 x 480 SDTV(576i) 720 x 576 SDTV(576p) 720 x 576 HDTV(720p) 1280 x 720 50/60 HDTV(1080i) 1920 x 1080 50/60 HDTV(1080p) 1920 x 1080 24 / 25 / 30 / 50 / 60 / 120 3840 x 2160 24 / 25 / 30 / 50 / 60... -
Page 53: 3D Support Timing
3D Support Timing HDMI 3D Frame Packing Format Timing Resolution Refresh Rate (Hz) 720p 1280 x 720 50 / 60 1080p 1920 x 1080 Side by Side Format Timing Resolution Refresh Rate (Hz) 1080i 1920 x 1080 50 / 60 Top and Bottom Format Timing Resolution... -
Page 54: Troubleshooting
Troubleshooting This section describes some common problems that you may experience when using the projector. Problem or Issue Possible Solutions • Ensure the power cord is properly attached to the projector and to the power outlet. • If the cooling process has not completed, please The projector does not wait until it has finished then try to turn on the turn on... - Page 55 Problem or Issue Possible Solutions • Ensure there are no obstacles between the remote control and projector; and that they are within The remote control range, 8m (26 ft). does not work • The batteries may be out of power, please check and replace if necessary.
-
Page 56: Led Indicators
LED Indicators When the warning indicators (see below) light up or flash, the projector will automatically shutdown. Unplug the power cord from the projector, wait for 30 seconds and try again. If the warning indicators light up or flash, please contact your nearest service center for assistance. -
Page 57: Maintenance
• ViewSonic® does not recommend the use of any ammonia or alcohol-based cleaners on the lens or case. Some chemical cleaners have been reported to damage the lens and/or case of the projector. • ViewSonic® will not be liable for damage resulting from use of any ammonia or alcohol-based cleaners. -
Page 58: Regulatory And Service Information
Regulatory and Service Information Compliance Information This section addresses all connected requirements and statements regarding regulations. Confirmed corresponding applications shall refer to nameplate labels and relevant markings on the unit. FCC Compliance Statement This device complies with part 15 of FCC Rules. Operation is subject to the following two conditions: (1) this device may not cause harmful interference, and (2) this device must accept any interference received, including interference that may cause undesired operation. -
Page 59: Ce Conformity For European Countries
CE Conformity for European Countries The device complies with the EMC Directive 2014/30/EU and Low Voltage Directive 2014/35/EU. Ecodesign Directive 2009/125/EC. The following information is only for EU-member states: The mark shown to the right is in compliance with the Waste Electrical and Electronic Equipment Directive 2012/19/EU (WEEE). -
Page 60: Declaration Of Rohs2 Compliance
Declaration of RoHS2 Compliance This product has been designed and manufactured in compliance with Directive 2011/65/EU of the European Parliament and the Council on restriction of the use of certain hazardous substances in electrical and electronic equipment (RoHS2 Directive) and is deemed to comply with the maximum concentration values issued by the European Technical Adaptation Committee (TAC) as shown below: Proposed Maximum Actual Concentration... -
Page 61: Indian Restriction Of Hazardous Substances
Schedule 2 of the Rule. Product Disposal at End of Product Life ViewSonic® respects the environment and is committed to working and living green. Thank you for being part of Smarter, Greener Computing. Please visit the ViewSonic®... -
Page 62: Copyright Information
ENERGY STAR® is a registered trademark of the U.S. Environmental Protection Agency (EPA). As an ENERGY STAR® partner, ViewSonic® Corporation has determined that this product meets the ENERGY STAR® guidelines for energy efficiency. Disclaimer: ViewSonic® Corporation shall not be liable for technical or editorial errors or omissions contained herein;... -
Page 63: Customer Service
For technical support or product service, see the table below or contact your reseller. NOTE: You will need the product’s serial number. Country/ Region Website Country/ Region Website Asia Pacific & Africa Australia www.viewsonic.com/au/ Bangladesh www.viewsonic.com/bd/ 中国 (China) www.viewsonic.com.cn www.viewsonic.com/hk/ 香港 (繁體中文) Hong Kong (English) www.viewsonic.com/hk-en/ India www.viewsonic.com/in/... -
Page 64: Limited Warranty
If a product proves to be defective in material or workmanship during the warranty period, ViewSonic® will, at its sole option, repair or replace the product with a like product. Replacement product or parts may include remanufactured or refurbished parts or components. - Page 65 (e) the serial number of the product. 3. Take or ship the product, freight prepaid, in the original container to an authorized ViewSonic® service center or ViewSonic®. 4. For additional information or the name of the nearest ViewSonic® service center, contact ViewSonic®. Limitation of implied warranties:...
- Page 66 Exclusion of damages: ViewSonic’s liability is limited to the cost of repair or replacement of the product. ViewSonic® shall not be liable for: 1. Damage to other property caused by any defects in the product, damages based upon inconvenience, loss of use of the product, loss of time, loss of profits, loss of business opportunity, loss of goodwill, interference with business relationships, or other commercial loss, even if advised of the possibility of such damages.
-
Page 67: Mexico Limited Warranty
If a product proves to be defective in material or workmanship during the warranty period, ViewSonic® will, at its sole option, repair or replace the product with a like product. Replacement product or parts may include remanufactured or refurbished parts or components &... - Page 68 Exclusion of damages: ViewSonic®’s liability is limited to the cost of repair or replacement of the product. ViewSonic® shall not be liable for: 1. Damage to other property caused by any defects in the product, damages based...
- Page 69 Name, address, of manufacturer and importers: México, Av. de la Palma #8 Piso 2 Despacho 203, Corporativo Interpalmas, Col. San Fernando Huixquilucan, Estado de México Tel: (55) 3605-1099 http://www.viewsonic.com/la/soporte/index.htm NÚMERO GRATIS DE ASISTENCIA TÉCNICA PARA TODO MÉXICO: 001.866.823.2004 Hermosillo: Villahermosa: Distribuciones y Servicios Computacionales SA de CV.
Need help?
Do you have a question about the LS7 Series and is the answer not in the manual?
Questions and answers