
Related Manuals for Veromatic Perto 2.0


Summary of Contents for Veromatic Perto 2.0
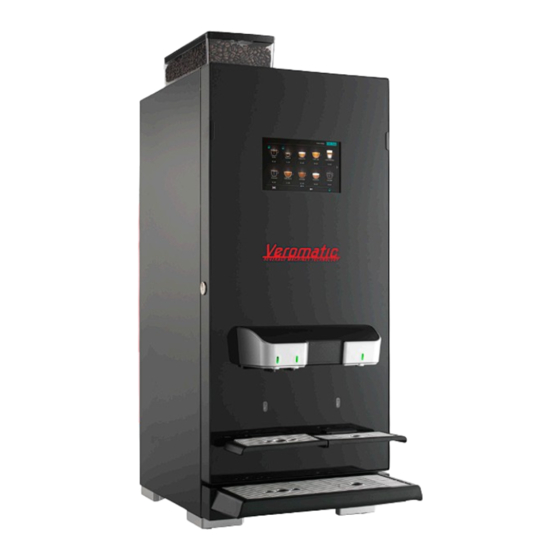
- Page 1 Perto 2.0 PETE2 Espresso machine Installatie, gebruik, onderhoud Installation, use and maintenance GH-PETE2-M01 rev.1...
- Page 2 Veromatic International B.V. behoudt zicht het recht om het product en deze handleiding te wijzigen zonder hiervan vooraf melding te maken.
-
Page 3: Table Of Contents
Inhoud Storingen en reparaties 8.1. Foutmeldingen op het scherm Belangrijk 8.2. Reparaties 1.1. Veiligheidsvoorschriften Buiten gebruik stellen 1.2. Bevoegdheid gebruikers 9.1. Tijdelijk buiten gebruik stellen 1.3. Gebruiksomgeving 9.2. Afdanken 1.4. Originele onderdelen Technische gegevens 1.5. Hygiëne 10.1. EU-verklaring van overeenstemming 1.6. -
Page 4: Veiligheidsvoorschriften
(reserve)onderdelen. Dit geldt ook voor de genoemde opties. Die voldoen aan strenge kwa- liteitseisen waardoor de machine optimaal blijft functioneren. Als er geen originele onderdelen worden gebruikt vervalt de garantie en is Veromatic International B.V. niet aansprakelijk voor eventuele daaruit voortvloeiende schade. -
Page 5: Watertemperatuur
De machine mag ook niet geplaatst worden in ruimten waar gereinigd wordt met stoom- of hogedruk apparaten. 1.12. Aansprakelijkheid en garantie Onder verwijzing naar de (Metaalunie) levervoorwaarden van Veromatic International BV is zij niet aanspra- kelijk en garantieplichtig als gebreken het gevolg zijn van: • Normale slijtage. -
Page 6: Transport En Uitpakken
Transport en uitpakken Het vervoeren van deze machine mag uitsluitend in de originele verpakking gebeuren. Op de verpakking staan aanwijzingen die nodig zijn voor het opslaan en vervoeren van deze machine (zie Figuur 1). Temperatuur Tijdens gebruik +10° tot +32° Celsius Tijdens transport en +0°... -
Page 7: De Machine
De machine 3.1. Algemeen Dit is een automatische machine voor het bereiden van warme dranken. U plaatst een beker, glas of kan on- der de juiste uitloop. Vervolgens kiest U een product en eventueel de instellingen voor uw consumptie op het scherm. -
Page 8: Typeplaatje
3.3. Typeplaatje Het typeplaat bevindt zich in de machine bovenaan op de rechterzij- wand (Zie Figuur 4). Op het typeplaatje vindt u de volgende gegevens van de machine: • Model • Serienummer • Bouwjaar • Elektrische gegevens • Wateraansluiting De instellingen van product- en waterhoeveelheden kunnen per ma- chine verschillen. -
Page 9: Installeren
Installeren WAARSCHUWING: Het installeren mag alleen gebeuren door een bekwaam servicemonteur! 4.1. Werkingsschema Zie Figuur 5 1. Wateraansluiting 2. Reduceerventiel (optioneel) 3. Waterfilter (optioneel) 4. Inlaatventiel boiler (naar mixers) 5. Boiler (naar mixers) 6. Boileraftap 7. Inlaatventiel espressozijde 8. Air break - waterbuffer 9. -
Page 10: Algemene Installatierichtlijnen
Behalve de wettelijke richtlijnen waaraan een servicemonteur moet voldoen stelt Veromatic International BV bovendien nog de volgende eisen aan een servicemonteur: 1. De monteur is goed op de hoogte van de machine, door training bij Veromatic International B.V. of door gelijkwaardige, elders verkregen training. -
Page 11: Wateraansluiting
2.0 – 8.0 0.2 – 0.8 Waterslot Veromatic International BV schrijft het gebruik van een waterslot (bestelcode HL-00190) voor en aanvaardt geen enkele verantwoording en eventuele aanspra- kelijkheid met betrekking tot waterschade, indien de machine zonder deze beveili- ging wordt geïnstalleerd. -
Page 12: In Bedrijf Stellen
4.6. In bedrijf stellen 1. Open de voordeur van de machine 2. Vul de bonen container met koffiebonen (zie Figuur 7). 3. Verwijder de instant canisters uit de machine met de uitlopen naar boven (zie Figuur 8). 4. Vul de canisters tot maximaal driekwart van de inhoud (zie Figuur LET OP! Het geheel vullen van de canisters zal morsen in de hand werken Figuur 7. -
Page 13: Afstelling
Deze machine is alleen bedoeld voor gebruik met koffiebonen en droog poeder instant producten. Gebruik van een ander product wordt niet gegarandeerd. Veromatic International BV is niet aansprakelijk voor scha- de of kwaliteitsproblemen voortkomend uit het gebruik van een ander product dan beoogd. -
Page 14: Maalgraad Afstellen
5.4. Maalgraad afstellen Deze machine is af fabriek ingesteld voor een algemeen espresso pro- fiel (maalgraad en instellingen) om de beste in-cup kwaliteit te geven. Echter, omdat het type koffieboon en instant mix de in-cup kwaliteit sterk beïnvloeden, kunnen de maalgraad, dosering en vele andere in- stellingen een aanpassing vereisen. -
Page 15: Bediening
Bediening 6.1. De machine in/uitschakelen Schakel de machine in met de AAN/UIT schakelaar aan de achterzijde van de machine. De machine start en warmt op (zie Figuur 16). Schakel de machine uit met de AAN/UIT schakelaar aan de achterzij- de van de machine (zie Figuur 17). 6.2. -
Page 16: Een Kan Vullen
3. Raadpleeg eventueel de allergenen informatie van de door u ge- selecteerde consumptie (zie Figuur 22). 4. Plaats een beker of glas op de cuptray onder de uitloop met knip- perend lampje (zie Figuur 23). LET OP! De machine zal een glas niet kunnen detecteren en geeft dan de melding “Wilt u toch doorgaan?”... -
Page 17: Lekbak Legen
de rechter uitgifte. Het uitgeven van heet of koud water consump- ties kunt u altijd afbreken door op Stop te drukken. 6.5. Lekbak legen Als de lekbak vol is, geeft de machine een melding op het scherm: (zie Figuur 28) Doe dan het volgende: 1. -
Page 18: Onderhoud
Onderhoud Goed onderhoud is van groot belang. Hygiëne en een lekkere kop koffie zijn nauw met elkaar verbonden. Door de instructies goed op te volgen kan de machine op een veilige en efficiënte manier schoongehouden worden in overeenstemming met HACCP voorschriften. WAARSCHUWING: Spuit nooit met vloeistof in of tegen de machine. -
Page 19: Het Spoelmenu
7.3. Het Spoelmenu Het Spoelmenu gebruikt u voor het bijvullen, spoelen en reinigen van de machine. Als u de deur opent, wordt automatisch het Spoelmenu geactiveerd (zie Figuur 31). Hier ziet u in één oog- opslag hoe vol de canisters, lekbak en afvalbak zijn. De niveaus van de canisters kunt u hier bijstellen na het bijvullen. -
Page 20: Het Servicemenu
7.4. Het Servicemenu Vanuit het Spoelmenu, zie paragraaf 7.3, kunt u met de knop rechtsonder het Servicemenu (zie Figuur 32) openen. Het Servicemenu is alleen beschikbaar in de Engelse taal. Veel andere opties en instellingen van producten en de machine zijn hier te vinden. Deze zijn alleen toegankelijk voor een dealer of monteur met het juiste wachtwoord. -
Page 21: Dagelijks Onderhoud
7.5. Dagelijks onderhoud Voor het schoonmaken mag alleen water met eventueel afwasmiddel gebruikt worden. Altijd goed naspoelen met schoon water. De machine is voorzien van een geactiveerde dagelijkse automatische spoeloptie. Wanneer uitgeschakeld, moet spoelen dagelijks handma- tig gedaan worden. Volledig dagelijks onderhoud bestaat uit: 1. -
Page 22: Wekelijks Onderhoud
7.6. Wekelijks onderhoud Voer alle acties uit voor het dagelijks onderhoud (paragraaf 7.5) en dan extra: 1. Verwijder de heet water en koffie cup tray (Figuur 38) en reinig deze met warm water. 2. Plaats de cup trays terug 7.6.1. Espressobrewer schoonmaken Voor de reinigingscyclus van de brewer wordt gebruik van een reini- gingstablet geadviseerd. - Page 23 Figuur 43. Figuur 47. Figuur 44. Figuur 48. Figuur 45. Figuur 49. Figuur 50. Figuur 46.
-
Page 24: Instant Mixers Schoonmaken
7.6.2. Instant mixers schoonmaken 1. Schakel de machine uit. 2. Open de deur van de machine. 3. Open de bovenklep (zie Figuur 51). 4. Draai de uitlopen van de canisters omhoog en haal één voor één de canisters uit de machine (zie Figuur 52). LET OP! Draai de uitloop omhoog. - Page 25 Figuur 61. Figuur 56. Figuur 57. Figuur 58. Figuur 59. Figuur 60.
-
Page 26: Bijvullen Van De Bonencanister
7.6.3. Bijvullen van de bonencanister Om een goede werking te behouden wordt aanbevolen om de machi- ne uitsluitend te vullen met bonen die door uw dealer voorgeschre- ven worden. 1. Ontgrendel en open de deur. Het Spoelmenu verschijnt op het scherm. -
Page 27: Bijvullen Van Een Instant Canister
7.6.4. Bijvullen van een instant canister Om een goede werking te behouden mag deze machine uitsluitend gevuld worden met producten die door uw dealer voorgeschreven worden. 1. Ontgrendel en open de deur. Het Spoelmenu verschijnt op het scherm. 2. Open de bovenklep (zie Figuur 67). 3. -
Page 28: Maandelijks Onderhoud
7.7. Maandelijks onderhoud Ter aanvulling op het wekelijkse onderhoud dient ook het onderstaan- de te gebeuren: 1. Leeg de product canisters (zie Figuur 72). 2. Kijk in de container of er geen losgeraakte onderdelen (veren bv.) in zitten. Als dit het geval is, bel dan uw dealer/servicenummer. 3. - Page 29 Storingen en reparaties 8.1. Foutmeldingen op het scherm De machine zal in de meeste gevallen door middel van een popup- scherm een melding geven als er een fout is opgetreden. Onder de foutmelding staat wat u kan doen om de fout te verhelpen. Door op het uitroepteken te klikken komt u weer terug in het hoofdmenu (zie Figuur 74).
- Page 30 1. De monteur is op de hoogte van alle wetten en regels op het gebied van elektrische aansluitingen, elek- trische symbolen enz. 2. De monteur is goed op de hoogte van soepautomaten, door training bij Veromatic International B.V. of door gelijkwaardige, elders verkregen training.
- Page 31 5. Zorg dat de machine compleet is. 6. Lever de machine in. Als de machine vervangen wordt door een nieuwe machine van Veromatic International B.V. wordt het oude exemplaar door de leverancier teruggenomen. Voor automaten van Veromatic International BV is een verwijderingsbijdrage betaald. U kunt uw leveran- cier vragen de machine op te halen en deze naar speciaal aangewezen retourstations te transporteren.
- Page 32 Geluidsniveau idle/grind/brew/mix <50 / 64 / 58 / 61 dB(A) Veromatic International BV schrijft het gebruik van een waterslot voor en aanvaardt geen enkele verant- woording met betrekking tot waterschade, indien de machine zonder deze beveiliging wordt geïnstalleerd. In Nederland moet drinkwater voldoen aan de kwaliteitseisen zoals die zijn omschreven in de Drinkwa- terwet en in het Drinkwaterbesluit van 2012.
- Page 33 EU-VERKLARING VAN OVER- EU-DECLARATION OF CON- EU-KONFORMITÄTS-ERKLÄ- EU-DECLARATION DE CON- EENSTEMMING FORMITY RUNG FORMITE Veromatic International B.V. Donker Duyvisweg 56 NL-3316 BM Dordrecht Nederland wij verklaren geheel onder we herewith declare, on our wir erklären hiermit eigenver- nous déclarons par la pré-...
- Page 34 Preface Congratulations! You now have the pleasure of using a hot drinks dispenser by Veromatic International B.V. This user manual contains all information needed to use, refill and maintain the machine. Failure to comply with prescribed guidelines for use and maintenance could result in personal injury, mortal danger and/or damage to the machine.
- Page 35 Index Malfunctions & repairs 8.1. Display malfunction messages Important 8.2. Repairs 1.1. Safety regulations Decommissioning 1.2. Users’ qualifications 9.1. Temporary decommissioning 1.3. Use environment 9.2. Disposal 1.4. Original parts Technical information 1.5. Hygiene 10.1. EU-declaration of conformity 1.6. Ingredients 1.7. Ventilation openings 1.8.
- Page 36 Parts must meet strict quality demands through which the machine will continue to function optimally. When non original parts are used, the warranty is null and void. Veromatic International B.V. is not responsible for any possible damage that may occur as a result thereof.
- Page 37 The machine may not be placed in areas where cleaning takes place with steam or high pressure devices. 1.12. Liability and warranty With reference to the (Metaalunie) terms of delivery, Veromatic International BV is not liable for warranty as a result of: •...
- Page 38 Transportation and unpacking The transportation of this machine may only occur in the original packaging. Instructions necessary to store and transport this machine are located on the packaging. (Figure 1). Temperature During operation +10° tot +32° Celsius During transport and +0°...
- Page 39 Machine overview 3.1. General The machine is an automatic machine for preparing hot beverages. The user places a cup, glass or jug under the appropriate pouring outlet. A product is then selected on the touchscreen as well as additional settings for the beverage.
- Page 40 3.3. Type plate The type plate is located inside the machine, at the top of the right- hand wall. (See Figure 4). This type plate features the following details of the machine: • Model • Serial number • Year of construction •...
- Page 41 Installation WARNING: Only a qualified service technician may install the machine! 4.1. Operating scheme See Figure 5 1. Water connection 2. Reducing valve (optional) 3. Water filter (optional) 4. Inlet valve boiler (to mixers) 5. Boiler (to mixers) 6. Boiler drain 7.
- Page 42 Besides the legal guidelines that a service technician has to meet, Veromatic International BV moreover makes the following demands of a service technician: 1. The technician must be very well acquainted with the machine, through training by Veromatic Interna- tional B.V. or through similar training obtained elsewhere.
- Page 43 0.2 – 0.8 Water lock Veromatic International BV advises the use of a water lock (Veromatic order code HL-00190) and does not accept any responsibility with regard to water damage, in case the machine gets installed without this water lock.
- Page 44 4.6. First installation 1. Open the front door of the machine. 2. Fill the bean canister with coffee beans (see Figure 7). 3. Take the instant canisters out of the machine with the outlets turned upwards (see Figure 8). 4. Fill the canisters to maximum three quarters of the capacity (see Figure 9).
- Page 45 This vending machine is solely intended for use with coffee beans and dry instant products. Use of a differ- ent product is not guaranteed to function well. Veromatic International BV is not liable for any damage or quality degradation if a different product is used. Consult your dealer which products can be used. Consult the regulations on the product packaging regarding the shelf life and replacement of the products used.
- Page 46 5.4. Grinder adjustment This machine is off factory pre-adjusted for a regular espresso grind (grinding degree and settings) to give the best in-cup quality. Howev- er, because the type of coffee bean and instant mix strongly effects the in-cup quality, the grinding degree, dosage and many other set- tings may require adjustment.
- Page 47 Operation 6.1. Switching the machine on/off Switch the machine on using the ON/OFF switch on the back of the machine. The machine will start and warm up. (see Figure 16). Switch the machine off using the ON/OFF switch on the back of the machine.
- Page 48 3. Optionally refer to allergy-related information for the beverage you have selected. (see Figure 22). 4. Place a cup or glass under the pouring spout with the flashing light (see Figure 23). ATTENTION! The machine can not detect all glass shapes. If so it will display the message “Do you want to continue?”...
- Page 49 5. Confirm on the screen that the drip tray is replaced and empty. 6.6. Energy saving modus (VIPS) Figure 27. The machine is equipped with the energy-saving Veromatic Intelligent Power Save (VIPS) as standard. In the first two weeks after installation (and continuously thereafter), VIPS learns how the machine is used. It automatically determines the timing for energy savings when con- sumptions are generally not taken.
- Page 50 Maintenance Good maintenance is of the utmost importance. Hygiene and a good cup of coffee are closely related. By strictly following the instructions the machine can be kept clean in a safe and efficient manner in accord- ance with the local regulations. WARNING: Never spray liquids into or against the machine.
- Page 51 7.3. Rinse menu For regular maintenance the dispenser is fitted with a Rinse menu, for rinsing, reset canister levels and cleaning. The Rinse menu will be activated automatically once the door is opened. (see Figure 31). This will show you the fill level of canisters, the drip tray and the waste bucket. You can modify the status of canis- ters once they have been refilled.
- Page 52 7.4. The Service menu Many other options and settings of products and the machine are provided in the “Service menu”. These are only accessible for a dealer or mechanic with the appropriate password. These settings are not for regular maintenance and are not covered in this user manual. The button in the bottom-right of the Rinse menu, see paragraph 7.3, can be used to open the Service menu.
- Page 53 7.5. Daily maintenance For cleaning you may only use water, possibly with some dishwashing detergent. Always rinse thoroughly with clean water. The machine is equipped with an automated daily or idle timed rins- ing option. When active, it will ask to place a container underneath the outlet and press start to start rinsing.
- Page 54 7.6. Weekly maintenance Perform all actions for the daily maintenance (paragraph 7.5) and then extra: 1. Remove the hot water and coffee cup tray (see Figure 38) and clean them with hot water 2. Replace the cup trays 7.6.1. Rinse the espresso brewer A cleaning tablet of 2.0 g is recommended for the brewer cleaning Figure 38.
- Page 55 Figure 47. Figure 43. Figure 48. Figure 44. Figure 45. Figure 49. Figure 46. Figure 50.
- Page 56 7.6.2. Cleaning of instant mixers 1. Switch off the machine. 2. Open the door of the machine. 3. Open the top cover (see Figure 51). 4. Turn the canister spouts up, and remove the canisters one by one (see Figure 52). ATTENTION! Turn the pouring spout upwards at all times.
- Page 57 Figure 61. Figure 56. Figure 57. Figure 58. Figure 59. Figure 60.
- Page 58 7.6.3. Filling the bean canister To ensure effective operation, we recommend only filling the machine with beans that have been prescribed by your operator. 1. Unlock and open the door. The Rinse menu will appear on the screen. 2. Pull the canister slide towards you (see Figure 62). This will re- lease the canister and close it at the bottom.
- Page 59 7.6.4. Filling the instant canisters To ensure continued proper operation of this machine, it may only be filled with products that are prescribed by your dealer. 1. Unlock and open the door. The Rinse menu will appear on the screen. 2.
- Page 60 7.7. Monthly maintenance In addition to the weekly maintenance, the following should be done: 1. Empty the canisters (see Figure 72). 2. Check if there are no detached parts (like springs). If so, call your dealer/service number. 3. Clean the canisters with hot water. 4.
- Page 61 Malfunctions & repairs 8.1. Display malfunction messages In most cases, a message will appear in a pop-up screen if the ma- chine encounters an error. Error messages can be accompanied by advice about how to resolve the errors in question. The exclamation mark button will take you back to the main menu.
- Page 62 1. The technician has to be informed of all laws and regulations regarding electrical connections, electrical symbols, etc. 2. The technician is very familiar with the machine, by training with Veromatic International B.V. or similar training obtained elsewhere. 3. The technician uses the instructions, diagrams etc., applicable for this type and model.
- Page 63 5. Make sure the machine is complete. 6. Hand in the machine. If the machine is to be replaced by a new machine from Veromatic International B.V. the old machine will be taken back by the supplier for recycling. For devices of Veromatic International B.V. a disposal fee has been paid. You can ask your supplier to pick up the machine and take it to specially allocated return stations.
- Page 64 <50 / 64 / 58 / 61 dB(A) Veromatic International BV instructs the use of a water lock (order code HL-00190) and does not accept any responsibility with regard to water damage, in case the machine gets installed without this water lock.
- Page 65 EU-VERKLARING VAN OVER- EU-DECLARATION OF CON- EU-KONFORMITÄTS-ERKLÄ- EU-DECLARATION DE CON- EENSTEMMING FORMITY RUNG FORMITE Veromatic International B.V. Donker Duyvisweg 56 NL-3316 BM Dordrecht Nederland wij verklaren geheel onder we herewith declare, on our wir erklären hiermit eigenver- nous déclarons par la pré-...
Need help?
Do you have a question about the Perto 2.0 and is the answer not in the manual?
Questions and answers