Table of Contents
Advertisement
Quick Links
Advertisement
Table of Contents

Related Manuals for Veromatic MBE01


Summary of Contents for Veromatic MBE01
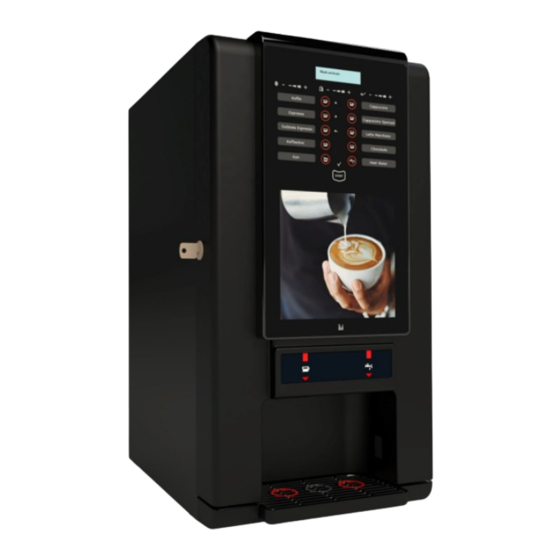
- Page 1 SERVICE MANUAL MBE01 Espresso machine Read the manual before installing, using and serviceing the machine. This manual is intended for dealers and mechanics who are qualified and instructed to perform service to the machine. SM-MBE01-A v1.1 09/2019...
-
Page 2: Preface
This service manual is intended exclusively for technical support to be executed by a qualified or licensed mechanic. The demands for a qualified mechanic are: The mechanic is well known in the workings of the dispenser/machine, by training at Veromatic International BV or an equal training elsewhere (dealer for instance). -
Page 3: Table Of Contents
Contents Taking a drink ........20 Preface ..............2 Hot water ..........22 Important ............5 Jug/cup-to-go function ......22 Safety regulations ........5 Energy save mode (VIPS) ....... 23 Users’ qualifications ......... 5 Rinse menu and service menu ....23 Use environment ........ - Page 4 Malfunctions & repairs ......58 12.1 Display malfunction messages ....58 12.2 Repairs ........... 60 Decommissioning ........61 13.1 Temporary decommissioning ....61 13.2 Disposal ..........61 Technical information ....... 62 14.1 EU-declaration of conformity ....63...
-
Page 5: Important
Parts must meet strict quality demands through which the machine will continue to function optimally. When parts are used that are not original then the warranty is null and void and Veromatic International B.V. is not responsible for any possible damage that may occur as a result thereof. -
Page 6: Ingredients
The machine may also not be placed in areas where cleaning takes place with steam or high pressure devices. 1.12 Liability and warranty With reference to the terms of delivery of Veromatic International BV, it is not liable and liable for warranty as a result of: •... -
Page 7: Personal Safety
• not or incorrectly performed maintenance • defects in or unsuitability of goods or used materials or tools by instructions or third partie. 1.13 Personal safety Mind the following points before performing maintenance, to ensure a safe working environment: 1. Make sure the machine complies to the connection requirements. 2. -
Page 8: Transportation And Unpacking
2 Transportation and unpacking Transportation The transportation of this machine may only occur in the original packaging. Instructions necessary to store and transport this machine are located on the packaging. 50°C. 0°C. /2.1 Environmental temperature During operation +10° to +32° Celsius During transport and storage +0°... -
Page 9: Installation
3 Installation WARNING: Only a qualified service technician may install the machine! Operation schematic Water connection Reducing valve (optional) Water filter (optional) Intake valve Air break Flow meter Pressure pump Non-return valve Bypass valve Espressoboiler Threeway valve Outlet valve 1 hot water Outlet valve 2 extra hot water Outlet valve 3 mixer... -
Page 10: Installation Location
It is required that a sufficiently fused wall outlet with proven grounding is present within 1½ meters and an aerated washing machine faucet. Besides the legal guidelines that a service technician has to meet, Veromatic International BV moreover makes the following demands of a service technician: The technician must be very well acquainted with the machine, through training by Veromatic International B.V. -
Page 11: Water Connection
2.0 – 8.0 0.2 – 0.8 Water lock Veromatic International BV instructs the use of a water lock (Veromatic order code HL-00190) and does not accept any responsibility with regard to water damage, in case the machine gets installed without this water lock. -
Page 12: Interface Operation (Short)
Interface operation (short) The interface of the machine consist of a two line information display, LED lit capacitive touch buttons and information LED’s. The interface operates in two states, normal vending operation and menu navigation. /3-3 When opening the door, the maintenance menu is activated by activating the door switch (/4-1). When doing this, the navigation symbols are lit (/4-2). -
Page 13: First Installation
First installation The machine is provided with two empty taste cards and a sheet of product stickers. Before commissioning the correct stickers have to be placed onto the taste cards and installed behind the glass. The correct sticker placement should correspond to the configuration of the machine. This can be modified if wished by the service technician. -
Page 14: Taste Card Installation
Alternative taste card order Left taste card Right taste card Espresso Cappuccino Coffee Latte Macchiato Cafe Americano Cafè latte Double espresso Hot water Procedure for changing the configuration: 1. Open the door with key and go to the rinse menu. 2. -
Page 15: Using A Customized Key Layout
Open the lower panel of the door with the hand removable knurled nuts. (/3.4 a) Place the product stickers on the taste card in correspondance with the standard or desired configuration. (/3.4 b) Insert the taste cards in the slot of the plastic holder (/3.4 c). Close the inner panel with the knurled nuts. -
Page 16: Customization Of Bean Grind And Product Settings
Press the “Go back” key to start operation. Adjust the machine for taste and quantity desired. Choose every product at least twice to check the adjustment. See chapter 4 how to change flavours. Customization of bean grind and product settings This machine has been pre-adjusted for a general espresso grind and with general settings to provide the best in-cup quality. -
Page 17: Adjustments
This vending machine is solely intended for use with coffee beans and dry instant products. Use of a different product is not guarenteed to function well. Veromatic International BV is not liable for any damage or quality degradation if a different product is used. Consult your dealer which products can be used. -
Page 18: Grinder Adjustment
Grinder adjustment The grinder is off factory pre-adjusted for a regular espresso grind. If desired, this can be adjusted. Open the door and enter the service menu (password protected). Go to Product settings, choose ‘Espresso’ product, then ‘Coffee’ setting. This determines the grind time. -
Page 19: Operation
5 Operation The interface of the machine consist of: 1: Product keys 1 – 10 (8 product keys; 1 hot water key (right bottom); 1 jug key (left bottom) 2: Navigation Indicators (LEDs) (operated with product key 1) Down (operated with product key 2) Go back (operated with product key 3) Enter... -
Page 20: Taking A Drink
/5-2 Taking a drink 1. Place a cup properly according to the cup positioning sticker. For hot water, place your cup on the right. For all other beverages, place the cup on the left side. The display will give direction. (/5-3) /5-3 2. - Page 21 3. Choose the drink by pressing one of the active product keys. The other product keys will become inactive (/5-5). The START key will become active. Note: When a pay system is attached, the display will show a message ‘Insufficient credit’, if the START key is pressed before having paid.
-
Page 22: Hot Water
7. Press the Start key to dispense the beverage. The chosen product key will blink during the dispense (/5-9). /5-9 8. After the beverage has been served, the display will show a message ‘Your drink is ready’. WARNING: Hot drinks may cause burn injuries. Keep your hands away from the cup or glass as long as the machine is dispensing your drink. -
Page 23: Energy Save Mode (Vips)
Energy save mode (VIPS) The machine is equiped with the Veromatic Intelligent Power Save (VIPS) energy saving turned on by default. In the first two weeks after installation (and after that continuously), VIPS will learn the usage of the machine. It automatically determines the timing for energy saving when no dispenses are made generally. -
Page 24: Maintenance
6 Maintenance Good maintenance is of the utmost importance. Hygiene and a good cup of coffee are very closely related. By strictly following the instructions the machine can be kept clean in a safe and efficient manner in accordance with the local regulations. WARNING: Never spray liquids into or against the machine. -
Page 25: Machine Overview
Machine overview Outer parts: Front door Cabinet Door key Cup position sticker Drip tray grill Drip tray Cup sensor Branding light Interface Information display Inner parts: Upper cover Bean canister cover Bean canister Grinder Mixing bowl Brewer Product outlet a) Espresso/instant products b) Hot water Waste bucket... - Page 26 Reset container Machine VIPS mode* / On / Off Read counter Grand total counter Read log Enter password?** * VIPS = Veromatic Intelligent Power Save ** This is the gate to the deeper lying service menus. Intended for a dealer only.
-
Page 27: Daily Maintenance
Daily maintenance For cleaning you may only use water, possibly with some dishwashing detergent. Always rinse thoroughly with clean water. The machine is pre-installed with an automated daily rinsing option enabled each early morning. When active, it will ask to place a canister underneath the outlet and press start to start rinsing. When not active, it should be done manually. -
Page 28: Weekly Maintenance
Turn the machine on. Press the “Go back” key to leave the Rinse menu and to resume normal operation (when the door was not closed). Take a ‘test’ consumption of every product. ATTENTION: Be assured that following a maintenance all detachable parts are replaced to their normal position before restarting the operation of the machine. - Page 29 Remove the pin of the brewer and place it in the hole on the left of the cabinet. Carefully bend the click finger downwards and remove the brewer. Place it on the side to easily access the inlet hose coupling. Disconnect the brewer hose by pressing the ring with one hand and pulling the hose with the other hand.
- Page 30 Rinse the brewer with warm water under the tap. Dry the brewer. Reinstall the inlet hose thoroughly in the quick coupling at the bottom (see 25/26 in reverse) Replace all parts in the reverse order. Check if the drive notch is aligned with the motor shaft and if the sensor carrier is aligned with the notch on the back of the brewer.
-
Page 31: Cleaning Instant Mixer
• The brewer is first pre-rinsed. • Open the door and insert a cleaning pill in the brewer chute when asked. Regular pills of 1.6 gram are advised, max. is 3.5 grams. • Close the door, place the canister back underneath the outlet to catch the cleaning liquid and confirm with 'Start’. - Page 32 • Remove the mixer paddle from the mixer axis. • Remove the mixer plate by turning it further clockwise and pulling it from the base. • Clean all parts in a bucket with hot water, brush them clean and dry. •...
- Page 33 Close the top lid and the door. ATTENTION: Be assured that following a maintenance all detachable parts are replaced to their normal position before restarting the operation of the machine. Clean the outside of the machine with a clean moist cloth. Turn the machine on.
-
Page 34: Filling Bean Hopper
6.7.3 Filling bean hopper To ensure continued proper operation of this machine, it may only be filled with products that are prescribed by your dealer. Open the door of the machine. Open the upper lid. Close the bean hopper by pressing the locking slide fully (a), tilt the hopper (b) and remove (c). - Page 35 Open the door of the machine. Open the upper lid. Turn the spouts of the instant product canisters upwards and remove the product canisters from the machine, starting with the left one (see 1-3). Place the canisters on the counter. Remove the lids of the product canisters.
-
Page 36: Monthly Maintenance
Monthly maintenance In addition to the weekly maintenance, the following should be done: Empty the canisters. Check if there are no detached parts (like springs). If so, call your dealer/service number. Clean the canisters with hot water. Always place the canisters back in a complete dry state. Annual maintenance To continue the safe and hygienic operation of the machine it has to undergo a scheduled maintenance at least once a year. -
Page 37: Service Menu
8 Service menu Extended machine settings The machine menus are made up of three levels. The higher the level of the menu, the more settings can be changed. Access to a higher level is provided by a password code. • Basic Not guarded with a code () Least extensive menu for regular maintenance... - Page 38 /8-1 By SCROLLING, the options can be selected. By pressing ENTER, the desired option is saved and this menu is left to the previous branch. By pressing BACK, the process is cancelled, the original setting remains, and the menu exits to the previous branch.
- Page 39 /8.3 For some deeper lying menus, a password has to be entered. In that case the navigation functions are deactivated. The indicator lights are not lit in this case. The first three round product buttons AND the ENTER/START key now determine the password code. See /8-4 for the values of the password keys. The password must NOT be acknowledged with START as this key is now part of the password digits.
-
Page 40: Basic - Menu Level
Method of power saving management Machine on Machine manually set to always on Machine off Machine manually set to always off VIPS mode VIPS Veromatic Intelligent Power Saving Adaptive power saving according to real day use. Read counter Read product counters Espresso... -
Page 41: Password Protection For Higher Levels
Coffee User can scroll the list by UP/Down Keys. Product name and count will be displayed on the screen. Café Americano Caffe latte It is also possible to save counters to USB drive. Cappuccino Cappuccino Special Insert USB drive into the USB port on machine and press “Start”... -
Page 42: Menu Level
Relation between pitcher and recovery password: pitcher ADVANCED SUPERVISOR 8.4.1 ADVANCED - & SUPERVISOR - MENU LEVEL Function Text in display Details Level Product Settings Settings related to the vend products Product Prices Price – Espresso Price – Coffee Price – Café Americano Scroll through the possible product list to set the prices. - Page 43 Product Settings (Note: actual list may be different depending on Product selected, configuration file and model selected). Delay time coffee Delay time before starting dispensing coffee powder (grinder) Coffee Time to dispense coffee powder/grind time Extra coffee Extra coffee powder / grind time when using by products (milk/sugar) Coffee/espresso water (time in seconds) for pre-brewing Pre-brew coffee water...
- Page 44 Ingredient powder motor torque and revolutions limiter for Motor duty cycle controlling the dispense speed. Cacao powder dispense time (seconds) Cacao Delay time cacao Delay time before the mixer motor starts running. mixer Mixing motor torque and revolutions limiter for full Mixer duty cycle strength or less powerfull mixing.
- Page 45 NLG = //Obsolete. GRD= Dragma INR = Indian Rupee DKK = Danish krone Charge Jug in single All jug amount in one go Milk Price Price of a milk Sugar Price Price of a Sugar Show exact change Display message: exact change. message Show comma in Show comma in credit display.
- Page 46 Daily rinse time To set the time at which daily rinse activity will be started. To enable/disable idle time rinse option. Triggers a rinse Use auto idle rinse warning and procedure after a set time period in which no dispense was made. To be acknowledged by the start key. To set the time period (in minutes) after which the auto Auto idle rinse time rinse functionality will be performed.
- Page 47 Monitor Sensors This is diagnostic screen use Up/down keys to scroll through to monitor sensors. Espresso: Min. Boiler Temperature and state of the heater (on/off) operating temp Door: Open/Close Driptray: Drip tray: Empty/ Full Cup Left: Cup Sensor L: Cup / No Cup Cup Right: Cup Sensor R: Cup / No Cup Esp.
- Page 48 Latte Macchiato Chocolate Hot water Grand Total Counter Milk Sugar Water Counter Dealer total counter Reset Counters Reset All Espresso Coffee Cafe Americano Reset all counters at once. This menu will only available in Supervisor access level. Caffe latte User can scroll through the list by pressing UP/Down Cappuccino keys.
- Page 49 Merge settings from To Merge the settings to the actual settings Save Settings to USB. To save settings from the current machine to USB Test Programs To view or to start the Factory test programs Empty Boiler To start the process of emptying the boiler. To load new “PP58.bin”...
-
Page 50: Machine Electronics
Interface PCB PP-00880 Front door Control of human machine interface – display, buttons, LED’s Grinder converter PCB PP-00851 Cabinet Power converter and control unit for 230V DC backside grinder Table 1 Control electronics in the MBE01 Espressso machine... -
Page 51: Pp-00581 Main I/O Board
9.1.1 PP-00581 main I/O board Part Description MDB (pay system) Connection PP-00880 Telemetry Power 24V output Sensors Boot button Jumper Battery Heating element steering 230V output Fuse (2A) -
Page 52: Pp-00880 Interface Board
9.1.2 PP-00880 interface board Part Description Connection to PP-00581 Branding LED panel 24V Cup sensor (Right) Program connector and boot button Door switch Display connector Cupsensor (Left) -
Page 53: Pp-00851 Converter And Protection Circuitry For 230 Vdc Grinding Motor
9.1.3 PP-00851 Converter and protection circuitry for 230 VDC grinding motor Part Description Input Connection from PP-00581 Encoder connection to PP-00581 Output Connection to Grinder Motor The concerning circuitry is specially designed to protect the DC grinding motor(s) against overload situations. -
Page 54: Electrical Wiring Diagram
Electrical wiring diagram... -
Page 55: Service
10.2 Water lock and water filter Veromatic International BV strongly advises to use a water lock (ordering code HL-00190) to prevent high damages in case of leakages and will accept no responsibility nor liability with regard to water damage if the vending machine is installed without this protection. -
Page 56: Maintenance Schedule
10.5 Maintenance schedule Yearly Replace Minibar Espresso inspect clean each AIR BREAK Empty and clean the air break tank. yearly yearly TANK Check the hoses for damage or contamination. yearly if needed, max. two years Check the working of the level sensors. yearly FLOW METER Check the hoses for damage or contamination. - Page 57 CANISTERS Empty the instant canisters and clean thoroughly. Re- place them completely dry. Empty the bean hopper and clean thoroughly. Depending on the beans used, the surface may get sticky. Re-place completely dry. Check if the fan is clean. 6 months 6 months CABINET Check all wiring harnesses for signs of damage.
-
Page 58: Malfunctions & Repairs
12 Malfunctions & repairs 12.1 Display malfunction messages This machine features advanced malfunction analysis. When something is wrong, a message will appear on the display. Often the operator will be able to solve these malfunctions. ATTENTION! The solution to the malfunction is only intended as a tip. You have to consult the extended instructions in the relevant chapters of this manual to find the solution to this malfunction. - Page 59 A transparent cup is used Use the glass function (see 5.1 point 6) or use an (these are not always opaque cup detected!) Products not able The door is open. Re-)place brewer, waste bucket and close the to select, error door.
-
Page 60: Repairs
To replace parts, use only original (spare) parts, issued by Veromatic International B.V. These satisfy strict quality demands which assure that the machine continues to function optimally. If original parts are not used, the warranty is null and void and Veromatic International B.V. is not responsible for possible damages resulting thereof. -
Page 61: Decommissioning
• Hand in the machine. If the machine is to be replaced by a new machine from Veromatic International B.V. the old machine will be taken back by the supplier for recycling. For devices of Veromatic International BV a disposal fee has been paid. You can ask your supplier to pick up the machine and take it to specially allocated return stations. -
Page 62: Technical Information
2.0 – 8.0 0.2 – 0.8 Water lock Veromatic International BV instructs the use of a water lock (order code HL-00190) and does not accept any responsibility with regard to water damage, in case the machine gets installed without this water lock. -
Page 63: Eu-Declaration Of Conformity
EU-VERKLARING VAN EU-DECLARATION OF EU-KONFORMITÄTS- EU-DECLARATION DE OVEREENSTEMMING CONFORMITY ERKLÄRUNG CONFORMITE Veromatic International B.V. Donker Duyvisweg 56 NL-3316 BM Dordrecht Nederland wij verklaren geheel onder eigen we herewith declare, on our own wir erklären hiermit nous déclarons par la présente...
Need help?
Do you have a question about the MBE01 and is the answer not in the manual?
Questions and answers