Table of Contents
Advertisement
Quick Links
Advertisement
Table of Contents

Related Manuals for VOITAS V11 5 M


Summary of Contents for VOITAS V11 5 M
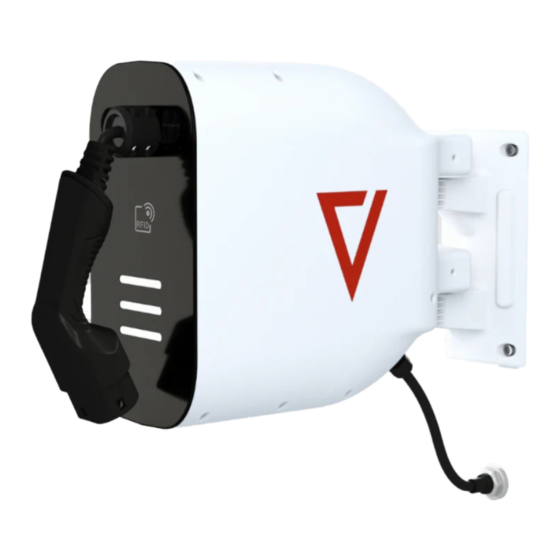
- Page 1 USER MANUAL VOITAS V11 5 M / 8 M RELEASE DATE: JULY 2023, REV. 1.1...
-
Page 3: Table Of Contents
User Manual Table of Contents Electrical Safety Instructions Introduction Drawings & Dimensions Installation Installation Guide First Use & Set-up Charging Process RFID Residual Current Device (RCD) Type B LED Effects Datasheet... -
Page 4: Electrical Safety Instructions
RoHS, PN-EN IEC 61851-1:2019-10E, PN-EN IEC is too high. 61316:2022-04,PN-EN 62196-2:2017-06. • Do not install the VOITAS V11 in an area prone to flooding or direct water spray. Important note on the correct disposal of the • Make sure that the power supply is turned off product based on Directive 2012/19/EU. -
Page 5: Introduction
VOITAS V11. Thank you for choosing our product! NOTE: The VOITAS V11 is a part of an extendable EV charging system that allows for safe, convenient, and efficient The serial number (S/N) is required to register your charging of EVs. -
Page 6: Drawings & Dimensions
Drawings & Dimensions Cable reel zone Isometric view VOITAS V11 zone - Service zone - dedicated sealed and separated to the installer functional electronics Side view Top view Front view Service plate NOTE: All dimensions are in milimeters. -
Page 7: Installation
For detailed instructions on how to install and connect the VOITAS V11, see Installation Guide section. To ensure the safe use of the VOITAS V11, the user is required to install the device according to the instructions in this manual. -
Page 8: Installation Guide
T20 screwdriver Mount the VOITAS V11 to the wall on the dedicated Align the bracket vertically bracket included with the Wallbox or to one of the two types of VOITAS Bases (posts designed for concrete or drill) that can be purchased separately. - Page 9 All the screws, anchors and washers needed to mount the post (for concrete or drill respectively) are STEP 1 included in the VOITAS Base kit. STEP 1: 1. Place the threaded flat bar inside the post and position it in place of the holes drilled in the post.
- Page 10 Installation Guide MOUNTING THE BASE OF THE POST TO THE The post base GROUND - with drill version WITH DRILL VERSION: Attach the base of the post to the ground using four M12 concrete anchors. NOTE: To seal the holes in the base of the post, use the four The post base M12 washers for the anchors included in the kit.
- Page 11 Side view electrical system, remove the VOITAS V11 from the bracket. A power cable is included with the VOITAS V11. A 5 Isometric view x 2,5mm2 section with a length of 50 cm has been added and installed. On the installer's side, the operation consists of preparing a junction box in which they will connect and secure the cables.
-
Page 12: First Use & Set-Up
If the device does not respond, make sure the power switch is on (the power supply switch is set to position '1'). The VOITAS V11 will turn on its access point itself. Launch the VOITAS App on your phone and register the account. -
Page 13: Charging Process
Charging Process CHARGING PROCESS After the first use, the charging process goes as The VOITAS V11 8 M requires at least 5 meters of a follows: cable to be unrolled, and the VOITAS V11 5 M requires at least 2 meters to be unrolled. -
Page 14: Rfid
VOITAS V11, which can be added in the configuration step when ordering the VOITAS V11. Please note that the RFID function of the VOITAS V11 only works with VOITAS RFID tokens. It allows to secure the unit and verify the user. RFID tokens are assigned to individual user accounts in the VOITAS App in the configuration section in local Wi-... -
Page 15: Residual Current Device (Rcd) Type B
RCD - DIFFERENTIAL CURRENT MONITORING AND ELECTRIC SHOCK PROTECTION The VOITAS V11 is equipped with an RCD module type B (AC 30 mA/DC 6mA) that monitors the level of residual current and the continuity of the PE wire. In case of... -
Page 16: Led Effects
LED Effects DISPLAY MARKINGS The VOITAS V11 has three LED bars on the front panel to indicate different states and modes. -
Page 17: Datasheet
Datasheet POWER / CHARGING Nominal load current / voltage / v. frequency 3,7 kW (1 phase) - 16A/230V/50Hz 11 kW (3 phases) - 16A/400V/50Hz Charging current range 6 - 16A Charging power 3,7 kW - 11 kW (3 phases) 1,4 kW - 3,7 kW (1 phase) Charging mode IEC 61851-1, mode 3 Connection to the vehicle... - Page 18 Communication WLAN, LAN, MODBUS TCP RFID verification Optional Additional accessoires (optional) VOITAS Smart Meter, VOITAS RFID tokens, VOITAS Base App control Compliance with norms, directives and certificates EU (LVD) Directive 2014/35/EU, EU (EMC) Directive 2014/30/EU, EU (RED) Directive 2014/53 /EU,the...
- Page 20 USER MANUAL (ENG)
Need help?
Do you have a question about the V11 5 M and is the answer not in the manual?
Questions and answers