Advertisement
Quick Links
Advertisement

Related Manuals for PRIXTON DV660


Summary of Contents for PRIXTON DV660
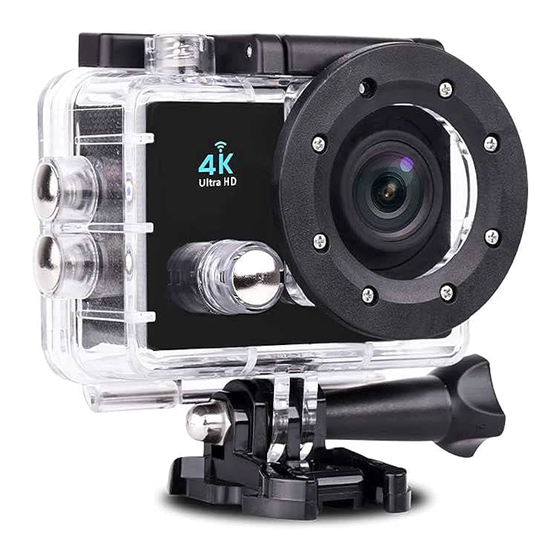
- Page 1 DV660 4K MULTI SPORT ACTION CAM...
- Page 2 Funciones Precauciones...
- Page 3 Requisitos del sistema...
- Page 4 Apariencia Tipo C Extracción de la batería de la cámara...
- Page 5 Primeros pasos...
- Page 11 X-Sport Pro App Instrucciones 1. APP de control de la cámara (Compatible con Android e iOS) 1.1. Cómo instalar la APP a. Para android, por favor busque "X-Sport Pro" en la tienda de Google APP para descargarlo e instalarlo de acuerdo con la instrucción. b.
- Page 12 Introducción de la función de interfaz de funcionamiento de APP 1 Salir 2 Ajustes de la cámara 3 Señal WIFI 4 Ajuste de la resolución 5 Parámetros de vídeo y foto 6 Álbum de la cámara 7 Selección del modo de vídeo 8 Selección del modo de cámara 9 Botón del obturador Compartir fotos de vídeo...
- Page 13 Especificaciones Técnicas...
- Page 14 fin de proveer un mejor equipo. Declaración ue de conformidad simplificada Por la presente, La Trastienda Digital SL como propietaria de la marca comercial Prixton, ubicada en Avenida Cervantes 49, módulo 25, Basauri 48970, Bizkaia, declara que el tipo de equipo radioeléctrico que a continuación se expone:...
- Page 15 Function Thank you for choosing this camera. Please carefully read the manual before using, and keep it at a safe place for future reference. The compilation of the manual refers to the latest information. The manual quotes captured screen displays and graphics, with the aim to introduce the digital camera through detailed and direct methods.
- Page 16 Start to use Charge the built-in lithium battery The camera is equipped with built-in 3.7V lithium battery. Please ensure power available for the camera and timely charge it in case of low battery. charging indicator will be on when charging, and will be off when the battery is fully charged.
- Page 17 the current video/photo from the SD Card. Indicators BUSY indicator: when the camera is working (e.g. recording, photographing, etc.), the indicator will light; Charging indicator: when power is off , the lightened indicator means the user is charging the camera. Photo/recording/vehicle-mounted/mode It enters automatically into recording mode.
- Page 18 Screen display in movement mode 1.movement mode 2.resolution and fps. 3.Storage available. 4.Micro SD card. 5.WIFI. 6.Battery. 7.Date and time. 7.Playback mode Turn on the camera, you can press the mode key to enter playback mode. You can press the up/down key to choose the photo or video you want to play, then press the shutter key to enter preview.
- Page 19 System Configuration menu After opening the menu by pressing power key, press mode key to switch over to setting main menu. Press up/down key to select menu, and after that to press shutter key for confirming to enter the submenu. In the submenu, press up or down key to select menu, to main menu.
- Page 20 have to rename the photo files to allow your software identify them correctly. Connecting to HDTV Connect the DV to HDTV via HDMI cable (optional) If you need to transfer the image and audio to an HDTV for playback, insert the com end of the HDMI cable to the DV, and the other end (output) to the HD input of the HDTV, as shown in the following figure: When the camera is connected with the HDTV successfully, the camera display is...
- Page 21 X-Sport Pro App Instruction 1. APP control of the camera (Supports Android and iOS) 1.1. How to install the APP a. For android, please search "X-Sport Pro" on the Google APP store to download and install it according to the instruction. b.
- Page 22 APP operation interface function introduction 1 Drop out 2 Camera settings 3 WIFI signal 4 Resolution setting 5 Video and photo parameters 6 Camera album 7 Video mode selection 8 Camera mode selection 9 Shutter button Video photo sharing After downloading pictures and videos from the camera album, they will be automatically saved in the APP "Offline Album".
- Page 23 This product is guaranteed for 2 years from the date of purchase. When you have a problem that you can not solve, you must access the web www.prixton.com and click on the contact option to send us your assistance form. These technical and electrical specifications are those of typical units and may be chan- ged without prior notice in order to provide improved equipment.
- Page 24 Avertissement Utilisation ne le frappez pas. Introduction cambriolage Photographie Slow -motion fonctionnement WIFI merveilleux HDMI : 1080p, 720p sportif...
- Page 25 : beaucoup de couleurs optionnels UTILISATION Notation fonctionnement normale.
- Page 26 2. Installer et enlever les batteries symboles +/- et la direction des flèches sur les piles, afin que les piles sont c) Indicateur de chargement d) Enlever les batteries : ouvrez le couvercle pour enlever les batteries. 3. Chargement a) Appuyez sur le bouton Marche/Arrêt pendant 3-5 secondes a) Activer : appuyez brièvement sur le bouton En Haut, activer WIFI et le 6.
- Page 27 Supprimer un fichier le bouton OK pendant 3-5 secondes, maintenant vous pouvez supprimer un seule fichier. 9. Installation et utilisation de WiFi Notation WIFI Message X10000-686868 66666666) ; d) installation APP Instructions pour l'application X-Sport Pro 1. Contrôle de la caméra par APP (compatible avec Android et iOS) 1.1.
- Page 28 Introduction de la fonction de l'interface de fonctionnement de l'APP 1 Décrochage 2 Réglages de la caméra 3 Signal WIFI 4 Réglage de la résolution 5 Paramètres vidéo et photo 6 Album photo 7 Sélection du mode vidéo 8 Sélection du mode caméra 9 Bouton de l'obturateur Partage de photos vidéo Après avoir téléchargé...
- Page 29 être modifiées sans préavis afin d’améliorer le matériel. Déclaration de conformité simplifiée La Trastienda Digital SL, en tant que propriétaire de la marque Prixton, située dans Avenida Cervantes 49, módulo 25, Basauri 48970, Bizkaia, déclare que le type d'équipement radioélectrique indiqué...
- Page 30 Funzioni Grazie per aver scelto questa fotocamera sportiva. Si prega di leggere attentamente il manuale prima dell'uso e di conservarlo in un luogo sicuro per riferimenti futuri. Questo manuale è stato redatto tenendo conto delle più recenti informazioni sui prodotti. Allo scopo di presentare le funzioni della fotocamera digitale in modo chiaro e dettagliato, il manuale contiene immagini delle schermate e grafici.
- Page 31 - La sconnessione dalla fonte di alimentazione elettrica o la rimozione della scheda di memoria durante la registrazione, la lettura o la formattazione; Si raccomanda di eseguire il backup dei dati importanti su altri dispositivi come chiavette USB, hard disk o CD. Manutenzione della fotocamera Tenere la fotocamera in un luogo asciutto e al buio quando non la si utilizza;...
- Page 32 Estrazione della batteria della fotocamera BATTERY 1. Togliere il coperchio della 2. Rimuovere il coperchio ed batteria facendolo scorrere con il estrarre la batteria tirando la pollice linguetta. Primi passi 1. Caricare la batteria al litio incorporata La fotocamera è dotata di una batteria al litio 3.7V. Accertarsi sempre che la fotocamera abbia la batteria e caricarla quando è...
- Page 33 3. Accendere e spegnere (ON / OFF) 3.2 Spegnere: Premere il pulsante di OFF per 3 secondi inattiva per spegnerla. 3.3 Spegnimento automatico: La fotocamera si spegne automaticamente quando resta inattiva per un tempo determinato per risparmiare energia. Il tempo previsto per lo spegnimento automatico è...
- Page 34 Nota: Quando si utilizza la risoluzione video 4K, HD e FHD, si deve utilizzare una scheda ad alta velocità TF di classe 4 o superiore. Si consiglia di utilizzare sempre schede di Classe 10. 6.3 Schermo in modalità movimento In modalità movimento. Risoluzione e fps.
- Page 35 Menu di configurazione del sistema Bilanciamento del bianco Interruttore WiFi 8.3 Impostazione di data e ora confermare. Premere verso il basso per selezionare "Data e ora" e quindi premere il pulsante di acquisizione per entrare nella finestra di configurazione. (data/ora) per regolare e premere la freccia Su o Giù per regolare; premere il pulsante di acquisizione per confermare e finalizzare le modifiche o premere il pulsante ON/OFF per annullare le modifiche e uscire.
- Page 36 Una volta acquisite le fotografie, vanno importate nel programma di editing per il video come sequenza di fotogrammi. A seconda del software utilizzato, andranno importate in forma diversa; consultare il manuale del programma di editing per maggiori dettagli su questa software possa identificarle correttamente.
- Page 37 Android Avviare il WIFI (sia Android che iOS) 1. Inserire la scheda di memoria Micro e accendere la fotocamera. Accedere al menu e attivare il WIFI (X10000_XXXX). 2. Attivare il WI-FI su smartphone o tablet e cercare l'SSID Wifi "66666666", quindi collegar- lo alla fotocamera.
-
Page 38: Specifiche Tecniche
Specifiche Tecniche Sensore di immagine SONY 179 Registrazione, in movimento, acquisizione, riproduzione Schermo LCD 2.0" LCD Risoluzione immagine 16M (4608 x 3456) 12M (4000 x 3000), 8M (3264 x 2448), 5M (2560 x 1920), 2M (1600 x 1200) Risoluzione video 4K(3840 x 2160 30fps), 2.7K(30fps), FHD(1920 x 1080 30fps), FHD(1920 x 1080 60fps) HD(1280 x 720 30fps) HD(1280 x 720 30fps) HD (1280x720 60fps) HD (1280x720 120fps) - Page 39 Politica di garanzia Questo prodotto è garantito per 2 anni dalla data di acquisto. Quando hai un problema che non puoi risolvere, devi accedere al sito www.prixton.com e fare clic sull`opzione di contatto per inviarci il tuo modulo di assistenza.
- Page 40 Funktionen: Diese Version der Bedienungsanleitung bezieht sich auf die aktuellsten Funktionen der Kamera auf klare und detaillierte Weise darzustellen. Aufgrund von technischer Forschung und Entwicklung und unterschiedlichen dieser Bedienungsanleitung von denen Ihrer Kamera abweichen. Vorkehrungen: Benutzung einer originalen Speicherkarte der Klasse 10 wird empfohlen, um die Anweisungen zur Benutzung der Speicherkarte Falls Sie eine neuerworbene Speicherkarte zum ersten Mal benutzen oder falls Dateien auf der Speicherkarte oder Fotos, die mit einer...
- Page 41 Die Speicherkarte sollte stets sauber und trocken sein. Sollte sie einmal weichen, trockenen Tuch ab; werden kann. Dies ist normal und kein Grund zur Beunruhigung; Benutzen Sie keine Speicherkarten, die vorher in anderen Kameras eingesetzt wurden. Sollte dies der Fall sein, formatieren Sie die Benutzen Sie die Speicherkarte nicht, sollten Sie sie mit anderen Trennung der Kamera von der Stromversorgung bei Aufnahme, Instandhaltung der Kamera...
- Page 42 Systemanforderungen PCCAM Microsoft Windows XP (SP3), Vista, 7, Betriebssystem MSDC Microsoft Windows 2000, XP, Vista, 7, Prozessor Intel Pentium mit 1 GHz oder schneller; ein Leistung Interner Speicher Sound-Karte und Grafikkarte CD-Laufwerk Mit einer Minimalgeschwindigkeit von 4x Festplatte mindestens 2GB freier Speicherplatz 1.
- Page 43 Entnahme des Akkus 2. Entfernen Sie die Abdeckung und ziehen Sie den Akku mithilfe der Schlaufe aus der Kamera. Erste Schritte Laden Sie den mitgelieferten Lithium-Akku auf oder nahezu leer sein. Verbinden Sie die Kamera mit einem Computer, um den Akku bei abgeschalteter Kamera aufzuladen.
- Page 44 An- und Ausschaltknopf (ON/OFF) dem Bildschirm erscheint der Startbildschirm und die Kamera wechselt in den angeschalteten Status. 5. Automatisches Ausschalten: Um Energie zu sparen, schaltet sich die drei Minuten. 6. Ausschalten aufgrund eines niedrigen Akkustands: Wenn der Akku einen niedrigen Ladestand aufweist, wird auf dem LCD-Bildschirm das Symbol Modustaste zwischen den verschiedenen Modi zu wechseln, nachdem Sie die Kamera eingeschaltet haben.
- Page 45 Bildschirm im Foto-Modus 1. Foto-Modus. 4. Micro SD-Speicherkarte 5. WLAN. 6. Akku. 7. Datum und Uhrzeit. Bildschirm im Videoaufnahme-Modus 1. Videoaufnahme-Modus. 4. Micro SD-Speicherkarte. 5. WLAN. 6. Akku. 7. Datum und Uhrzeit verwendet werden. Die Benutzung einer Speicherkarte der Klasse 10 wird empfohlen.
- Page 46 Einstellung von Datum und Uhrzeit und Ausschaltknopf, um den Konfigurationsmodus zu verlassen. Einstellungen des Zeitraffer-Modus Sekunde Video zu erhalten; im HD-Modus steigt dieser Wert auf 30 Fotografien.
- Page 47 Aufnahmetaste. Um eine gute Zeitrafferaufnahme zu bekommen, ist es wichtig, dass Sie die Kamera nicht bewegen. Nachdem die Fotos aufgenommen wurden, importieren Sie diese in Ihre Videobearbeitungs-Software als Einzelbilderreihe. Je nachdem welche importieren; bitte ziehen Sie dazu die Bedienungsanleitung Ihrer Verbindung mit HD-Fernsehern Kabels (nicht mitgeliefert).
- Page 48 zum Webcam-Modus (PCCAM) zu wechseln; der Bildschirm wird PCCAM anzeigen. erneut. X-Sport Pro App-Anleitung 1. APP-Steuerung der Kamera (Unterstützt Android und iOS) 1.1. So installieren Sie die APP a. Für Android, suchen Sie bitte "X-Sport Pro" auf dem Google APP-Store zum Herun- terladen und installieren Sie es nach der Anleitung.
- Page 49 Einführung in die Funktionen der APP-Bedienoberfläche 1 Dropout 2 Kameraeinstellungen 3 WIFI-Signal 4 Einstellung der Auflösung 5 Video- und Fotoparameter 6 Kameraalbum 7 Auswahl des Videomodus 8 Auswahl des Kameramodus 9 Auslösetaste Video-Foto-Sharing Nach dem Herunterladen von Bildern und Videos aus dem Kameraalbum werden diese automatisch in der APP "Offline Album"...
- Page 50 Technische Daten Bildsensor SONY 179 Funktionsmodi Videoaufnahme, Bewegung, Fotografie, Wiedergabe Bildschirm 16M (4608 x 3456) 12M (4000 x 3000), 8M (3264 x 2448), 5M (2560 x 1920), 2M (1600 x 1200) 4K(3840 x 2160 30fps), 2.7K(30fps), FHD(1920 x 1080 30fps), FHD(1920 x 1080 60fps) HD(1280 x 720 30fps) HD(1280 X 720 30fps) HD (1280x720 60fps) HD (1280x720 120fps) Speicherkarten...
- Page 51 Geräten und können ohne Vorankündigung geändert werden, um ein besseres Gerät anzubieten. Vereinfachte EU-einverständniserklärung La Trastienda Digital SL als Inhaber der Handelsmarke Prixton, mit dem Standort Avenida Cervantes 49, módulo 25, Basauri 48970, Bizkaia, erklärt hiermit, dass das im Folgenden detaillierte radioelektrische Gerät:...
- Page 52 utilizar o produto e mantenha-o num lugar seguro para referência futura. quedas ou cargas pesadas sobre o mesmo; ou baixas; prolongada; 10 de marcas originais;...
-
Page 53: Requisitos Do Sistema
Requisitos do sistema Requisitos do sistema PCCA Sistema Operativ MSDC Microsoft Windows 2000. XP, Vista, 7, 8 Mac Intel Pentium de 1GHz ou superior; outro CPU com um desempenho semelhante Superior a 1GB Placa de som e com DirectX 8 ou Driver de Cds Velocidade de 4 vezes ou superior Espaço livre de mais de 2GB... -
Page 54: Primeiros Passos
BATERIA 1 Retire a tampa da bateria deslocando o 2. Retire a tampa, segure a lingueta da seu dedo polegar. bateria e remova a bateria. Primeiros passos carga. horas. baixo. ejetado. Ligar e desligar (ON / OFF) entrar em estado de LIGADA. inatividade para a desligar. - Page 55 Indicadores 1. Modo de captura. 5. WiFi. 5. WiFi. 6. Bateria. 6. Bateria. 7. Data e hora. 7. Data e hora 1. Em modo de movimento. 5. WiFi. 6. Bateria. 7. Data e hora. voltar ao menu principal...
- Page 56 os cancelar HD 30 fotografias HDMI na caixa). Ligar a um PC para evitar a perda de dados. Nota: superior.
- Page 57 Instruções da aplicação X-Sport Pro 1. Controlo da câmara através da APP (compatível com Android e iOS) 1.1. Como instalar a aplicação a. Para o Android, procurar "X-Sport Pro" na loja de aplicações do Google para descarregar e instalar de acordo com as instruções. b.
- Page 58 Partilha de fotografias de vídeo Depois de transferir fotografias e vídeos do álbum da câmara, estes serão guardados automaticamente no "Álbum offline" da APP. Depois de o telemóvel estar ligado à rede, abra a APP e entre no "Álbum offline" para ver ou partilhar as fotografias de vídeo que foram transferidas para o local.
- Page 59 Declaração De Conformidade Simplificada Pela presente, a La Trastienda Digital SL, na qualidade de proprietária da marca comercial Prixton, com sede no Avenida Cervantes 49, módulo 25, Basauri 48970, Bizkaia, declara que o tipo de equipamento radioelétrico que de seguida se expõe:...
- Page 60 Gebruiker Waarschuwingen: 1. Dit is een product met hoge precisie, laat de camera niet vallen of beschadigen. 2. Plaats dit apparaat niet in de nabijheid van producten met sterk magnetische velden, zoals een magneet of elektrische apparaten. Vermijd tevens objecten die sterke radio golven kunnen uitzenden. Het magnetische veld zou de werking van het apparaat kunnen storen en beeld en geluid kunnen beschadigen.
-
Page 61: Bediening Van Het Apparaat
1.Ligh indicator 2.Shutter button 3.Sound alert 4.MicroSD card slot 5.Type C port 6.Micro HDMI port 7.Up / down buttons 8.Lens 9.POWER / Mode Bediening van het apparaat 1. Het plaatsen van de Micro SD kaart Let Op: gebruik een kaart van een bekend merk en formatteer deze op de computer. - Page 62 4. Het apparaat aan- en uitzetten a) Druk gedurende 3-5 seconden op de Aan/Uit knop b) Zodra u het apparaat aanzet zal het scherm worden geactiveerd. 5. Activeren/deactiveren WiFi a) Activeren WiFi: druk kort op de Omhoog knop, WiFi zal worden geactiveerd de gele LED indicator zal knipperen.
- Page 63 Instructie X-Sport Pro-app 1. APP-besturing van de camera (Ondersteunt Android en iOS) 1.1. Hoe de APP installeren a. Voor Android, zoek "X-Sport Pro" in de Google APP store om het te downloaden en te installeren volgens de instructies. b. Voor IOS, zoek "X-Sport Pro" om te downloaden en te installeren in de App Store van Apple.
- Page 64 Specificaties van de camera LCD scherm 2.0 LTPS Lens Taal opties Engels, Gesimplificeerd Chinees, Traditioneel Chinees, Koreaans, Russisch, Frans, Duits, Italiaans, Spaans, Portugees, Japans Video Opname resolutie 4K(3840*2160 30fps), 2.7K(30fps), FHD(1920*1080 30fps), FHD(1920*1080 60fps) HD(1280*720 30fps) HD(1280*720 30fps) HD(1280*720 60fps) HD(1280*720 120fps) Video Opname formaat Gecomprimeerd Video formaat...
- Page 65 LET OP: Door voortdurende ontwikkelingen ter verbetering van het product kunnen bovengenoemde specificaties eventueel afwijken van het gekochte apparaat. De functies van het gekochte apparaat zijn dan de standaard.
- Page 66 Dit product heeft een garantie van 2 jaar vanaf de datum van aankoop. Als u een probleem hebt dat u niet kunt oplossen, moet u naar www.prixton.com gaan en op de contactoptie klikken om ons uw assistentieformulier toe te sturen.
Need help?
Do you have a question about the DV660 and is the answer not in the manual?
Questions and answers